Codes Acura MDX 2011 Owner's Manual
[x] Cancel search | Manufacturer: ACURA, Model Year: 2011, Model line: MDX, Model: Acura MDX 2011Pages: 609, PDF Size: 12.7 MB
Page 365 of 609

The HomeLink
®Universal
Transceiver built into your vehicle can
be programmed to operate up to three
remote controlled devices around
your home, such as garage doors,
lighting, or home security systems.
General Safety InformationBefore programming your HomeLink
to operate a garage door opener,
confirm that the opener has an
external entrapment protection
system, such as an ‘‘electronic eye, ’’or
other safety and reverse stop features.
If your garage door was manufactured
before April 1, 1982, you may not be
able to program HomeLink to operate
it. These units do not have safety
features that cause the motor to stop
and reverse it if an obstacle is
detected during closing, increasing
the risk of injury. Do not use
HomeLink with any garage door
opener that lacks safety stop and
reverse features. Units manufactured between April 1,
1982 and January 1, 1993 may be
equipped with safety stop and reverse
features. If your unit does not have an
external entrapment protection
system, an easy test to confirm the
function and performance of the safety
stop and reverse feature is to lay a 2
╳
4 under the closing door. The door
should stop and reverse upon
contacting the piece of wood.
As an additional safety feature, garage
door openers manufactured after
January 1, 1993 are required to have
external entrapment protection
systems, such as an electronic eye,
which detect an object obstructing the
door.
Important Safety PrecautionsRefer to the safety information that came
with your garage door opener to test that
the safety features are functioning
properly. If you do not have this
information, contact the manufacturer of
the equipment.
Before programming HomeLink to a
garage door or gate opener, make sure
that people and objects are out of the way
of the device to prevent potential injury or
damage.
When programming a garage door opener,
park just outside the garage.Training HomeLinkBefore you begin
- If you just
received your vehicle and have not
trained any of the buttons in
HomeLink before, you should erase
any previously learned codes before
training the first button.
To do this, press and hold the two
outside buttons on the HomeLink
transceiver for about 20 seconds,
until the red indicator flashes.
Release the buttons, then proceed to
step 1.
HomeLink
®
Universal Transceiver
36010/06/29 11:59:04 11 ACURA MDX MMC North America Owner's M 50 31STX640 enu
Page 366 of 609

If you are training the second or third buttons, go directly to step 1.
2
a
ab
1
1
23
5
4
Training a Button
NO NO
NO YES
YES
Retraining a Button
Erasing Codes
Press and hold the desired
HomeLink button until the HomeLink
indicator begins to flash slowly.
When the indicator begins to flash
slowly, continue to hold the HomeLink
button and follow steps 1-3 under
Training a Button.
To erase codes stored in all buttons, press
and hold the two outer buttons until the
HomeLink indicator begins to flash (about
10 to 20 seconds), then release the buttons.
You should erase all three codes before
selling the vehicle.
Press and hold the programmed
Homelink button for about a
second.
Press and hold the
HomeLink button
again.
The remote has a rolling code.
Press the "learn" button on the
remotely controlled device
(e.g., garage door opener).
Within 30 seconds, press and hold
the programmed HomeLink button
for 2 seconds.
Press the programmed HomeLink
button again; the remotely
controlled device should operate. Training
complete
Position the remote transmitter you
wish to link 1-3 inches (3-8cm) from the
HomeLink button you want to program.
Press and hold the desired HomeLink
button and the button on the remote
transmitter you wish to link.
Press and hold the button on the
remote and the HomeLink button at
the same time. Then, while
continuing to hold the HomeLink
button, press and release the button
on the remote every 2 seconds.
Does the HomeLink indicator (LED) blink at a
faster rate after about 10 seconds? HomeLink
LED is on.
Does the device (garage door opener) work?
HomeLink indicator
flashes for 2 seconds,
then remains on. Indicator remains
on for about 25
seconds (standard
transmitter)
If you have any problems programming
HomeLink, see the owner's manual included with
the device you are trying to program, or call
HomeLink at 1-800-355-3515 or go online to
www.homelink.com. Indicator flashes rapidly
for 2 seconds, then
remains on for about 23
seconds (rolling code
transmitter)
Does the LED blink at a faster rate within 20 seconds? YES
CONTINUED
HomeLink
®
Universal Transceiver
361
Features
10/06/29 11:59:04 11 ACURA MDX MMC North America Owner's M 50 31STX640 enu
Page 382 of 609

To select either a ring tone or aprompt as the incoming call
notification
ꭧ:
Press and release the HFL Talk
button before a command.
1. Say ‘‘System setup .’’
2. Say ‘‘Call notification ’’after the
prompts.
3. Follow the HFL prompts and say ‘‘Ring tone ’’or ‘‘Prompt .’’ You can
also say ‘‘Off ’’for no audible
incoming call notification.
ꭧ : The default setting is a ring tone.
To activate or deactivate the auto
transfer function:If you get into the vehicle while you
are on the phone, the call can be
automatically transferred to HFL
with the ignition switch in the
ACCESSORY (I) or ON (II) position.
Press and release the HFL Talk
button before a command.
1. Say ‘‘System setup .’’
2. Say ‘‘Auto transfer ’’after the
prompts.
3. HFL will let you know if auto transfer is on or off, depending on
the previous setting. Follow the
HFL prompts to change the
setting.
To clear the system:This operation clears the passcodes,
paired phones, and all names in the
HFL phonebook data.
Press and release the HFL Talk
button before a command.
1. Say ‘‘System setup .’’
2. Say ‘‘Clear ’’after the prompts.
3. Follow the HFL prompts to continue to complete the clearing
procedure.
You can also clear the system when
you have forgotten the passcode and
cannot access HFL. When HFL asks
you for the passcode, say ‘‘System
clear .’’ Paired phones, all names in
the HFL phonebook data will be lost.
CONTINUED
Bluetooth
®
HandsFreeLink
®
377
Features
10/06/29 11:59:04 11 ACURA MDX MMC North America Owner's M 50 31STX640 enu
Page 510 of 609

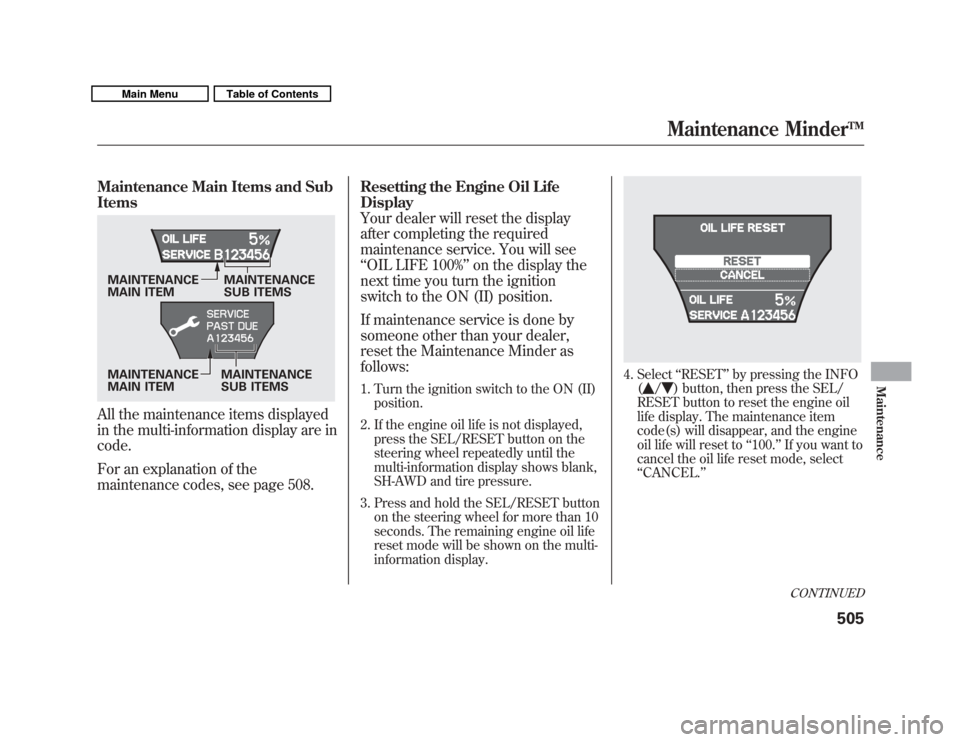
Maintenance Main Items and Sub
ItemsAll the maintenance items displayed
in the multi-information display are in
code.
For an explanation of the
maintenance codes, see page 508.Resetting the Engine Oil Life
Display
Your dealer will reset the display
after completing the required
maintenance service. You will see
‘‘
OIL LIFE 100% ’’on the display the
next time you turn the ignition
switch to the ON (II) position.
If maintenance service is done by
someone other than your dealer,
reset the Maintenance Minder as
follows:
1. Turn the ignition switch to the ON (II)
position.
2. If the engine oil life is not displayed, press the SEL/RESET button on the
steering wheel repeatedly until the
multi-information display shows blank,
SH-AWD and tire pressure.
3. Press and hold the SEL/RESET button on the steering wheel for more than 10
seconds. The remaining engine oil life
reset mode will be shown on the multi-
information display.
4. Select ‘‘RESET ’’by pressing the INFO
(
/
) button, then press the SEL/
RESET button to reset the engine oil
life display. The maintenance item
code(s) will disappear, and the engine
oil life will reset to ‘‘100. ’’If you want to
cancel the oil life reset mode, select
‘‘ CANCEL. ’’
MAINTENANCE
SUB ITEMS
MAINTENANCE
MAIN ITEM MAINTENANCE
MAIN ITEM MAINTENANCE
SUB ITEMS
CONTINUED
Maintenance Minder
TM505
Maintenance
10/06/29 11:59:04 11 ACURA MDX MMC North America Owner's M 50 31STX640 enu
Page 562 of 609

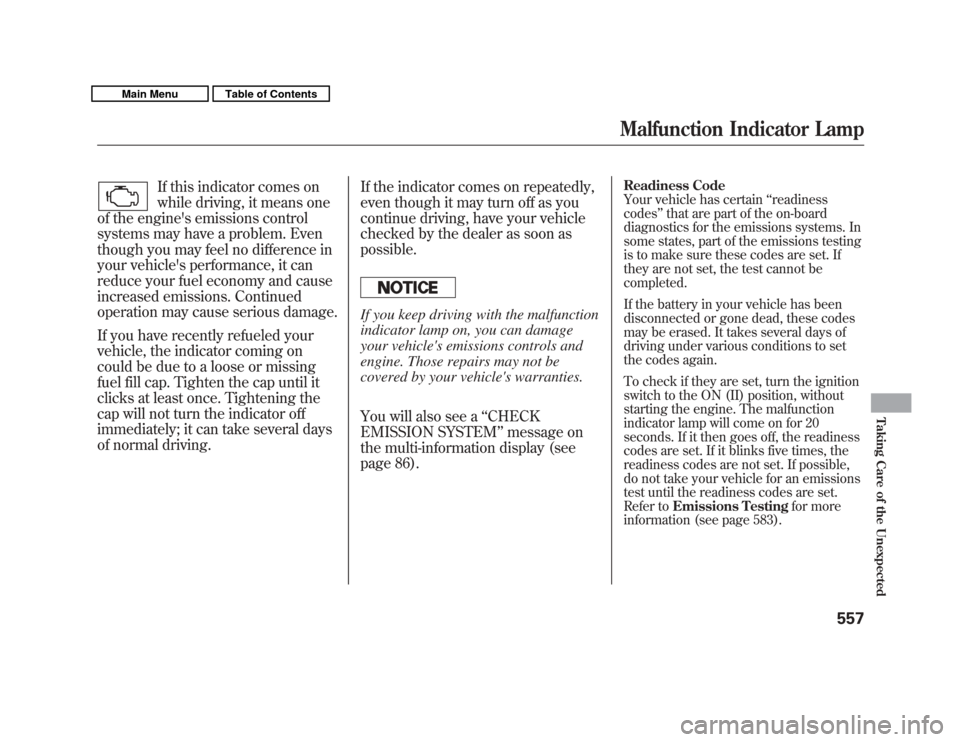
If this indicator comes on
while driving, it means one
of the engine's emissions control
systems may have a problem. Even
though you may feel no difference in
your vehicle's performance, it can
reduce your fuel economy and cause
increased emissions. Continued
operation may cause serious damage.
If you have recently refueled your
vehicle, the indicator coming on
could be due to a loose or missing
fuel fill cap. Tighten the cap until it
clicks at least once. Tightening the
cap will not turn the indicator off
immediately; it can take several days
of normal driving. If the indicator comes on repeatedly,
even though it may turn off as you
continue driving, have your vehicle
checked by the dealer as soon as
possible.
If you keep driving with the malfunction
indicator lamp on, you can damage
your vehicle's emissions controls and
engine. Those repairs may not be
covered by your vehicle's warranties.
You will also see a
‘‘CHECK
EMISSION SYSTEM ’’message on
the multi-information display (see
page 86).
Readiness Code
Your vehicle has certain ‘‘readiness
codes ’’that are part of the on-board
diagnostics for the emissions systems. In
some states, part of the emissions testing
is to make sure these codes are set. If
they are not set, the test cannot be
completed.
If the battery in your vehicle has been
disconnected or gone dead, these codes
may be erased. It takes several days of
driving under various conditions to set
the codes again.
To check if they are set, turn the ignition
switch to the ON (II) position, without
starting the engine. The malfunction
indicator lamp will come on for 20
seconds. If it then goes off, the readiness
codes are set. If it blinks five times, the
readiness codes are not set. If possible,
do not take your vehicle for an emissions
test until the readiness codes are set.
Refer to Emissions Testing for more
information (see page 583).Malfunction Indicator Lamp
557
Taking Care of the Unexpected
10/06/29 11:59:04 11 ACURA MDX MMC North America Owner's M 50 31STX640 enu
Page 588 of 609

Testing of Readiness Codes
If you take your vehicle for an
emissions test shortly after the
battery has been disconnected or
gone dead, it may not pass the test.
This is because of certain‘‘readiness
codes ’’that must be set in the on-
board diagnostics for the emissions
systems. These codes are erased
when the battery is disconnected,
and set again only after several days
of driving under a variety of
conditions. If the testing facility determines that
the readiness codes are not set, you
will be requested to return at a later
date to complete the test. If you must
get the vehicle retested within the
next two or three days, you can
condition the vehicle for retesting by
doing the following.
1. Make sure the gas tank is nearly,
but not completely, full (around
3/4).
2. Make sure the vehicle has been parked with the engine off for 6
hours or more.
3. Make sure the ambient temperature is between 40° and
95°F (4° and 35°C). 4. Without touching the accelerator
pedal, start the engine, and let it
idle for 20 seconds.
5. Keep the vehicle in Park. Increase the engine speed to 2,000 rpm, and
hold it there until the temperature
gauge rises to at least 1/4 of the
scale (about 3 minutes).
6. Without touching the accelerator pedal, let the engine idle for 20
seconds.
CONTINUED
Emissions Testing
583
Technical Information
10/06/29 11:59:04 11 ACURA MDX MMC North America Owner's M 50 31STX640 enu
Page 589 of 609

7. Select a nearby lightly traveledmajor highway where you can
maintain a speed of 50 to 60 mph
(80 to 97 km/h) for at least 20
minutes. Drive on the highway in
D. Do not use the cruise control.
When traffic allows, drive for 90
seconds without moving the
accelerator pedal. (Vehicle speed
may vary slightly; this is okay.) If
you cannot do this for a continuous
90 seconds because of traffic
conditions, drive for at least 30
seconds, then repeat it two more
times (for a total of 90 seconds). 8. Then drive in city/suburban traffic
for at least 10 minutes. When
traffic conditions allow, let the
vehicle coast for several seconds
without using the accelerator pedal
or the brake pedal. 9. Make sure the vehicle has been
parked with the engine off for 30
minutes.
If the testing facility determines the
readiness codes are still not set, see
your dealer.Emissions Testing58410/06/29 11:59:04 11 ACURA MDX MMC North America Owner's M 50 31STX640 enu
Page 603 of 609

P
Panel Brightness Control
...........
132
Park Gear Position
.....................
438
Parking
......................................
448
Parking Brake
............................
163
Parking Brake and Brake System Indicator
...........................
67, 558
Parking Lights
...........................
127
Parking Over Things that Burn
................................
448, 582
Passenger Airbag Off Indicator
....
36
PGM-FI System
..........................
581
Playing a Disc
............................
232
Playing an iPod
®.........................
275
Playing a USB Flash Memory Device
....................................
284
Playing Disc
...............................
200
Playing Hard Disc Drive (HDD) Audio (Models with navigationsystem)
...............................
247
Playing the AM/FM Radio
...............................
191, 210
Playing the XM
®Radio
........
195, 223
Pollen Filter
...............................
528 Power Seat Adjustments
............
148
Power Socket Locations
.............
175
Power Steering Fluid
.................
520
Power Windows
.........................
158
Pregnancy, Using Seat Belts
........
19
Preparing to Drive
......................
435
Proper Seat Belt Usage
................
16
Protecting Adults and Teens
........
12
Additional Safety Precautions
...
20
Advice for Pregnant Women
....
19
Protecting Children
......................
39
General Guidelines
..................
39
Protecting Infants
.....................
44
Protecting Larger Children
......
56
Protecting Small Children
........
45
Using Child Seats with Tethers
.................................
53
Using LATCH
..........................
49
R
Radiator Overheating
.................
554
Radio/CD Sound System
...........
190
Radio/Disc Sound System
............................
191, 210 Radio Theft Protection
...............
305
Readiness Codes
........................
583
Rear A/C Unit
............................
185
Rear Audio Control Panel
...........
312
Rear Entertainment System
.......
307
Rear Lights, Bulb Replacement
...........................
525
Rearview Mirror
.........................
163
Rearview Mirror with Rearview Camera Display
......................
414
Rear Window Defogger
..............
131
Rear Window Wiper and
Washer
...................................
126
Recalling a Memorized Driving Position
..................................
147
Reclining the Seat Backs
............
148
Reclining the Second Seats
........
152
Refueling
....................................
419
Reminder Indicators
.....................
66
Remote Audio Controls
..............
302
Remote Control (RES)
...............
331
Remote Transmitter
...................
144
Replacement Information Dust and Pollen Filter
.............
528
Engine Oil and Filter
...............
512
Fuses
......................................
559
IndexVIII10/06/29 11:59:04 11 ACURA MDX MMC North America Owner's M 50 31STX640 enu