navigation system Acura MDX 2012 Owner's Manual
[x] Cancel search | Manufacturer: ACURA, Model Year: 2012, Model line: MDX, Model: Acura MDX 2012Pages: 621, PDF Size: 11.15 MB
Page 307 of 621
Once a device is linked, the name of
the device will appear on the screen.
Pressing the TITLE button switches
the audio display between theBluetooth
®Audio and the device
name.
If more than one phone is paired to
the HFL system, there will be delay
before the system begins to play.In the following conditions, the
display showsŌĆśŌĆśNO CONNECTŌĆÖŌĆÖ
message after pressing the TITLE
button.
ŌŚÅ
The phone is not linked to HFL.
ŌŚÅ
The phone is not turned on.
ŌŚÅ
The phone is not in the vehicle.
ŌŚÅ
Another HFL compatible phone,
which is not compatible forBluetooth
®Audio, is already
connected.If your
Bluetooth
®Audio compatible
phone does not operate as described,
make sure it is an Acura approved
phone. To find out if your phone is
approved, go to
www.acura.com/
handsfreelink(in Canada,
www.
acura.ca
), or call the
HandsFreeLink
®consumer support
at 1-888-528-7876.
Voice Control SystemYou can select the AUX mode by
using the voice control buttons, but
cannot operate the play mode
functions.To skip a filePress the side
of the SKIP
button to skip forward to the next
file, and press the
side to skip
backward to the beginning of the
current file. Push the
side again
to skip to the previous file.
Bluetooth
®
Audio System (Models with navigation system)
300
Page 308 of 621
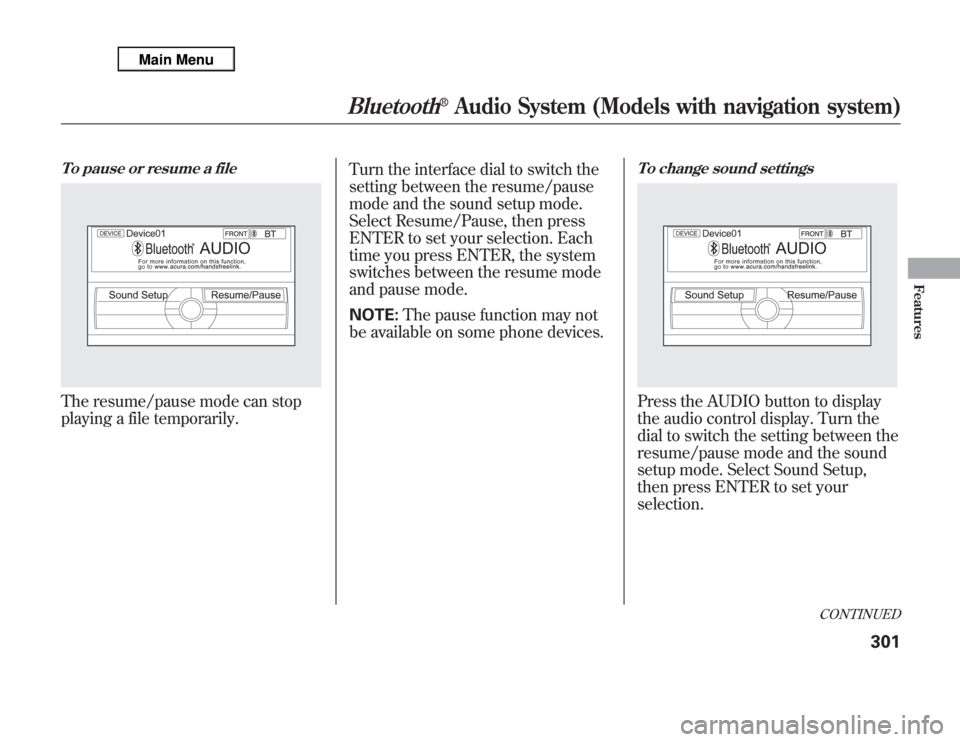
To pause or resume a fileThe resume/pause mode can stop
playing a file temporarily.Turn the interface dial to switch the
setting between the resume/pause
mode and the sound setup mode.
Select Resume/Pause, then press
ENTER to set your selection. Each
time you press ENTER, the system
switches between the resume mode
and pause mode.
NOTE:The pause function may not
be available on some phone devices.
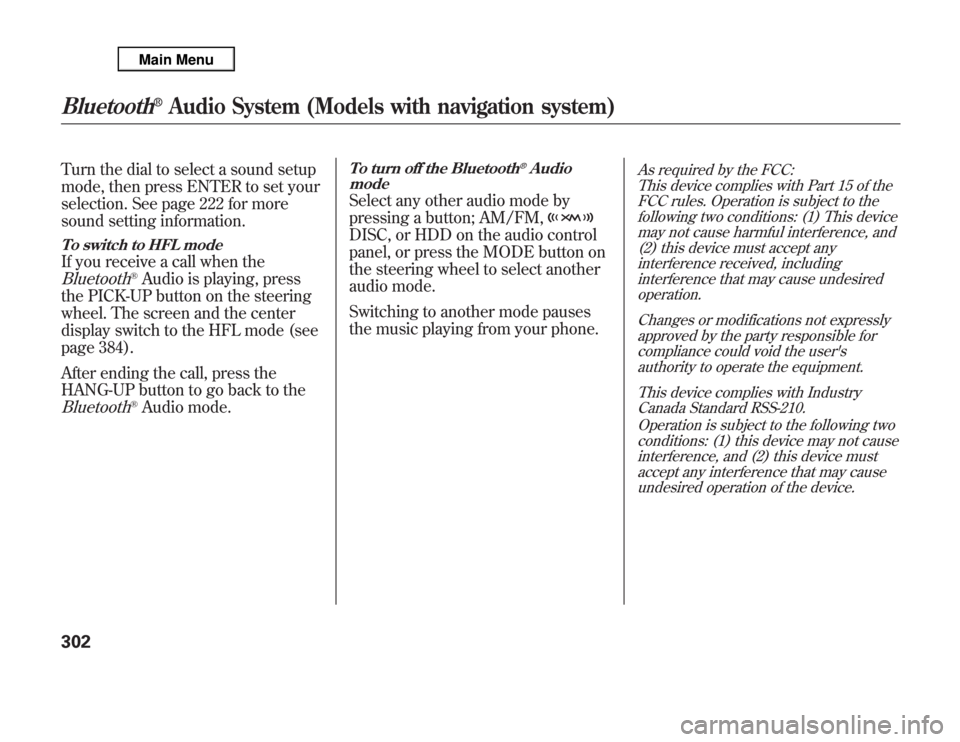
To change sound settingsPress the AUDIO button to display
the audio control display. Turn the
dial to switch the setting between the
resume/pause mode and the sound
setup mode. Select Sound Setup,
then press ENTER to set your
selection.
CONTINUED
Bluetooth
®
Audio System (Models with navigation system)
301
Features
Page 309 of 621
Turn the dial to select a sound setup
mode, then press ENTER to set your
selection. See page 222 for more
sound setting information.To switch to HFL modeIf you receive a call when theBluetooth
®Audio is playing, press
the PICK-UP button on the steering
wheel. The screen and the center
display switch to the HFL mode (see
page 384).
After ending the call, press the
HANG-UP button to go back to the
Bluetooth
®Audio mode.
To turn off the Bluetooth
®Audio
mode
Select any other audio mode by
pressing a button; AM/FM,DISC, or HDD on the audio control
panel, or press the MODE button on
the steering wheel to select another
audio mode.
Switching to another mode pauses
the music playing from your phone.
As required by the FCC:
This device complies with Part 15 of the
FCC rules. Operation is subject to the
following two conditions: (1) This device
may not cause harmful interference, and
(2) this device must accept any
interference received, including
interference that may cause undesired
operation.
Changes or modifications not expressly
approved by the party responsible for
compliance could void the user's
authority to operate the equipment.
This device complies with Industry
Canada Standard RSS-210.
Operation is subject to the following two
conditions: (1) this device may not cause
interference, and (2) this device must
accept any interference that may cause
undesired operation of the device.
Bluetooth
®
Audio System (Models with navigation system)
302
Page 312 of 621
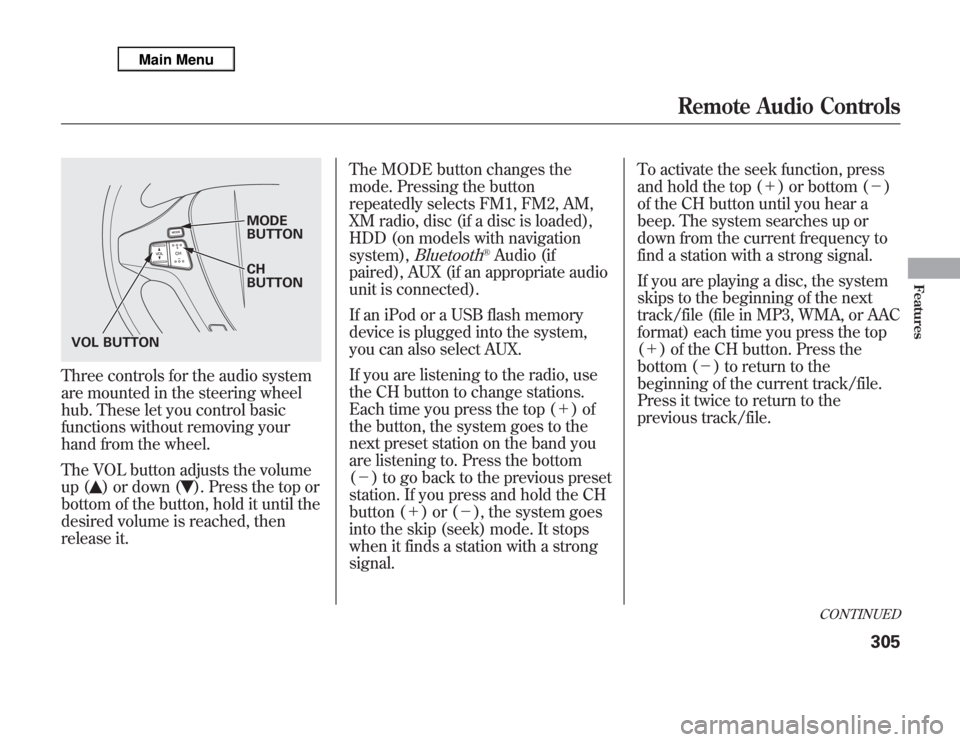
Three controls for the audio system
are mounted in the steering wheel
hub. These let you control basic
functions without removing your
hand from the wheel.
The VOL button adjusts the volume
up (
) or down (
). Press the top or
bottom of the button, hold it until the
desired volume is reached, then
release it.The MODE button changes the
mode. Pressing the button
repeatedly selects FM1, FM2, AM,
XM radio, disc (if a disc is loaded),
HDD (on models with navigation
system),
Bluetooth
®Audio (if
paired), AUX (if an appropriate audio
unit is connected).
If an iPod or a USB flash memory
device is plugged into the system,
you can also select AUX.
If you are listening to the radio, use
the CH button to change stations.
Each time you press the top (’╝ŗ)of
the button, the system goes to the
next preset station on the band you
are listening to. Press the bottom
(’╝Ź) to go back to the previous preset
station. If you press and hold the CH
button (’╝ŗ)or(’╝Ź), the system goes
into the skip (seek) mode. It stops
when it finds a station with a strong
signal.To activate the seek function, press
and hold the top (’╝ŗ) or bottom (’╝Ź)
of the CH button until you hear a
beep. The system searches up or
down from the current frequency to
find a station with a strong signal.
If you are playing a disc, the system
skips to the beginning of the next
track/file (file in MP3, WMA, or AAC
format) each time you press the top
(’╝ŗ) of the CH button. Press the
bottom (’╝Ź) to return to the
beginning of the current track/file.
Press it twice to return to the
previous track/file.
MODE
BUTTON
CH
BUTTON
VOL BUTTON
CONTINUED
Remote Audio Controls
305
Features
Page 313 of 621
You will see the track/file number
and the elapsed time. If the disc has
text data or is compressed inMP3 or
WMA, you can also see any other
information (track title, file name,
folder name, etc.).
In MP3 or WMA mode, you can use
the seek function to select folders.
Press and hold the top (’╝ŗ) of the CH
button until you hear a beep, to skip
forward to the first file of the next
folder. Press the bottom (’╝Ź) to skip
backward to the previous folder.
If you are playing a USB flash
memory device or iPod with the USB
adapter cable, press and release the
top (’╝ŗ) of the CH button to skip
forward to the beginning of the next
file. Press the bottom (’╝Ź) to skip
backward to the beginning to the
current file. Press it twice to return to
the previous file.When playing a USB flash memory
device, you can also use the seek
function to skip the folder. To
activate this, press and hold either
side of the CH button until you hear
a beep.
On models without navigation
systemIf you are playing a conventional CD
(without the text data and not
compressed in MP3 or WMA), you
can use the skip function to select
discs. Press and hold the top (’╝ŗ)of
the CH button until you hear a beep,
to skip forward to the next disc.
Press and hold the bottom (’╝Ź)to
skip backward to the previous disc.
Remote Audio Controls306
Page 314 of 621
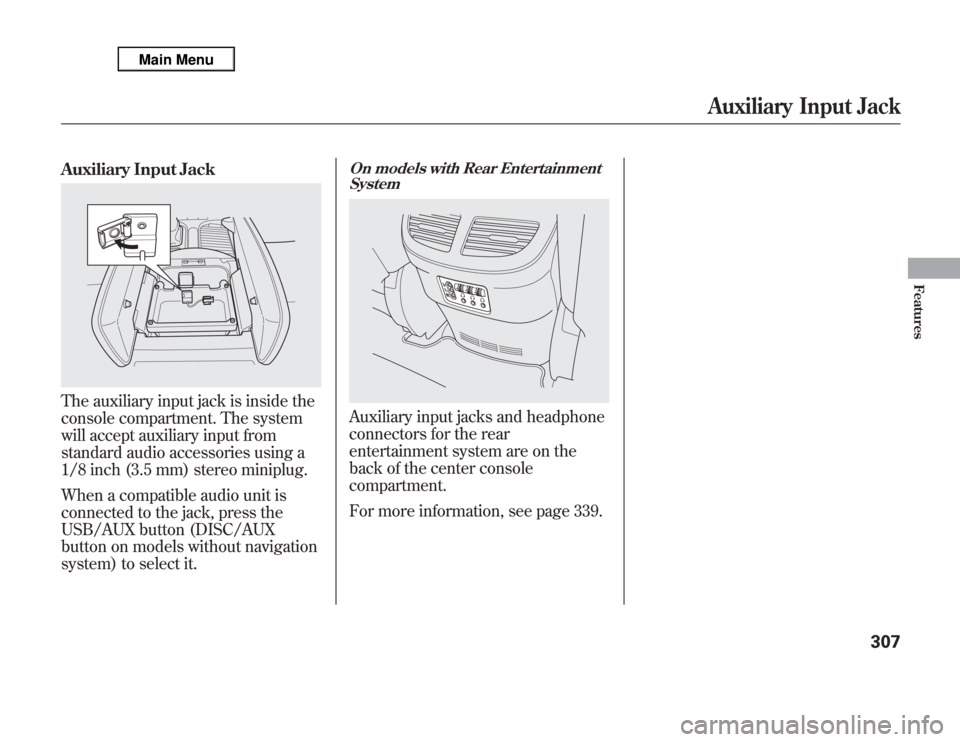
Auxiliary Input JackThe auxiliary input jack is inside the
console compartment. The system
will accept auxiliary input from
standard audio accessories using a
1/8 inch (3.5 mm) stereo miniplug.
When a compatible audio unit is
connected to the jack, press the
USB/AUX button (DISC/AUX
button on models without navigation
system) to select it.
On models with Rear Entertainment
SystemAuxiliary input jacks and headphone
connectors for the rear
entertainment system are on the
back of the center console
compartment.
For more information, see page 339.
Auxiliary Input Jack
307
Features
Page 315 of 621
If your vehicleŌĆÖs battery is disconnected
or goes dead, the audio system
disables itself. If this happens, you will
seeŌĆśŌĆśENTER CODEŌĆÖŌĆÖin the frequency
display next time you turn on the
system. Use the preset buttons (Icons
on models with navigation system) to
enter the five-digit code. The code is on
the Anti-theft Identification Card
included in your ownerŌĆÖs manual kit.
When it is entered correctly, the radio
will start playing.
The Anti-theft Identification Card also
lists your audio serial number. It is best
to store the card in a safe place at
home. In addition, you should write the
audio systemŌĆÖs serial number in this
ownerŌĆÖs manual.
If you make a mistake entering the
code, do not start over; complete the
five-digit sequence, then enter the
correct code. You have ten tries to
enter the correct code. If you are
unsuccessful in ten attempts, you must
then leave the system on for one hour
before trying again.The system will retain your AM and
FM presets even if power is
disconnected.
NOTE:
If you have a My Acura account, it is
easy to retrieve the anti-theft code
online without having to access the
serial number.
U.S. ownersWe recommend that you register the
security code at My Acura (myacura.
com.) If you lose the Anti-theft
Identification Card before registering
the code at My Acura, you must obtain
the code from your dealer or
https://
radionavicode.acura.com/
. To do this,
you will need the audio systemŌĆÖs serial
number. If you do not have the serial
number with you, ask your dealer or go
to
https://radionavicode.acura.com/
for
information on how to retrieve it.
Canadian ownersIf you lose the Anti-theft Identification
Card, you must obtain the code from
your dealer. To do this, you will need
the audio systemŌĆÖs serial number. If
you do not have the serial number with
you, ask your dealer how to retrieve it.Models with navigation systemYou need to enter the same code for
the navigation system to reactivate.
Read the navigation system manual for
details.
Radio Theft Protection308
Page 316 of 621
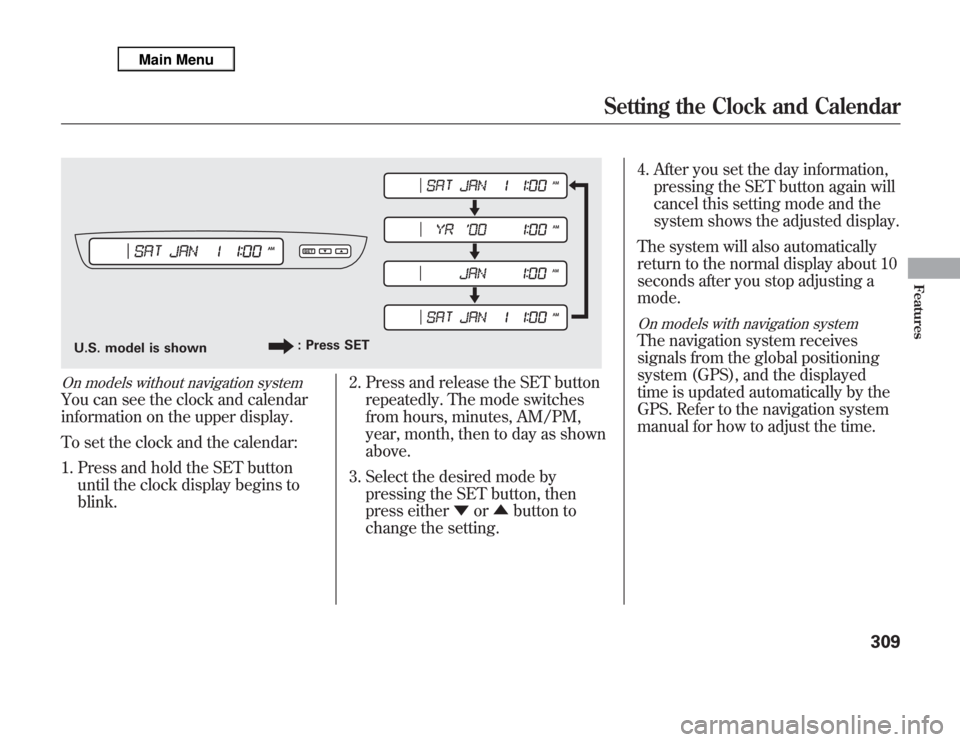
On models without navigation systemYou can see the clock and calendar
information on the upper display.
To set the clock and the calendar:
1. Press and hold the SET button
until the clock display begins to
blink.2. Press and release the SET button
repeatedly. The mode switches
from hours, minutes, AM/PM,
year, month, then to day as shown
above.
3. Select the desired mode by
pressing the SET button, then
press eitherŌ¢╝orŌ¢▓button to
change the setting.4. After you set the day information,
pressing the SET button again will
cancel this setting mode and the
system shows the adjusted display.
The system will also automatically
return to the normal display about 10
seconds after you stop adjusting a
mode.
On models with navigation systemThe navigation system receives
signals from the global positioning
system (GPS), and the displayed
time is updated automatically by the
GPS. Refer to the navigation system
manual for how to adjust the time.
U.S. model is shown: Press SET
Setting the Clock and Calendar
309
Features
Page 333 of 621
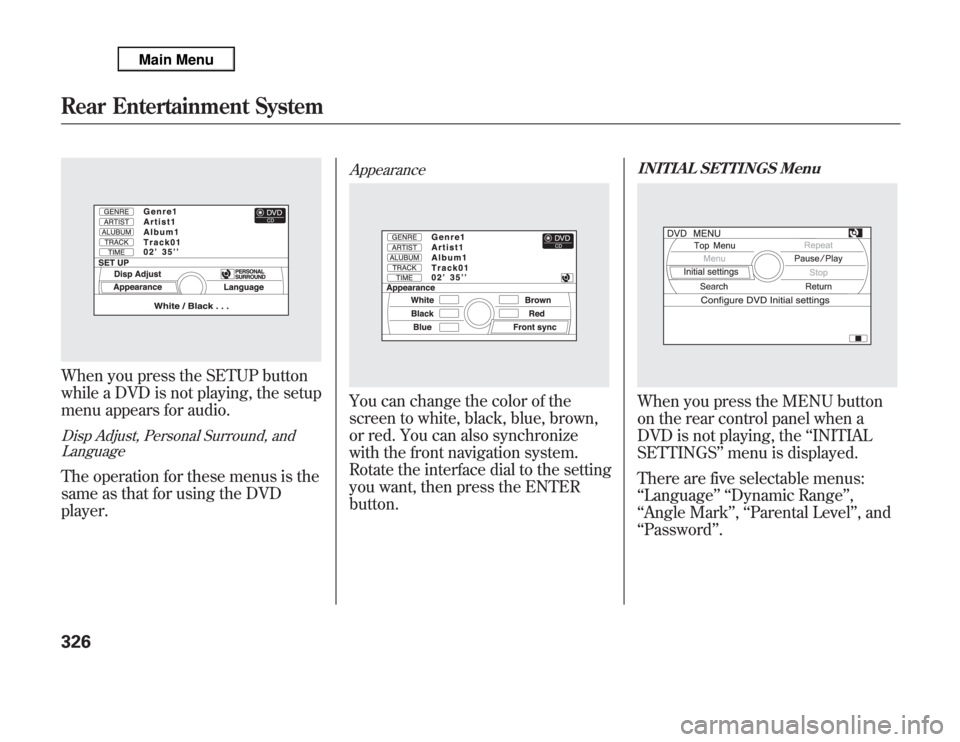
When you press the SETUP button
while a DVD is not playing, the setup
menu appears for audio.Disp Adjust, Personal Surround, and
LanguageThe operation for these menus is the
same as that for using the DVD
player.
AppearanceYou can change the color of the
screen to white, black, blue, brown,
or red. You can also synchronize
with the front navigation system.
Rotate the interface dial to the setting
you want, then press the ENTER
button.
INITIAL SETTINGS MenuWhen you press the MENU button
on the rear control panel when a
DVD is not playing, theŌĆśŌĆśINITIAL
SETTINGSŌĆÖŌĆÖmenu is displayed.
There are five selectable menus:
ŌĆśŌĆśLanguageŌĆÖŌĆÖ ŌĆśŌĆśDynamic RangeŌĆÖŌĆÖ,
ŌĆśŌĆśAngle MarkŌĆÖŌĆÖ,ŌĆśŌĆśParental LevelŌĆÖŌĆÖ, and
ŌĆśŌĆśPasswordŌĆÖŌĆÖ.
Rear Entertainment System326
Page 349 of 621
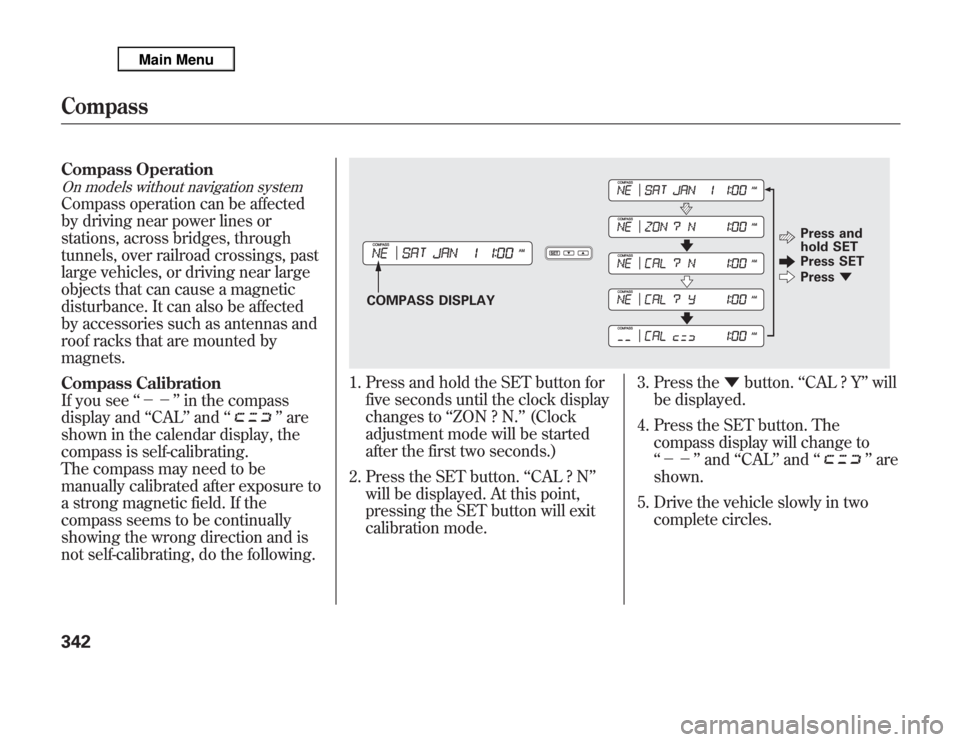
Compass OperationOn models without navigation systemCompass operation can be affected
by driving near power lines or
stations, across bridges, through
tunnels, over railroad crossings, past
large vehicles, or driving near large
objects that can cause a magnetic
disturbance. It can also be affected
by accessories such as antennas and
roof racks that are mounted by
magnets.
Compass Calibration
If you seeŌĆśŌĆś’╝Ź’╝ŹŌĆÖŌĆÖin the compass
display andŌĆśŌĆśCALŌĆÖŌĆÖandŌĆśŌĆś
ŌĆÖŌĆÖare
shown in the calendar display, the
compass is self-calibrating.
The compass may need to be
manually calibrated after exposure to
a strong magnetic field. If the
compass seems to be continually
showing the wrong direction and is
not self-calibrating, do the following.
1. Press and hold the SET button for
five seconds until the clock display
changes toŌĆśŌĆśZON ? N.ŌĆÖŌĆÖ(Clock
adjustment mode will be started
after the first two seconds.)
2. Press the SET button.ŌĆśŌĆśCAL ? NŌĆÖŌĆÖ
will be displayed. At this point,
pressing the SET button will exit
calibration mode.3. Press theŌ¢╝button.ŌĆśŌĆśCAL ? YŌĆÖŌĆÖwill
be displayed.
4. Press the SET button. The
compass display will change to
ŌĆśŌĆś’╝Ź’╝ŹŌĆÖŌĆÖandŌĆśŌĆśCALŌĆÖŌĆÖandŌĆśŌĆś
ŌĆÖŌĆÖare
shown.
5. Drive the vehicle slowly in two
complete circles.
COMPASS DISPLAYPress and
hold SET
Press SET
PressŌ¢╝
Compass342