Acura MDX 2012 Owner's Manual
Manufacturer: ACURA, Model Year: 2012, Model line: MDX, Model: Acura MDX 2012Pages: 621, PDF Size: 11.15 MB
Page 161 of 621

Third Row AccessTo get into the third row seats, pull
up the lever on the side of the
passenger's side second row seat-
back. The seat-back will tilt forward,
and then can be slid forward.
After you return the seat-back to the
upright position, push the whole seat
backwards until it latches. Make sure
the seat is fully latched before sitting
in it.Folding the Third Row Seat
1. Use the latch plate to release the
seat belt from the detachable
anchor (see page 155).
2. Lower the head restraints to their
lowest positions.
NOTE:To fold the third row seat, the
second row seat-back must be folded
down or in the full up right position.
3. Unlock the seat-back by pulling
the handle. Push the seat-back
forward.
Make sure the outer shoulder belts
are positioned on each hook on the
side panel whenever the third seat is
folded.
RELEASE LEVER
THIRD ROW SEAT
HANDLE
Seats154
Page 162 of 621

Reverse this procedure to return the
seat to the upright position. Make
sure the seat is locked securely
before driving. Reconnect the seat
belts to the detachable anchors.
Make sure all items in the cargo area
are secured. Loose items can fly
forward and cause injury if you have
to brake hard (SeeCarrying Cargo
on page 433).Detachable Anchor
The seat belts in the second row
center seat and the third row seats
are equipped with detachable
anchors.
To unlatch the detachable anchor,
insert the latch plate into the slot on
the side of the anchor buckle. Store
the detachable anchor and seat belt
latch plates in the retractor housing.When the seats are returned to the
upright position, these detachable
anchors should be latched back
properly.
Using the seat belt with the
detachable anchor unlatched
increases the chance of serious
injury or death in a crash.
Before using the seat belt,
make sure the detachable
anchor is correctly latched.
LATCH PLATE
CONTINUED
Seats
155
Instruments and Controls
Page 163 of 621

Pull out the small latch plate and the
latch plate from each holding slot in
the ceiling, and pull out the seat belt
to extend it.
Pull out the outer shoulder belts
from the hook. Both of the third-row
hooks should only be used when the
seat belt is detached.
Line up the triangle marks on the
small latch plate and anchor buckle
when reattaching the belt and
buckle.
Tug on the seat belt to verify that the
detachable anchor is securely
latched. Make sure the seat belt is
not twisted.
SECOND ROW CENTER SEAT
LATCH PLATE
SMALL LATCH PLATE
THIRD ROW SEATS
HOOK
SMALL LATCH PLATE
ANCHOR BUCKLETRIANGLE
MARKS
Seats156
Page 164 of 621

MDX, Technology Package, and U.S.
Technology Package with Entertainment
modelsBoth front seats are equipped with
seat heaters. Because of the sensors
for the side airbag cutoff system,
there is no heater in the passenger's
seat-back. The ignition switch must
be in the ON (II) position to use the
heaters.
Push the front of the switch, HI, to
rapidly heat up the seat. After the
seat reaches a comfortable
temperature, select LO by pushing
the back of the switch. This will keep
the seat warm.
U.S. Technology Package with
Entertainment, Advance Package with
Entertainment and Canadian modelsThe outer second row seat cushions
and seat-backs are equipped with
seat heaters. Turning the switch on
the driver side warms the outer seat
behind the driver's seat only. The
passenger side switch warms the
outer seat behind the front passenger
seat.
Passenger's
Seat
HEATERSDriver's
Seat
Front seatHI
LOW
Second row seat
CONTINUED
Seat Heaters
157
Instruments and Controls
Page 165 of 621

Heat induced burns are
possible when using seat
heaters.
Persons with a diminished
ability to sense temperature (e.
g., persons with diabetes,
lower-limb nerve damage, or
paralysis) or with sensitive skin
should not use seat heaters.
In the HI setting, the heater turns off
when the seat gets warm, and turns
back on after the seat's temperature
drops.
In the LO setting, the heater runs
continuously. It does not cycle with
temperature changes.
Follow these precautions when using
the seat heaters:
●
Do not use the seat heater in the
HI setting for an extended period,
because it draws large amounts of
current from the battery.
●
If the engine is left idling for an
extended period, do not use the
seat heaters even on the LO
setting. It can weaken the battery,
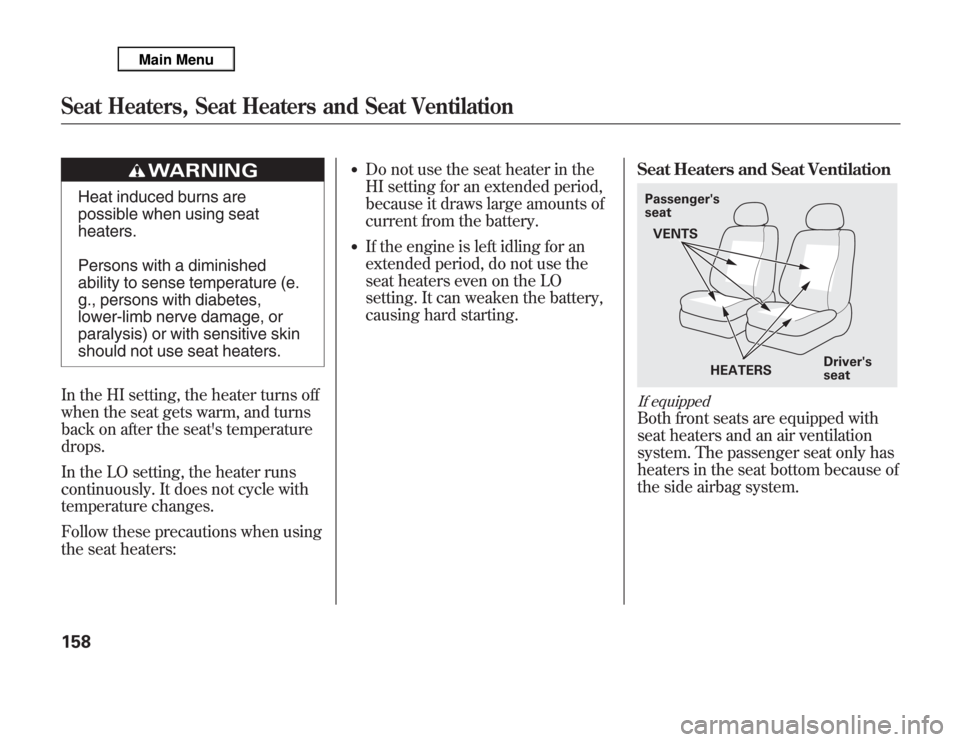
causing hard starting.Seat Heaters and Seat Ventilation
If equippedBoth front seats are equipped with
seat heaters and an air ventilation
system. The passenger seat only has
heaters in the seat bottom because of
the side airbag system.Passenger's
seat
HEATERSDriver's
seat VENTS
Seat Heaters, Seat Heaters and Seat Ventilation158
Page 166 of 621

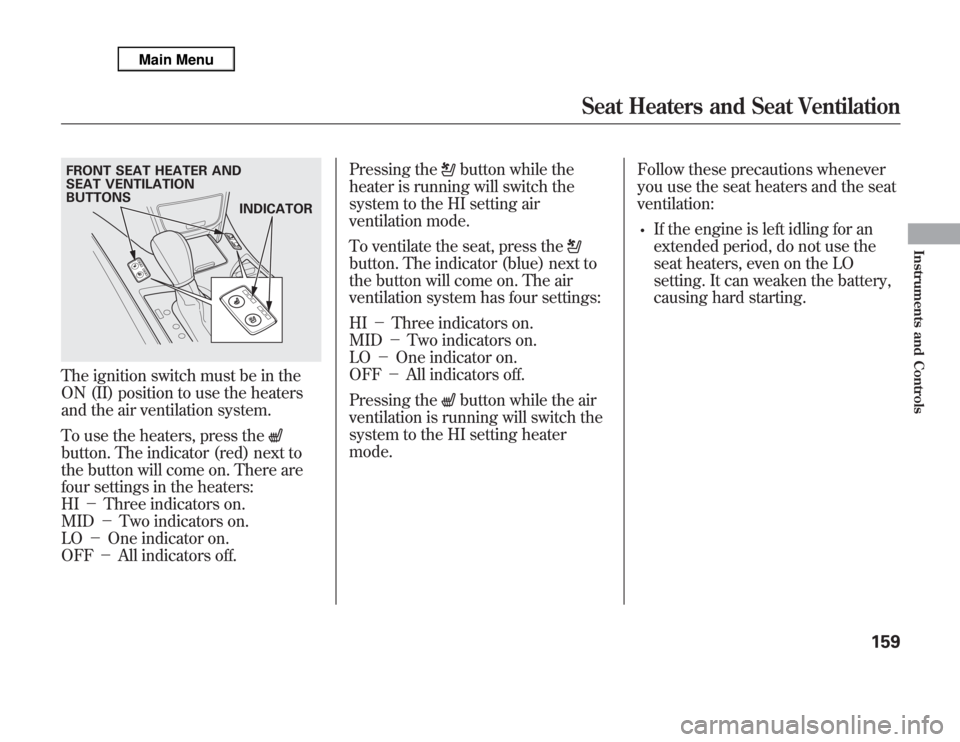
The ignition switch must be in the
ON (II) position to use the heaters
and the air ventilation system.
To use the heaters, press thebutton. The indicator (red) next to
the button will come on. There are
four settings in the heaters:
HI-Three indicators on.
MID-Two indicators on.
LO-One indicator on.
OFF-All indicators off.Pressing the
button while the
heater is running will switch the
system to the HI setting air
ventilation mode.
To ventilate the seat, press the
button. The indicator (blue) next to
the button will come on. The air
ventilation system has four settings:
HI-Three indicators on.
MID-Two indicators on.
LO-One indicator on.
OFF-All indicators off.
Pressing the
button while the air
ventilation is running will switch the
system to the HI setting heater
mode.Follow these precautions whenever
you use the seat heaters and the seat
ventilation:
•
If the engine is left idling for an
extended period, do not use the
seat heaters, even on the LO
setting. It can weaken the battery,
causing hard starting.
FRONT SEAT HEATER AND
SEAT VENTILATION
BUTTONS
INDICATOR
Seat Heaters and Seat Ventilation
159
Instruments and Controls
Page 167 of 621

Turn the ignition switch to the ON
(II) position to raise or lower any
window. To open a window, push the
switch down and hold it. Release the
switch when you want the window to
stop. Pull back on the switch and
hold it to close the window.The windows will operate for up to 10
minutes after you turn off the ignition
switch. Opening either front door
cancels this function.
Closing a power window on
someone's hands or fingers can
cause serious injury.
Make sure your passengers are
away from the windows before
closing them.
AUTO-To open either front
window fully, push the window
switch firmly down to the second
detent, then release it. The window
automatically goes down all the way.
To stop the window from going all
the way down, pull back on the
window switch briefly.To close either front window fully,
pull back the window switch firmly to
the second detent, then release it.
The window automatically goes all
the way up. To stop the window from
going all the way up, push down on
the window switch briefly.
When you push the MAIN switch in,
the switch is off, and the passengers'
windows cannot be raised or
lowered. To cancel this feature, push
on the switch again to get it to pop
out. Keep the MAIN switch pushed
in when you have children in the
vehicle so they do not injure
themselves by operating the
windows unintentionally.
DRIVER'S WINDOW
SWITCHMAIN SWITCHPower Windows160
Page 168 of 621

AUTO REVERSE-If either front
window senses any obstacle while it
is closing automatically, it will
reverse direction and then stop. To
close the window, remove the
obstacle, then use the window switch
again.
Auto reverse stops sensing when the
window is almost closed. You should
always check that all passengers and
objects are away from the window
before closing it.If your vehicle's battery is
disconnected or goes dead, or the
driver's window fuse is removed, the
AUTO function may be disabled. If
the AUTO function is disabled, the
power window system will need to be
reset after reconnecting the battery
or installing the fuse.
1. Start the engine. Push down and
hold the driver's window switch
until the window is fully open.
2. Pull and hold the driver's window
switch to close the window
completely, then hold the switch
for about 2 seconds.
If the power windows do not operate
properly after resetting, have your
vehicle checked by your dealer.Opening the Windows and
Moonroof with the Remote
Transmitter
You can open all of the windows and
the moonroof from outside with the
remote transmitter.
1. Press the UNLOCK button once to
unlock the driver's door.
2. Press the UNLOCK button a
second time, and hold it. All the
doors unlock, and all four windows
and moonroof start to open. To
stop the windows and moonroof,
release the button.
3. To open the windows and
moonroof further, press the button
again (within 10 seconds of step 1)
and hold it. If the windows and the
moonroof stop before the desired
position, repeat steps 1 and 2.
You cannot close the windows or the
moonroof with the remote
transmitter.
CONTINUED
Power Windows
161
Instruments and Controls
Page 169 of 621

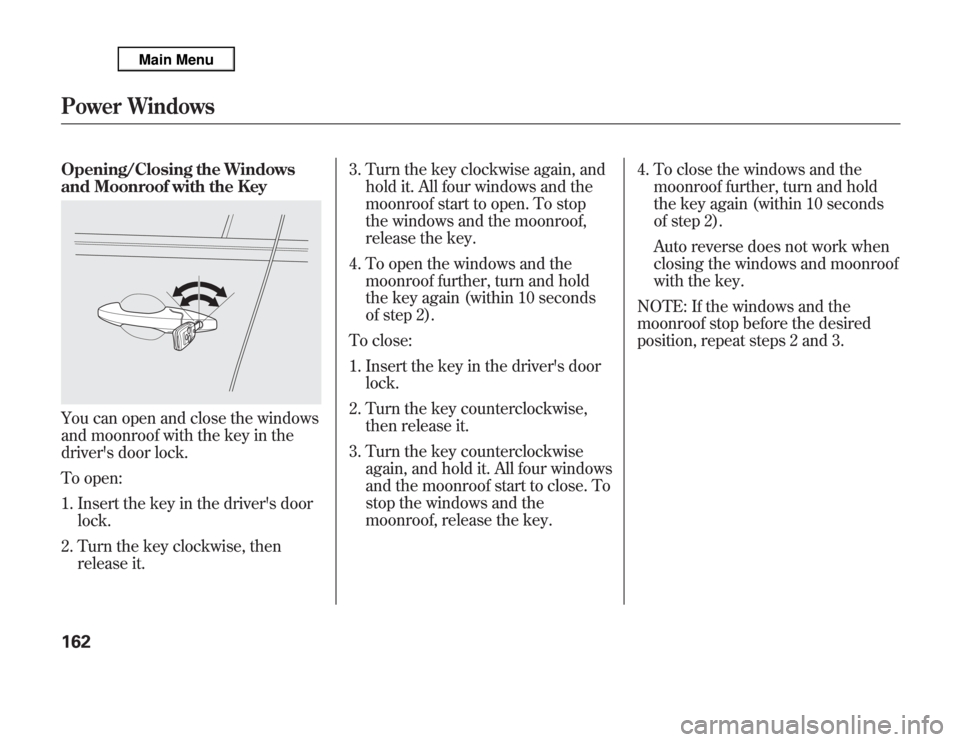
Opening/Closing the Windows
and Moonroof with the KeyYou can open and close the windows
and moonroof with the key in the
driver's door lock.
To open:
1. Insert the key in the driver's door
lock.
2. Turn the key clockwise, then
release it.3. Turn the key clockwise again, and
hold it. All four windows and the
moonroof start to open. To stop
the windows and the moonroof,
release the key.
4. To open the windows and the
moonroof further, turn and hold
the key again (within 10 seconds
of step 2).
To close:
1. Insert the key in the driver's door
lock.
2. Turn the key counterclockwise,
then release it.
3. Turn the key counterclockwise
again, and hold it. All four windows
and the moonroof start to close. To
stop the windows and the
moonroof, release the key.4. To close the windows and the
moonroof further, turn and hold
the key again (within 10 seconds
of step 2).
Auto reverse does not work when
closing the windows and moonroof
with the key.
NOTE: If the windows and the
moonroof stop before the desired
position, repeat steps 2 and 3.Power Windows162
Page 170 of 621

To open the moonroof fully, pull back
the moonroof switch firmly. The
moonroof opens all the way. To stop
the moonroof from opening fully,
push the switch briefly.To tilt up the moonroof, push the
center of the moonroof switch
straight up. To stop the moonroof
from tilting up fully, push the
moonroof switch forward.
To close the moonroof fully, push the
moonroof switch forward to the
second detent, then release it. The
moonroof closes all the way. To stop
the moonroof from closing all the
way, push the switch briefly.
To open or close the moonroof
partially, pull back or push forward
on the moonroof switch lightly to the
first detent and hold it. The moonroof
will stop when you release the
switch.Auto Reverse
If the moonroof runs into any
obstacle while it is closing
automatically, it will reverse
direction, and then stop. To close the
moonroof, remove the obstacle, then
use the moonroof switch again.
Auto reverse stops sensing when the
moonroof is almost closed. You
should always check that all
passengers and objects are away
from the moonroof before closing it.
Opening or closing the
moonroof on someone's hands
or fingers can cause serious
injury.
Make sure all hands and fingers
are clear of the moonroof
before opening or closing it.
MOONROOF SWITCH
CONTINUEDMoonroof
163
Instruments and Controls