mirror Acura MDX 2012 User Guide
[x] Cancel search | Manufacturer: ACURA, Model Year: 2012, Model line: MDX, Model: Acura MDX 2012Pages: 621, PDF Size: 11.15 MB
Page 173 of 621

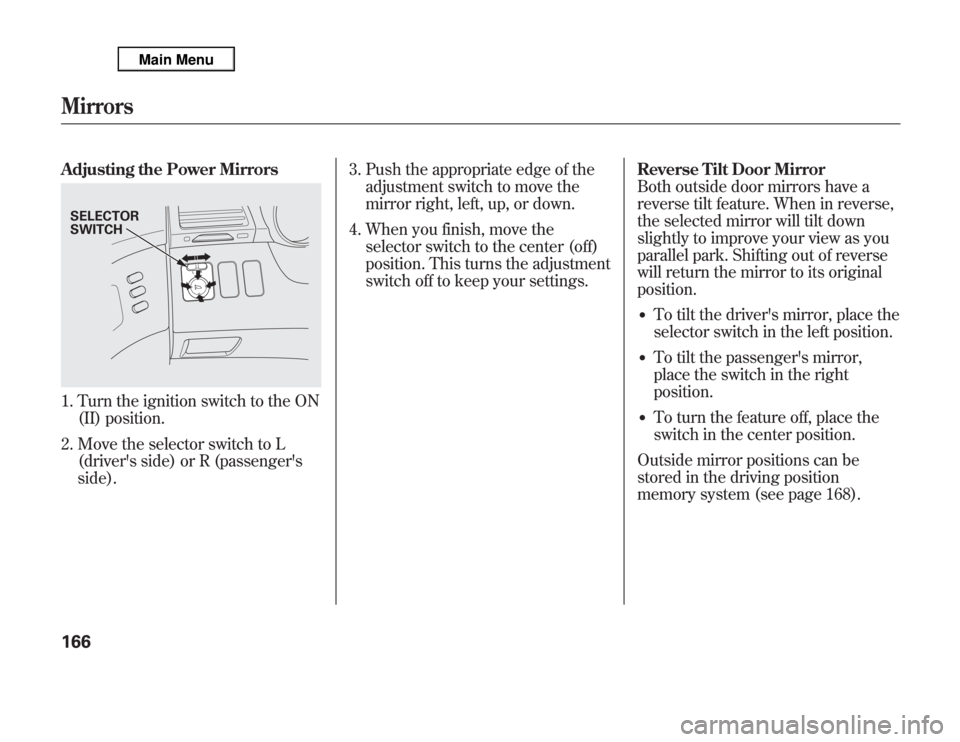
Adjusting the Power Mirrors1. Turn the ignition switch to the ON
(II) position.
2. Move the selector switch to L
(driver's side) or R (passenger's
side).3. Push the appropriate edge of the
adjustment switch to move the
mirror right, left, up, or down.
4. When you finish, move the
selector switch to the center (off)
position. This turns the adjustment
switch off to keep your settings.Reverse Tilt Door Mirror
Both outside door mirrors have a
reverse tilt feature. When in reverse,
the selected mirror will tilt down
slightly to improve your view as you
parallel park. Shifting out of reverse
will return the mirror to its original
position.
●
To tilt the driver's mirror, place the
selector switch in the left position.
●
To tilt the passenger's mirror,
place the switch in the right
position.
●
To turn the feature off, place the
switch in the center position.
Outside mirror positions can be
stored in the driving position
memory system (see page 168).
SELECTOR
SWITCHMirrors166
Page 174 of 621

Heated MirrorsThe outside mirrors are heated to
remove fog and frost. With the
ignition switch in the ON (II)
position, turn on the heaters by
pressing the button. The indicator in
the button comes on as a reminder.
Press the button again to turn the
heaters off. Pressing this button also
turns the rear window defogger on
and off.
This heated mirror function has a
timer (see page 132).If the outside temperature is below
41°F (5°C), the heated mirror
function will come on automatically
for 10 minutes when you turn the
ignition switch to the ON (II)
position.Folding Door Mirrors
Canadian Elite Package modelDoor mirrors can be folded by the
folding button next to the selector
switch, which enables you to park
your vehicle in a limited parking
space easily. Make sure you fold out
the mirrors before you start driving.
With the ignition switch in the ON
(II) position, press the folding button
to fold up both outside mirrors
simultaneously. To fold out, press
the button again.
HEATED MIRROR BUTTON
FOLDING BUTTON
CONTINUEDMirrors
167
Instruments and Controls
Page 175 of 621

Never drive your vehicle with the
outside mirrors folded.Driving Position Memory System
Your vehicle has a memory feature
for the steering wheel, driver's seat,
and outside mirror positions.
Seat, except for power lumbar,
steering wheel and outside mirror
positions can be stored in separate
memories. You select a memorized
position by pushing the appropriate
button or using the appropriate
remote transmitter (Driver 1 or
Driver 2). For more information see
page 148.Storing a Driving Position in
Memory
Store a driving position only when
the vehicle is parked.
1. Turn the ignition switch to the ON
(II) position. You cannot add a new
driving position to the memory
unless the ignition switch is in the
ON (II) position. You can recall a
memorized position with the
ignition switch in any position.
2. Adjust the seat to a comfortable
position (see page 149).
Adjust the steering wheel to a
comfortable position (see page
134).
Adjust the outside mirrors for best
visibility (see page 166).Mirrors, Driving Position Memory System168
Page 176 of 621

3. Press and release the MEMO
button on the control panel. You
will hear a beep. Immediately
press and hold one of the memory
buttons (1 or 2) until you hear two
beeps. The indicator in the
memory button will come on. The
current positions of the driver's
seat, steering wheel, and outside
mirrors are now stored.Doing any of the following after
pressing the MEMO button will
cancel the storing procedure.
●
Not pressing a memory button
within 5 seconds.
●
Readjusting the seat position.
●
Readjusting the outside mirror
position.
Each memory button stores only one
driving position. Storing a new
position erases the previous setting
stored in that button's memory. If
you want to add a new position while
retaining the current one, use the
other memory button.Selecting a Memorized Position
To select a memorized position, do
this:
1. Make sure the vehicle is parked.
2. Press the desired memory button
(1 or 2) until you hear a beep, then
release the button.
The system will move the seat,
steering wheel, and outside mirrors
to the memorized positions. The
indicator in the selected memory
button will flash during movement.
When the adjustments are complete,
you will hear two beeps, and the
indicator will remain on.
To change the‘‘MEMORY
POSITION LINK’’setting, see page
108.
MEMO BUTTON MEMORY BUTTONS
CONTINUED
Driving Position Memory System
169
Instruments and Controls
Page 177 of 621

To stop the system's automatic
adjustment, do any of these actions:●
Press any button on the control
panel: MEMO, 1, or 2.
●
Push any of the adjustment
switches for the seat.
●
Shift out of Park.
●
Adjust the outside mirrors.
If desired, you can use the
adjustment switches to change the
positions of the seat, steering wheel
or outside mirrors after they are in
their memorized position. If you
change the memorized position, the
indicator in the memory button will
go out. To keep this driving position
for later use, you must store it in the
driving position memory.Light Control Buttons
Your vehicle has the light control
buttons on the front ceiling. With
these buttons, you can select three
positions: OFF, Door (door activated
position), and ON. To select a
position, press the appropriate
button.
When you press the DOOR button,
the green indicator in the button
comes on as a reminder.To turn off the setting, press the OFF
button.
OFF position:●
The front individual map lights can
be turned on and off by pressing
each map light button (
).
●
The second and third row
individual map lights cannot be
turned on.
Front
ON
DOOR ACTIVATE
OFF
Second and Third row Front
MAP LIGHT BUTTONS
Driving Position Memory System, Interior Lights170
Page 180 of 621

SUN VISORSUNGLASSES HOLDER COAT HOOK
STORAGE COMPARTMENTS VANITY MIRROR
GROCERY HOOK
GLOVE BOX
CENTER POCKET
ACCESSORY
POWER SOCKET
CONSOLE COMPARTMENT
ARMREST/BEVERAGE HOLDER ACCESSORY POWER SOCKETBEVERAGE HOLDER
Interior Convenience Items
173
Instruments and Controls
Page 183 of 621

Sunglasses HolderTo open the sunglasses holder, push
on the lid. It will unlatch and swing
down. To close it, push it until it
latches. Make sure the holder is
closed while you are driving.
Some larger styles of sunglasses may
not fit in the holder.
You may also store small items in
this holder. Make sure they are small
enough to let the holder close and
latch, and that they are not heavy
enough to cause the holder to pop
open while driving.Sun Visor
To use the sun visor, pull it down.
When using the sun visor for the
side window, remove the support rod
from the clip, and swing it out.
In this position, the sun visor can be
adjusted by moving it on its slider.
Do not use the extended sun visor
over the inside mirror.
Make sure you put the sun visor
back in place when you are getting
into or out of the vehicle.
SUNGLASSES HOLDER PUSH
SUN VISOR Slide
Interior Convenience Items176
Page 184 of 621

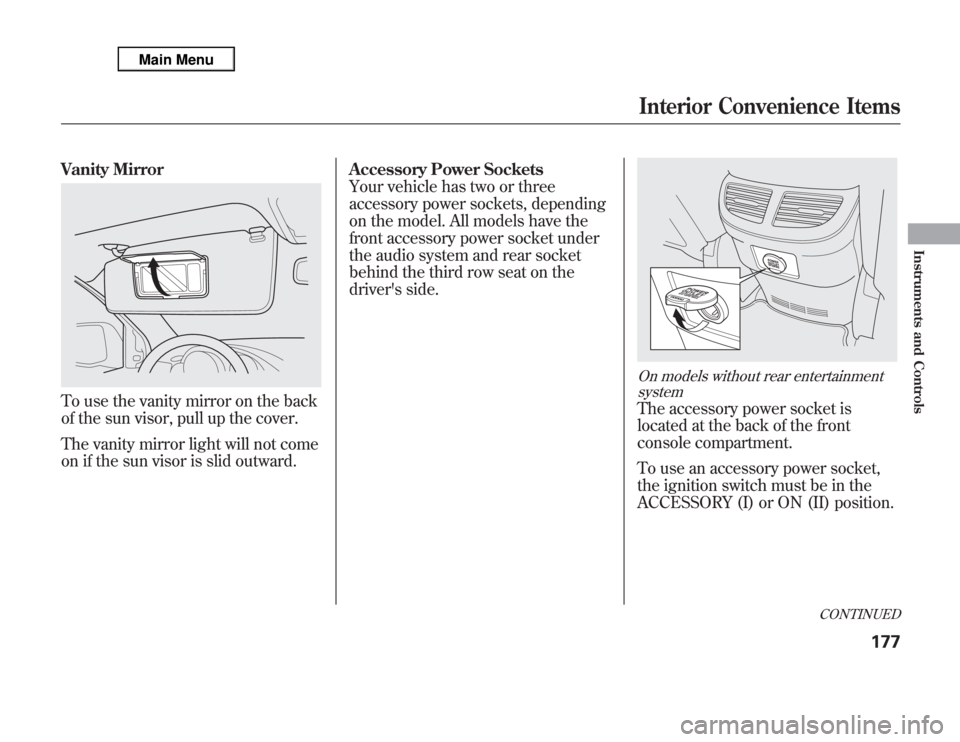
Vanity MirrorTo use the vanity mirror on the back
of the sun visor, pull up the cover.
The vanity mirror light will not come
on if the sun visor is slid outward.Accessory Power Sockets
Your vehicle has two or three
accessory power sockets, depending
on the model. All models have the
front accessory power socket under
the audio system and rear socket
behind the third row seat on the
driver's side.
On models without rear entertainment
systemThe accessory power socket is
located at the back of the front
console compartment.
To use an accessory power socket,
the ignition switch must be in the
ACCESSORY (I) or ON (II) position.
CONTINUED
Interior Convenience Items
177
Instruments and Controls
Page 188 of 621

The climate control system in your
vehicle provides a comfortable driving
environment in all weather conditions.
The standard audio system has many
features. This section describes those
features and how to use them.
Your vehicle has an anti-theft audio
system that requires a code number to
enable it.
The security system helps do
discourage vandalism and theft to your
vehicle.
Climate Control System
................
182
Rear Climate Controls
................
187
Audio System
...............................
192
Playing the AM/FM Radio (Models
without navigation system)
.......
193
Playing the XM
®Radio (Models
without navigation system)
.......
197
Playing Discs (Models without
navigation system)
...................
203Disc Changer Error Message
(Models without navigation
system)
................................
211
Audio System (Models with
navigation system)
...................
212
Playing the AM/FM Radio (Models
with navigation system)
............
213
Playing the XM
®Radio (Models
with navigation system)
............
226
Playing a Disc (Models with
navigation system)
...................
235
Disc Player Error Messages
(Models with navigation
system)
................................
246
Protecting Your Discs
...................
247
Playing Hard Disc Drive (HDD)
Audio (Models with navigation
system)
................................
250
Playing an iPod
®(Models with
navigation system)
...................
278
iPod
®Error Messages (Models
with navigation system)
............
286
Playing a USB Flash Memory
Device (Models with navigation
system)
................................
287USB Flash Memory Device Error
Messages (Models with
navigation system)
................
297
Bluetooth
®Audio System (Models
with navigation system)
............
298
AM/FM Radio Reception
..............
303
Remote Audio Controls
.................
305
Auxiliary Input Jack
......................
307
Radio Theft Protection
..................
308
Setting the Clock and Calendar
.....
309
Rear Entertainment System
...........
310
Security System
............................
341
Compass
......................................
342
Cruise Control
..............................
345
Adaptive Cruise Control (ACC)
.....
348
HomeLink
®Universal
Transceiver
..............................
363
Bluetooth
®HandsFreeLink
®
(Models without navigation
system)
................................
365
Bluetooth
®HandsFreeLink
®
(Models with navigation
system)
................................
383
AcuraLink
®(U.S. models only)
......
402
Rearview Mirror with Rearview
Camera Display
........................
417
Features
181
Features
Page 189 of 621

FRONT CONTROL PANELDRIVER'S SIDE
TEMPERATURE
CONTROL
BUTTONS
DUAL BUTTONREAR BUTTONWINDSHIELD
DEFROSTER
BUTTON
RECIRCULATION BUTTON REAR WINDOW DEFOGGER/HEATED
MIRROR BUTTON
REAR CONTROL PANEL
REAR PASSENGER
COMPARTMENT
TEMPERATUREAUTO SYNC INDICATOR
FAN CONTROL BUTTONS REAR PASSENGER
COMPARTMENT
TEMPERATURE
CONTROL BUTTONS
AUTO BUTTONMODE BUTTON AUTO BUTTONON/OFF
BUTTON
DRIVER'S SIDE TEMPERATURE
AUTO INDICATORFRONT PASSENGER'S SIDE TEMPERATURE
FAN CONTROL
BUTTONSFRONT PASSENGER'S
SIDE TEMPERATURE
CONTROL BUTTONS
AIR CONDITIONING
BUTTON MODE
BUTTON
ON/OFF BUTTON
Climate Control System182