engine Acura MDX 2012 Owner's Guide
[x] Cancel search | Manufacturer: ACURA, Model Year: 2012, Model line: MDX, Model: Acura MDX 2012Pages: 621, PDF Size: 11.15 MB
Page 166 of 621
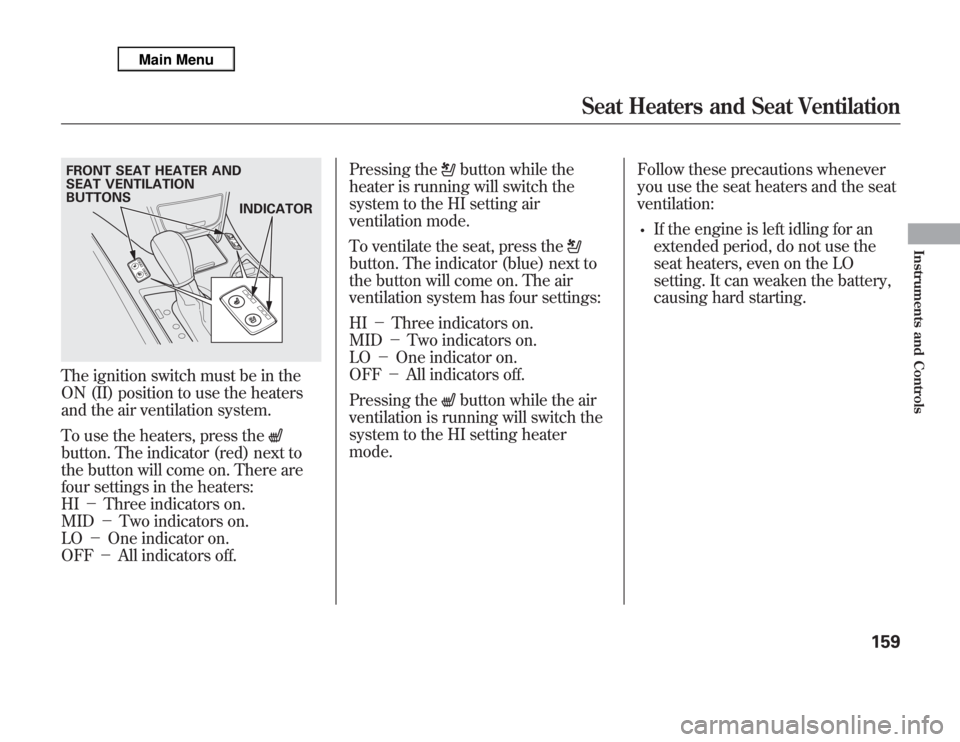
The ignition switch must be in the
ON (II) position to use the heaters
and the air ventilation system.
To use the heaters, press thebutton. The indicator (red) next to
the button will come on. There are
four settings in the heaters:
HI-Three indicators on.
MID-Two indicators on.
LO-One indicator on.
OFF-All indicators off.Pressing the
button while the
heater is running will switch the
system to the HI setting air
ventilation mode.
To ventilate the seat, press the
button. The indicator (blue) next to
the button will come on. The air
ventilation system has four settings:
HI-Three indicators on.
MID-Two indicators on.
LO-One indicator on.
OFF-All indicators off.
Pressing the
button while the air
ventilation is running will switch the
system to the HI setting heater
mode.Follow these precautions whenever
you use the seat heaters and the seat
ventilation:
•
If the engine is left idling for an
extended period, do not use the
seat heaters, even on the LO
setting. It can weaken the battery,
causing hard starting.
FRONT SEAT HEATER AND
SEAT VENTILATION
BUTTONS
INDICATOR
Seat Heaters and Seat Ventilation
159
Instruments and Controls
Page 168 of 621
AUTO REVERSE-If either front
window senses any obstacle while it
is closing automatically, it will
reverse direction and then stop. To
close the window, remove the
obstacle, then use the window switch
again.
Auto reverse stops sensing when the
window is almost closed. You should
always check that all passengers and
objects are away from the window
before closing it.If your vehicle's battery is
disconnected or goes dead, or the
driver's window fuse is removed, the
AUTO function may be disabled. If
the AUTO function is disabled, the
power window system will need to be
reset after reconnecting the battery
or installing the fuse.
1. Start the engine. Push down and
hold the driver's window switch
until the window is fully open.
2. Pull and hold the driver's window
switch to close the window
completely, then hold the switch
for about 2 seconds.
If the power windows do not operate
properly after resetting, have your
vehicle checked by your dealer.Opening the Windows and
Moonroof with the Remote
Transmitter
You can open all of the windows and
the moonroof from outside with the
remote transmitter.
1. Press the UNLOCK button once to
unlock the driver's door.
2. Press the UNLOCK button a
second time, and hold it. All the
doors unlock, and all four windows
and moonroof start to open. To
stop the windows and moonroof,
release the button.
3. To open the windows and
moonroof further, press the button
again (within 10 seconds of step 1)
and hold it. If the windows and the
moonroof stop before the desired
position, repeat steps 1 and 2.
You cannot close the windows or the
moonroof with the remote
transmitter.
CONTINUED
Power Windows
161
Instruments and Controls
Page 185 of 621
Each socket is intended to supply
power for 12 volt DC accessories that
are rated 120 watts or less (10 amps).
None of the sockets will power an
automotive type cigarette lighter
element.AC Power Outlet
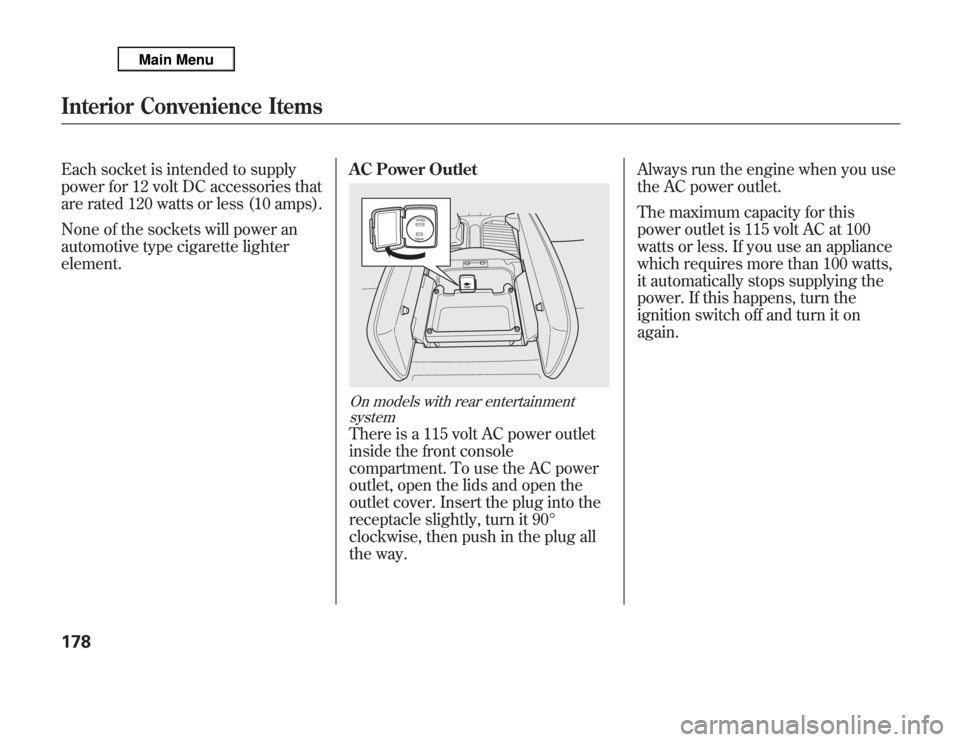
On models with rear entertainment
systemThere is a 115 volt AC power outlet
inside the front console
compartment. To use the AC power
outlet, open the lids and open the
outlet cover. Insert the plug into the
receptacle slightly, turn it 90°
clockwise, then push in the plug all
the way.Always run the engine when you use
the AC power outlet.
The maximum capacity for this
power outlet is 115 volt AC at 100
watts or less. If you use an appliance
which requires more than 100 watts,
it automatically stops supplying the
power. If this happens, turn the
ignition switch off and turn it on
again.
Interior Convenience Items178
Page 260 of 621
Recording a Music CD to HDD
Audio
If you play a music CD that has not
yet been recorded on the HDD, the
system will automatically begin
recording to the HDD once the disc
is loaded. To turn this feature off, see
page 254.
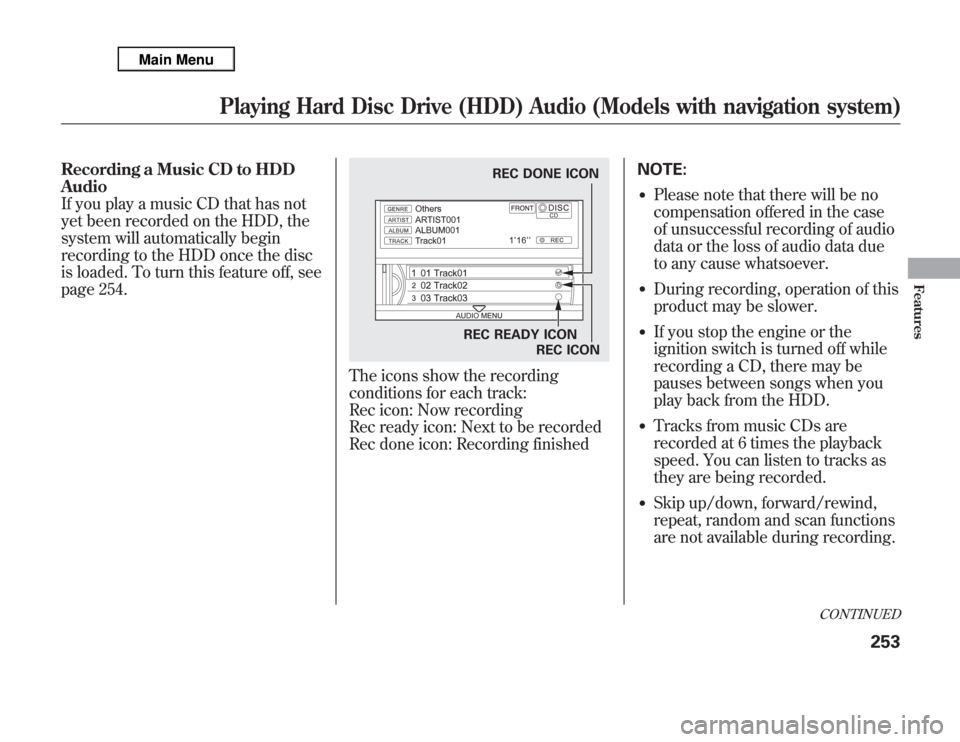
The icons show the recording
conditions for each track:
Rec icon: Now recording
Rec ready icon: Next to be recorded
Rec done icon: Recording finishedNOTE:
●
Please note that there will be no
compensation offered in the case
of unsuccessful recording of audio
data or the loss of audio data due
to any cause whatsoever.
●
During recording, operation of this
product may be slower.
●
If you stop the engine or the
ignition switch is turned off while
recording a CD, there may be
pauses between songs when you
play back from the HDD.
●
Tracks from music CDs are
recorded at 6 times the playback
speed. You can listen to tracks as
they are being recorded.
●
Skip up/down, forward/rewind,
repeat, random and scan functions
are not available during recording.
REC DONE ICON
REC READY ICON
REC ICON
CONTINUED
Playing Hard Disc Drive (HDD) Audio (Models with navigation system)
253
Features
Page 343 of 621
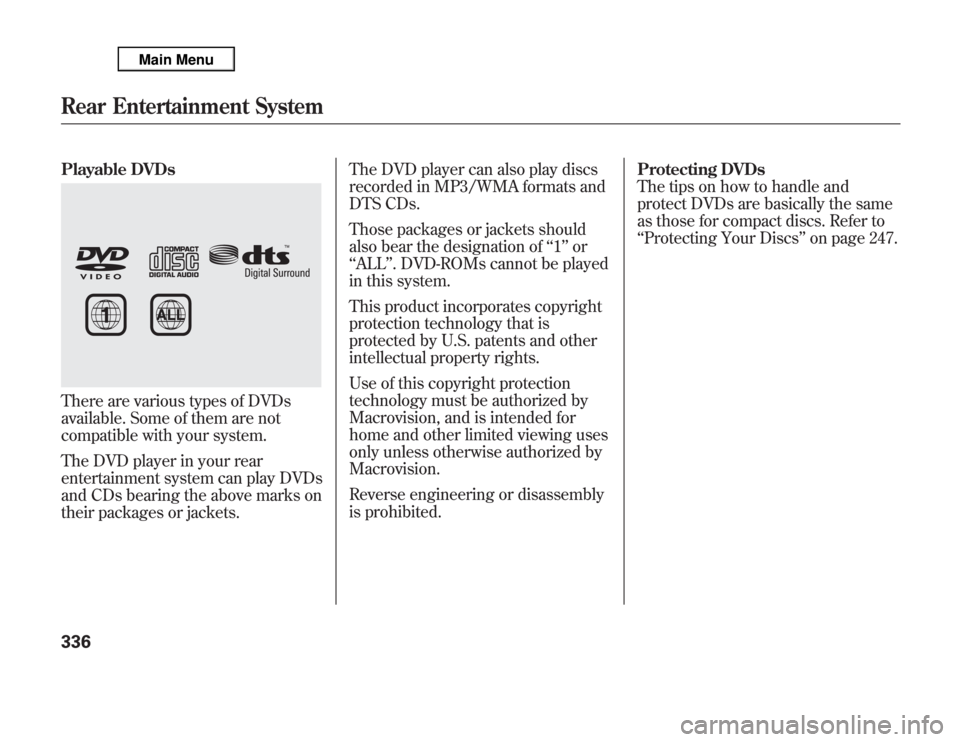
Playable DVDsThere are various types of DVDs
available. Some of them are not
compatible with your system.
The DVD player in your rear
entertainment system can play DVDs
and CDs bearing the above marks on
their packages or jackets.The DVD player can also play discs
recorded in MP3/WMA formats and
DTS CDs.
Those packages or jackets should
also bear the designation of‘‘1’’or
‘‘ALL’’. DVD-ROMs cannot be played
in this system.
This product incorporates copyright
protection technology that is
protected by U.S. patents and other
intellectual property rights.
Use of this copyright protection
technology must be authorized by
Macrovision, and is intended for
home and other limited viewing uses
only unless otherwise authorized by
Macrovision.
Reverse engineering or disassembly
is prohibited.Protecting DVDs
The tips on how to handle and
protect DVDs are basically the same
as those for compact discs. Refer to
‘‘Protecting Your Discs’’on page 247.Rear Entertainment System336
Page 425 of 621

On models without navigation systemYou can turn the camera display on
and off by pressing the power button
when the shift lever is in reverse.
The camera display turns on
everytime you shift to reverse, even if
you turned it off the last time.
Whenever you shift to reverse (R)
with the ignition switch in the ON
(II) position, the rearview appears on
a display in the rearview mirror.
For the best picture, always keep the
rearview camera clean, and do not
cover the camera lens. To avoid
scratching the lens when you clean
it, use a moist, soft cloth.
Since the rearview camera display
area is limited, you should always
back up slowly and carefully, and
look behind you for obstacles.If the engine has just been started, it
may take a short time for the system
to display the rearview.
The camera display brightness is
adjusted automatically by sensors. If
you use the camera display
continuously at high temperatures,
the image will gradually dim.
The rearview mirror will be hot when
you use the camera display for an
extended period of time.
If a bright light (such as sunlight) is
reflected on the mirror, the image
may be difficult to see.
REARVIEW CAMERA DISPLAY
POWER BUTTON
Rearview Mirror with Rearview Camera Display418
Page 428 of 621

Before you begin driving your
vehicle, you should know what
gasoline to use and how to check the
levels of important fluids. You also
need to know how to properly store
luggage or packages. The
information in this section will help
you. If you plan to add any
accessories to your vehicle, please
read the information in this section
first.Break-in Period
...........................
422
Fuel Recommendation
................
422
Service Station Procedures
.........
424
Refueling
.................................
424
Tighten Fuel Cap Message
.....
425
Opening and Closing the
Hood
...................................
426
Oil Check
................................
427
Engine Coolant Check
............
427
Fuel Economy
.............................
428
Accessories and
Modifications
..........................
431
Carrying Cargo
...........................
433
Before Driving
421
Before Driving
Page 429 of 621

Break-in Period
Help assure your vehicle's future
reliability and performance by paying
extra attention to how you drive
during the first 600 miles (1,000 km).
During this period:●
Avoid full-throttle starts and rapid
acceleration.
●
Avoid hard braking for the first 200
miles (300 km).
●
Do not change the oil until the
multi-information display indicates
it is needed.
●
Do not tow a trailer.
You should also follow these
recommendations with an
overhauled or exchanged engine, or
when the brakes are replaced.Fuel Recommendation
Your vehicle is designed to operate
on premium unleaded gasoline with
a pump octane of 91 or higher. If this
octane grade is unavailable, regular
unleaded gasoline with a pump
octane of 87 or higher may be used
temporarily. The use of regular
unleaded gasoline can cause metallic
knocking noises in the engine and
will result in decreased engine
performance. The long-term use of
regular-grade gasoline can lead to
engine damage.
To help prevent harmful fuel system and
engine deposits, use high quality fuel
containing detergent and additives. In
addition, in order to maintain good
performance, fuel economy, and
emissions control, we strongly
recommend the use of gasoline that
does NOT contain harmful
manganesebased fuel additives such as
MMT, if such gasoline is available.
Use of gasoline with these additives
may adversely affect performance,
and cause the malfunction indicator
lamp on your instrument panel to
come on. If this happens, contact
your dealer for service.
Break-in Period, Fuel Recommendation422
Page 430 of 621

Some gasoline today is blended with
oxygenates such as ethanol or
MTBE. Your vehicle is designed to
operate on oxygenated gasoline
containing up to 10% ethanol by
volume and up to 15% MTBE by
volume. Do not use gasoline
containing methanol.
If you notice any undesirable
operating symptoms, try another
service station or switch to another
brand of gasoline.Because the level of detergency and
additives in gasoline vary in the
market, Honda endorses the use of
‘‘TOP TIER Detergent Gasoline’’
where available to help maintain the
performance and reliability of your
vehicle. TOP TIER Detergent
Gasoline meets a new gasoline
standard jointly established by
leading automotive manufacturers to
meet the needs of today’s advanced
engines. Qualifying gasoline retailers
will, in most cases, identify their
gasoline as having met‘‘TOP TIER
Detergent Gasoline’’standards at the
retail location. This fuel is
guaranteed to contain the proper
level of detergent additives and be
free of metallic additives. The proper
level of detergent additives, and
absence of harmful metallic additives
in gasoline, help avoid build-up of
deposits in your engine and emission
control system.For further important fuel-related
information for your vehicle, or
information on gasoline that does not
contain MMT, visit My Acura at
owners.acura.com.
In Canada, visit
www.acura.ca
for additional
information on gasoline.
Fuel Recommendation
423
Before Driving
Page 431 of 621

Refueling1. Park with the driver's side closest
to the service station pump.
2. Open the fuel fill door by pressing
the button in the driver's door. (To
open the fuel fill door manually,
see page 572.)
3. Remove the fuel fill cap slowly.
You may hear a hissing sound as
pressure inside the tank equalizes.
Place the cap in the holder on the
fuel fill door.
4. Stop filling the tank after the fuel
nozzle automatically clicks off. Do
not try to‘‘top off’’the tank. Leave
some room for the fuel to expand
with temperature changes.If the fuel nozzle keeps clicking off
even though the tank is not full,
there may be a problem with your
vehicle's fuel vapor recovery system.
The system helps keep fuel vapor
from going into the atmosphere. Try
filling at another pump. If this does
not fix the problem, consult your
dealer.
Gasoline is highly flammable
and explosive. You can be
burned or seriously injured
when handling fuel.●
Stop the engine, and keep
heat, sparks, and flame
away.
●
Handle fuel only outdoors.
●
Wipe up spills immediately.
Push
FUEL FILL CAP
TETHER
HOLDER
Service Station Procedures424