lock Acura MDX 2014 Navigation Manual
[x] Cancel search | Manufacturer: ACURA, Model Year: 2014, Model line: MDX, Model: Acura MDX 2014Pages: 343, PDF Size: 15.72 MB
Page 30 of 343
29
Interface Settings
Clock Adjustment
System Setup
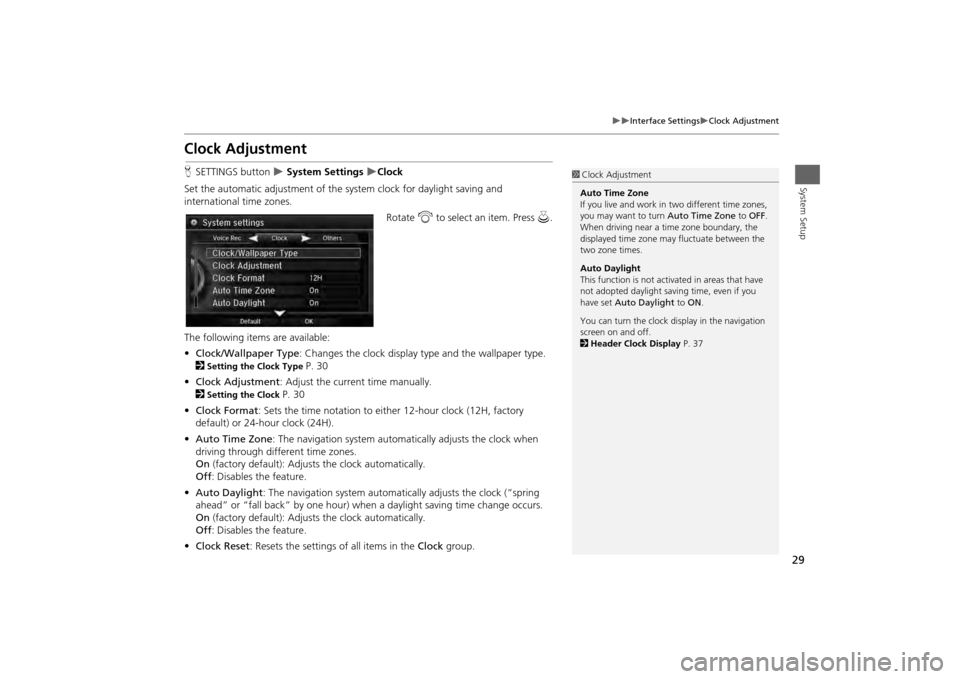
Clock AdjustmentHSETTINGS button
System Settings
Clock
Set the automatic adjustment of the sy stem clock for daylight saving and
international time zones.
Rotate i to select an item. Press u.
The following items are available:
• Clock/Wallpaper Type : Changes the clock display ty pe and the wallpaper type.
2
Setting the Clock Type
P. 30
• Clock Adjustment : Adjust the current time manually.
2
Setting the Clock
P. 30
• Clock Format : Sets the time notation to either 12-hour clock (12H, factory
default) or 24-hour clock (24H).
• Auto Time Zone : The navigation syst em automatically adju sts the clock when
driving through different time zones.
On (factory default): Adjusts the clock automatically.
Off : Disables the feature.
• Auto Daylight : The navigation system automati cally adjusts the clock (“spring
ahead” or “fall back” by one hour) when a daylight saving time change occurs.
On (factory default): Adjusts the clock automatically.
Off : Disables the feature.
• Clock Reset : Resets the settings of all items in the Clock group.
1Clock Adjustment
Auto Time Zone
If you live and work in two different time zones,
you may want to turn Auto Time Zone to OFF.
When driving near a time zone boundary, the
displayed time zone ma y fluctuate between the
two zone times.
Auto Daylight
This function is not activated in areas that have
not adopted daylight saving time, even if you
have set Auto Daylight to ON .
You can turn the clock di splay in the navigation
screen on and off.
2 Header Clock Display P. 37
Page 31 of 343
30
Interface Settings
Clock Adjustment
System Setup
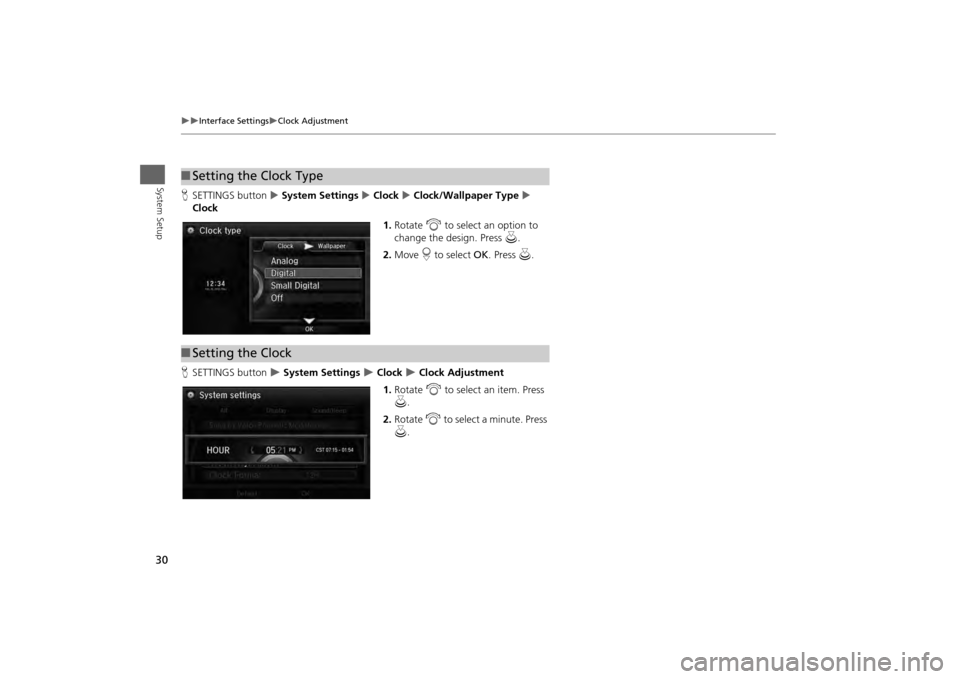
HSETTINGS button System Settings Clock Clock/Wallpaper Type
Clock
1.Rotate i to select an option to
change the design. Press u.
2. Move r to select OK. Press u.
H SETTINGS button
System Settings
Clock
Clock Adjustment
1. Rotate i to select an item. Press
u .
2. Rotate i to select a minute. Press
u .
■Setting the Clock Type■Setting the Clock
Page 32 of 343
31
Interface Settings
Wallpaper Settings
System Setup
Wallpaper SettingsSelect, delete, and import wallpaper pictures for display on the screen.
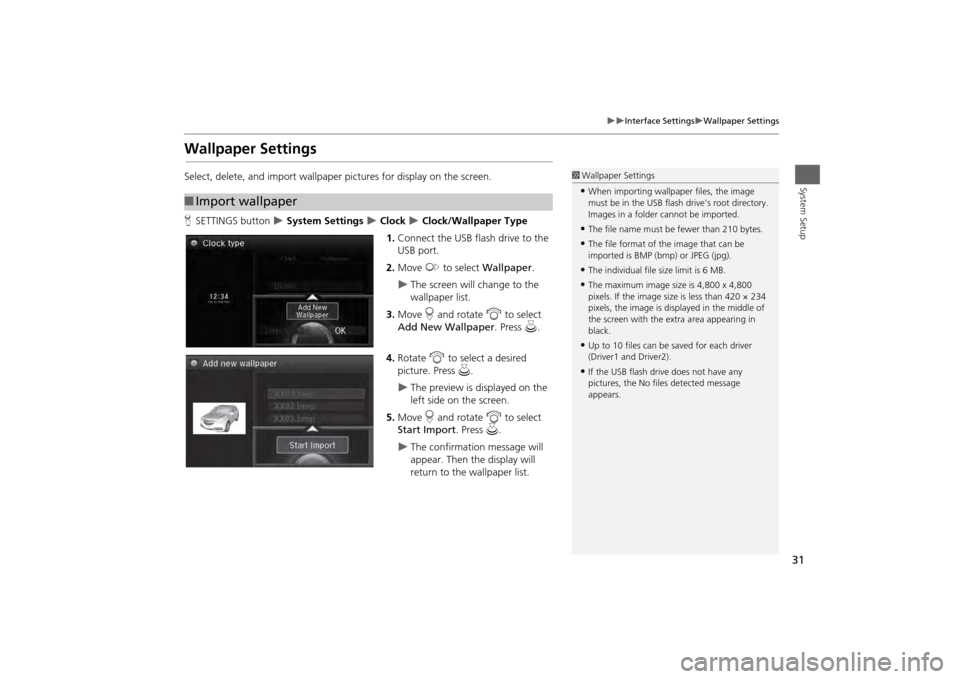
HSETTINGS button
System Settings
Clock
Clock/Wallpaper Type
1. Connect the USB flash drive to the
USB port.
2. Move y to select Wallpaper .
The screen will change to the
wallpaper list.
3. Move r and rotate i to select
Add New Wallpaper. Press u.
4. Rotate i to select a desired
picture. Press u.
The preview is displayed on the
left side on the screen.
5. Move r and rotate i to select
Start Import . Press u.
The confirmation message will
appear. Then the display will
return to the wallpaper list.
■Import wallpaper
1 Wallpaper Settings•When importing wallpaper files, the image
must be in the USB flash drive’s root directory.
Images in a folder cannot be imported.•The file name must be fewer than 210 bytes.•The file format of the image that can be
imported is BMP (bmp) or JPEG (jpg).•The individual file size limit is 6 MB.•The maximum image size is 4,800 x 4,800
pixels. If the image size is less than 420 × 234
pixels, the image is displayed in the middle of
the screen with the extra area appearing in
black.•Up to 10 files can be saved for each driver
(Driver1 and Driver2).•If the USB flash driv e does not have any
pictures, the No file s detected message
appears.
Page 33 of 343
32
Interface Settings
Wallpaper Settings
System Setup
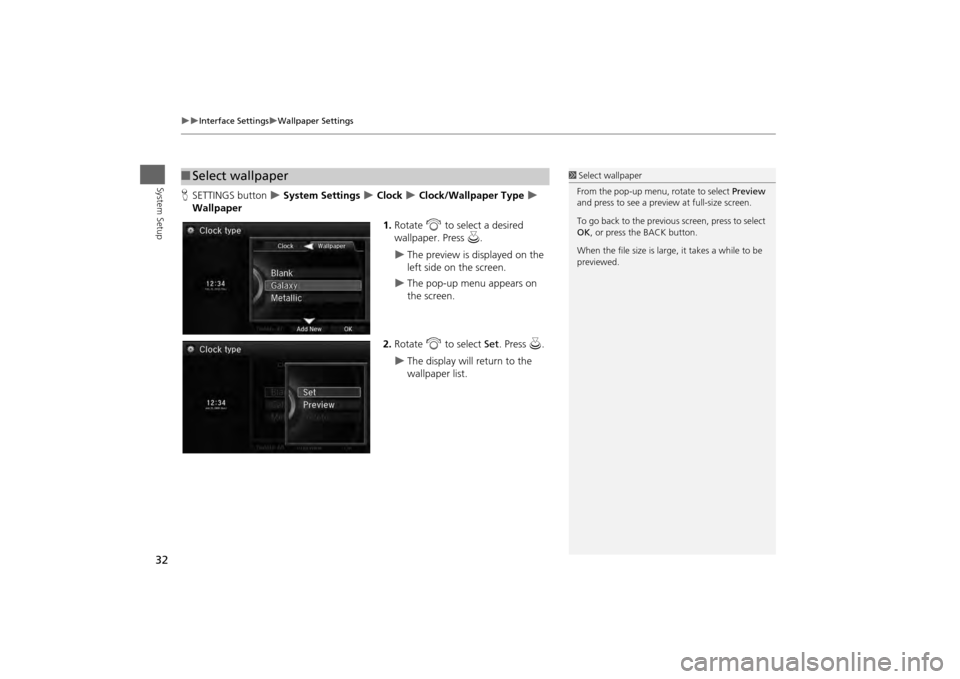
HSETTINGS button
System Settings
Clock
Clock/Wallpaper Type
Wallpaper
1.Rotate i to select a desired
wallpaper. Press u.
The preview is displayed on the
left side on the screen.
The pop-up menu appears on
the screen.
2. Rotate i to select Set. Press u.
The display will return to the
wallpaper list.
■Select wallpaper
1 Select wallpaper
From the pop-up menu, rotate to select Preview
and press to see a preview at full-size screen.
To go back to the previous screen, press to select
OK , or press the BACK button.
When the file size is large, it takes a while to be
previewed.
Page 34 of 343
33
Interface Settings
Wallpaper Settings
System Setup
HSETTINGS button
System Settings
Clock
Clock/Wallpaper Type
Wallpaper
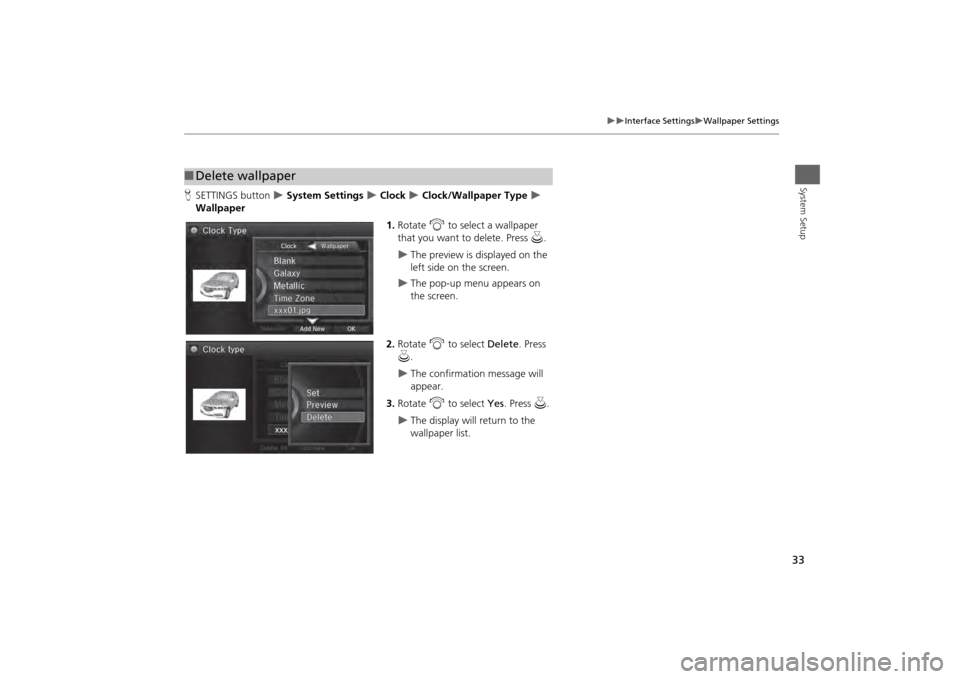
1.Rotate i to select a wallpaper
that you want to delete. Press u.
The preview is displayed on the
left side on the screen.
The pop-up menu appears on
the screen.
2. Rotate i to select Delete. Press
u .
The confirmation message will
appear.
3. Rotate i to select Yes. Press u.
The display will return to the
wallpaper list.
■Delete wallpaper
Page 38 of 343
37
Interface Settings
Header Clock Display
System Setup
Header Clock DisplayHSETTINGS button
System Settings
Others
Header Clock Display
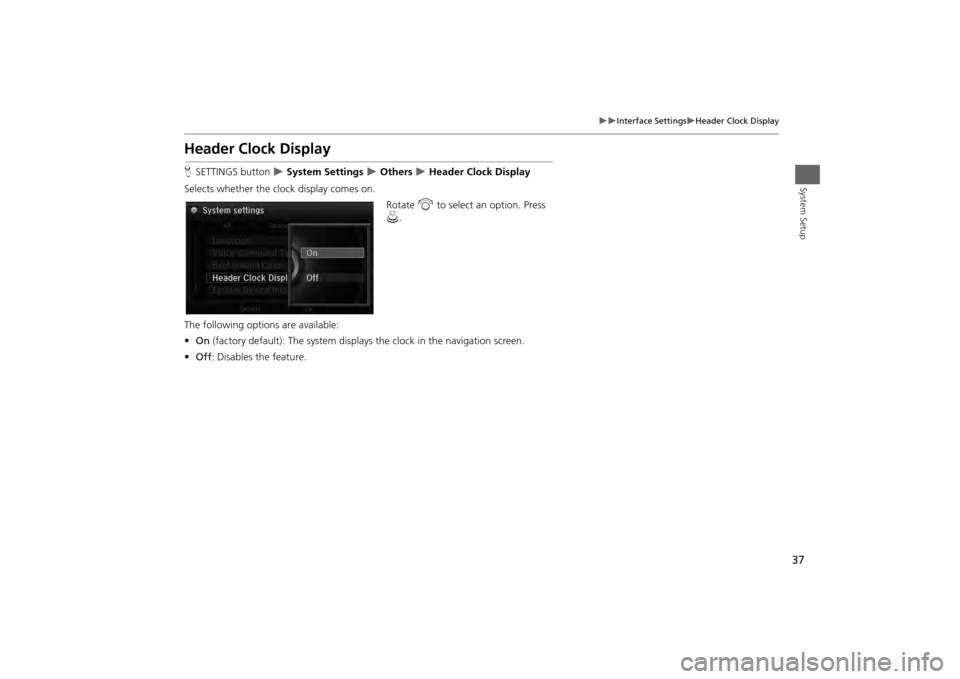
Selects whether the clock display comes on. Rotate i to select an option. Press
u .
The following options are available:
• On (factory default): The system displa ys the clock in the navigation screen.
• Off : Disables the feature.
Page 76 of 343
75
Map
Color
System Setup
Illumination control Priority Operationa
button
1
Selects Day, Night, or Off display mode. This button has
the highest priority and overrides all other display control
adjustments listed below.
Remember : Once you press this button, you assume full
manual control of the display mode until the power mode
is set to VEHICLE OFF (LOCK).
Sunlight sensor
(see your
Owner’s Manual
for location) 2 If the sunlight sensor detects daylight and the headlights
are turned on, the system automatically overrides the
Night display and displays the Day display mode.
Remember : If desired, use the a button to override
this automatic choice.
Dash illumination
adjustment
buttons (see your
Owner’s Manual
for location)
3
When headlights are turned on, and you wish to have the
Day display mode, adjust the illumination to the full
brightness setting (beeps).
Remember : Adjust the dash brightness back to mid-range
to allow auto switching by sensing the headlights are on or
off.
Headlights
(Auto/On/Off) 4 When turned on, the display changes to Night display
mode. The previous three controls listed above can
“cancel” this function.
Remember : Use the a button, or adjust the dash
illumination to full brightness, to set the display to your
desired choice.
Screen color
choice
N/A
The user can select the color of the screen that will be
displayed for the Day and Night display modes described
above.
Remember : For best contrast, ensure that the map color is
white for Day and black for Night.
Page 85 of 343
84
Map
Correct Vehicle Position
System Setup
Correct Vehicle PositionHSETTINGS button
Navi Settings
Map
Correct Vehicle Position
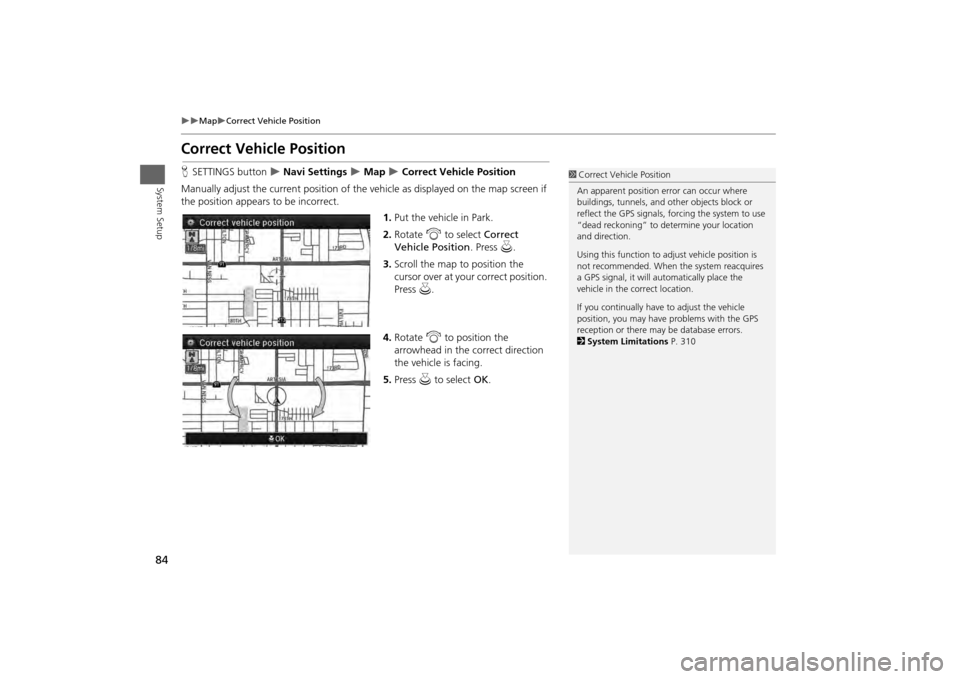
Manually adjust the current position of the vehicle as displayed on the map screen if
the position appear s to be incorrect.
1.Put the vehicle in Park.
2. Rotate i to select Correct
Vehicle Position . Press u.
3. Scroll the map to position the
cursor over at your correct position.
Press u.
4. Rotate i to position the
arrowhead in the correct direction
the vehicle is facing.
5. Press u to select OK.
1Correct Vehicle Position
An apparent position error can occur where
buildings, tunnels, and ot her objects block or
reflect the GPS signals, forcing the system to use
“dead reckoning” to determine your location
and direction.
Using this function to ad just vehicle position is
not recommended. When the system reacquires
a GPS signal, it will automatically place the
vehicle in the correct location.
If you continually have to adjust the vehicle
position, you may have problems with the GPS
reception or there may be database errors.
2 System Limitations P. 310
Page 200 of 343
199Audio
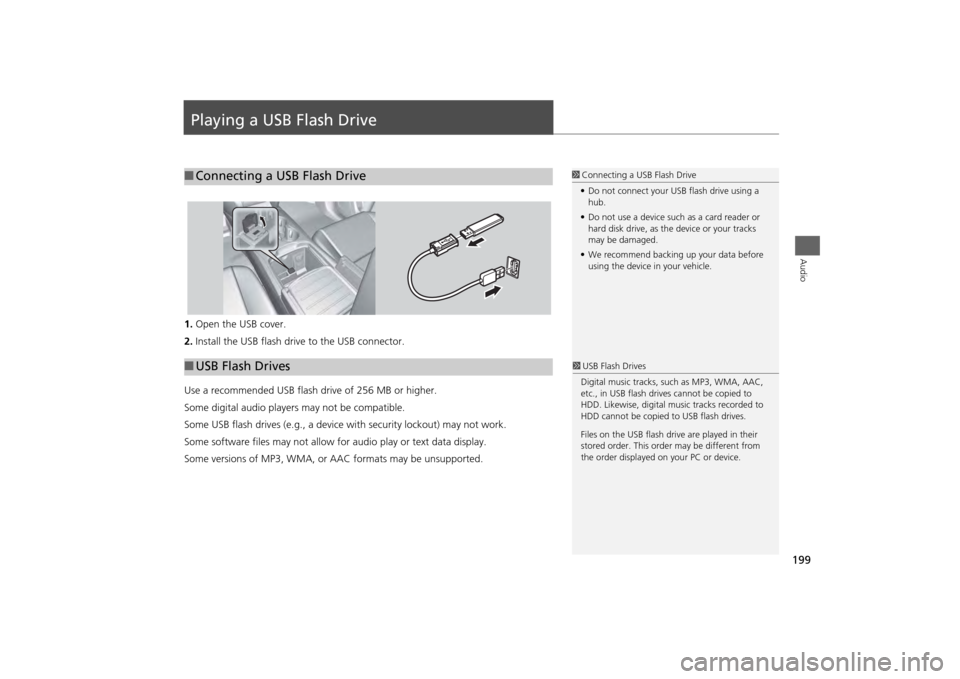
Playing a USB Flash Drive1.Open the USB cover.
2. Install the USB flash drive to the USB connector.
Use a recommended USB flash drive of 256 MB or higher.
Some digital audio players may not be compatible.
Some USB flash drives (e.g., a device with security lockout) may not work.
Some software files may not allow for audio play or text data display.
Some versions of MP3, WMA, or AAC formats may be unsupported.■Connecting a USB Flash Drive
1 Connecting a USB Flash Drive
• Do not connect your US B flash drive using a
hub.
• Do not use a device such as a card reader or
hard disk drive, as th e device or your tracks
may be damaged.
• We recommend backing up your data before
using the device in your vehicle.
■ USB Flash Drives
1 USB Flash Drives
Digital music tracks, such as MP3, WMA, AAC,
etc., in USB flash drives cannot be copied to
HDD. Likewise, digital music tracks recorded to
HDD cannot be copied to USB flash drives.
Files on the USB flash drive are played in their
stored order. This orde r may be different from
the order displayed on your PC or device.
Page 259 of 343
258
AcuraLink®
Security Features
AcuraLink®
Security FeaturesYour subscribed telematics service provider can track your vehicle’s location, remotely
lock or unlock doors, and help you find your vehicle.
To use these features, you need your user ID and personal identification number (PIN).
■ Stolen vehi cle tracking
This feature searches and tracks down your ve hicle position even if it is on the move.
If you believe that your vehicle has been stolen, contact the pol ice as well as the
provider.
■ Remote door lock/unlock
The provider can remotely lock or unlock doors upon your request.
■ Vehicle finder
This feature is convenient to use when try ing to locate your vehicle in large areas,
such as a crowded parking lot. If you ca nnot locate your vehicle after using the
remote transmitter’s answerback function , you can contact the provider which can
then flash your vehicle’s exterior lights and sound the horn.
■ Security ala rm notification
If the security system in your vehicle dete cts an abnormal condition, such as someone
tampering with the lock on your vehicle, the provider notifies you by your preferred
method.
1 Security Features
The contact information of your provider, your
user ID and PIN will be given when you subscribe
to AcuraLink. If you forget any of the above,
contact a dealer or go to owners.acura.com.
You can also activate the remote door lock/
unlock and vehicle finder features from the
Internet or using your smartphone app. Ask a
dealer or visit owners.acura.com for details.1Vehicle finder
The lights will stop fl ashing and horn will stop
sounding under the following conditions:•When 30 seconds have elapsed.•You unlock the doors using the remote
transmitter.•You unlock the doors us ing the keyless access
system.•You unlock the doors using the built-in key.•The power mode is set to ACCESSORY or ON.