warning light Acura MDX 2014 User Guide
[x] Cancel search | Manufacturer: ACURA, Model Year: 2014, Model line: MDX, Model: Acura MDX 2014Pages: 500, PDF Size: 11.72 MB
Page 184 of 500

Continued
183
uuInterior Lights/Interior Convenience ItemsuInterior Convenience Items
Controls
The power mode must be in ON to use the
seat heaters. The HI setting heats the seats
faster than the LO setting.
Press the seat heater button:
Once - The HI setting (three indicators on)
Twice - The MID setting (two indicators on)
Three times - The LO setting
Four times - The OFF setting (no indicators on)
■Second Row Outer Seat Heaters
*
1Second Row Outer Seat Heaters
*
Do not use the seat heaters even in LO when the
engine is off. Under such conditions, the battery may
be weakened, making the engine difficult to start.
3
WARNING
Heat induced burns are possible when
using seat heaters.
Persons with a diminished ability to sense
temperature (e.g., persons with diabetes,
lower-limb nerve damage, or paralysis) or
with sensitive skin should not use seat
heaters.
* Not available on all models
Page 251 of 500

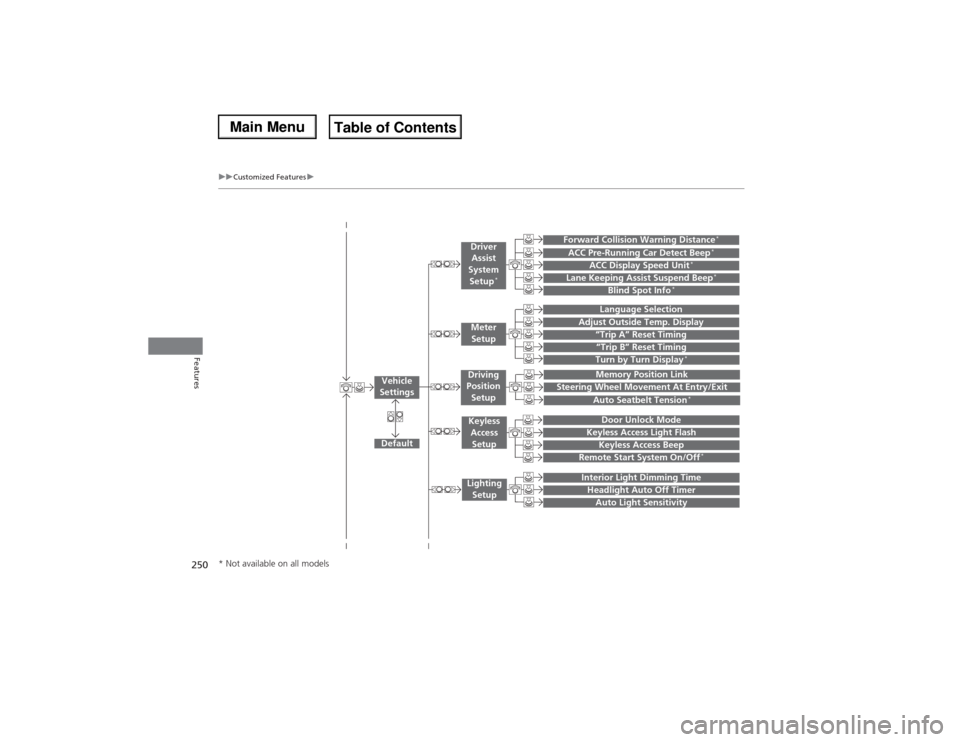
250
uuCustomized Featuresu
Features
“Trip B” Reset TimingTurn by Turn Display
*
Adjust Outside Temp. Display
“Trip A” Reset Timing
Default
Memory Position Link
Keyless Access Light Flash
Keyless Access Beep
Interior Light Dimming TimeHeadlight Auto Off TimerAuto Light Sensitivity
Vehicle
Settings
Meter
SetupKeyless
Access
SetupLighting
Setup
Remote Start System On/Off
*
Steering Wheel Movement At Entry/Exit
Driving
Position
Setup
Door Unlock Mode
Lane Keeping Assist Suspend Beep
*
Blind Spot Info
*
ACC Pre-Running Car Detect Beep
*
ACC Display Speed Unit
*
Driver
Assist
System
Setup
*
Forward Collision Warning Distance
*
Language SelectionAuto Seatbelt Tension
*
* Not available on all models
Page 350 of 500

349
uuWhen DrivinguForward Collision Warning (FCW)
*
Driving
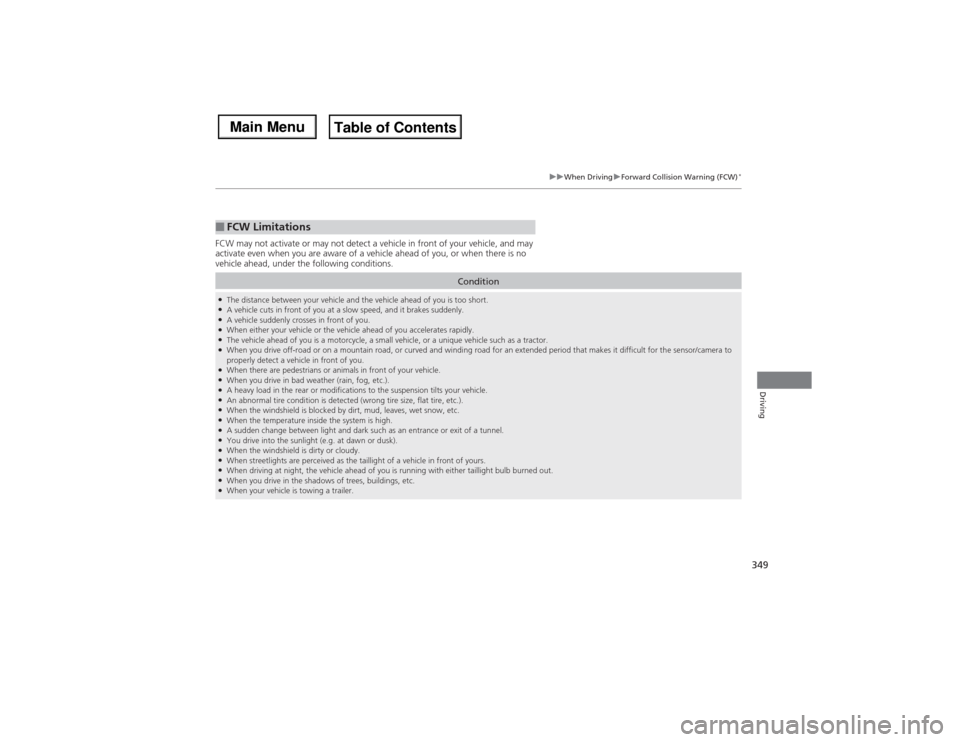
FCW may not activate or may not detect a vehicle in front of your vehicle, and may
activate even when you are aware of a vehicle ahead of you, or when there is no
vehicle ahead, under the following conditions.■FCW Limitations
Condition
●The distance between your vehicle and the vehicle ahead of you is too short.●A vehicle cuts in front of you at a slow speed, and it brakes suddenly.●A vehicle suddenly crosses in front of you.●When either your vehicle or the vehicle ahead of you accelerates rapidly.●The vehicle ahead of you is a motorcycle, a small vehicle, or a unique vehicle such as a tractor.●When you drive off-road or on a mountain road, or curved and winding road for an extended period that makes it difficult for the sensor/camera to
properly detect a vehicle in front of you.●When there are pedestrians or animals in front of your vehicle.●When you drive in bad weather (rain, fog, etc.).●A heavy load in the rear or modifications to the suspension tilts your vehicle.●An abnormal tire condition is detected (wrong tire size, flat tire, etc.).●When the windshield is blocked by dirt, mud, leaves, wet snow, etc.●When the temperature inside the system is high.●A sudden change between light and dark such as an entrance or exit of a tunnel.●You drive into the sunlight (e.g. at dawn or dusk).●When the windshield is dirty or cloudy.●When streetlights are perceived as the taillight of a vehicle in front of yours.●When driving at night, the vehicle ahead of you is running with either taillight bulb burned out.●When you drive in the shadows of trees, buildings, etc.●When your vehicle is towing a trailer.
Page 351 of 500

350
uuWhen DrivinguLane Departure Warning (LDW)
*
Driving
Lane Departure Warning (LDW)
*
Alerts you when the system detects a possibility of your vehicle unintentionally
crossing over left or right side lane markings.
If your vehicle is getting too close to detected
left or right side lane markings without a turn
signal activated, LDW will give audible and
visual alerts.
The beeper sounds and the Lane Departure
message appears on the MID, letting you
know that you need to take appropriate
action.
The system begins to search for lane markings when all the following conditions are
met:
•The vehicle is traveling between 40 and 90 mph (64 and 145 km/h).
•The vehicle is on a straight or slightly curved road.
•The turn signals are off.
•The brake pedal is not depressed.■How the System Works
1Lane Departure Warning (LDW)
*
Important Safety Reminder
Like all assistance systems, LDW has limitations.
Over-reliance on LDW may result in a collision. It is
always your responsibility to keep the vehicle within
your driving lane.
LDW only alerts you when lane drift is detected
without a turn signal in use. LDW may not detect all
lane markings or lane departures; accuracy will vary
based on weather, speed and lane marker condition.
It is always your responsibility to safely operate the
vehicle and avoid collisions.
■How the System Activates
1How the System Activates
LDW may automatically shut off and the LDW
indicator comes and stays on.
2Indicators P. 81
* Not available on all models
Page 353 of 500

352
uuWhen DrivinguLane Departure Warning (LDW)
*
Driving
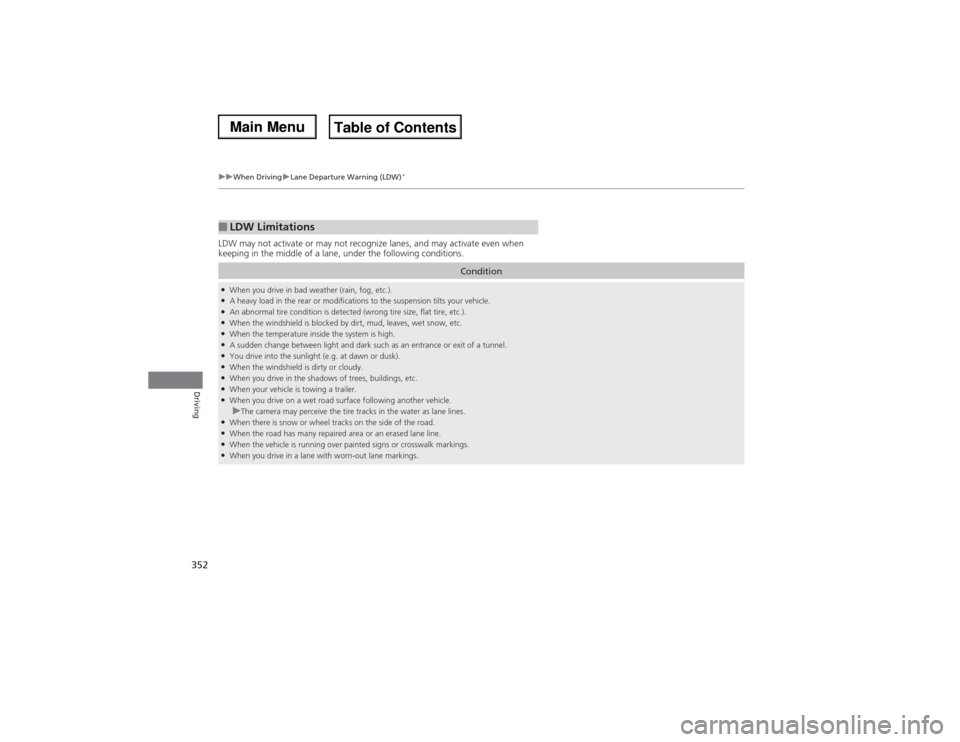
LDW may not activate or may not recognize lanes, and may activate even when
keeping in the middle of a lane, under the following conditions.■LDW Limitations
Condition
●When you drive in bad weather (rain, fog, etc.).●A heavy load in the rear or modifications to the suspension tilts your vehicle.●An abnormal tire condition is detected (wrong tire size, flat tire, etc.).●When the windshield is blocked by dirt, mud, leaves, wet snow, etc.●When the temperature inside the system is high.●A sudden change between light and dark such as an entrance or exit of a tunnel.●You drive into the sunlight (e.g. at dawn or dusk).●When the windshield is dirty or cloudy.●When you drive in the shadows of trees, buildings, etc.●When your vehicle is towing a trailer.●When you drive on a wet road surface following another vehicle.uThe camera may perceive the tire tracks in the water as lane lines.
●When there is snow or wheel tracks on the side of the road.●When the road has many repaired area or an erased lane line.●When the vehicle is running over painted signs or crosswalk markings.●When you drive in a lane with worn-out lane markings.
Page 373 of 500

uuBrakinguCollision Mitigation Braking System
TM (CMBS
TM)*
372Driving
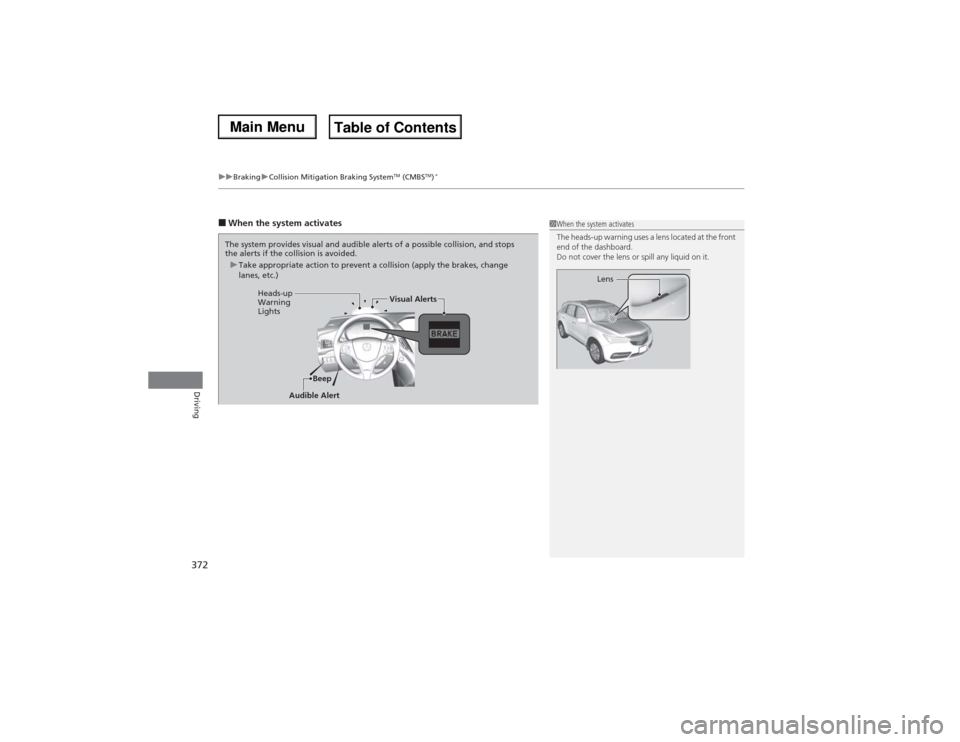
■When the system activates
1When the system activates
The heads-up warning uses a lens located at the front
end of the dashboard.
Do not cover the lens or spill any liquid on it.
Lens
The system provides visual and audible alerts of a possible collision, and stops
the alerts if the collision is avoided.
uTake appropriate action to prevent a collision (apply the brakes, change
lanes, etc.)
Beep Heads-up
Warning
LightsVisual Alerts
Audible Alert
Page 375 of 500

374
uuBrakinguCollision Mitigation Braking System
TM (CMBS
TM)*
Driving
Stage
two
The risk of a
collision has
increased, time to
respond is
reduced.
Retracts the driver’s seat
belt gently a few times,
providing a physical
warning.
Visual and audible alerts.
Lightly
applied
Stage
three
The CMBS
TM
determines that a
collision is
unavoidable.
Forcefully tightens driver
and front passenger seat
belts.
Forcefully
applied
Distance between vehicles
CMBS
TM
The radar sensor
detects a vehicle
E-pretensioner
Audible & Visual WARNINGS
Braking
Your
VehicleVehicle
Ahead
Your
VehicleVehicle
Ahead
Page 440 of 500

439
Continued
Handling the Unexpected
If a Tire Goes FlatChanging a Flat Tire
*
If a tire goes flat while driving, grasp the steering wheel firmly, and brake gradually
to reduce speed. Then, stop in a safe place. Replace the flat tire with a compact
spare tire. Go to a dealer as soon as possible to have the full-size tire repaired or
replaced.
1.Park the vehicle on firm, level, non-slippery surface and apply the parking brake.
2.Move the shift lever to
(P.
3.Turn on the hazard warning lights and set the power mode to VEHICLE OFF
(LOCK).
1Changing a Flat Tire
*
Periodically check the tire pressure of the compact
spare. It should be set to the specified pressure.
Specified Pressure: 60 psi (420 kPa, 4.2 kgf/cm
2)
When driving with the compact spare tire, keep the
vehicle speed under 50 mph (80 km/h). Replace with
a full-size tire as soon as possible.
The compact spare tire and wheel in your vehicle are
specifically for this model.
Do not use them with another vehicle.
Do not use another type of compact spare tire or
wheel with your vehicle.
Do not mount tire chains on a compact spare tire.
If a chain-mounted front tire goes flat, remove one of
the full-size rear tires and replace it with the compact
spare tire. Remove the flat front tire and replace it
with the full-size tire that was removed from the rear.
Mount the tire chains on the front tire.
Do not use a puncture-repairing agent on a flat tire,
as it can damage the tire pressure sensor.
* Not available on all models
Page 447 of 500

446
uuIf a Tire Goes FlatuTemporarily Repairing a Flat Tire
*
Handling the Unexpected
Temporarily Repairing a Flat Tire
*
If the tire has a large cut or is otherwise severely damaged, you will need to have the
vehicle towed. If the tire only has a small puncture, from a nail for instance, you can
use the temporary tire repair kit so that you can drive to the nearest service station
for a more permanent repair.
If a tire goes flat while driving, grasp the steering wheel firmly, and brake gradually
to reduce speed. Then stop in a safe place.
1.Park the vehicle on a firm, level, and non-slippery surface and apply the parking
brake.
2.Move the shift lever to
(P.
3.Turn on the hazard warning lights and set the power mode to VEHICLE OFF
(LOCK).
■Getting Ready to Temporarily Repair the Flat Tire
1Temporarily Repairing a Flat Tire
*
The kit should not be used in the following situations.
Instead, contact a dealer or a roadside assistant to
have the vehicle towed.•The tire sealant has expired.•More than two tires are punctured.•The puncture or cut is larger than 3/16 inch (4mm).•The tire side wall is damaged or the puncture is
outside the contact area.•Damage has been caused by driving with the tire
extremely under inflated.•The tire bead is no longer seated.•The rim is damaged.
Do not remove a nail or screw that punctured the
tire. If you remove it from the tire, you may not be
able to repair the puncture using the kit.NOTICEDo not use a puncture-repairing agent other than the
one provided in the kit that came with your vehicle. If
a different agent is used, you may permanently
damage the tire pressure sensor.
When the puncture is:
Kit Use
Smaller than 3/16 inch
(4 mm)
Yes
Larger than 3/16 inch
(4 mm)
No
Contact
Area
Instruction
Manual
Air Only Hose (Black)Speed Restriction Label Repair Notification Label Pressure Relief
ButtonInflator Switch
Selector Switch
SEALANT/AIR side Sealant/Air Hose (Clear)AIR ONLY side
Power Plug Pressure Gauge
Tire Sealant
Expiration Date* Not available on all models
Page 461 of 500

460Handling the Unexpected
Jump StartingTurn off the power to electric devices, such as audio and lights. Turn off the engine,
then open the hood.
1.Pull up on the engine cover, remove it from
the pins.
2.Connect the first jumper cable to your
vehicle’s battery + terminal.
3.Connect the other end of the first jumper
cable to the booster battery + terminal.
uUse a 12-volt booster battery only.
4.Connect the second jumper cable to the
booster battery - terminal.■Jump Starting Procedure
1Jump Starting
Securely attach the jumper cables clips so that they
do not come off when the engine vibrates. Also be
careful not to tangle the jumper cables or allow the
cable ends to touch each other while attaching or
detaching the jumper cables.
Battery performance degrades in cold conditions and
may prevent the engine from starting.
3
WARNING
A battery can explode if you do not follow
the correct procedure, seriously injuring
anyone nearby.
Keep all sparks, open flames, and smoking
materials away from the battery.
Engine Cover
Pin
Booster Battery