ECU Acura MDX 2014 Service Manual
[x] Cancel search | Manufacturer: ACURA, Model Year: 2014, Model line: MDX, Model: Acura MDX 2014Pages: 500, PDF Size: 11.72 MB
Page 319 of 500
318
uuTowing a TraileruDriving Safely with a Trailer
Driving
Driving Safely with a Trailer•Have the trailer properly serviced and keep it in good condition.
•Make sure that all the weights and load in the vehicle and trailer are within limits.
2Towing Load Limits P. 309
•When towing more than 3,500 lbs (1,590 kg), use of gasoline with a pump
octane number of 91 or higher is recommended.
uTowing performance can be affected by high altitude, high temperature, or
steep uphill.
•Securely attach the hitch, safety chains, and other necessary parts to the trailer.
•Securely store all the items in and on the trailer so that they do not shift while
driving.
•Check if the lights and brakes on the trailer are working properly.
•Check the pressures of the trailer tires, including the spare.
•Drive slower than normal.
•Obey posted speed limits for vehicles with trailers.
•Use the
(D position when towing a trailer on level roads.
•Turn more slowly and with a wider turning arc than normal.
•Allow more time and distance for braking.
•Do not brake or turn suddenly.
■Things You Need To Know Before Towing a Trailer■Towing Speeds and Gears■Turning and Braking
1Driving Safely with a Trailer
Parking
In addition to the normal precautions, place wheel
chocks at each of the trailer’s tires.1Towing Speeds and Gears
When towing a fixed-sided trailer (e.g., camper), do
not exceed 55 mph (88 km/h).
At higher speeds, the trailer may sway or affect
vehicle handling.
Page 326 of 500
Continued
325
uuWhen DrivinguStarting the Engine
Driving
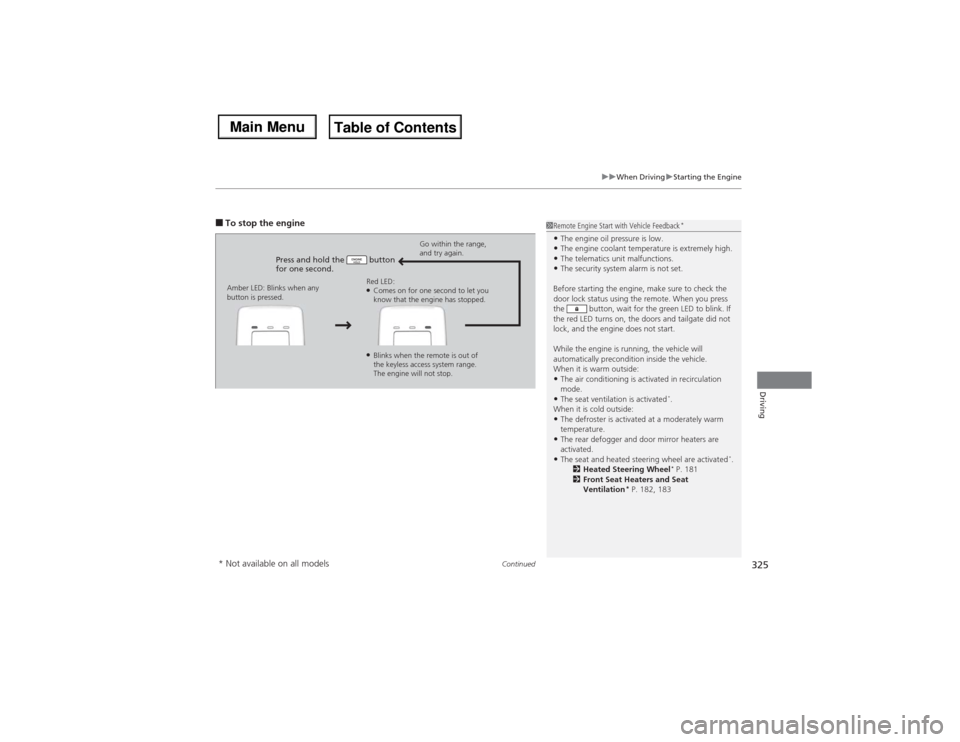
■To stop the engine
Press and hold the button
for one second.
Go within the range,
and try again.
Amber LED: Blinks when any
button is pressed.Red LED:
●Comes on for one second to let you
know that the engine has stopped.●Blinks when the remote is out of
the keyless access system range.
The engine will not stop.
1Remote Engine Start with Vehicle Feedback
*
•The engine oil pressure is low.•The engine coolant temperature is extremely high.•The telematics unit malfunctions.•The security system alarm is not set.
Before starting the engine, make sure to check the
door lock status using the remote. When you press
the button, wait for the green LED to blink. If
the red LED turns on, the doors and tailgate did not
lock, and the engine does not start.
While the engine is running, the vehicle will
automatically precondition inside the vehicle.
When it is warm outside:•The air conditioning is activated in recirculation
mode.•The seat ventilation is activated
*.
When it is cold outside:
•The defroster is activated at a moderately warm
temperature.•The rear defogger and door mirror heaters are
activated.•The seat and heated steering wheel are activated
*.
2Heated Steering Wheel
* P. 181
2Front Seat Heaters and Seat
Ventilation
* P. 182, 183
* Not available on all models
Page 397 of 500

396
uuMaintenance Under the HooduOpening the Hood
Maintenance
Opening the Hood
1.Park the vehicle on a level surface, and set
the parking brake.
2.Pull the hood release handle under the
lower left corner of the dashboard.
uThe hood will pop up slightly.
3.Push up the hood latch lever in the center
of the hood to release the lock mechanism,
and open the hood.
4.Lift the hood up most of the way.
uThe hydraulic supports will lift it up the
rest of the way and hold it up.
When closing, lower it to approximately 12
inches (30 cm), then press down firmly with
your hands.
1Opening the HoodNOTICEDo not open the hood when the wiper arms are
raised.
The hood will strike the wipers, and may damage
either the hood or the wipers.
When closing the hood, check that the hood is
securely latched.
If the hood latch lever moves stiffly, or if you can
open the hood without lifting the lever, the latch
mechanism should be cleaned and lubricated.
Hood Release Handle
Pull
Lever
Page 401 of 500

400
uuMaintenance Under the HooduAdding Engine Oil
Maintenance
Adding Engine Oil
1.Unscrew and remove the engine oil fill cap.
2.Add oil slowly.
3.Reinstall the engine oil fill cap, and tighten
it securely.
4.Wait for three minutes and recheck the
engine oil dipstick.
1Adding Engine Oil
If any oil spills, wipe it up immediately. Spilled oil may
damage the engine compartment components.NOTICEDo not fill the engine oil above the upper mark.
Overfilling the engine oil can result in leaks and
engine damage.
Engine Oil Fill Cap
Page 403 of 500
uuMaintenance Under the HooduChanging the Engine Oil and Oil Filter
402Maintenance
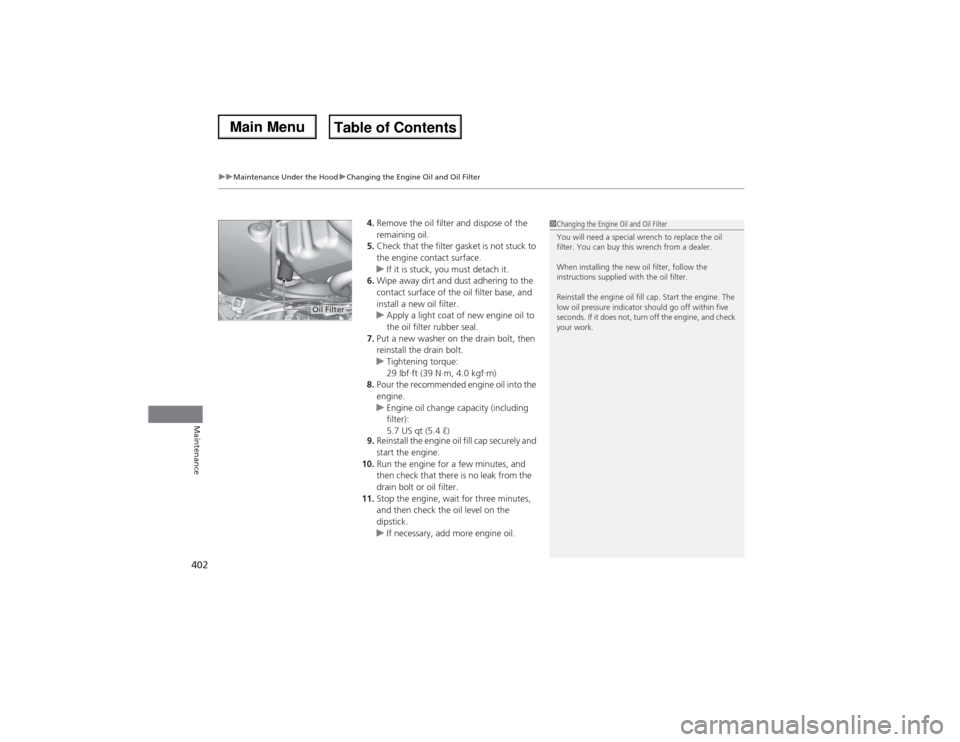
4.Remove the oil filter and dispose of the
remaining oil.
5.Check that the filter gasket is not stuck to
the engine contact surface.
uIf it is stuck, you must detach it.
6.Wipe away dirt and dust adhering to the
contact surface of the oil filter base, and
install a new oil filter.
uApply a light coat of new engine oil to
the oil filter rubber seal.
7.Put a new washer on the drain bolt, then
reinstall the drain bolt.
uTightening torque:
29 lbf∙ft (39 N∙m, 4.0 kgf∙m)
8.Pour the recommended engine oil into the
engine.
uEngine oil change capacity (including
filter):
5.7 US qt (5.4 ℓ)
9.Reinstall the engine oil fill cap securely and
start the engine.
10.Run the engine for a few minutes, and
then check that there is no leak from the
drain bolt or oil filter.
11.Stop the engine, wait for three minutes,
and then check the oil level on the
dipstick.
uIf necessary, add more engine oil.
1Changing the Engine Oil and Oil Filter
You will need a special wrench to replace the oil
filter. You can buy this wrench from a dealer.
When installing the new oil filter, follow the
instructions supplied with the oil filter.
Reinstall the engine oil fill cap. Start the engine. The
low oil pressure indicator should go off within five
seconds. If it does not, turn off the engine, and check
your work.
Oil Filter
Page 434 of 500

433
uuCleaninguInterior Care
Maintenance
The front floor mats hook over the floor
anchors, which keep the mats from sliding
forward. To remove a mat for cleaning, turn
the anchor knobs to the unlock position.
When reinstalling the mat after cleaning, turn
the knobs to the lock position.
Do not put additional floor mats on top of
the anchored mat.
Vacuum dirt and dust from the leather frequently. Pay close attention to the pleats
and seams. Clean the leather with a soft cloth dampened with a 90% water and
10% neutral soap solution. Then buff it with a clean, dry cloth. Remove any dust or
dirt on leather surfaces immediately.
■Floor Mats
1Floor Mats
If you use any floor mats that were not originally
provided with your vehicle, make sure they are
designed for your specific vehicle, fit correctly, and
are securely anchored by the floor anchors.
Position the rear seat floor mats properly. If they are
not properly positioned, the floor mats can interfere
with the front seat functions.
Lock Unlock
■Maintaining Genuine Leather
Page 446 of 500
445
uuIf a Tire Goes FlatuChanging a Flat Tire
*
Handling the Unexpected
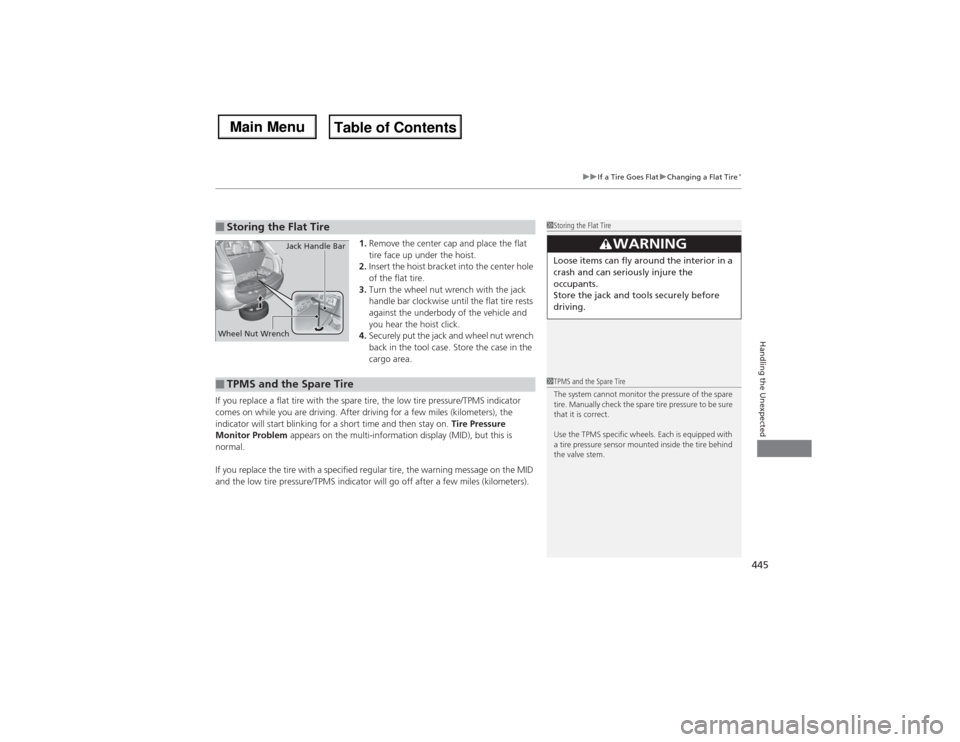
1.Remove the center cap and place the flat
tire face up under the hoist.
2.Insert the hoist bracket into the center hole
of the flat tire.
3.Turn the wheel nut wrench with the jack
handle bar clockwise until the flat tire rests
against the underbody of the vehicle and
you hear the hoist click.
4.Securely put the jack and wheel nut wrench
back in the tool case. Store the case in the
cargo area.
If you replace a flat tire with the spare tire, the low tire pressure/TPMS indicator
comes on while you are driving. After driving for a few miles (kilometers), the
indicator will start blinking for a short time and then stay on. Tire Pressure
Monitor Problem appears on the multi-information display (MID), but this is
normal.
If you replace the tire with a specified regular tire, the warning message on the MID
and the low tire pressure/TPMS indicator will go off after a few miles (kilometers).
■Storing the Flat Tire
1Storing the Flat Tire
3
WARNING
Loose items can fly around the interior in a
crash and can seriously injure the
occupants.
Store the jack and tools securely before
driving.
Wheel Nut WrenchJack Handle Bar■TPMS and the Spare Tire
1TPMS and the Spare Tire
The system cannot monitor the pressure of the spare
tire. Manually check the spare tire pressure to be sure
that it is correct.
Use the TPMS specific wheels. Each is equipped with
a tire pressure sensor mounted inside the tire behind
the valve stem.
Page 461 of 500

460Handling the Unexpected
Jump StartingTurn off the power to electric devices, such as audio and lights. Turn off the engine,
then open the hood.
1.Pull up on the engine cover, remove it from
the pins.
2.Connect the first jumper cable to your
vehicle’s battery + terminal.
3.Connect the other end of the first jumper
cable to the booster battery + terminal.
uUse a 12-volt booster battery only.
4.Connect the second jumper cable to the
booster battery - terminal.■Jump Starting Procedure
1Jump Starting
Securely attach the jumper cables clips so that they
do not come off when the engine vibrates. Also be
careful not to tangle the jumper cables or allow the
cable ends to touch each other while attaching or
detaching the jumper cables.
Battery performance degrades in cold conditions and
may prevent the engine from starting.
3
WARNING
A battery can explode if you do not follow
the correct procedure, seriously injuring
anyone nearby.
Keep all sparks, open flames, and smoking
materials away from the battery.
Engine Cover
Pin
Booster Battery
Page 470 of 500
469
Continued
Handling the Unexpected
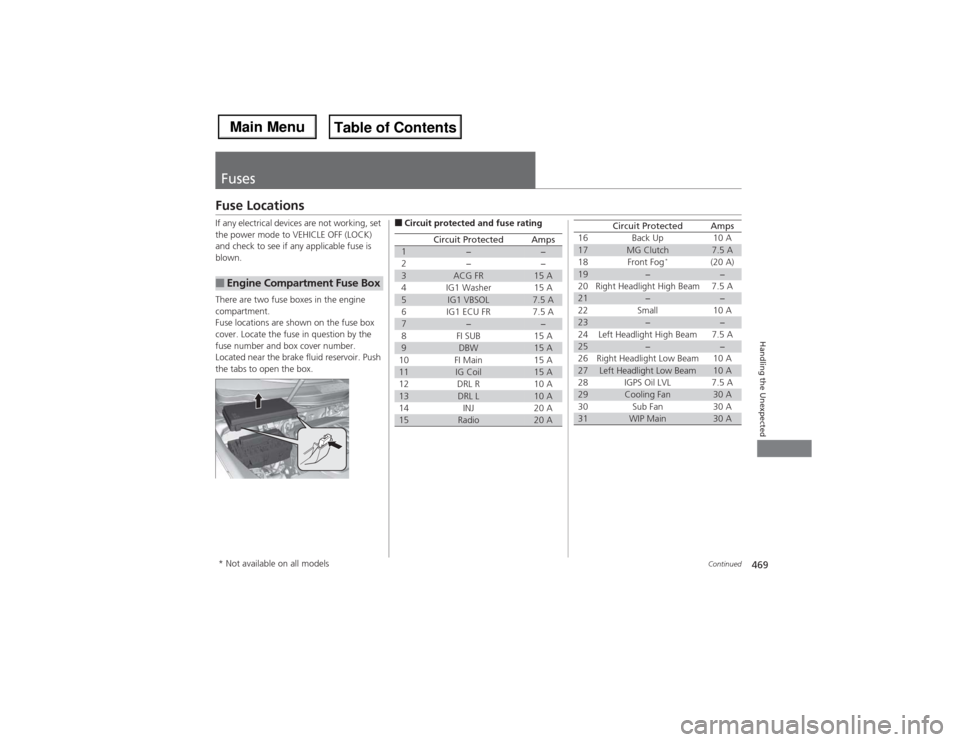
FusesFuse LocationsIf any electrical devices are not working, set
the power mode to VEHICLE OFF (LOCK)
and check to see if any applicable fuse is
blown.
There are two fuse boxes in the engine
compartment.
Fuse locations are shown on the fuse box
cover. Locate the fuse in question by the
fuse number and box cover number.
Located near the brake fluid reservoir. Push
the tabs to open the box.■Engine Compartment Fuse Box
■Circuit protected and fuse rating
Circuit Protected
Amps
1
−
−
2
−
−
3
ACG FR
15 A
4 IG1 Washer 15 A
5
IG1 VBSOL
7.5 A
6 IG1 ECU FR 7.5 A
7
−
−
8FI SUB 15A
9
DBW
15 A
10 FI Main 15 A
11
IG Coil
15 A
12 DRL R 10 A
13
DRL L
10 A
14 INJ 20 A
15
Radio
20 A
16 Back Up 10 A17
MG Clutch
7.5 A
18 Front Fog
*
(20 A)
19
−
−
20 Right Headlight High Beam 7.5 A
21
−
−
22 Small 10 A
23
−
−
24 Left Headlight High Beam 7.5 A
25
−
−
26 Right Headlight Low Beam 10 A
27
Left Headlight Low Beam
10 A
28 IGPS Oil LVL 7.5 A
29
Cooling Fan
30 A
30 Sub Fan 30 A
31
WIP Main
30 A
Circuit Protected
Amps
* Not available on all models
Page 473 of 500

472
uuFusesuFuse Locations
Handling the Unexpected
Located on the lower side panel. Take off
the cover to open.
Fuse locations are shown on the cover.■Passenger’s Side Interior Fuse
BoxCoverFuse Label
■Circuit protected and fuse rating
Circuit Protected
Amps
1
Right e-pretensioner
*
(30 A)
2
Rear Passenger’s Side
Power Window
20 A
3
ACM
20 A
4
Front DEF
*
(15 A)
5
AVS/Seat Heaters
20 A
6
Front Passenger’s Power
Window
20 A
7
Passenger’s Power Seat
Sliding
20 A
8
Passenger’s Power Seat
Reclining
20 A
9
Passenger’s Lumber
*
(7.5 A)
10
−
−
11
HSW
*
(10 A)
12
−
−
13
−
−
14
Rear Accessory Power
Socket
20 A
15
Console Accessory Power
Socket
20 A
16
−
−
17
−
−
18
Premium AMP
30 A
19
SRS1
10 A
20
Passenger’s ECU
7.5 A
21
SVTM4
7.5 A
22
−
−
23
−
−
24
IG1 OPDS
7.5 A
25
Illumination
7.5 A
26
Left e-pretensioner
*
(30 A)
27
Front Accessory Power
Socket
20 A
28
AC Inverter
(30 A)
Circuit Protected
Amps
* Not available on all models