plug Acura MDX 2014 Owner's Manual
[x] Cancel search | Manufacturer: ACURA, Model Year: 2014, Model line: MDX, Model: Acura MDX 2014Pages: 500, PDF Size: 11.72 MB
Page 180 of 500

Continued
179
uuInterior Lights/Interior Convenience ItemsuInterior Convenience Items
Controls
■Accessory power socket (cargo area)
Open the cover to use it.
The AC power outlet can be used when the engine is running.
Open the cover to use it. Plug in the appliance
slightly, turn it 90° clockwise, then push it all
the way.
■AC Power Outlet
*
1AC Power Outlet
*
NOTICEDo not use the AC power outlet for electric
appliances that require high initial peak wattage,
such as cathode-ray tube type televisions,
refrigerators, electric pumps, etc. It is not suitable for
devices that process precise data, such as medical
equipment, and that require an extremely stable
power supply, such as microcomputer-controlled
electric blankets, touch sensor lamps, etc.
The AC power outlet is designed to supply power for
up to 115 volt appliances that are rated 150 watts or
less.
Continued use of any electric appliance/device
exceeding these ratings may result in damage to the
appliance/device.
* Not available on all models
Page 201 of 500
200
uuAudio SystemuAuxiliary Input Jack
Features
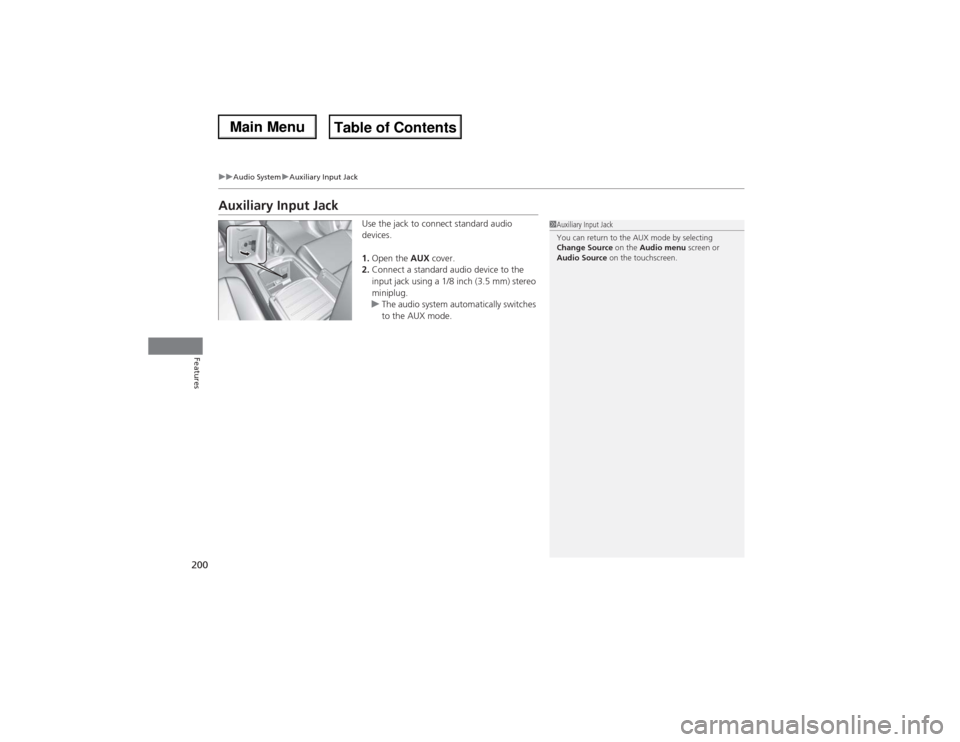
Auxiliary Input Jack
Use the jack to connect standard audio
devices.
1.Open the AUX cover.
2.Connect a standard audio device to the
input jack using a 1/8 inch (3.5 mm) stereo
miniplug.
uThe audio system automatically switches
to the AUX mode.
1Auxiliary Input Jack
You can return to the AUX mode by selecting
Change Source on the Audio menu screen or
Audio Source on the touchscreen.
Page 314 of 500
Continued
313
uuTowing a TraileruTowing Preparation
Driving
Towing generally requires a variety of supplemental equipment.
To ensure the best quality, we recommend that you purchase Acura equipment
whenever possible.■Towing Equipment and Accessories
1Towing Equipment and Accessories
Make sure that all equipment is properly installed and
maintained, and that it meets federal, state, province/
territory, and local regulations.
Consult your trailer maker for proper installation and
setup of the equipment.
Improper installation and setup can affect the
handling, stability, and braking performance of your
vehicle.
Consult your trailer sales or rental agency if any other
items are recommended or required for your towing
situation.
The lighting and wiring of trailers can vary by type
and brand. If a connector is required, it should only
be installed by a qualified technician.
Trailer packages and products:•Ball mount, hitch plug, hitch pin etc.•Wiring harness kit•Trailer hitch kit (jumper harness included)
2Trailer brakes P. 314•Automatic transmission cooler kit
2Automatic transmission cooler P. 316
Are available at a dealer.
Page 394 of 500
393
uuMaintenance Minder
TMuTo Use Maintenance Minder
TM
Continued
Maintenance
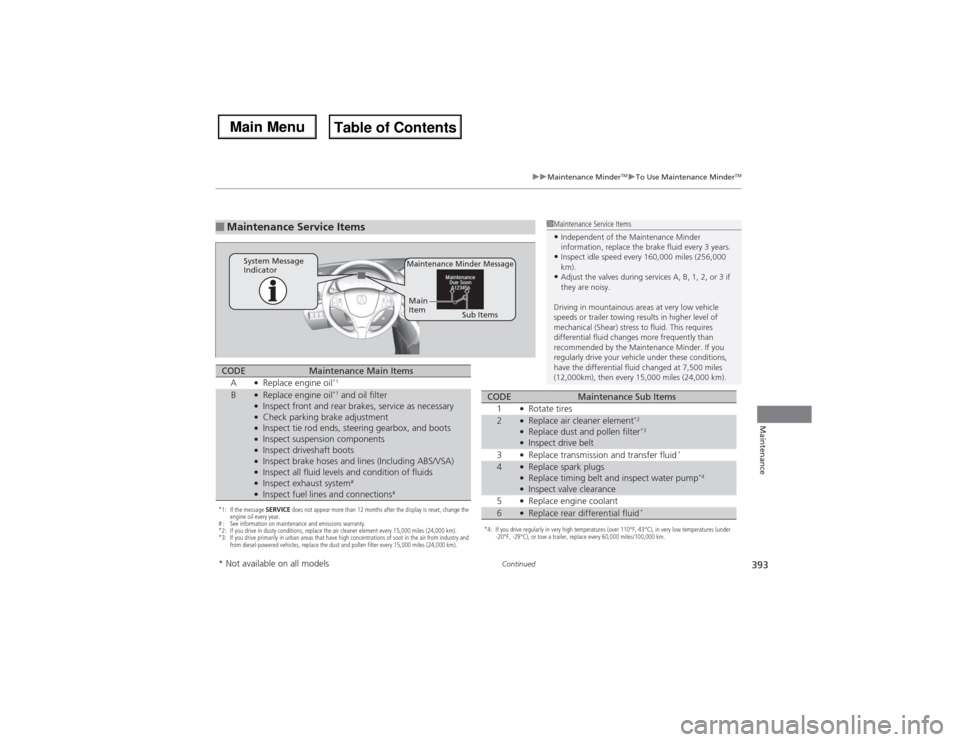
■Maintenance Service Items
1Maintenance Service Items•Independent of the Maintenance Minder
information, replace the brake fluid every 3 years.•Inspect idle speed every 160,000 miles (256,000
km).•Adjust the valves during services A, B, 1, 2, or 3 if
they are noisy.
Driving in mountainous areas at very low vehicle
speeds or trailer towing results in higher level of
mechanical (Shear) stress to fluid. This requires
differential fluid changes more frequently than
recommended by the Maintenance Minder. If you
regularly drive your vehicle under these conditions,
have the differential fluid changed at 7,500 miles
(12,000km), then every 15,000 miles (24,000 km).
Maintenance Minder Message
System Message
Indicator
Sub Items Main
Item
*1: If the message SERVICE does not appear more than 12 months after the display is reset, change the
engine oil every year.
# : See information on maintenance and emissions warranty.
*2: If you drive in dusty conditions, replace the air cleaner element every 15,000 miles (24,000 km).
*3: If you drive primarily in urban areas that have high concentrations of soot in the air from industry and
from diesel-powered vehicles, replace the dust and pollen filter every 15,000 miles (24,000 km).CODE
Maintenance Main Items
A
●Replace engine oil
*1
B
●Replace engine oil
*1 and oil filter
●Inspect front and rear brakes, service as necessary●Check parking brake adjustment●Inspect tie rod ends, steering gearbox, and boots●Inspect suspension components●Inspect driveshaft boots●Inspect brake hoses and lines (Including ABS/VSA)●Inspect all fluid levels and condition of fluids●Inspect exhaust system
#
●Inspect fuel lines and connections
#
*4: If you drive regularly in very high temperatures (over 110°F, 43°C), in very low temperatures (under
-20°F, -29°C), or tow a trailer, replace every 60,000 miles/100,000 km.CODE
Maintenance Sub Items
1
●Rotate tires
2
●Replace air cleaner element
*2
●Replace dust and pollen filter
*3
●Inspect drive belt
3●Replace transmission and transfer fluid
*
4
●Replace spark plugs●Replace timing belt and inspect water pump
*4
●Inspect valve clearance
5●Replace engine coolant
6
●Replace rear differential fluid
*
* Not available on all models
Page 447 of 500

446
uuIf a Tire Goes FlatuTemporarily Repairing a Flat Tire
*
Handling the Unexpected
Temporarily Repairing a Flat Tire
*
If the tire has a large cut or is otherwise severely damaged, you will need to have the
vehicle towed. If the tire only has a small puncture, from a nail for instance, you can
use the temporary tire repair kit so that you can drive to the nearest service station
for a more permanent repair.
If a tire goes flat while driving, grasp the steering wheel firmly, and brake gradually
to reduce speed. Then stop in a safe place.
1.Park the vehicle on a firm, level, and non-slippery surface and apply the parking
brake.
2.Move the shift lever to
(P.
3.Turn on the hazard warning lights and set the power mode to VEHICLE OFF
(LOCK).
■Getting Ready to Temporarily Repair the Flat Tire
1Temporarily Repairing a Flat Tire
*
The kit should not be used in the following situations.
Instead, contact a dealer or a roadside assistant to
have the vehicle towed.•The tire sealant has expired.•More than two tires are punctured.•The puncture or cut is larger than 3/16 inch (4mm).•The tire side wall is damaged or the puncture is
outside the contact area.•Damage has been caused by driving with the tire
extremely under inflated.•The tire bead is no longer seated.•The rim is damaged.
Do not remove a nail or screw that punctured the
tire. If you remove it from the tire, you may not be
able to repair the puncture using the kit.NOTICEDo not use a puncture-repairing agent other than the
one provided in the kit that came with your vehicle. If
a different agent is used, you may permanently
damage the tire pressure sensor.
When the puncture is:
Kit Use
Smaller than 3/16 inch
(4 mm)
Yes
Larger than 3/16 inch
(4 mm)
No
Contact
Area
Instruction
Manual
Air Only Hose (Black)Speed Restriction Label Repair Notification Label Pressure Relief
ButtonInflator Switch
Selector Switch
SEALANT/AIR side Sealant/Air Hose (Clear)AIR ONLY side
Power Plug Pressure Gauge
Tire Sealant
Expiration Date* Not available on all models
Page 450 of 500
Continued
449
uuIf a Tire Goes FlatuTemporarily Repairing a Flat Tire
*
Handling the Unexpected
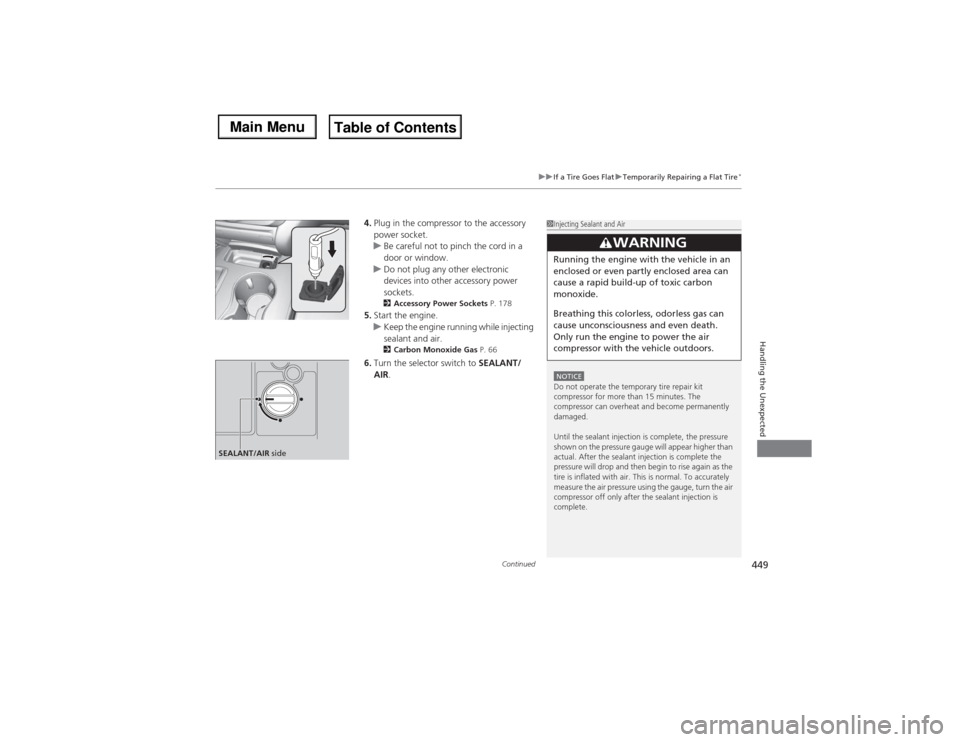
4.Plug in the compressor to the accessory
power socket.
uBe careful not to pinch the cord in a
door or window.
uDo not plug any other electronic
devices into other accessory power
sockets.
2Accessory Power Sockets P. 178
5.Start the engine.
uKeep the engine running while injecting
sealant and air.
2Carbon Monoxide Gas P. 66
6.Turn the selector switch to SEALANT/
AIR.
1Injecting Sealant and AirNOTICEDo not operate the temporary tire repair kit
compressor for more than 15 minutes. The
compressor can overheat and become permanently
damaged.
Until the sealant injection is complete, the pressure
shown on the pressure gauge will appear higher than
actual. After the sealant injection is complete the
pressure will drop and then begin to rise again as the
tire is inflated with air. This is normal. To accurately
measure the air pressure using the gauge, turn the air
compressor off only after the sealant injection is
complete.
3
WARNING
Running the engine with the vehicle in an
enclosed or even partly enclosed area can
cause a rapid build-up of toxic carbon
monoxide.
Breathing this colorless, odorless gas can
cause unconsciousness and even death.
Only run the engine to power the air
compressor with the vehicle outdoors.
SEALANT/AIR side
Page 451 of 500

uuIf a Tire Goes FlatuTemporarily Repairing a Flat Tire
*
450Handling the Unexpected
7.Press the inflator switch to turn on the
compressor.
uThe compressor starts injecting sealant
and air into the tire.
8.When the sealant injection is complete,
continue to add air.
9.After the air pressure reaches 35 psi (240
kPa), turn off the kit.
uTo check the pressure, occasionally turn
off the compressor and read the gauge.
10.Unplug the power plug from the accessory
power socket.
11.Unscrew the sealant/air hose from the tire
valve stem. Reinstall the valve cap.
12.Press the pressure relief button until the
gauge returns to 0 psi (0 kPa).
Pressure Gauge
ON
OFF
1Injecting Sealant and Air
If the required air pressure is not reached within 15
minutes, the tire may be too severely damaged for
the kit to provide the necessary seal and your vehicle
will need to be towed.
See an Acura dealer for a replacement sealant bottle
and proper disposal of an empty bottle.
Sealant/Air Hose
Valve Stem
Pressure Relief Button
Page 456 of 500
Continued
455
uuIf a Tire Goes FlatuTemporarily Repairing a Flat Tire
*
Handling the Unexpected
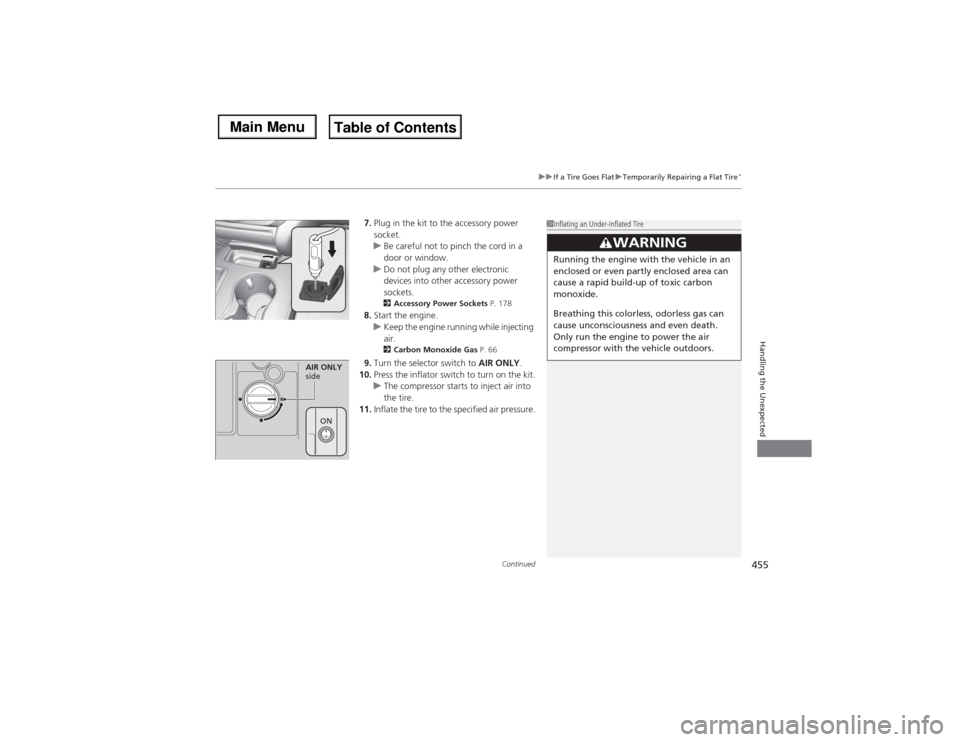
7.Plug in the kit to the accessory power
socket.
uBe careful not to pinch the cord in a
door or window.
uDo not plug any other electronic
devices into other accessory power
sockets.
2Accessory Power Sockets P. 178
8.Start the engine.
uKeep the engine running while injecting
air.
2Carbon Monoxide Gas P. 66
9.Turn the selector switch to AIR ONLY.
10.Press the inflator switch to turn on the kit.
uThe compressor starts to inject air into
the tire.
11.Inflate the tire to the specified air pressure.
1Inflating an Under-inflated Tire
3
WARNING
Running the engine with the vehicle in an
enclosed or even partly enclosed area can
cause a rapid build-up of toxic carbon
monoxide.
Breathing this colorless, odorless gas can
cause unconsciousness and even death.
Only run the engine to power the air
compressor with the vehicle outdoors.
AIR ONLY
side
ON
Page 457 of 500

456
uuIf a Tire Goes FlatuTemporarily Repairing a Flat Tire
*
Handling the Unexpected
12.Turn off the kit.
uCheck the pressure gauge on the air
compressor.
uIf overinflated, press the pressure relief
button.
13.Unplug the kit from the accessory power
socket.
14.Unscrew the air only hose from the tire
valve stem. Reinstall the valve cap.
15.Press the pressure relief button until the
gauge returns to 0 psi (0 kPa).
16.Repackage and properly stow the kit.
Pressure Relief Button
Page 481 of 500
480Information
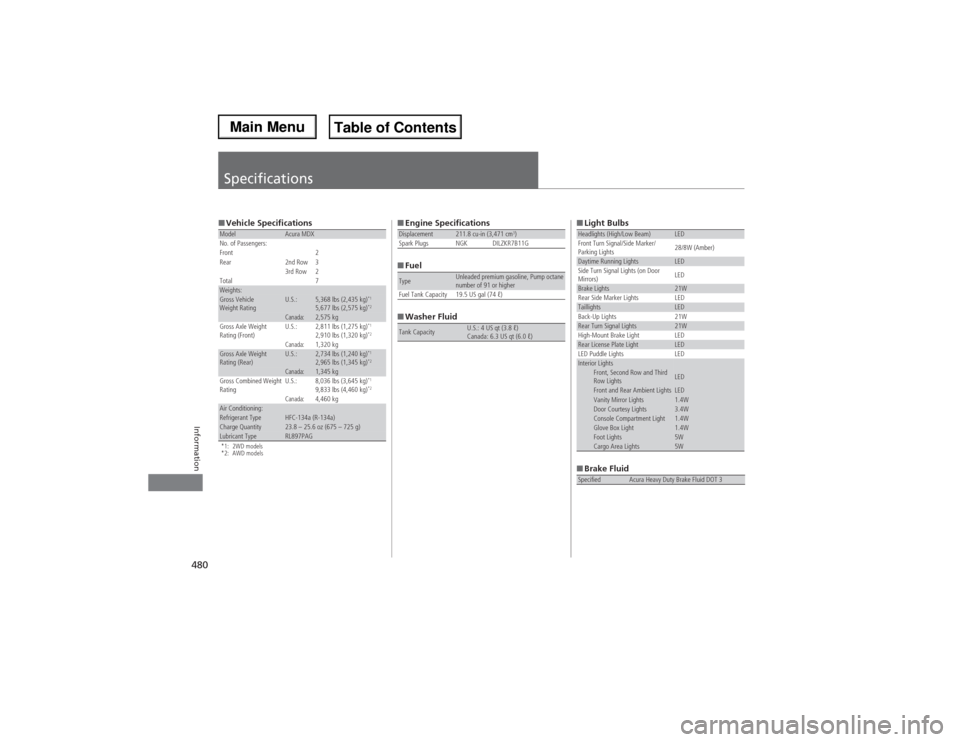
Specifications■Vehicle Specifications*1: 2WD models
*2: AWD modelsModel
Acura MDX
No. of Passengers:
Front 2
Rear 2nd Row 3
3rd Row 2
Total 7
Weights:Gross Vehicle
Weight Rating
U.S.:
5,368 lbs (2,435 kg)
*1
5,677 lbs (2,575 kg)
*2
Canada:
2,575 kg
Gross Axle Weight
Rating (Front)
U.S.:
2,811 lbs (1,275 kg)
*1
2,910 lbs (1,320 kg)
*2
Canada:
1,320 kg
Gross Axle Weight
Rating (Rear)
U.S.:
2,734 lbs (1,240 kg)
*1
2,965 lbs (1,345 kg)
*2
Canada:
1,345 kg
Gross Combined Weight
RatingU.S.: 8,036 lbs (3,645 kg)
*1
9,833 lbs (4,460 kg)
*2
Canada:
4,460 kg
Air Conditioning:Refrigerant Type
HFC-134a (R-134a)
Charge Quantity
23.8 – 25.6 oz (675 – 725 g)
Lubricant Type
RL897PAG
■Engine Specifications
■Fuel
■Washer FluidDisplacement
211.8 cu-in (3,471 cm
3)
Spark Plugs NGK DILZKR7B11G
Type
Unleaded premium gasoline, Pump octane
number of 91 or higher
Fuel Tank Capacity 19.5 US gal (74 ℓ)
Tank Capacity
U.S.: 4 US qt (3.8 ℓ)
Canada: 6.3 US qt (6.0 ℓ)
■Light Bulbs
■Brake FluidHeadlights (High/Low Beam)
LED
Front Turn Signal/Side Marker/
Parking Lights28/8W (Amber)
Daytime Running Lights
LED
Side Turn Signal Lights (on Door
Mirrors)LED
Brake Lights
21W
Rear Side Marker Lights LED
Taillights
LED
Back-Up Lights 21W
Rear Turn Signal Lights
21W
High-Mount Brake Light LED
Rear License Plate Light
LED
LED Puddle Lights LED
Interior Lights
Front, Second Row and Third
Row Lights
LED
Front and Rear Ambient Lights
LED
Vanity Mirror Lights
1.4W
Door Courtesy Lights
3.4W
Console Compartment Light
1.4W
Glove Box Light
1.4W
Foot Lights
5W
Cargo Area Lights
5W
Specified
Acura Heavy Duty Brake Fluid DOT 3