sensor Acura MDX 2015 Owner's Guide
[x] Cancel search | Manufacturer: ACURA, Model Year: 2015, Model line: MDX, Model: Acura MDX 2015Pages: 505, PDF Size: 18.62 MB
Page 147 of 505

uuOperating the Switches Around the Steering Wheel uLight Switches
146Controls
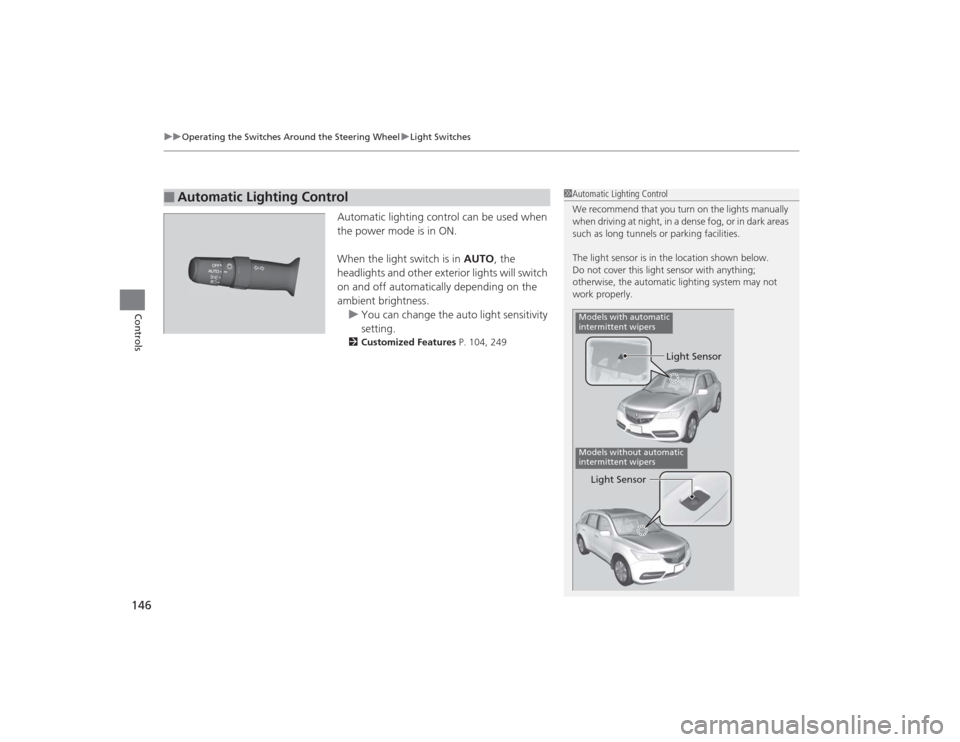
Automatic lighting control can be used when
the power mode is in ON.
When the light switch is in AUTO , the
headlights and other exterior lights will switch
on and off automatically depending on the
ambient brightness. u You can change the auto light sensitivity
setting.2 Customized Features P. 104, 249
■
Automatic Lighting Control
1Automatic Lighting Control
We recommend that you turn on the lights manually
when driving at night, in a dense fog, or in dark areas
such as long tunnels or parking facilities.
The light sensor is in the location shown below.
Do not cover this light sensor with anything;
otherwise, the automatic lighting system may not
work properly.
Light Sensor
Models with automatic
intermittent wipersModels without automatic
intermittent wipersLight Sensor
Page 151 of 505

uuOperating the Switches Around the Steering Wheel uWipers and Washers
150Controls
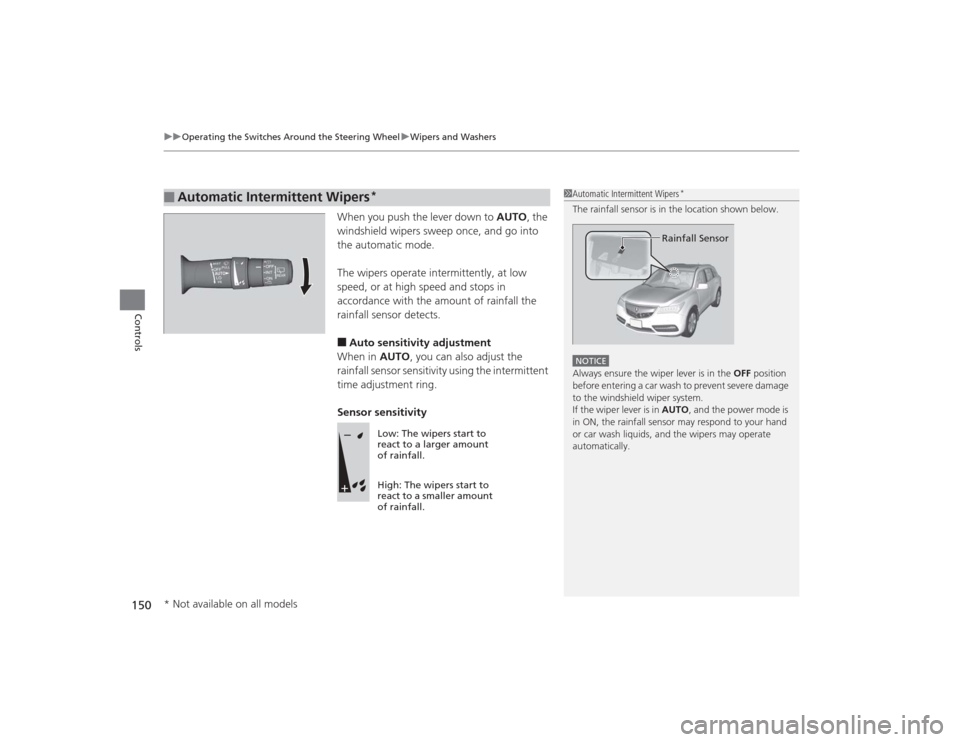
When you push the lever down to AUTO, the
windshield wipers sweep once, and go into
the automatic mode.
The wipers operate intermittently, at low
speed, or at high speed and stops in
accordance with the amount of rainfall the
rainfall sensor detects.■Auto sensitivity adjustment
When in AUTO, you can also adjust the
rainfall sensor sensitivity using the intermittent
time adjustment ring.
Sensor sensitivity
■
Automatic Intermittent Wipers
*
1 Automatic Intermittent Wipers
*
The rainfall sensor is in the location shown below.NOTICEAlways ensure the wiper lever is in the OFF position
before entering a car wash to prevent severe damage
to the windshield wiper system.
If the wiper lever is in AUTO , and the power mode is
in ON, the rainfall sensor may respond to your hand
or car wash liquids, and the wipers may operate
automatically.
Rainfall Sensor
Low: The wipers start to
react to a larger amount
of rainfall.
High: The wipers start to
react to a smaller amount
of rainfall.
* Not available on all models
Page 159 of 505

158Controls
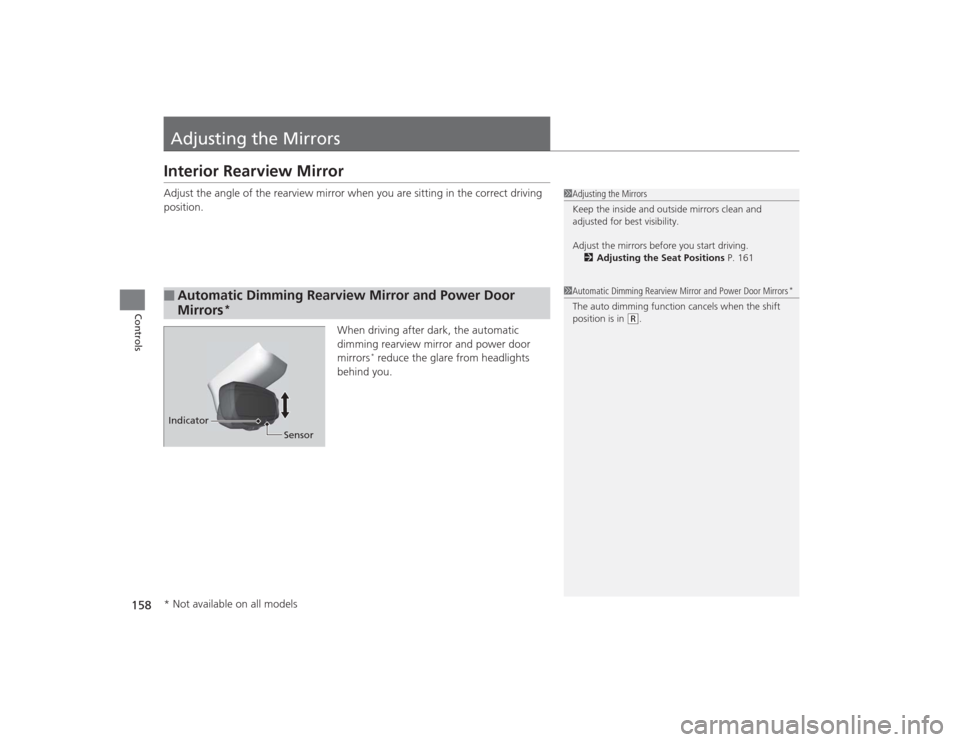
Adjusting the MirrorsInterior Rearview MirrorAdjust the angle of the rearview mirror when you are sitting in the correct driving
position.When driving after dark, the automatic
dimming rearview mirror and power door
mirrors
* reduce the glare from headlights
behind you.
■
Automatic Dimming Rearview Mirror and Power Door
Mirrors
*
1 Adjusting the Mirrors
Keep the inside and outside mirrors clean and
adjusted for best visibility.
Adjust the mirrors before you start driving.
2 Adjusting the Seat Positions P. 161
Indicator
Sensor
1Automatic Dimming Rearview Mirror and Power Door Mirrors
*
The auto dimming function cancels when the shift
position is in
(R.
* Not available on all models
Page 170 of 505

Continued
169
uuAdjusting the Seats uRear Seats
Controls
Separately fold down the left and right halves of the second row seat to make room
for cargo.
1. Store the center seat belt first. Insert the latch plate into the slot on the side of the
anchor buckle.
2. Retract the seat belt into the holder on the ceiling.
2 Seat Belt with Detachable Anchor P. 36
3.Lower the center head restraint to its lowest position. Put the armrest back into
the seat-back.
4.Pull up on the seat-back angle adjustment
lever.
To return the seat to the original position, pull
up the seat-back in the upright position.■
Folding Down the Second Row Seat
1 Folding Down the Second Row Seat
Make sure that the folded seat-back does not press
against the front passenger seat, as this can cause the
weight sensors in the front passenger seat to work
improperly.
2 Passenger Airbag Off Indicator P. 52
The front seats must be far enough forward so they
do not interfere with the second row seats as they
fold down.
To lock the seat-back upright, push it backwards until
it locks.
Make sure the seat-back, head restraints and seat
cushion are securely latched back into place before
driving. Also, make sure all rear shoulder belts are
positioned in front of the seat-back, and the center
shoulder belt is re-positioned in the holding slot.
Lever
Page 180 of 505

Continued
179
uuInterior Lights/Interior Convenience Items uInterior Convenience Items
Controls
■Accessory power socket (cargo area)
Open the cover to use it.
The AC power outlet can be used when the engine is running. Open the cover to use it. Plug in the appliance
slightly, turn it 90° clockwise, then push it all
the way.
■
AC Power Outlet
*
1AC Power Outlet
*
NOTICEDo not use the AC power outlet for electric
appliances that require high initial peak wattage,
such as cathode-ray tube type televisions,
refrigerators, electric pumps, et c. It is not suitable for
devices that process precise data, such as medical
equipment, and that require an extremely stable
power supply, such as microcomputer-controlled
electric blankets, touch sensor lamps, etc.
The AC power outlet is designed to supply power for
up to 115 volt appliances that are rated 150 watts or
less.
Continued use of any electric appliance/device
exceeding these rati ngs may result in damage to the
appliance/device.
* Not available on all models
Page 190 of 505

Continued
189
uuClimate Control System uUsing Automatic Climate Control
Controls
■SYNC on and off
1.Select SYNC.
2. Select ON for synchronized mode.
u When in synchronized mode, the front
passenger’s side temperature and the
rear passenger compartment become
the same as the driver’s side settings.
3. Adjust the temperature or change the
mode from the driver’s side.■Changing the fan speed
1.Select .
2. Change the fan speed with one of the
following:
The fan speed level indicators: Select your
desired speed level. The smaller indicator is
for a slower speed, and the larger for a
faster speed.
(+
/(-
: To go up or down one level at a
time.
Fan AUTO : The system automatically
selects the fan speed most suitable to the
ambient environment.
1 SYNC on and off
When you press the button, the system
synchronizes the driver's and front passenger's
temperature settings.
When the system is not in SYNC mode, the driver's
side temperature, the front passenger’s side
temperature and the rear passenger compartment (if
it is on) can be set separately.
You can also turn off SYNC mode by changing the
front passenger’s side temperature or rear
passenger’s temperature.
The system adjusts each temperature based on the
information of the sunlight sensor and the sun
position updated by the navigation system’s GPS.Models with navigation system1 Changing the fan speed
While the climate control system is in AUTO, Fan
AUTO is highlighted.
Fan Speed Level Indicators
Page 198 of 505

197
uuClimate Control System uAutomatic Climate Control Sensors
Controls
Automatic Climate Control Sensors
The automatic climate control system is
equipped with sensors. Do not cover or spill
any liquid on them.
Sensor
Sensor
Page 306 of 505

305
Driving
This chapter discusses driving, refueling, and information on items such as accessories.
Before DrivingDriving Preparation .......................... 306
Maximum Load Limit........................ 309
Towing a Trailer ................................ 311
Off-Highway Driving Guidelines ..... 322
When Driving Starting the Engine .......................... 324
Precautions While Driving................. 329
Automatic Transmission ................... 330
Shifting ............................................ 331
Integrated Dynamics System (IDS)..... 335
Cruise Control ................................. 336
Adaptive Cruise Control (ACC) with Low Speed Follow (LSF)
*......................... 339 Forward Collision Warning (FCW)
*.. 350
Lane Departure Warning (LDW)
*..... 354
Lane Keeping Assist System (LKAS)*.. 357
Vehicle Stability Assist (VSA ®), aka Electronic
Stability Control (ESC), System ............. 362Agile Handling Assist System............ 364
Blind Spot Information (BSI) System
*... 365
Super Handling-All Wheel Drive
TM (SH-
AWD® )
*......................................... 367
Tire Pressure Monitoring System (TPMS) ... 367Tire Pressure Monitoring System (TPMS) -
Required Federal Explanation ......... 369
Braking Brake System ................................... 371 Anti-lock Brake System (ABS) ........... 373
Brake Assist System ......................... 374
Collision Mitigation Braking System
TM
(CMBS
TM)*..................................... 375
Parking Your Vehicle
When Stopped ................................ 381
Parking Sensor System
*................... 382
Multi-View Rear Camera*................ 386
Refueling Fuel Information .............................. 387
How to Refuel ................................. 388
Fuel Economy .................................... 389
Accessories and Modifications ........ 390
* Not available on all models
Page 309 of 505

308
uuBefore Driving uDriving Preparation
Driving
• Be sure items placed on the floor behind the front seats cannot roll under the
seats.
u They can interfere with the driver’s ability to operate the pedals, the operation
of the seats, or the operation of the sensors under the seats.
• Everyone in the vehicle must fasten their seat belt.
2 Fastening a Seat Belt P. 34
•Make sure that the indicators in the instrument panel come on when you start the
vehicle, and go off soon after.
u Always have a dealer check the vehicle if a problem is indicated.
2 Indicators P. 70
Page 341 of 505

uuWhen Driving uAdaptive Cruise Control (ACC) with Low Speed Follow (LSF)
*
340Driving
1Adaptive Cruise Control (ACC) with Low Speed Follow (LSF)
*
Important Reminder
As with any system, there are limits to ACC with LSF.
Use the brake pedal whenever necessary, and always
keep a safe distance between your vehicle and other
vehicles.
The radar sensor for ACC with LSF is shared with the
collision mitigation braking system
TM (CMBS
TM).
2 Collision Mitigation Braking SystemTM
(CMBS
TM)* P. 375
■Vehicle speed for ACC with LSF: A vehicle is
detected ahead within ACC with LSF range –
ACC with LSF operates at any vehicle speed.
No vehicle is detected within ACC with LSF
range – ACC with LSF operates at the speed of
about 25 mph (40km/h) or above.■Shift positions for ACC with LSF: In
( D or
( S. The radar sensor is in the front grille.
■Press the
MAIN button on
the steering wheel. ACC (green) is on in the
instrument panel.
ACC with LSF is ready to
use.
When to use
How to use
* Not available on all models