audio Acura MDX 2017 Navigation Manual
[x] Cancel search | Manufacturer: ACURA, Model Year: 2017, Model line: MDX, Model: Acura MDX 2017Pages: 369, PDF Size: 29.59 MB
Page 273 of 369

272
AcuraLink®AcuraLink® Message
AcuraLink
®
AcuraLink® Message
AcuraLink® sends you messages on
vehicle features, safety and emissions
recall campaigns, maintenance
reminders, and diagnostic
information.
When you receive a new message, an
icon appears on the upper right corner
of the audio/information screen.
There are six message categories.
• Feature Guide : Messages about your vehicle and its features are sent daily for the
first 90 days.
• Quick Tips : Supplements your Owner’s Manual with updated vehicle information.
• Diagnostic Info : Appears when a warning indicator or message comes on.
Rotate i to select Check Later or Check Now .
Selecting Check Now lets you know if you should see a dealer immediately or
later in accordance with the warning severity level.
• Scheduled Dealer Appointment : An appointment made through the Acura
server or Acura Owners website can be rescheduled or canceled from this option.
2 Dealer Appointments P. 275
• Maintenance Minder : Lets you know which maintenance item is due along with
a reminder message.
• Recalls/Campaigns : Reminds you of a recall or important safety information. You
should also be notified by mail.
1 AcuraLink Message
Messages may not appear immediately after your
vehicle purchase. It can take several days for your
dealer to register your vehicle’s ID.
If an icon includes an exclamation point, it
indicates that Acura give s high priority to this
message compared to the one without.
•: An unread message with high priority•: An unread message
Message Icon
■Message category1 Message category
The types of messages you receive can be
modified. Ask a dealer or visit www.acura.ca/
owners/acuralink .
You can call your dealer, find the nearest dealer,
or schedule appointment s from the message
options in Maintenance Minder, Recalls/
Campaigns , and Diagnostic Info .
2 Message Options P. 274
Page 278 of 369
277
Rear Entertainment System
Rear seat passengers can enjoy a completely separate entertainment
source than front passengers, including movies, games, and other audio choices.
Rear Entertainment System..................278
Auxiliary Console Panel .........................278
HDMI
® Input Jack
(Ultrawide RES only) ............................279
Playable Discs ........................................280
Rear Control Panel Operation ...............281
Selecting the Audio Source ...................281
Rear DVD Menu ....................................282
Screen and Surround Settings ...............285
DVD Initial Settings (RES only) ...............288
Dual Screen Mode
(Ultrawide RES only) ............................289
Replacing the Batteries ..........................291 Front Control Panel Operation
............ 292
Selecting the Audio Source using front
control panel ...................................... 292
Rear System Setup ............................... 293
Setting the DVD Menu ......................... 294
Wireless Headphones ........................... 296
Using the Wireless Headphones ........... 296
Changing the Sound Source
(Ultrawide RES only) ........................... 297
Replacing the Batteries ......................... 298
Page 279 of 369
278
Rear Entertainment System
Rear Entertainment System
The Rear Entertainment System (RES) is operable from both the front control panel
and the rear control panel.
2Front Control Panel Operation P. 292
2Rear Control Panel Operation P. 281
Auxiliary Console Panel
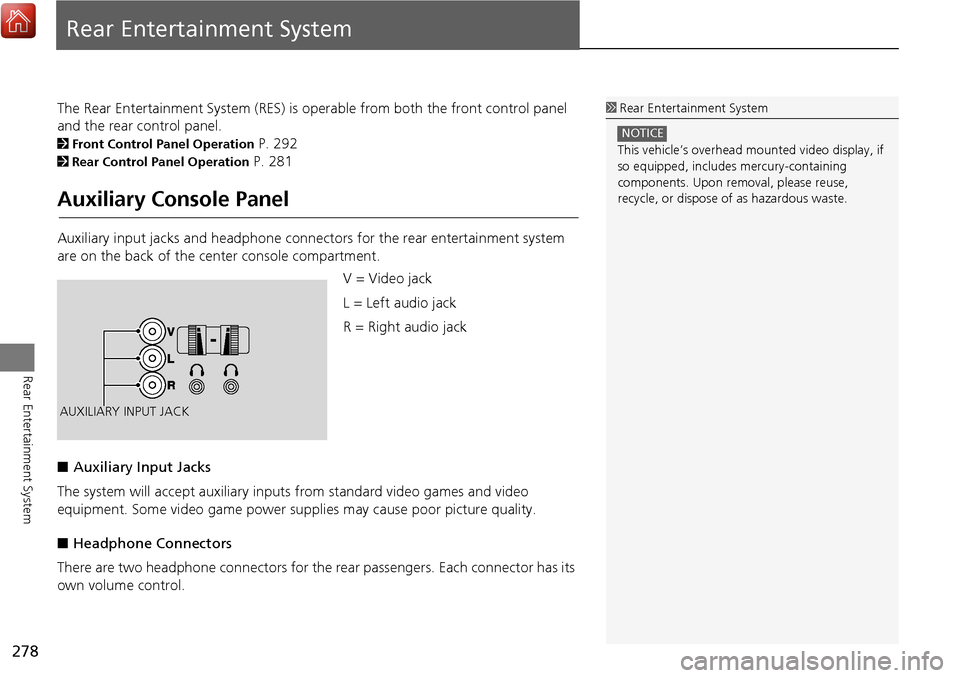
Auxiliary input jacks and headphone connectors for the rear entertainment system
are on the back of the center console compartment.
V = Video jack
L = Left audio jack
R = Right audio jack
■ Auxiliary Input Jacks
The system will accept auxiliary input s from standard video games and video
equipment. Some video game power su pplies may cause poor picture quality.
■ Headphone Connectors
There are two headphone connectors for th e rear passengers. Each connector has its
own volume control.
1 Rear Entertainment System
This vehicle’s overhead m ounted video display, if
so equipped, include s mercury-containing
components. Upon removal, please reuse,
recycle, or dispose of as hazardous waste.
NOTICE
AUXILIARY INPUT JACK
Page 282 of 369
281
Rear Entertainment System
Rear Control Panel Operation
Selecting the Audio Source
■RES
1. Press the Rear Power button on the front control panel.
2. Press the audio source button on the rear control panel.
You can also change the audio source by the front control panel.
2 Selecting the Audio Source using front control panel P. 292
3. Select a station, channel, track, or chapter using the CH/FOLDER, TUNE/SKIP, or
CATEGORY bars.
2 Overhead Screen and Rear Control Panel P. 15
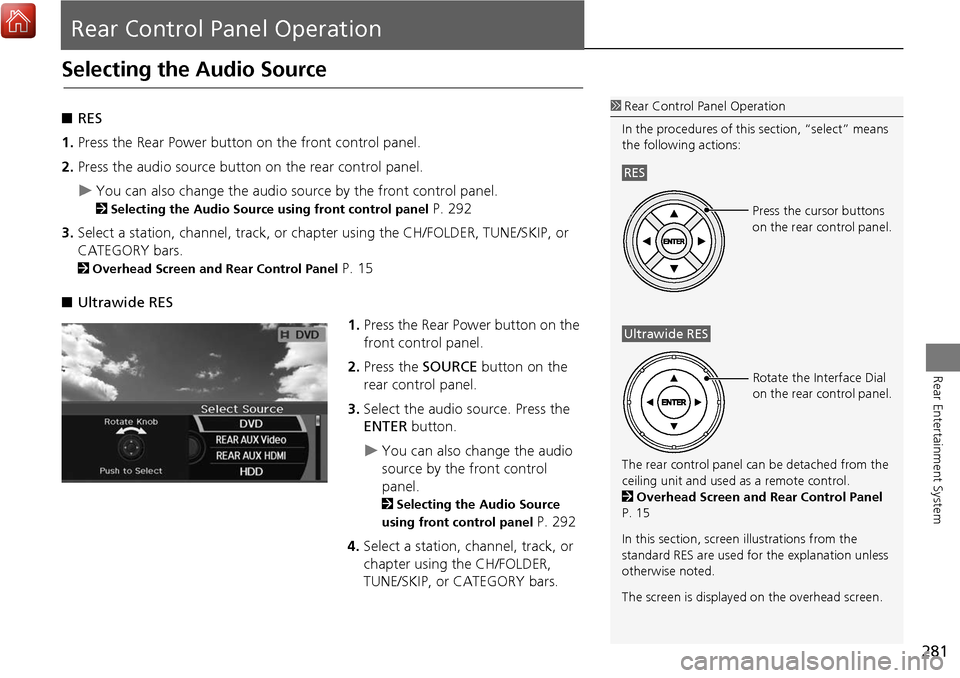
■ Ultrawide RES
1.Press the Rear Power button on the
front control panel.
2. Press the SOURCE button on the
rear control panel.
3. Select the audio source. Press the
ENTER button.
You can also change the audio
source by the front control
panel.
2Selecting the Audio Source
using front control panel
P. 292
4. Select a station, channel, track, or
chapter using the CH/FOLDER,
TUNE/SKIP, or CATEGORY bars.
1Rear Control Panel Operation
In the procedures of this section, “select” means
the following actions:
The rear control panel ca n be detached from the
ceiling unit and used as a remote control.
2 Overhead Screen and Rear Control Panel
P. 15
In this section, screen illustrations from the
standard RES are used for the explanation unless
otherwise noted.
The screen is displayed on the overhead screen.
RES
Press the cursor buttons
on the rear control panel.
Ultrawide RES
Rotate the Interface Dial
on the rear control panel.
Page 283 of 369
282
Rear Control Panel OperationRear DVD Menu
Rear Entertainment System
Rear DVD Menu
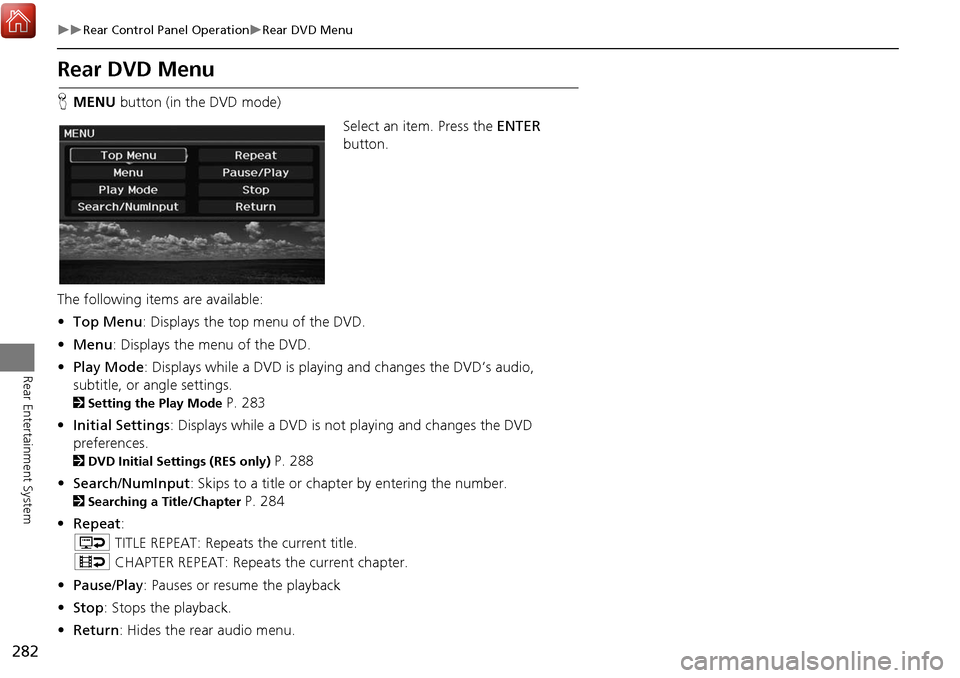
HMENU button (in the DVD mode)
Select an item. Press the ENTER
button.
The following item s are available:
• Top Menu : Displays the top menu of the DVD.
• Menu : Displays the menu of the DVD.
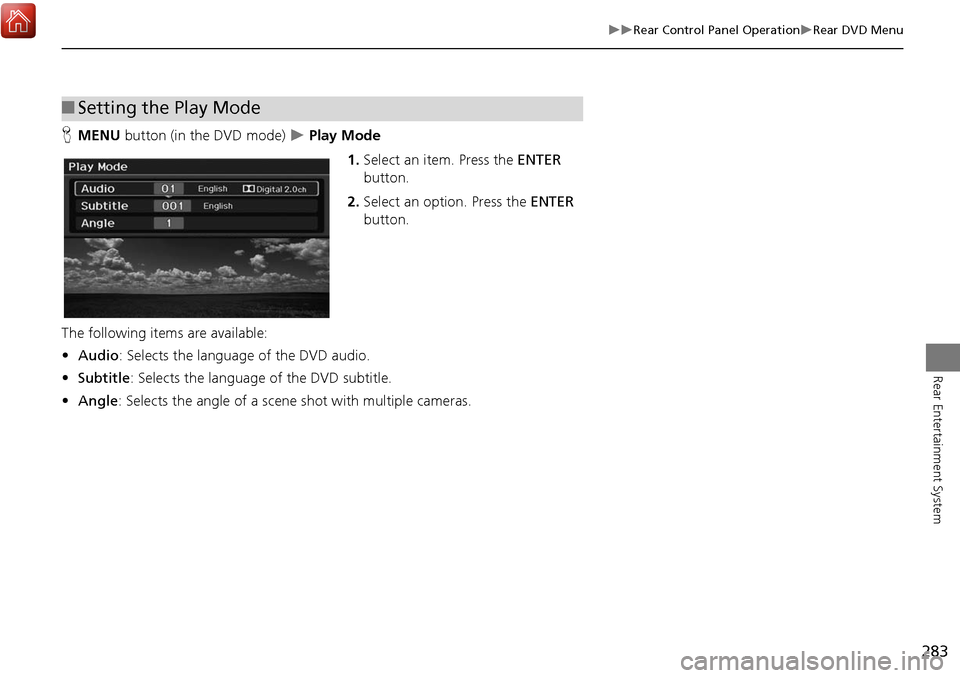
• Play Mode: Displays while a DVD is playing and changes the DVD’s audio,
subtitle, or angle settings.
2 Setting the Play Mode P. 283
• Initial Settings : Displays while a DVD is not playing and changes the DVD
preferences.
2 DVD Initial Settings (RES only) P. 288
• Search/NumInput : Skips to a title or chapter by entering the number.
2Searching a Title/Chapter P. 284
• Repeat :
o TITLE REPEAT: Repeats the current title.
p CHAPTER REPEAT: Repeats the current chapter.
• Pause/Play : Pauses or resume the playback
• Stop : Stops the playback.
• Return : Hides the rear audio menu.
Page 284 of 369
283
Rear Control Panel OperationRear DVD Menu
Rear Entertainment System
HMENU button (in the DVD mode) Play Mode
1.Select an item. Press the ENTER
button.
2. Select an option. Press the ENTER
button.
The following items are available:
• Audio : Selects the language of the DVD audio.
• Subtitle : Selects the language of the DVD subtitle.
• Angle : Selects the angle of a scene shot with multiple cameras.
■Setting the Play Mode
Page 290 of 369
289
Rear Control Panel OperationDual Screen Mode (Ultrawide RES only)
Rear Entertainment System
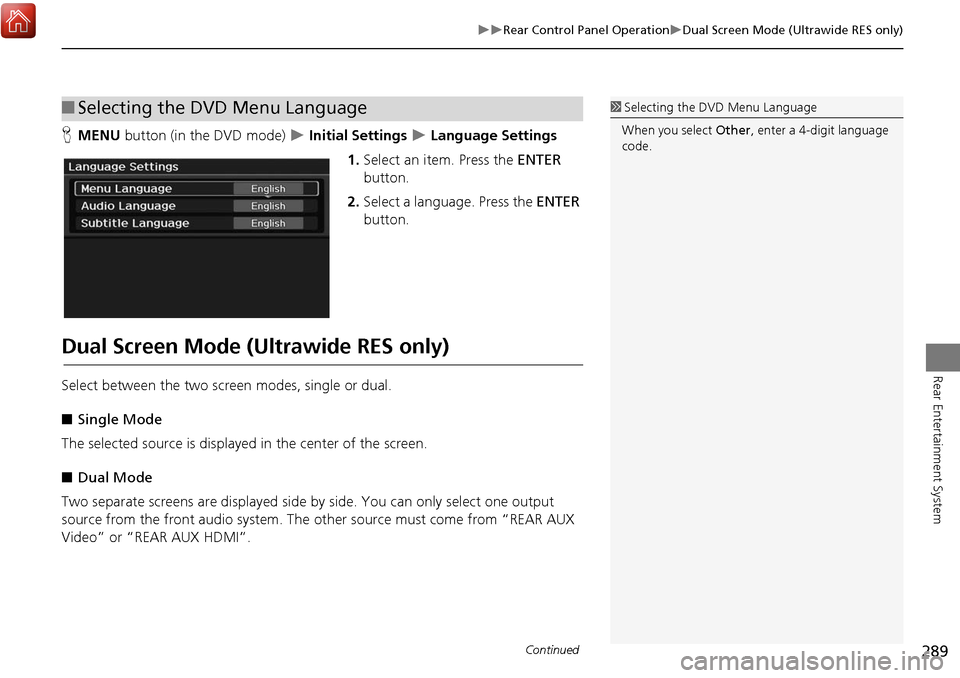
HMENU button (in the DVD mode) Initial Settings Language Settings
1. Select an item. Press the ENTER
button.
2. Select a language. Press the ENTER
button.
Dual Screen Mode (Ultrawide RES only)
Select between the two scre en modes, single or dual.
■ Single Mode
The selected source is displaye d in the center of the screen.
■ Dual Mode
Two separate screens are displayed side by side. You can only select one output
source from the front audio system. The other source must come from “REAR AUX
Video” or “REAR AUX HDMI”.
■ Selecting the DVD Menu Language1 Selecting the DVD Menu Language
When you select Other, enter a 4-digit language
code.
Continued
Page 293 of 369

292
Rear Entertainment System
Front Control Panel Operation
Operate the Rear Entertainment System (RES) from the front control panel.
Selecting the Audio Source using front control panel
1.Press the Rear 9 (Power) button
on the front control panel.
2. Press the REAR AUDIO button.
The rear source is displayed on
the front audio/information
screen and the On Demand
Multi-Use Display™.
The rear source is heard from
the front speakers.
3. Select Rear Source on the On
Demand Multi-Use Display™.
4. Select the audio source icon on the
On Demand Multi-Use Display™.
5. Select a station, channel, track, or
chapter in the same way as the
front audio system.
2 Audio P. 141
Page 294 of 369
293
Front Control Panel OperationRear System Setup
Rear Entertainment System
Rear System Setup
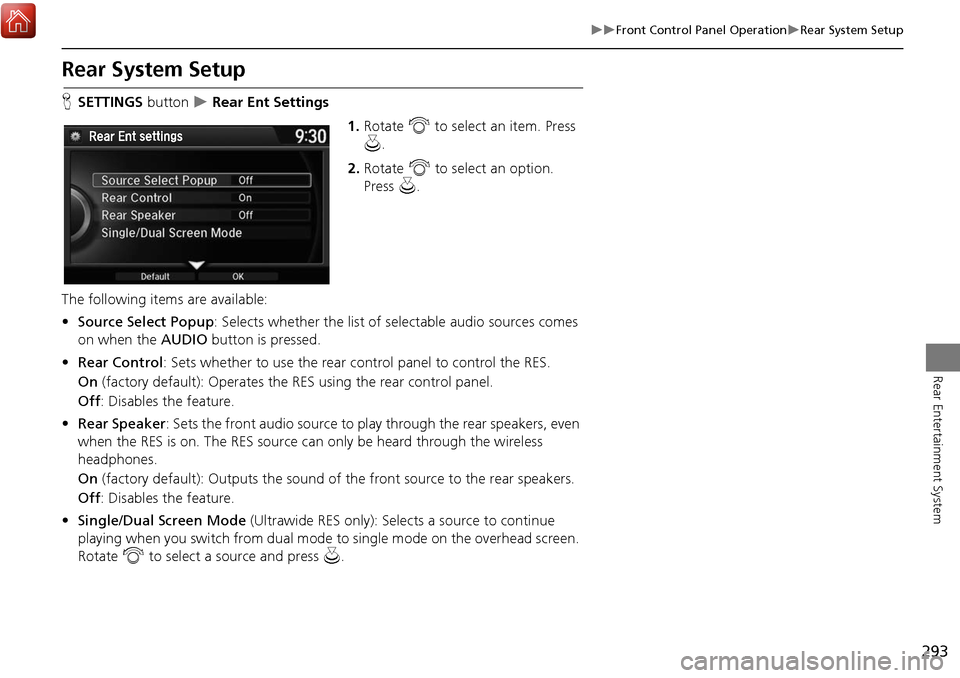
HSETTINGS button Rear Ent Settings
1.Rotate i to select an item. Press
u .
2. Rotate i to select an option.
Press u.
The following items are available:
• Source Select Popup : Selects whether the list of selectable audio sources comes
on when the AUDIO button is pressed.
• Rear Control: Sets whether to use the rear control panel to control the RES.
On (factory default): Operates the RES using the rear control panel.
Off : Disables the feature.
• Rear Speaker : Sets the front audio source to pl ay through the rear speakers, even
when the RES is on. The RES source can only be heard through the wireless
headphones.
On (factory default): Output s the sound of the front source to the rear speakers.
Off : Disables the feature.
• Single/Dual Screen Mode (Ultrawide RES only): Selects a source to continue
playing when you switch from dual mode to single mode on the overhead screen.
Rotate i to select a source and press u.
Page 295 of 369
294
Front Control Panel OperationSetting the DVD Menu
Rear Entertainment System
Setting the DVD Menu
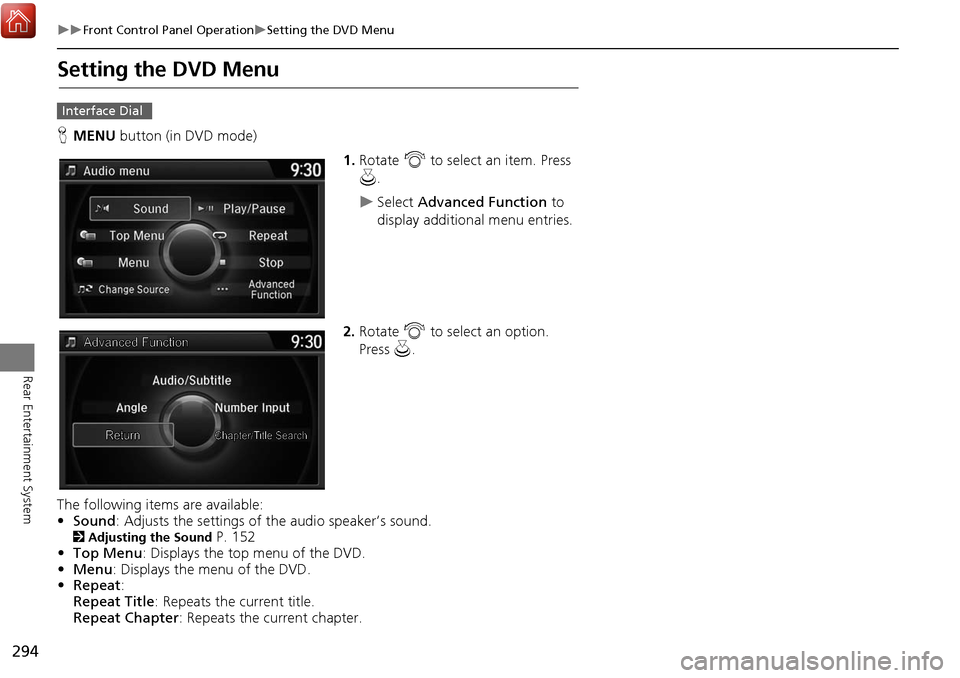
HMENU button (in DVD mode)
1.Rotate i to select an item. Press
u .
Select Advanced Function to
display additional menu entries.
2. Rotate i to select an option.
Press u.
The following item s are available:
• Sound : Adjusts the settings of the audio speaker’s sound.
2Adjusting the Sound P. 152
• Top Menu : Displays the top menu of the DVD.
• Menu : Displays the menu of the DVD.
• Repeat :
Repeat Title : Repeats the current title.
Repeat Chapter : Repeats the current chapter.
Interface Dial