display Acura MDX 2017 Navigation Manual
[x] Cancel search | Manufacturer: ACURA, Model Year: 2017, Model line: MDX, Model: Acura MDX 2017Pages: 369, PDF Size: 29.59 MB
Page 194 of 369
193
Playing Hard Disc Drive (HDD) AudioAudio Menu
Audio
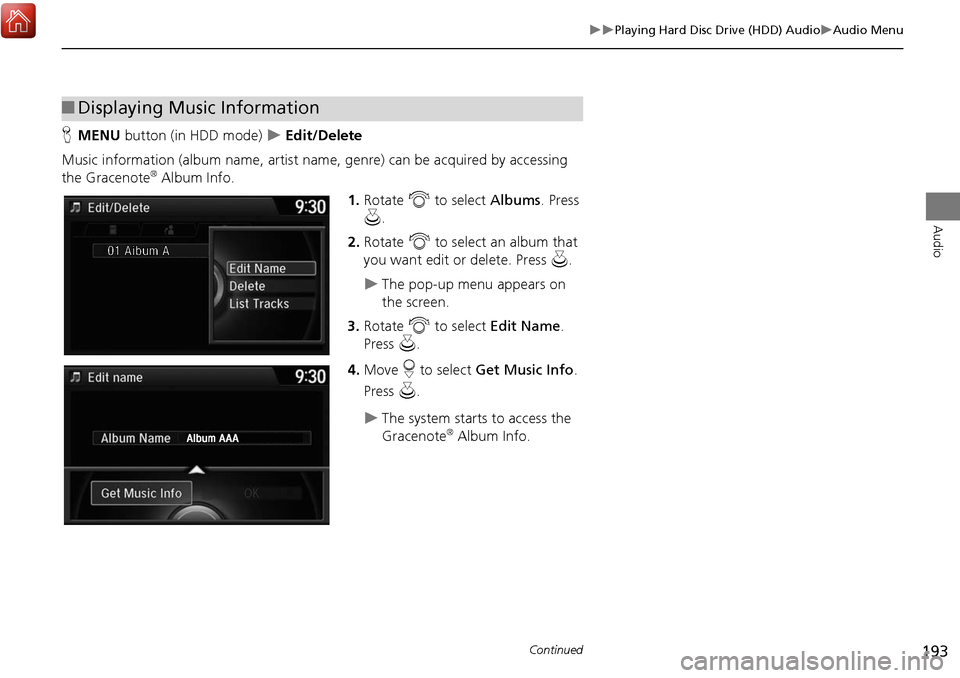
HMENU button (in HDD mode) Edit/Delete
Music information (album name, artist name, genre) can be acquired by accessing
the Gracenote
® Album Info. 1.Rotate i to select Albums. Press
u .
2. Rotate i to select an album that
you want edit or delete. Press u.
The pop-up menu appears on
the screen.
3. Rotate i to select Edit Name .
Press u.
4. Move r to select Get Music Info .
Press u.
The system starts to access the
Gracenote® Album Info.
■Displaying Music Information
Continued
Page 197 of 369
196
Audio
Playing an iPod
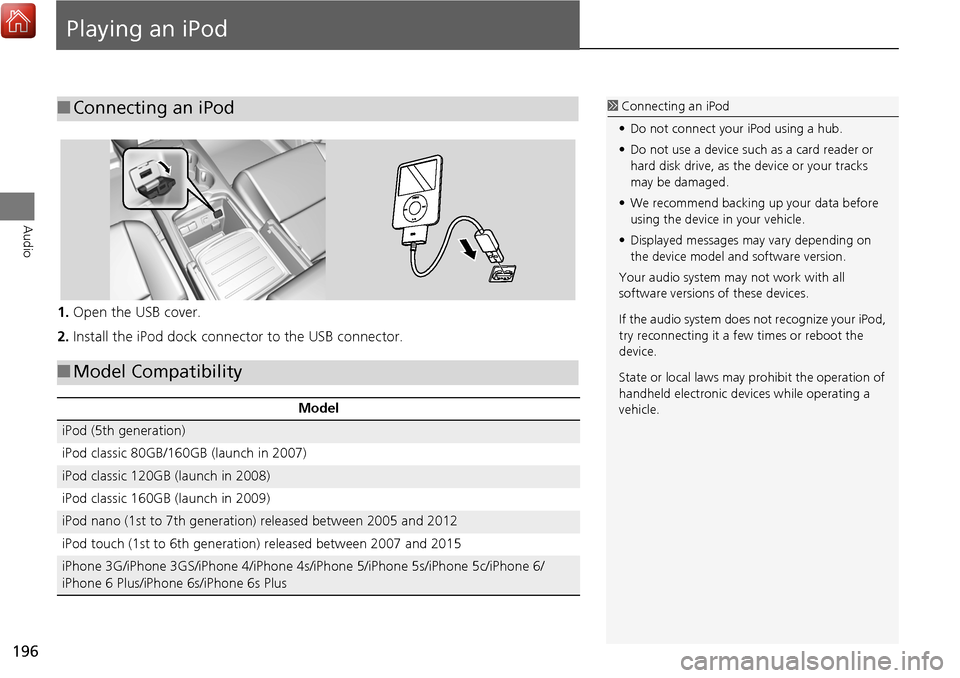
1.Open the USB cover.
2. Install the iPod dock connector to the USB connector.
■Connecting an iPod1 Connecting an iPod
• Do not connect your iPod using a hub.
• Do not use a device such as a card reader or
hard disk drive, as the device or your tracks
may be damaged.
• We recommend backing up your data before
using the device in your vehicle.
• Displayed messages ma y vary depending on
the device model a nd software version.
Your audio system ma y not work with all
software versions of these devices.
If the audio system does not recognize your iPod,
try reconnecting it a few times or reboot the
device.
State or local laws may prohibit the operation of
handheld electronic devi ces while operating a
vehicle.
■ Model Compatibility
Model
iPod (5th generation)
iPod classic 80GB/160GB (launch in 2007)
iPod classic 120GB (launch in 2008)
iPod classic 160GB (launch in 2009)
iPod nano (1st to 7th generation) released between 2005 and 2012
iPod touch (1st to 6th generation) released between 2007 and 2015
iPhone 3G/iPhone 3GS/iPhone 4/iPhone 4s/iPhone 5/iPhone 5s/iPhone 5c/iPhone 6/
iPhone 6 Plus/iPhone 6s/iPhone 6s Plus
Page 198 of 369

197
Playing an iPodSelecting iPod Mode
Audio
Selecting iPod Mode
1.Connect the iPod to the USB adapter cable in the console compartment.
2. Press the MENU button. (in AUDIO mode)
3. Rotate i, select Change Source . Press u.
4. Rotate i, select iPod. Press u.
2. Select Source .
3. Select the iPod icon.1Playing an iPod
You can control an iPod using voice commands.
2 Voice Control Operation P. 6
2 Song By Voice
TM (SBV) P. 203
Available opera ting functions vary on models or
versions. Some functions may not be available on
the vehicle’s audio system.
If there is a problem, you may see an error
message on the audio/information screen.
2 iPod/USB Flash Drive P. 339
Interface Dial
On Demand Multi-Use DisplayTM
Page 199 of 369

198
Playing an iPodAudio Screen Control
Audio
Audio Screen Control
Control the audio system through the audio/information screen and On Demand
Multi-Use DisplayTM.1.Rotate i or press u o display
the song list.
2. Rotate i, move w or y to
select a song from the list. Press
u .
Press MENU button to display
the menu items.
2Audio Menu P. 200
1Audio Screen Control
This function may not be available depending on
models or versions.
Select r to go back to the previous screen.
Track list
Interface Dial
Page 200 of 369

199
Playing an iPodAudio Screen Control
Audio
The following items are available:
• (Play/Pause): Plays or pauses a song file.
• c x : Select the previous or next track. Sel ect and hold to move rapidly within
a track.
• Album bar: Select to displa y the album search screen.
Select c or x to search for an album.
• More : Select to display the menu item.
2Audio Menu P. 200
•Repeat : Repeats the current track.
• Shuffle :
Shuffle Albums : Plays all available albums in a selected list (playlists, artists,
albums, songs, genres, or composers) in random order.
Shuffle All Songs : Plays all available files in a se lected list (playlists, artists,
albums, songs, genres, or composers) in random order.
On Demand Multi-Use DisplayTM
Album Bar Album Image
Select an album
image.
Select the
album bar.
Page 202 of 369

201
Playing an iPodAudio Menu
Audio
1.Select More.
2. Select a setting item.
The following items are available:
• Sound: Displays the sound preferences screen.
2
Adjusting the Sound P. 152
• Screen Settings: Displays the screen preferences screen.
2
Changing the Screen Settings P. 86
On Demand Multi-Use DisplayTM
Continued
Page 209 of 369
208
Audio
Playing Internet Radio
Selecting Internet Radio Mode
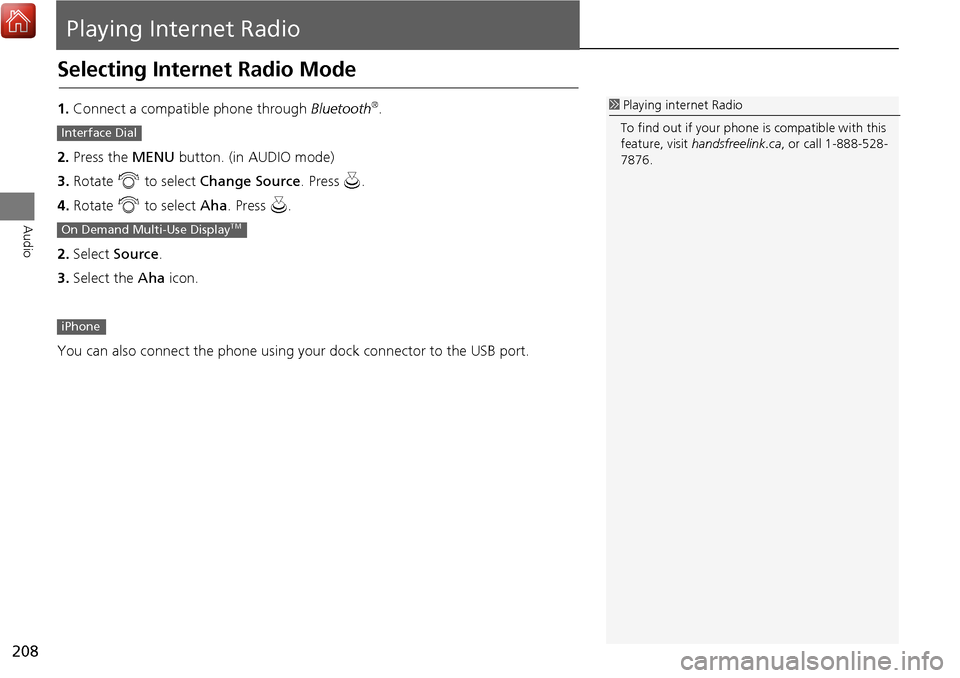
1.Connect a compatible phone through Bluetooth®.
2. Press the MENU button. (in AUDIO mode)
3. Rotate i to select Change Source . Press u.
4. Rotate i to select Aha. Press u.
2. Select Source .
3. Select the Aha icon.
You can also connect the phone using your dock connector to the USB port.1 Playing internet Radio
To find out if your phone is compatible with this
feature, visit handsfreelink.ca , or call 1-888-528-
7876.
Interface Dial
On Demand Multi-Use DisplayTM
iPhone
Page 210 of 369
209
Playing Internet RadioAhaTM Radio Menu
Audio
AhaTM Radio Menu
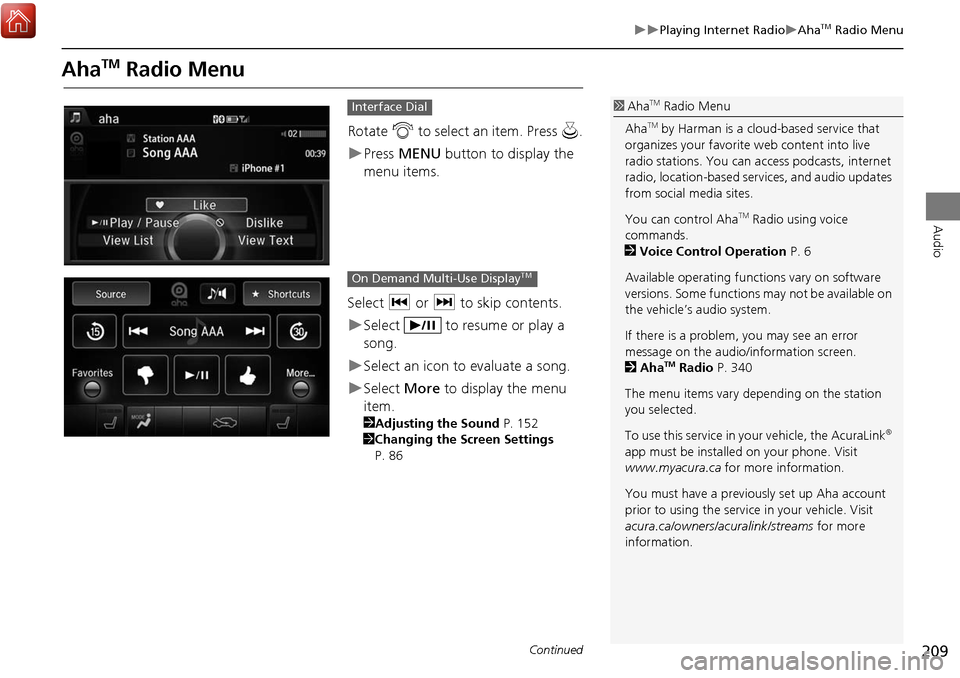
Rotate i to select an item. Press u.
Press MENU button to display the
menu items.
Select c or x to skip contents.
Select to resume or play a
song.
Select an icon to evaluate a song.
Select More to display the menu
item.
2 Adjusting the Sound P. 152
2 Changing the Screen Settings
P. 86
Interface Dial1 AhaTM Radio Menu
Aha
TM by Harman is a cloud-based service that
organizes your favorite web content into live
radio stations. You can access podcasts, internet
radio, location-based se rvices, and audio updates
from social media sites.
You can control Aha
TM Radio using voice
commands.
2 Voice Control Operation P. 6
Available operating functi ons vary on software
versions. Some functions may not be available on
the vehicle’s audio system.
If there is a problem, you may see an error
message on the audio/information screen.
2 Aha
TM Radio P. 340
The menu items vary depending on the station
you selected.
To use this service in your vehicle, the AcuraLink
®
app must be installed on your phone. Visit
www.myacura.ca for more information.
You must have a previously set up Aha account
prior to using the service in your vehicle. Visit
acura.ca/owners/acuralink/streams for more
information.
On Demand Multi-Use DisplayTM
Continued
Page 212 of 369
211
Audio
Playing a USB Flash Drive
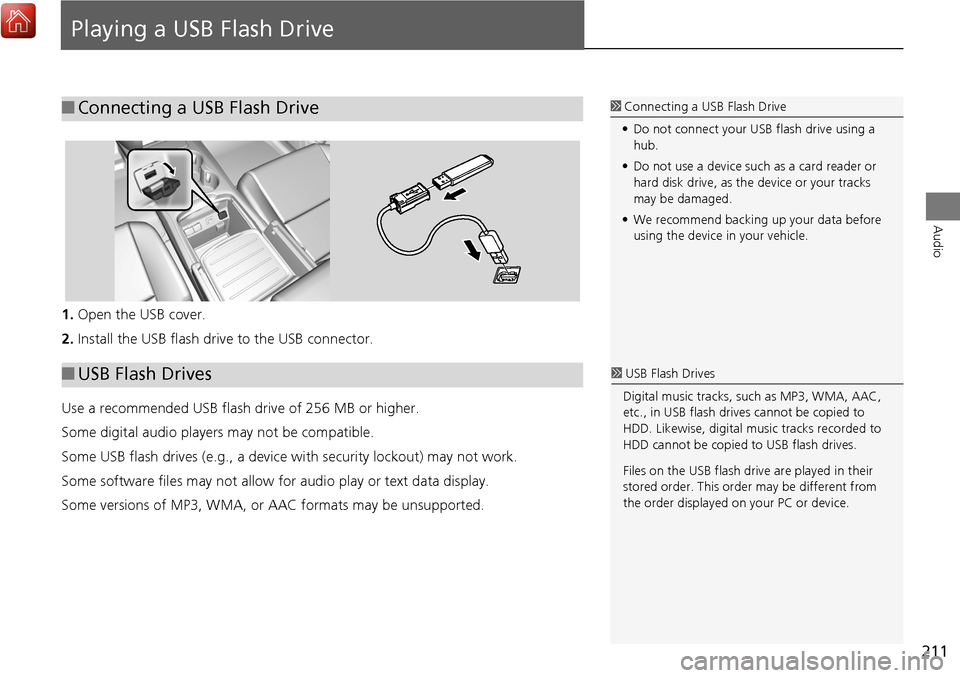
1.Open the USB cover.
2. Install the USB flash drive to the USB connector.
Use a recommended USB flash drive of 256 MB or higher.
Some digital audio players may not be compatible.
Some USB flash drives (e.g., a device with security lockout) may not work.
Some software files may not allow for audio play or text data display.
Some versions of MP3, WMA, or AAC formats may be unsupported.
■Connecting a USB Flash Drive1 Connecting a USB Flash Drive
• Do not connect your US B flash drive using a
hub.
• Do not use a device such as a card reader or
hard disk drive, as th e device or your tracks
may be damaged.
• We recommend backing up your data before
using the device in your vehicle.
■ USB Flash Drives1 USB Flash Drives
Digital music tracks, such as MP3, WMA, AAC,
etc., in USB flash drives cannot be copied to
HDD. Likewise, digital music tracks recorded to
HDD cannot be copied to USB flash drives.
Files on the USB flash drive are played in their
stored order. This orde r may be different from
the order displayed on your PC or device.
Page 213 of 369
212
Playing a USB Flash DriveSelecting USB Mode
Audio
Selecting USB Mode
1.Connect the USB flash drive to the USB port in the console compartment.
2. Press the MENU button. (in AUDIO mode)
3. Rotate i to select Change Source . Press u.
4. Rotate i to select USB. Press u .
2. Select Source .
3. Select the USB icon.1Playing a USB Flash Drive
You can control a USB flash drive using voice
commands.
2 Voice Control Operation P. 6
Files in WMA/AAC format protected by digital
rights management (DRM) cannot be played.
The audio system displays Unplayable File, and
then skips to the next file.
If there is a problem, you may see an error
message on the audio/information screen.
2 iPod/USB Flash Drive P. 339
Interface Dial
On Demand Multi-Use DisplayTM