stop start Acura MDX 2017 User Guide
[x] Cancel search | Manufacturer: ACURA, Model Year: 2017, Model line: MDX, Model: Acura MDX 2017Pages: 170, PDF Size: 12.43 MB
Page 113 of 170
106 |
DRIVING
During Operation
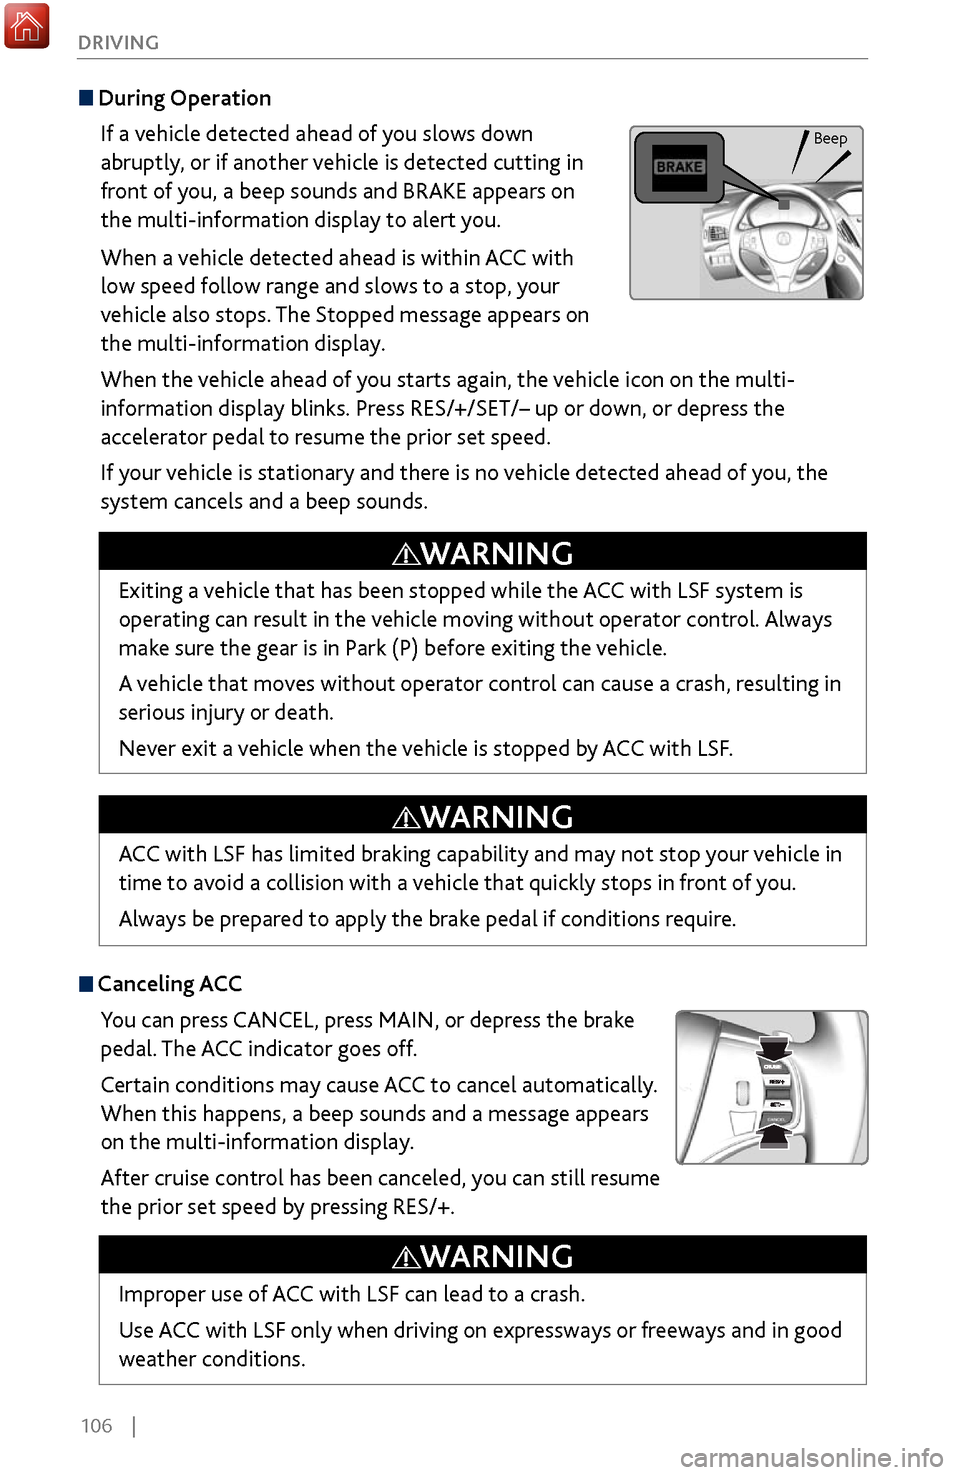
If a vehicle detected ahead of you slows down
abruptly, or if another vehicle is detected cutting in
front of you, a beep sounds and BRAKE appears on
the multi-information display to alert you.
When a vehicle detected ahead is within ACC with
low speed follow range and slows to a stop, your
vehicle also stops. The Stopped message appears on
the multi-information display.
When the vehicle ahead of you starts again, the vehicle icon on the multi-
information display blinks. Press RES/+/SET/– up or down, or depress the
accelerator pedal to resume the prior set speed.
If your vehicle is stationary and there is no vehicle detected ahead of you, the
system cancels and a beep sounds.
Canceling ACCYou can press CANCEL, press MAIN, or depress the brake
pedal. The ACC indicator goes off.
Certain conditions may cause ACC
to cancel automatically.
When
this happens, a beep sounds and a message appears
on the multi-information display.
After cruise control has been canceled, you can still resume
the prior set speed by pressing RES/+.
Exiting a vehicle that has been stopped while the ACC with LSF system is
operating can result in the vehicle moving without operator control. Always
make sure the gear is in Park (P) before exiting the vehicle.
A vehicle that moves without operator control can cause a crash, resulting in
serious injury or death.
Never exit a vehicle when the vehicle is stopped by ACC with LSF.
WARNING
ACC with LSF has limited braking capability and may not stop your vehicle in
time to avoid a collision with a vehicle that quickly stops in front of you.
Always be prepared to apply the brake pedal if conditions require.
WARNING
Improper use of ACC with LSF can lead to a crash.
Use ACC with LSF only when driving on expressways or freeways and in good
weather conditions.
WARNING
Beep
Page 127 of 170
120 |
HANDLING THE UNEXPECTED
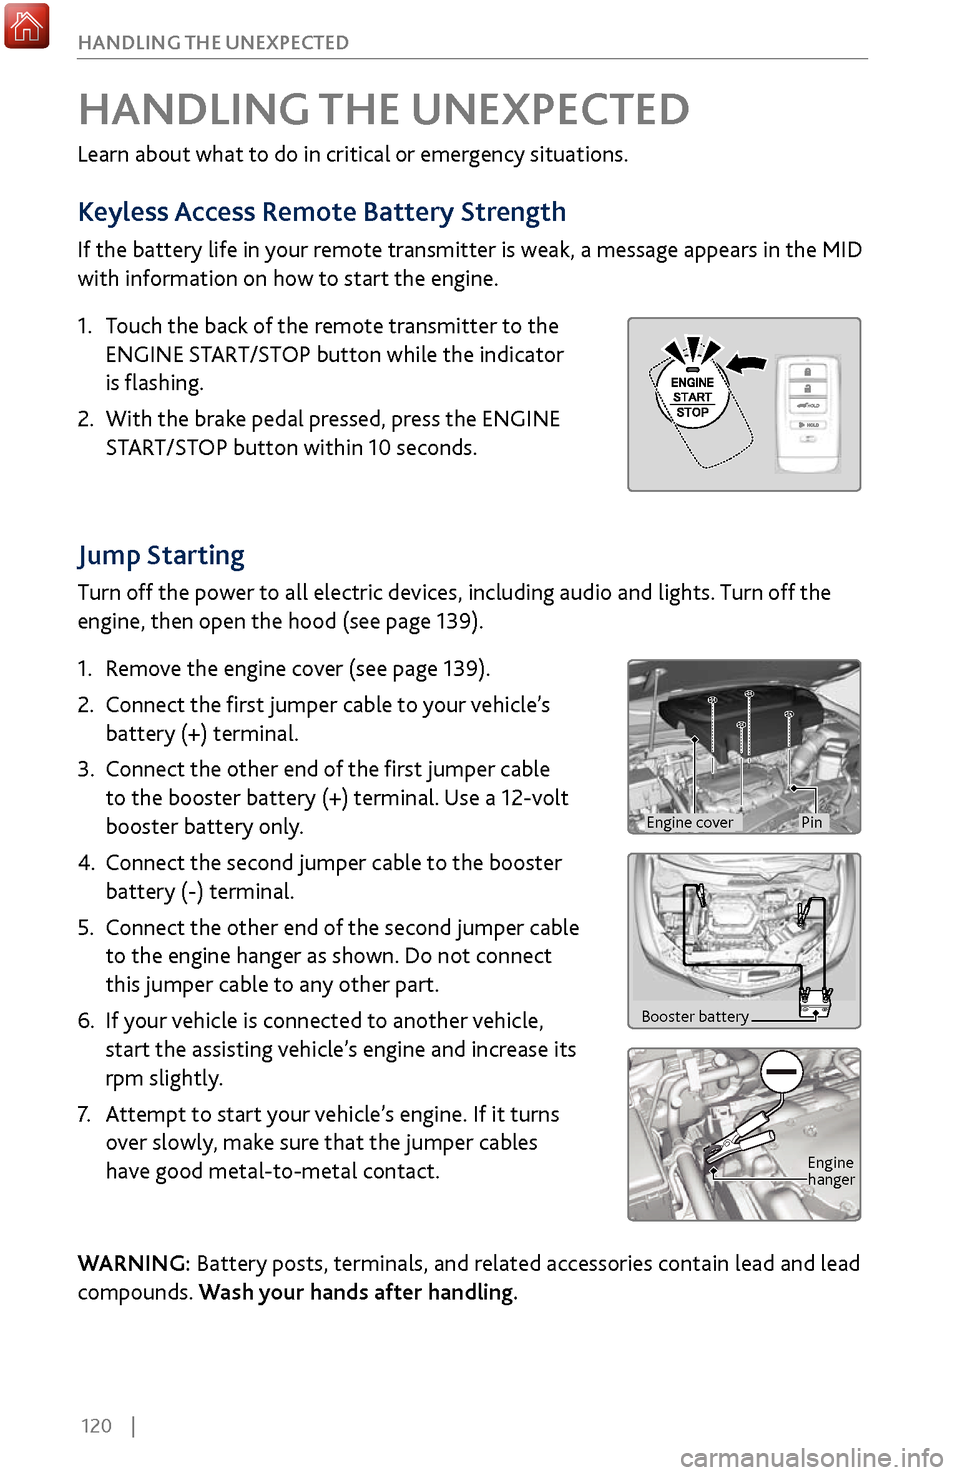
Jump Starting
Turn off the power to all electric devices, including audio and lights. Turn off the
engine, then open the hood (see page 139).
1.
Remov
e the engine cover (see page 139).
2.
Connect the first
jumper cable to your vehicle’s
battery (+) terminal.
3.
Connect the other end of the
first jumper cable
to the booster battery (+) terminal. Use a 12-volt
booster battery only.
4.
Connect the second jumper cable
to the booster
battery (-) terminal.
5.
Connect the other end of the
second jumper cable
to the engine hanger as shown. Do not connect
this jumper cable to any other part.
6.
If your
vehicle is connected to another vehicle,
start the assisting vehicle’s engine and increase its
rpm slightly.
7.
Attempt to start
your vehicle’s engine. If it turns
over slowly, make sure that the jumper cables
have good metal-to-metal contact.
WARNING: Battery posts, terminals, and related accessories contain lead and lead
compounds. Wash your hands after handling.
HANDLING THE UNEXPECTED
Learn about what to do in critical or emergency situations.
Keyless Access Remote Battery Strength
If the battery life in your remote transmitter is weak, a message appears in the MID
with information on how to start the engine.
1.
Touch the back of the
remote transmitter to the
ENGINE START/STOP button while the indicator
is flashing.
2.
With the brake pedal pr
essed, press the ENGINE
START/STOP button within 10 seconds.
Booster battery
Engine
hanger
Engine coverPin
Page 128 of 170
| 121
HANDLING THE UNEXPECTED
After the Engine Starts
Once your vehicle’s engine has started, remove the jumper cables in the following
order:
1.
Disconnect the jumper cable fr
om your vehicle’s ground.
2.
Disconnect the other end
of the jumper cable from the booster battery (-)
terminal.
3.
Disconnect the jumper cable fr
om your vehicle’s battery (+) terminal.
4.
Disconnect the other end
of the jumper cable from the booster battery (+)
terminal.
5.
Have y
our vehicle inspected by a nearby service station or a dealer.
A battery can explode if you do not follow the correct procedure, seriously
injuring anyone nearby.
Keep all sparks, open flames, and smoking materials away from the battery.
WARNING
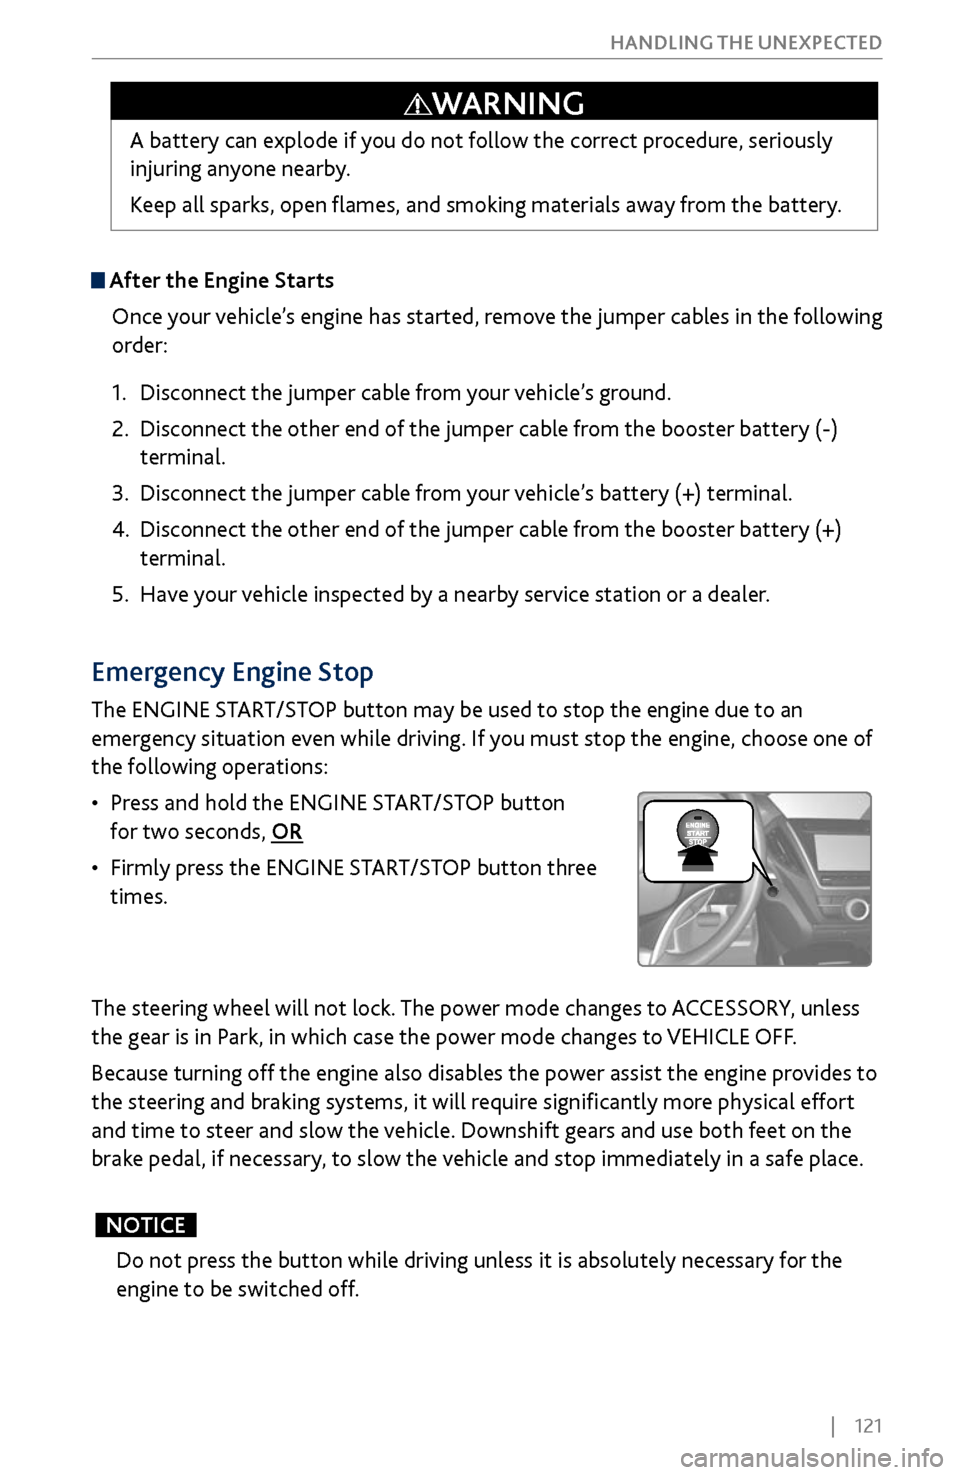
Emergency Engine Stop
The ENGINE START/STOP button may be used to stop the engine due to an
emergency situation even while driving. If you must stop the engine, choose one of
the following operations:
•
Press and hold the ENGINE
START/STOP button
for two seconds, OR
•
Firmly press
the ENGINE START/STOP button three
times.
The steering wheel will not lock. The power mode changes to ACCESSORY, unless
the gear is in Park, in which case the power mode changes to VEHICLE OFF.
Because turning off the engine also disables the power assist the engine provides to
the steering and braking systems, it will require significantly more physical effort
and time to steer and slow the vehicle. Downshift gears and use both feet on the
brake pedal, if necessary, to slow the vehicle and stop immediately in a safe place.
Do not press the button while driving unless it is absolutely necessary for the
engine to be switched off.
NOTICE
Page 129 of 170
122 |
HANDLING THE UNEXPECTED
Overheating
If you see the multi-information display (MID) message “Stop Driving When Safe.
Engine Temperature Too Hot,” your engine is overheating. You may also notice the
temperature gauge is at the H mark, the engine suddenly loses power, or steam or
spray comes out from under the hood.
1.
Immediately park the
vehicle in a safe place. Turn
off all accessories and turn on the hazard warning
lights.
2. If no steam or spray is present: Keep the engine
running and open the hood (see page 139).
If steam or spray is present
: Turn off the engine
and wait until it subsides. Then, open the hood.
3.
Check that the cooling
fan is operating. If it is not, immediately stop the engine.
Otherwise, idle the engine until the MID message goes off.
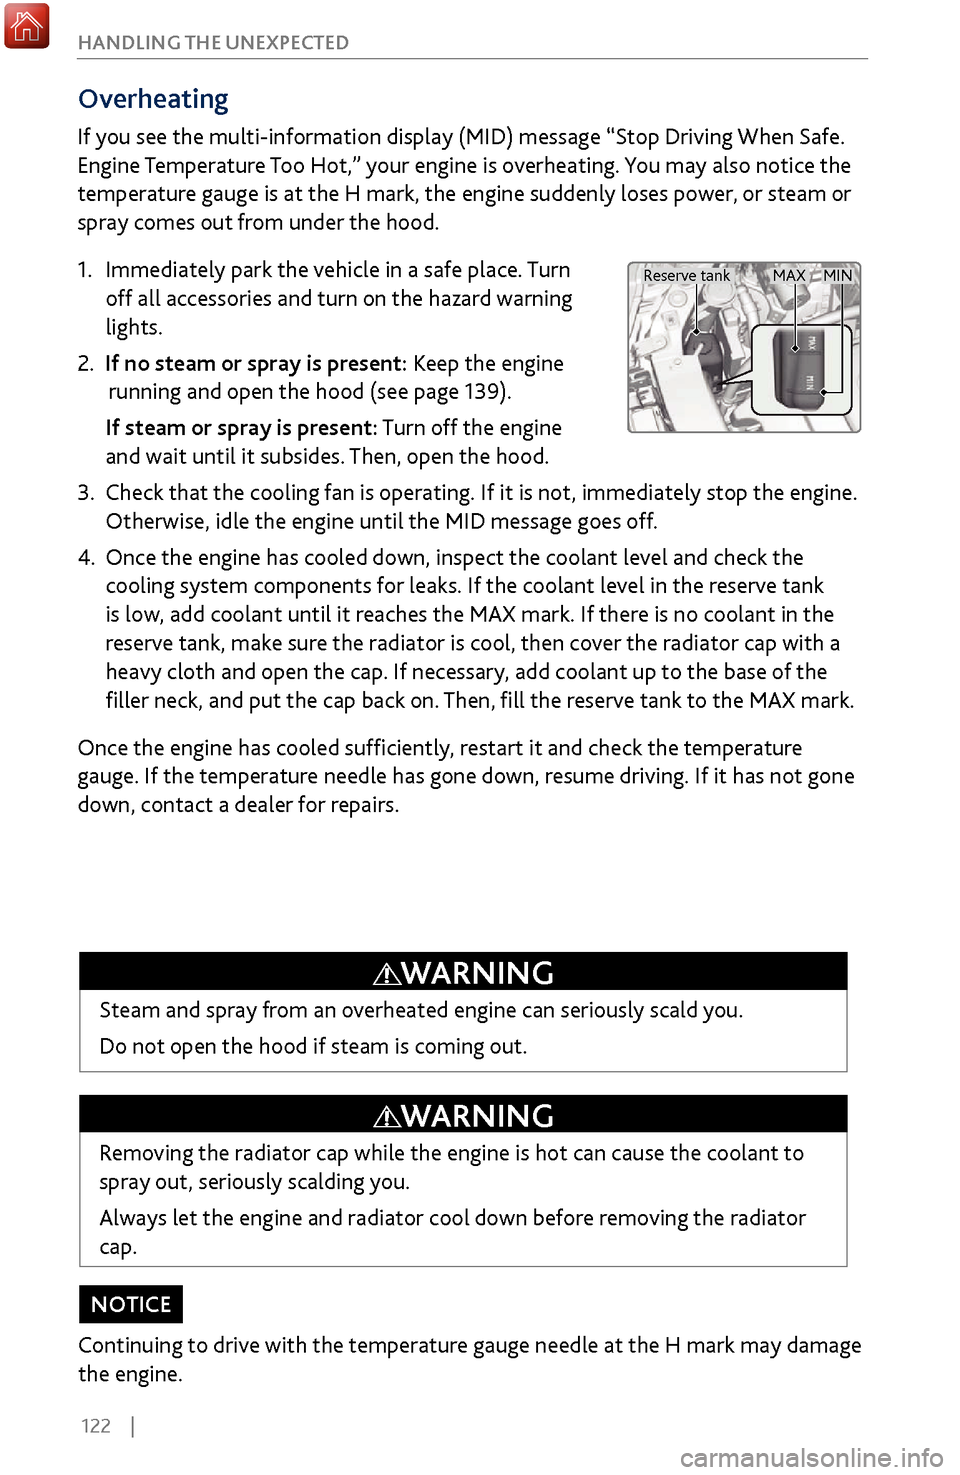
4. Once the engine has cooled down, inspect
the coolant level and check the
cooling system components for leaks. If the coolant level in the reserve tank
is low, add coolant until it reaches the MAX mark. If there is no coolant in the
reserve tank, make sure the radiator is cool, then cover the radiator cap with a
heavy cloth and open the cap. If necessary, add coolant up to the base of the
filler neck, and put the cap back on. Then, fill the reserve tank to the MAX mark.
Once the engine has cooled sufficiently, restart it and check the temperature
gauge. If the temperature needle has gone down, resume driving. If it has not gone
down, contact a dealer for repairs.
Removing the radiator cap while the engine is hot can cause the coolant to
spray out, seriously scalding you.
Always let the engine and radiator cool down before removing the radiator
cap.
WARNING
Steam and spray from an overheated engine can seriously scald you.
Do not open the hood if steam is coming out.
WARNING
Continuing to drive with the temperature gauge needle at the H mark may damage
the engine.
NOTICE
MAX MIN
Reserve tank
Page 131 of 170
124 |
HANDLING THE UNEXPECTED
Tire Pressure Monitoring System (TPMS) - Required Federal Explanation
Each tire, including the spare (if provided), should be checked monthly
when cold and inflated to the inflation pressure recommended by the
vehicle manufacturer on the vehicle placard or tire inflation pressure
label.
(If your vehicle has tires of a different size than the size indicated on the
vehicle placard or tire inflation pressure label, you should determine the
proper tire inflation pressure for those tires.)
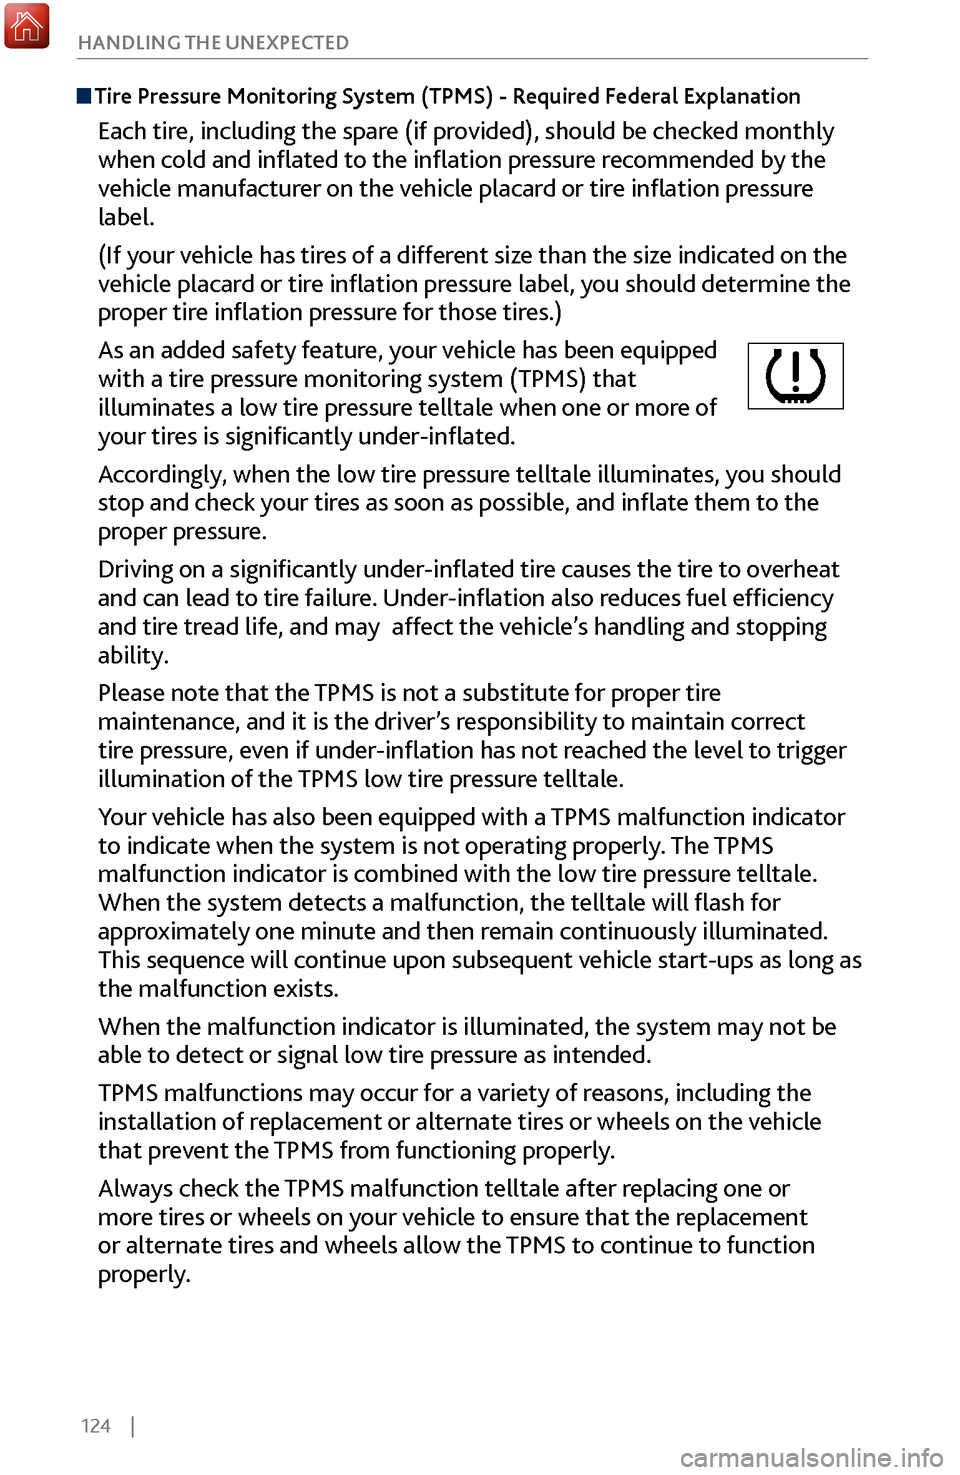
As an added safety feature, your vehicle has been equipped
with a tire pressure monitoring system (TPMS) that
illuminates a low tire pressure telltale when one or more of
your tires is significantly under-inflated.
Accordingly, when the low tire pressure telltale illuminates, you should
stop and check your tires as soon as possible, and inflate them to the
proper pressure.
Driving on a significantly under-inflated tire causes the tire to overheat
and can lead to tire failure. Under-inflation also reduces fuel efficiency
and tire tread life, and may affect the vehicle’s handling and stopping
ability.
Please note that the TPMS is not a substitute for proper tire
maintenance, and it is the driver’s responsibility to maintain correct
tire pressure, even if under-inflation has not reached the level to trigger
illumination of the TPMS low tire pressure telltale.
Your vehicle has also been equipped with a TPMS malfunction indicator
to indicate when the system is not operating properly. The TPMS
malfunction indicator is combined with the low tire pressure telltale.
When the system detects a malfunction, the telltale will flash for
approximately one minute and then remain continuously illuminated.
This sequence will continue upon subsequent vehicle start-ups as long as
the malfunction exists.
When the malfunction indicator is illuminated, the system may not be
able to detect or signal low tire pressure as intended.
TPMS malfunctions may occur for a variety of reasons, including the
installation of replacement or alternate tires or wheels on the vehicle
that prevent the TPMS from functioning properly.
Always check the TPMS malfunction telltale after replacing one or
more tires or wheels on your vehicle to ensure that the replacement
or alternate tires and wheels allow the TPMS to continue to function
properly.
Page 140 of 170
| 133
HANDLING THE UNEXPECTED
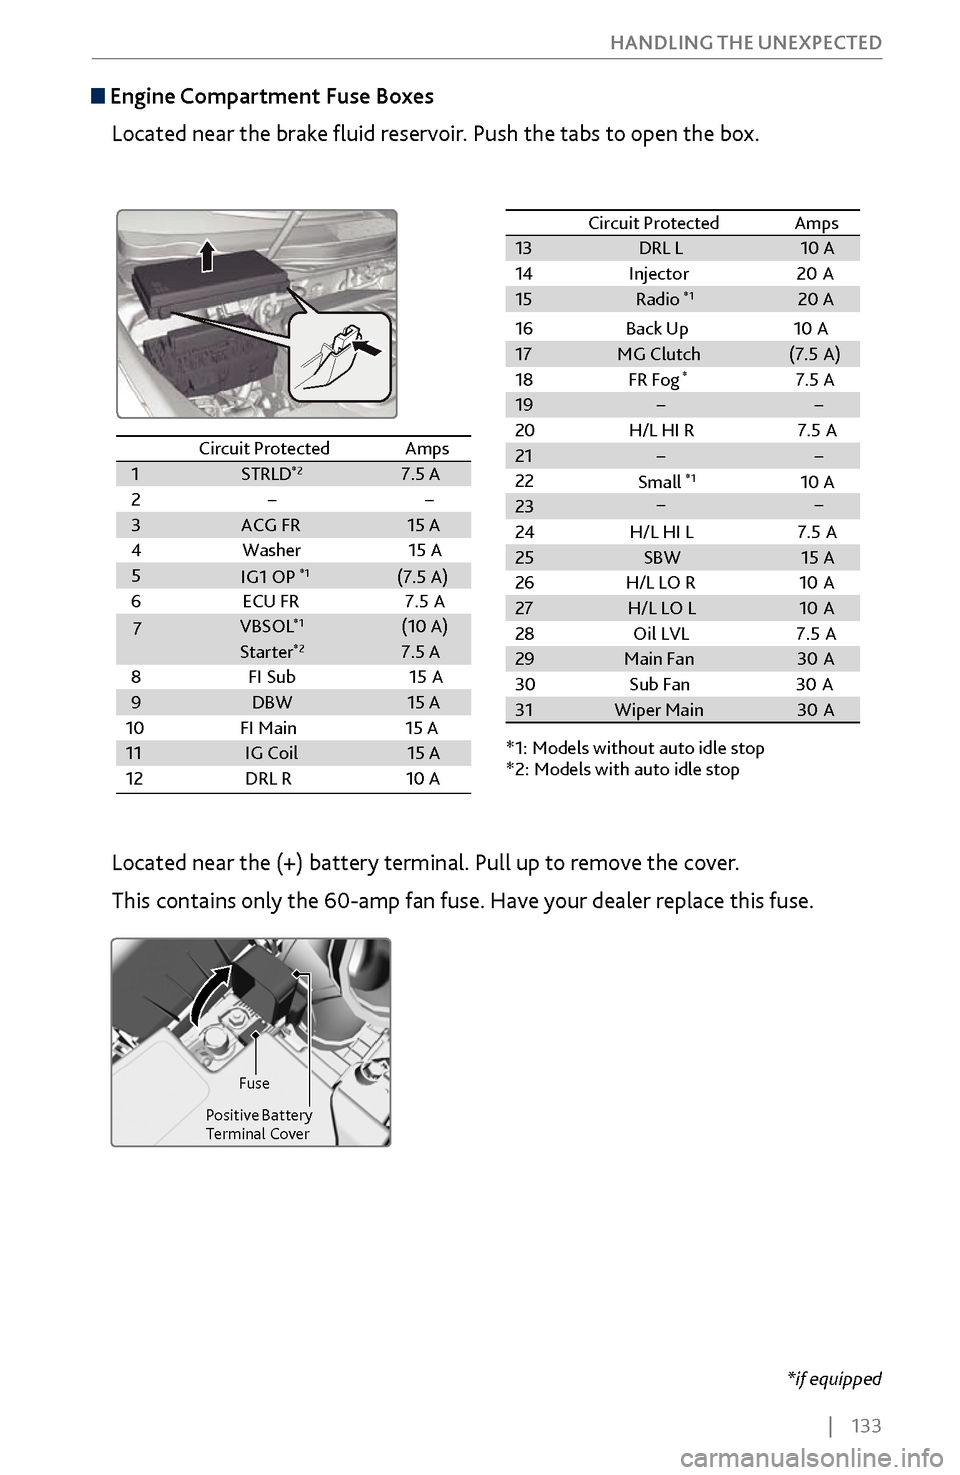
Engine Compartment Fuse Boxes
Located near the brake fluid reservoir. Push the tabs to open the box.
*if equipped
Circuit ProtectedAmps1STRLD*27.5 A2��3ACG FR15 A
4W asher15 A56E CU FR 7.5A
7VBSOL*1(10 A)
8F I Su
b15A9DBW15 A
10 FI Main 15 A
11IG Coil15 A
12 DRL R10 A
13 DRL L 10 A
14 Injector2 0A
15
*1: Models without auto idle stop
*2: Models with auto idle stop
16
Back Up 10A
17 MG Clutch (7.5A )
18 FR Fog
*7.5 A
19 � �
20 H/L HI R7.5 A
21 � �
22
23 Gear Selector 15 A
24 H/L HI L7.5 A
25 SBW 15 A
26 H/L LO R1 0A
27 H/L LO L 10A
28 Oil LVL 7.5A
29 Main Fan 30A
30 Sub Fan3 0A
31 Wiper Main 30A
Circuit Protecte
d Amps
Starter*27.5 A
��
IG1 OP*1(7.5 A)
Radio*120 A
Small
*110 A
Circuit Protected Amps
1 STRLD*27.5 A
2 � �
3 ACG FR 15 A
4W asher1 5 A
5
6E CU FR 7.5A
7 VBSOL
*1(10 A)
8F I Sub1 5A
9 DBW 15 A
10 FI Main 15 A
11 IG Coil 15 A
12 DRL R1 0 A
13DRL L10 A
14 Injector20A15
*1: Models without auto idle stop
*2: Models with auto idle stop
16
Back Up 10A
17MG Clutch(7.5A )
18 FR Fog*7.5 A19��
20 H/L HI R7.5 A21��
22
23 Gear Selector 15 A
24 H/L HI L7.5 A25SBW15 A
26 H/L LO R10A27H/L LO L10A
28 Oil LVL 7.5A
29Main Fa n30A
30 Sub Fan30A31Wiper Main30A
Circuit Protecte dAmps
Starter*27.5 A
��
IG1 OP
*1(7.5 A)
Radio*120
A
Small
*110 A
Located near the (+) battery terminal. Pull up to remove the cover.
This contains only the 60-amp fan fuse. Have your dealer replace this fuse.
Fuse
Positive Battery
Terminal Cover
Page 161 of 170
154 |
CLIENT INFORMATION
Learn about information specific to you as an Acura client and how to get help.
Frequently Asked Questions/Troubleshooting
Below are some frequently asked questions and troubleshooting items that you
may have about the vehicle.
Q: How do I set the vehicle clock?
A:
For vehicles without navigation, see page 55. For vehicles with navigation, the
time is automatically set using GPS signals.
Q:
Why doesn’t the vehicle start when I press the ENGINE START/STOP button?
A: The brake pedal must be pressed to start the engine.
Q: What is the AUTO setting on my headlight lever?
A: When in the AUTO position, the vehicle’s exterior lights will automatically turn
on or off depending on the ambient lighting.
Q:
Why won’t the driver’s door unlock when I grab the door handle, even though the
keyless ac
cess remote is within range?
A: If you pull the handle too quickly, the system may not have time to confirm the
door is unlocked. W
ait to hear a beep to confirm the door is unlocked. If you are
wearing gloves,
the system may be slow to respond.
Q: After my battery was disconnected or went dead, the audio system is asking for a
code. Wher
e do I find this?
A: In most cases, you do not need to enter a code. Turn on the vehicle and the audio
system, and press and hold the power button until
the system reactivates.
Q: Why can’t I operate Pandora* through the audio system?
A: Audio may be streaming through Bluetooth® Audio. Make sure Pandora mode
is selected and the phone cable is properl
y connected to the USB adapter. Some
phones may prompt y
ou to “Allow” a connection.
Q: Is my phone compatible with Bluetooth features?
A: Visit www.acura.com/handsfreelink (U.S) or www.handsfreelink.ca (Canada) to
check phone compatibility for Bluet
ooth® Audio, Bluetooth® HandsFreeLink®,
and SMS text messaging.
Q:
Every time I press the Talk button, the system gives me voice prompts. Can I turn
these off?*
A: Pr
ess SETTINGS. Use the interface dial to select System Settings then Voice Rec.
For the V
oice Prompt option, select Off.
CLIENT INFORMATION
*if equipped
Page 167 of 170
160 |
INDEX
Brake Assist System .............................................
102
Brake system .................................................... 26, 27
Braking .................................................................... 102
Anti-Lock Brak
e System
................................... 102
Brake Assist S
ystem
........................................... 102
Foot Brak
e
........................................................... 102
Parking Brak
e
............................................. 102, 103
Brightness Contr
ol.................................................. 37
BSI
............................................................... 27, 29, 113
Call History .............................................................. 76
Carbon Mono
xide Gas
............................................. 4
Cargo lights
............................................................. 40
Car wash mode
.......................................................99
Change
a Setting
.................................................... 55
Changing a Flat Tir
e
............................................. 126
Changing Fuses ..................................................... 135
Charging system ..................................................... 26
Childproof Door Locks .......................................... 34
Child Safety ............................................................. 15
Childproof Door Locks ....................................... 34
Child Seat ................................................................. 17
Adding
Security with a Tether
........................... 21
Installing a Child
Seat with a Lap/Shoulder Seat
Belt
........................................................................\
.20
LA
TCH-Compatible Child Seat .......................... 18
Selecting a Child Seat
......................................... 17
Client Information................................................
154
Climate Control Commands
.............................. 157
Climate Control
System
........................................ 51
Heated Steering Wheel ...................................... 53
Heated Windshield Button ................................ 53
Rear Climate Contr
ol
.......................................... 52
Seat Heaters and V
entilation
............................54
Clock ........................................................................\
. 55
CMBS ......................................................... 27, 29, 108
C
ompact Disc
.......................................................... 61
Compact
Disc Commands
.................................. 158
Condition Indicators .............................................. 28
Contact Us ............................................................. 155
Cross T
raffic Monitor
........................................... 116
Customized F
eatures
............................................. 55
Dashboard
and Ceiling Controls
............................ 2
Destination ............................................................. 84
Detour ....................................................................... 87
Dialing a Number ................................................... 74
Door Mirrors ........................................................... 46
Door Operation ..................................................... 34
Doors........................................................................\
. 32
Childpr
oof Door Locks
....................................... 34
Fr
ont Door Inner Handle
................................... 34
Lock Tab ................................................................ 34
Master Door Lock S
witch
..................................34
DOT
Tire Quality Grading
................................... 150
Driver’
s Knee Airbag
................................................. 9Driving
.....................................................................
88
Adaptiv e Cruise Control ..................................104
Auto Idle Stop ................................................... 100
Blind Spot Information ..................................... 113
Braking ................................................................. 102
Collision Mitigation Braking
System............. 108
ENGINE START/STOP
......................................... 97
Forward
Collision Warning with Pedestrian
Detection............................................................. 107
Integrated Dynamics System
.......................... 101
Lane Departure W
arning
..................................110
Lane Keeping Assist
System
..............................111
Maximum Load Limit ......................................... 90
Multi-View
Rear Camera
..................................115
Paddle shifters ......................................................99
P
arking Sensor System
.....................................114
Refueling ...................................................... 119, 125
Remote
Engine Start
...........................................96
Road Departur
e Mitigation (RDM)
.................112
Sequential Shift Mode ........................................99
Shifting
.................................................................. 98
Starting the Engine
.............................................. 97
Surround View
Camera
.....................................117
Towing a T
railer
....................................................92
Driving Position Memory
System
.......................47
DVD ........................................................................\
... 67
Electric P
ower Steering
.........................................27
Electronic Gear
Selector....................................... 98
E-Mail
........................................................................\
77
Emergency Assistance .......................................... 80
Emergency
Engine Stop
......................................121
Emergency Towing ............................................... 135
Engine and Fuel ..................................................... 153
ENGINE button ....................................................... 96
Engine Compartment C
over
...............................139
Engine Coolant ...................................................... 142
Engine Oil .............................................................. 140
ENGINE STAR
T/STOP
............................................97
Entering a Destination .......................................... 84
EPS ........................................................................\
..... 27
Exterior lights ................................................... 29, 37
F
astening a Seat Belt
...............................................7
FCW .................................................................. 29, 107
Find Nearest Place ................................................. 85
Flat Tire ................................................................... 126
Floor Mats ................................................................ 45
Fluids ....................................................................... 153
FM/AM Radio .......................................................... 59
FM/AM Radio C
ommands
..................................158
Fog lights .................................................................. 29
Foot Brak
e
..............................................................102
Forwar
d Collision Warning with Pedestrian
Detection
......................................................... 27, 107
F
requently Asked Questions
..............................154
Front Airbags
(SRS)
..................................................9