wheel Acura MDX 2017 Owner's Manual
[x] Cancel search | Manufacturer: ACURA, Model Year: 2017, Model line: MDX, Model: Acura MDX 2017Pages: 170, PDF Size: 12.43 MB
Page 115 of 170
108 |
DRIVING
Collision Mitigation Braking System™ (CMBS™)
Can assist you when there is a possibility of your vehicle colliding with a vehicle or a
pedestrian detected in front of yours.
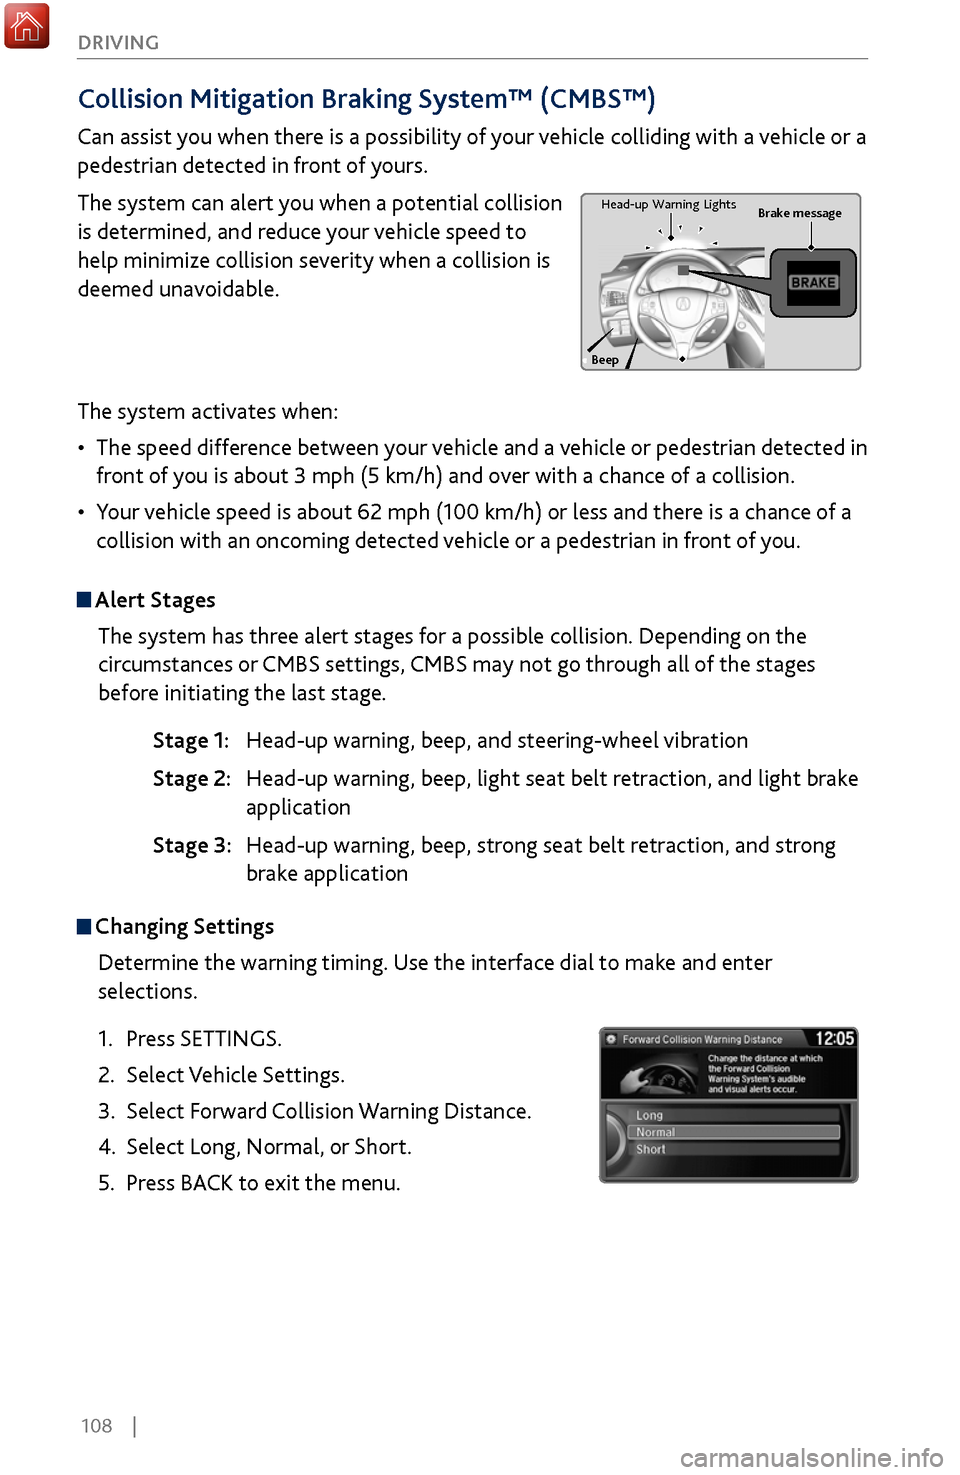
The system can alert you when a potential collision
is determined, and reduce your vehicle speed to
help minimize collision severity when a collision is
deemed unavoidable.
The system activates when:
•
The speed difference between
your vehicle and a vehicle or pedestrian detected in
front of you is about 3 mph (5 km/h) and over with a chance of a collision.
•
Your v
ehicle speed is about 62 mph (100 km/h) or less and there is a chance of a
collision with an oncoming detected vehicle or a pedestrian in front of you.
Alert Stages
The system has three alert stages for a possible collision. Depending on the
circumstances or CMBS settings, CMBS may not go through all of the stages
before initiating the last stage.
Stage 1: Head-up warning, beep
, and steering-wheel vibration
Stage 2: Head-up warning, beep
, light seat belt retraction, and light brake
application
Stage 3:
Head-up warning, beep
, strong seat belt retraction, and strong
brake application
Beep Brake message
Head-up
Warning Lights
Changing Settings
Determine the warning timing. Use the interface dial to make and enter
selections.
1.
Press SETTINGS.
2.
Select Vehicle Settings.
3.
Select Forward
Collision Warning Distance.
4.
Select Long, Normal, or
Short.
5.
Press BACK
to exit the menu.
Page 116 of 170
| 109
DRIVING
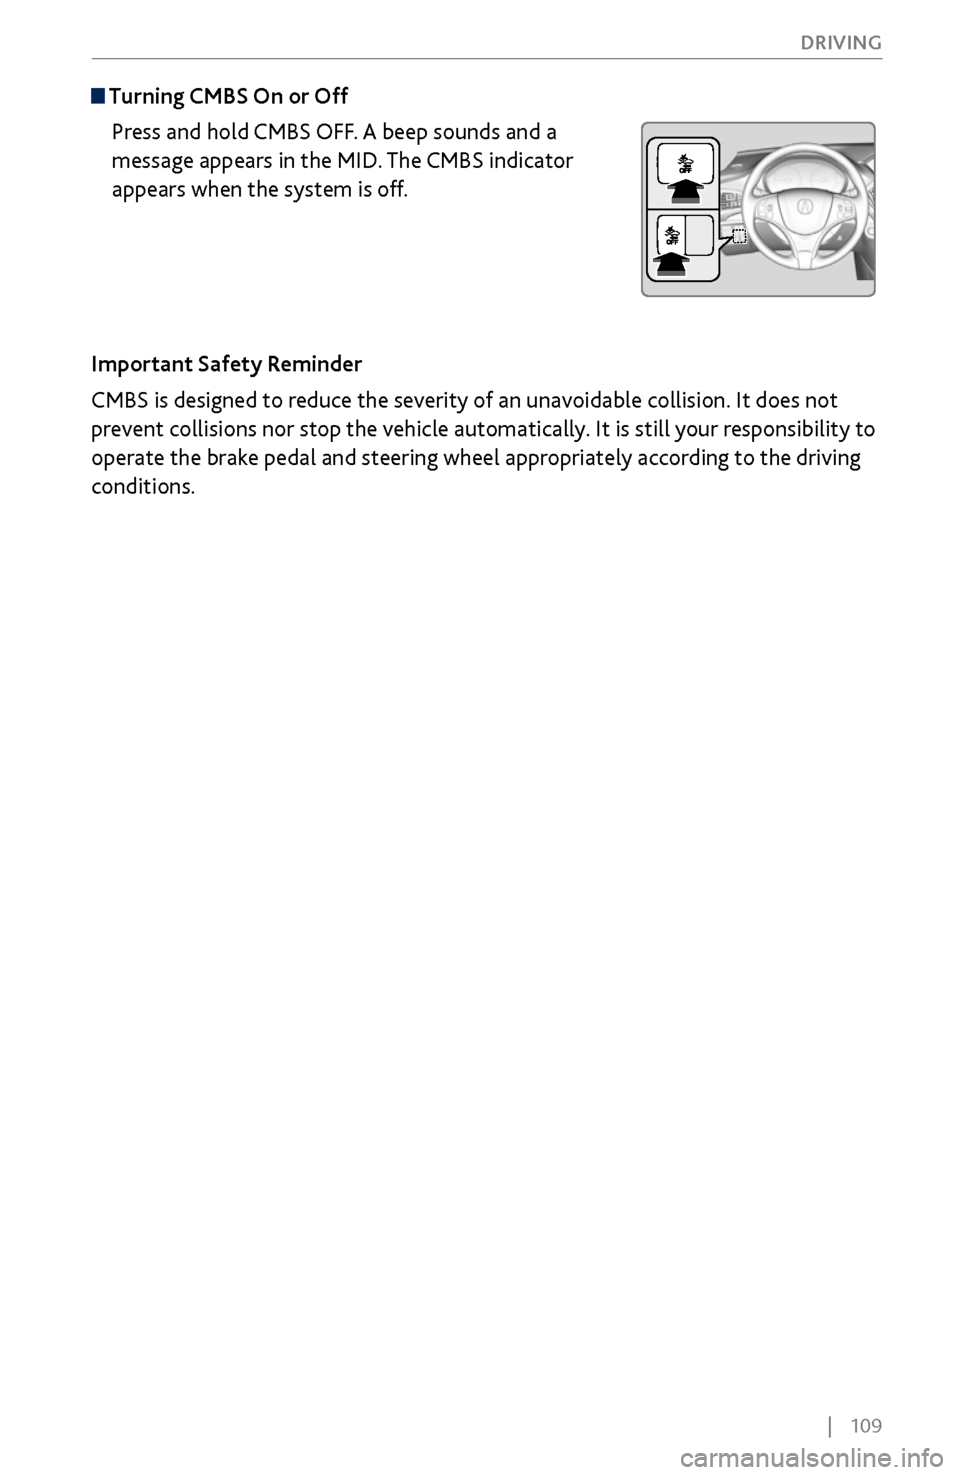
Turning CMBS On or Off
Press and hold CMBS OFF. A beep sounds and a
message appears in the MID. The CMBS indicator
appears when the system is off.
Important Safety Reminder
CMBS is designed to reduce the severity of an unavoidable collision. It does not
prevent collisions nor stop the vehicle automatically. It is still your responsibility to
operate the brake pedal and steering wheel appropriately according to the driving
conditions.
Page 117 of 170
110 |
DRIVING
Lane Departure Warning (LDW)
Alerts you if the system detects a possibility of your vehicle unintentionally
crossing over detected lane markings while driving between 45–90 mph (72–145
km/h).
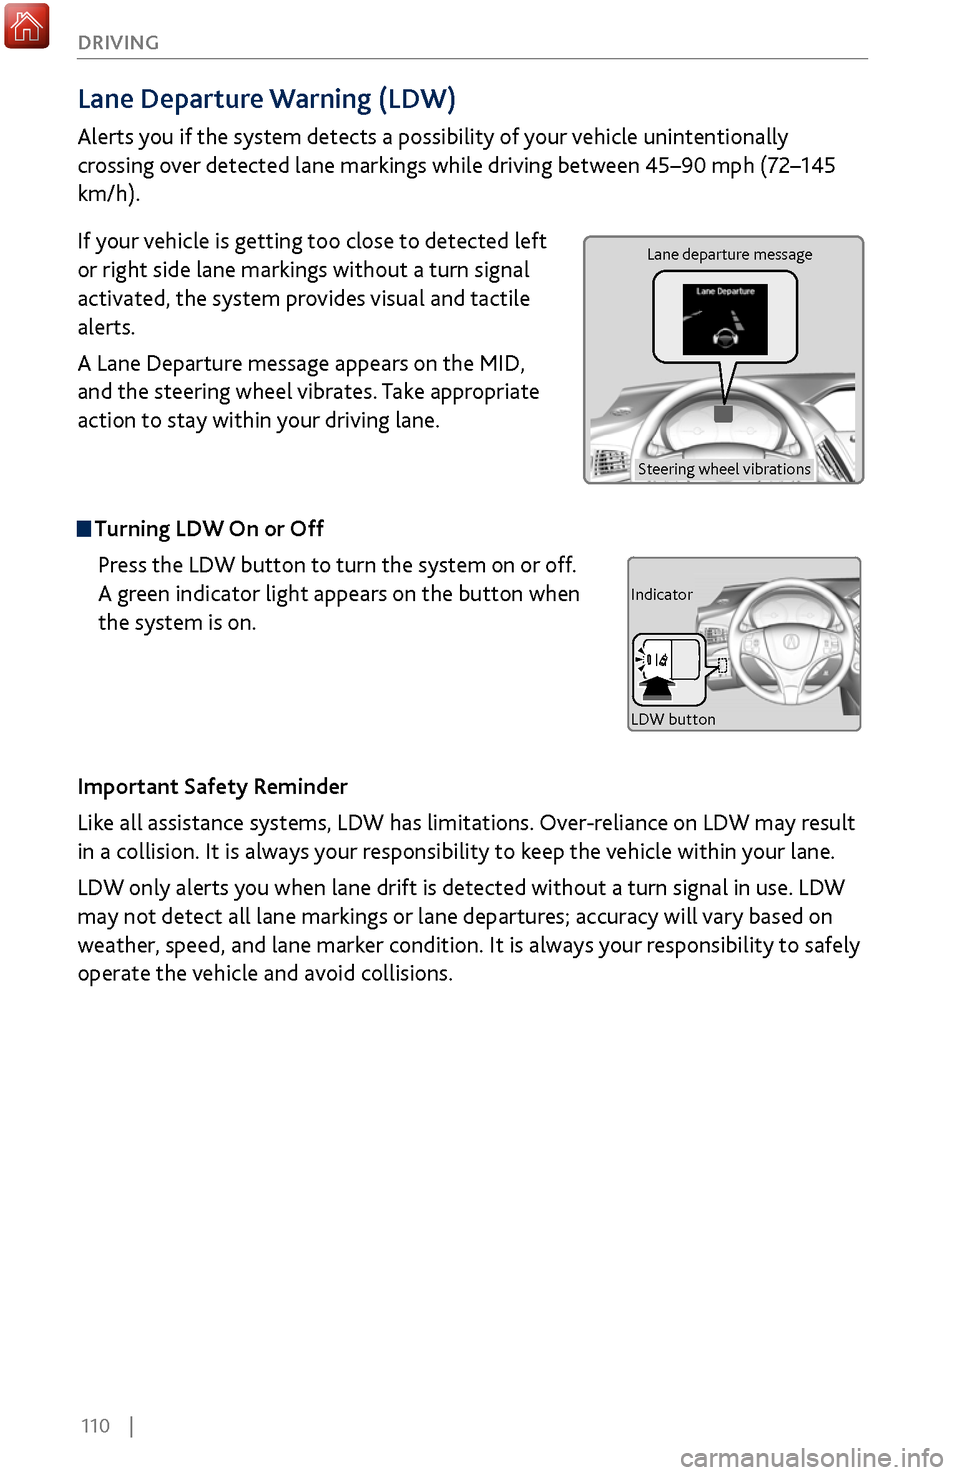
If your vehicle is getting too close to detected left
or right side lane markings without a turn signal
activated, the system provides visual and tactile
alerts.
A Lane Departure message appears on the MID,
and the steering wheel vibrates. Take appropriate
action to stay within your driving lane.
Turning LDW On or Off
Press the LDW button to turn the system on or off.
A green indicator light appears on the button when
the system is on.
Important Safety Reminder
Like all assistance systems, LDW has limitations. Over-reliance on LDW may result
in a collision. It is always your responsibility to keep the vehicle within your lane.
LDW only alerts you when lane drift is detected without a turn signal in use. LDW
may not detect all lane markings or lane departures; accuracy will vary based on
weather, speed, and lane marker condition. It is always your responsibility to safely
operate the vehicle and avoid collisions.
Lane departure message
Steering wheel vibrations
Indicator
LDW button
Page 118 of 170
| 111
DRIVING
Lane Keeping Assist System (LKAS)
Provides steering input to help keep the vehicle in the middle of a detected lane and
visual and tactile alerts if the vehicle is detected drifting out of its lane while driving
between 45–90 mph (72–145 km/h).
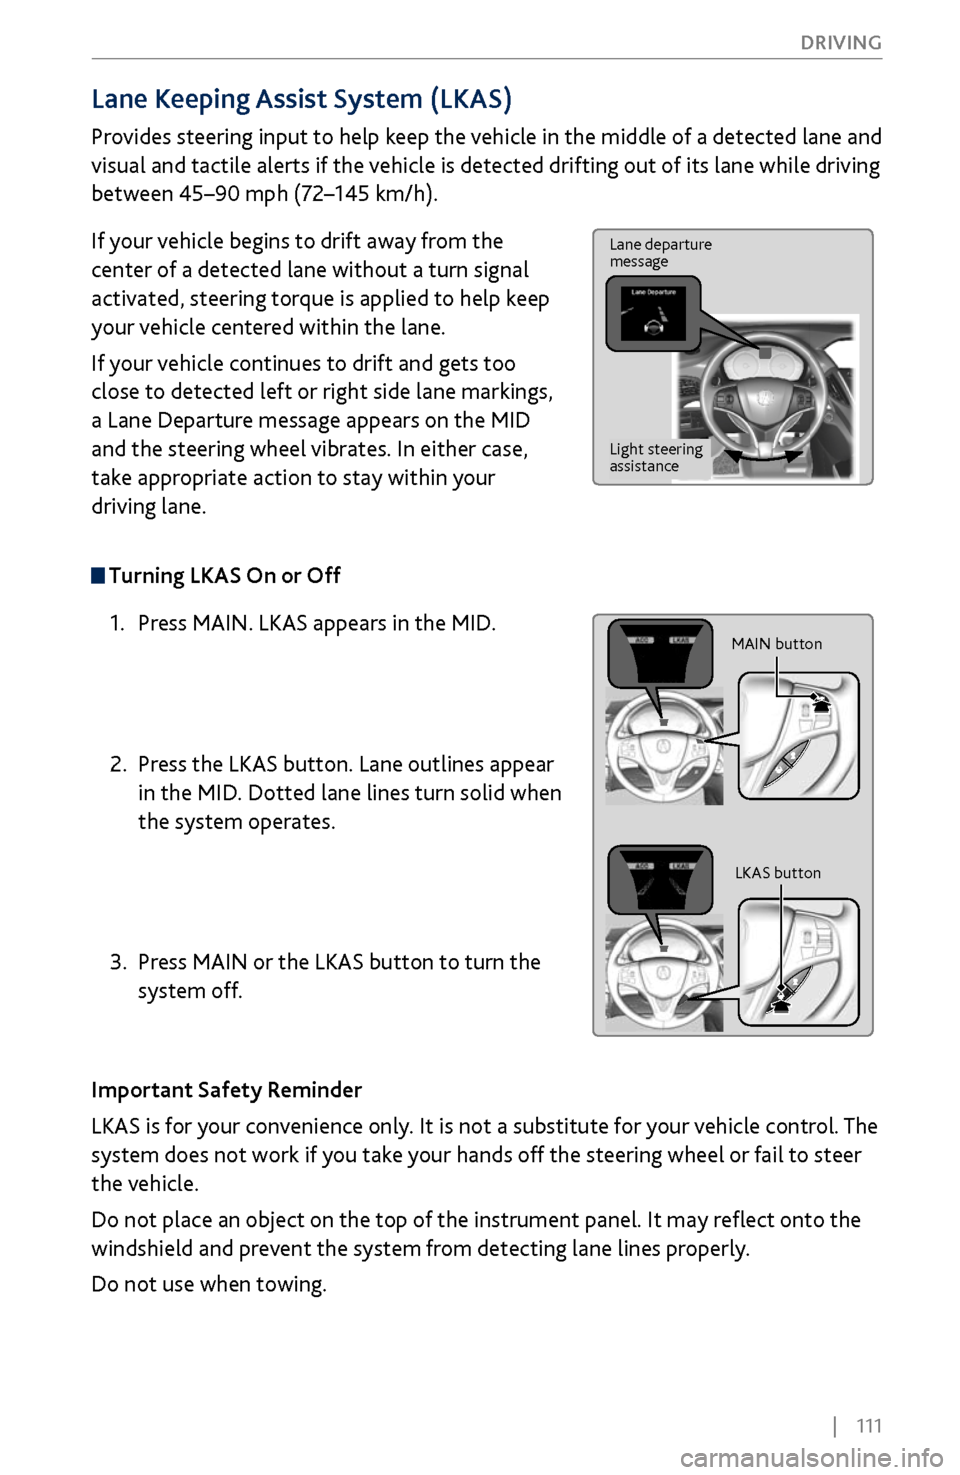
If your vehicle begins to drift away from the
center of a detected lane without a turn signal
activated, steering torque is applied to help keep
your vehicle centered within the lane.
If your vehicle continues to drift and gets too
close to detected left or right side lane markings,
a Lane Departure message appears on the MID
and the steering wheel vibrates. In either case,
take appropriate action to stay within your
driving lane.
Turning LKAS On or Off
1.
Press MAIN. LKAS appears in the MID
.
2.
Press the LKAS button. Lane
outlines appear
in the MID. Dotted lane lines turn solid when
the system operates.
3.
Press MAIN or the
LKAS button to turn the
system off.
Important Safety Reminder
LKAS is for your convenience only. It is not a substitute for your vehicle control. The
system does not work if you take your hands off the steering wheel or fail to steer
the vehicle.
Do not place an object on the top of the instrument panel. It may reflect onto the
windshield and prevent the system from detecting lane lines properly.
Do not use when towing.
Lane departure
message
Light steering
assistance
MAIN button
LKAS button
Page 119 of 170
112 |
DRIVING
Road Departure Mitigation (RDM)
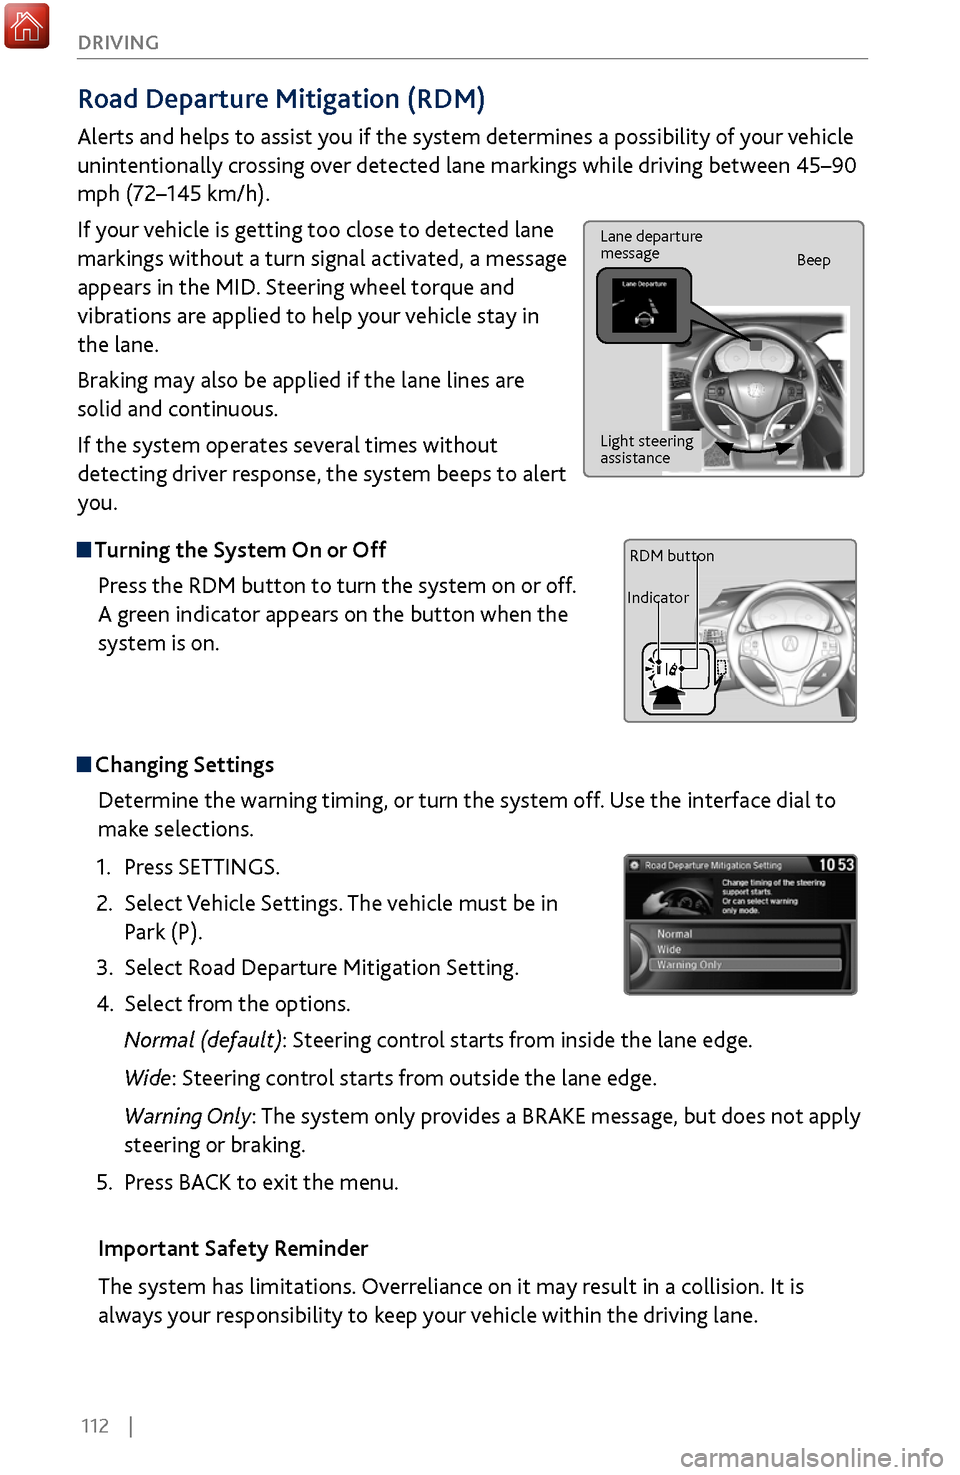
Alerts and helps to assist you if the system determines a possibility of your vehicle
unintentionally crossing over detected lane markings while driving between 45–90
mph (72–145 km/h).
If your vehicle is getting too close to detected lane
markings without a turn signal activated, a message
appears in the MID. Steering wheel torque and
vibrations are applied to help your vehicle stay in
the lane.
Braking may also be applied if the lane lines are
solid and continuous.
If the system operates several times without
detecting driver response, the system beeps to alert
you.
Turning the System On or Off
Press the RDM button to turn the system on or off.
A green indicator appears on the button when the
system is on.
Steering vibrations
Changing SettingsDetermine the warning timing, or turn the system off. Use the interface dial to
make selections.
1.
Press SETTINGS.
2.
Select Vehicle
Settings. The vehicle must be in
Park (P).
3.
Select Road Departure Mitigation
Setting.
4.
Select from the options.
Normal (def
ault): Steering control starts from inside the lane edge.
Wide: Steering control starts from outside the lane edge.
Warning Only: The system only provides a BRAKE message, but does not apply
steering or braking.
5.
Press BACK
to exit the menu.
Important Safety Reminder
The system has limitations. Overreliance on it may result in a collision. It is
always your responsibility to keep your vehicle within the driving lane.
Lane departure
message Beep
Light steering
assistance
IndicatorRDM button
Page 122 of 170
| 115
DRIVING
Multi-View Rear Camera*
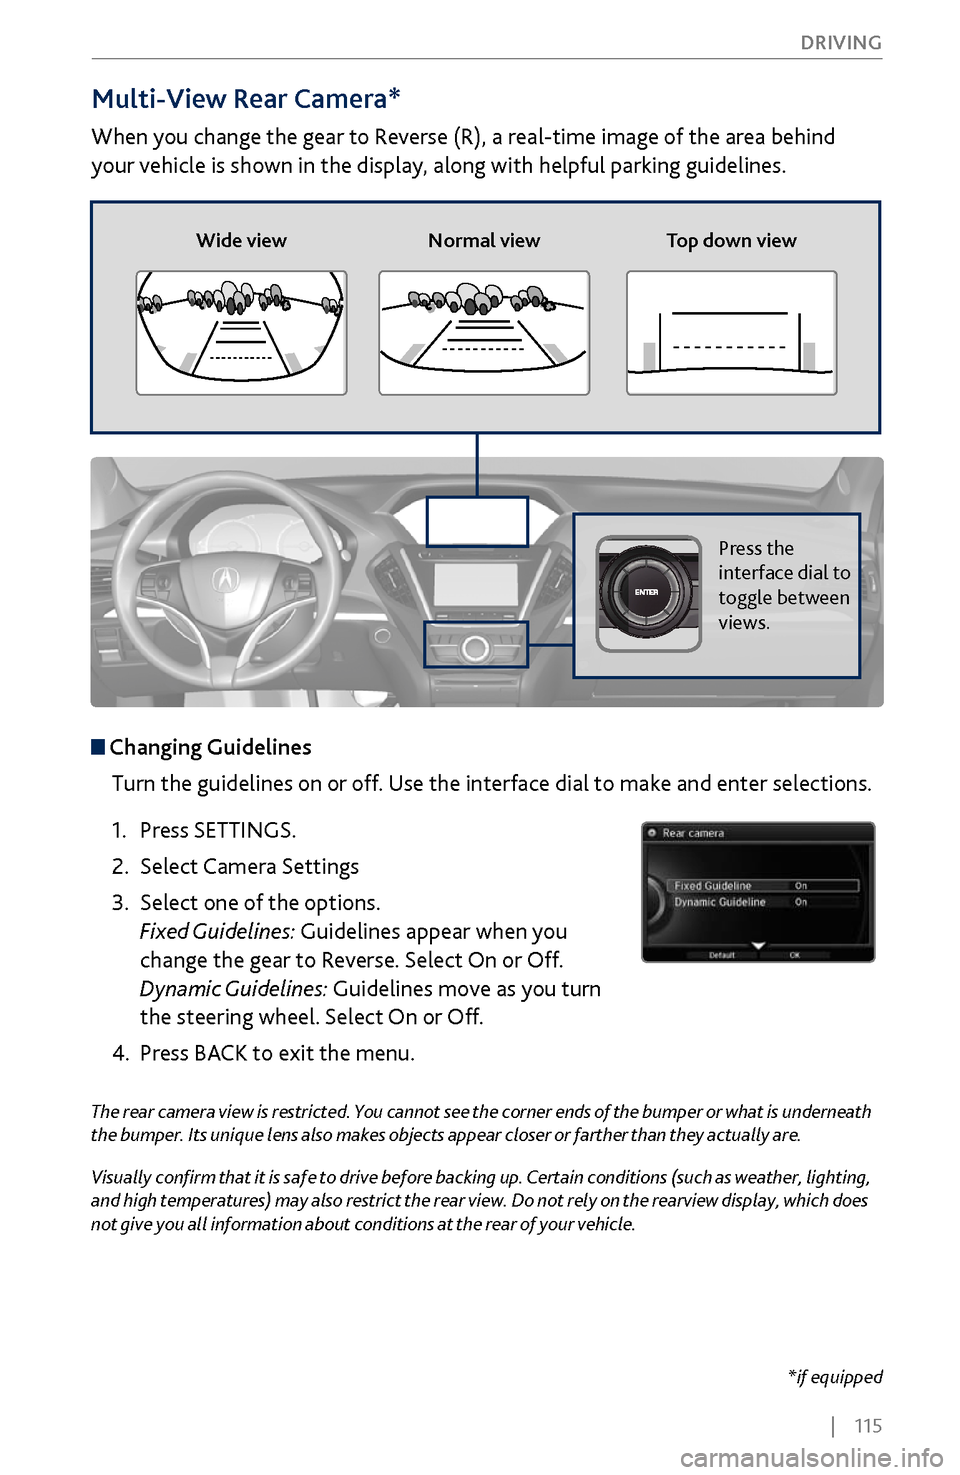
When you change the gear to Reverse (R), a real-time image of the area behind
your vehicle is shown in the display, along with helpful parking guidelines.
The rear camera view is restricted. You cannot see the corner ends of the bumper or what is underneath
the bumper. Its unique lens also makes objects appear closer or farther than they actually are.
Visually confirm that it is safe to drive before backing up. Certain conditions (such as weather, lighting,
and high temperatures) may also restrict the rear view. Do not rely on the rearview display, which does
not give you all information about conditions at the rear of your vehicle.
Wide view
Normal view Top down view
Press the
interface dial to
toggle between
views.
Changing Guidelines
Turn the guidelines on or off. Use the interface dial to make and enter selections.
1.
Press SETTINGS.
2.
Select Camera Settings
3.
Select one of the options.
Fixed Guidelines:
Guidelines appear when you
change the gear to Reverse. Select On or Off.
Dynamic Guidelines: Guidelines move as you turn
the steering wheel. Select On or Off.
4.
Press BACK
to exit the menu.
*if equipped
Page 128 of 170
| 121
HANDLING THE UNEXPECTED
After the Engine Starts
Once your vehicle’s engine has started, remove the jumper cables in the following
order:
1.
Disconnect the jumper cable fr
om your vehicle’s ground.
2.
Disconnect the other end
of the jumper cable from the booster battery (-)
terminal.
3.
Disconnect the jumper cable fr
om your vehicle’s battery (+) terminal.
4.
Disconnect the other end
of the jumper cable from the booster battery (+)
terminal.
5.
Have y
our vehicle inspected by a nearby service station or a dealer.
A battery can explode if you do not follow the correct procedure, seriously
injuring anyone nearby.
Keep all sparks, open flames, and smoking materials away from the battery.
WARNING
Emergency Engine Stop
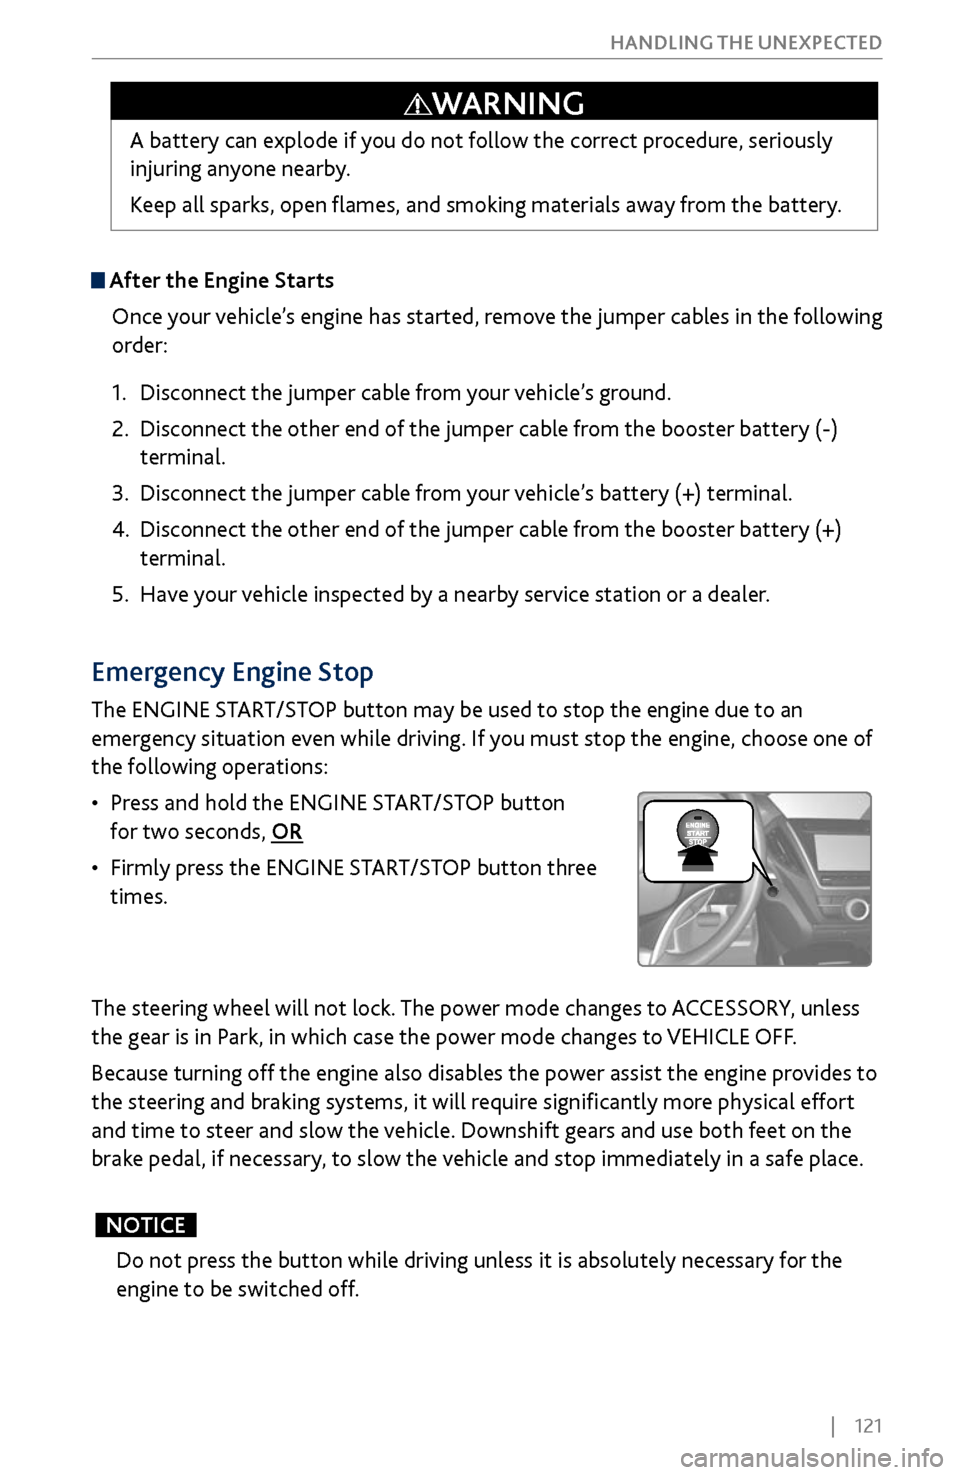
The ENGINE START/STOP button may be used to stop the engine due to an
emergency situation even while driving. If you must stop the engine, choose one of
the following operations:
•
Press and hold the ENGINE
START/STOP button
for two seconds, OR
•
Firmly press
the ENGINE START/STOP button three
times.
The steering wheel will not lock. The power mode changes to ACCESSORY, unless
the gear is in Park, in which case the power mode changes to VEHICLE OFF.
Because turning off the engine also disables the power assist the engine provides to
the steering and braking systems, it will require significantly more physical effort
and time to steer and slow the vehicle. Downshift gears and use both feet on the
brake pedal, if necessary, to slow the vehicle and stop immediately in a safe place.
Do not press the button while driving unless it is absolutely necessary for the
engine to be switched off.
NOTICE
Page 130 of 170
| 123
HANDLING THE UNEXPECTED
Tire Pressure Monitoring System (TPMS)
Monitors the tire pressure while you are driving.
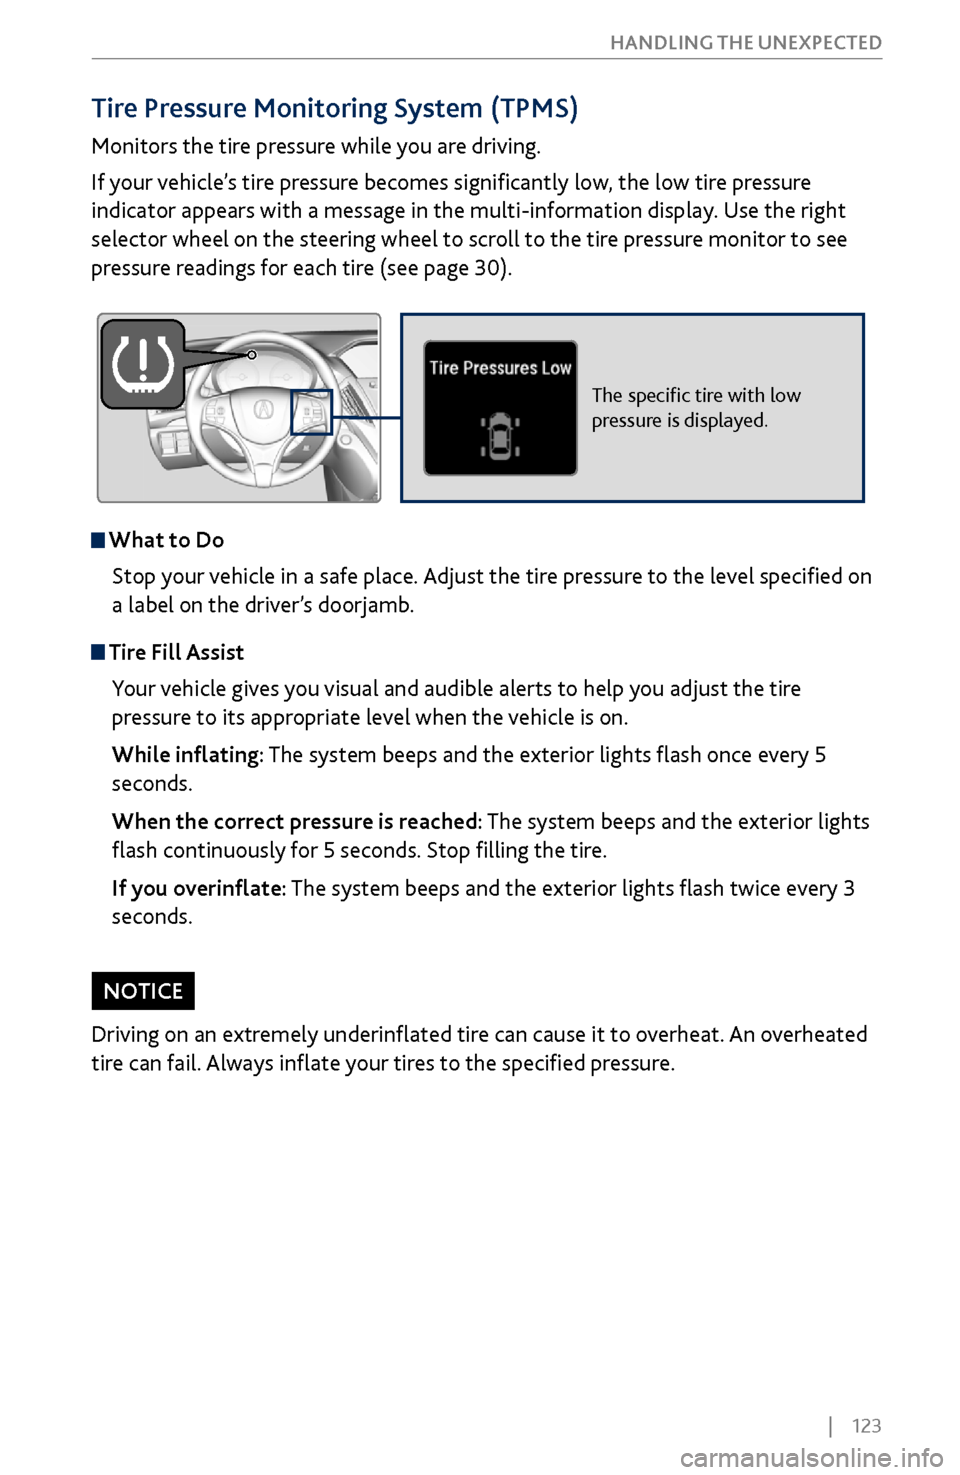
If your vehicle’s tire pressure becomes significantly low, the low tire pressure
indicator appears with a message in the multi-information display. Use the right
selector wheel on the steering wheel to scroll to the tire pressure monitor to see
pressure readings for each tire (see page 30).
The specific tire with low
pressure is displayed.
What to Do
Stop your vehicle in a safe place. Adjust the tire pressure to the level specified on
a label on the driver’s doorjamb.
Tire Fill AssistYour vehicle gives you visual and audible alerts to help you adjust the tire
pressure to its appropriate level when the vehicle is on.
While inflating: The system beeps and the exterior lights flash once every 5
seconds.
When the correct pressure is reached: The system beeps and the exterior lights
flash continuously for 5 seconds. Stop filling the tire.
If you overinflate: The system beeps and the exterior lights flash twice every 3
seconds.
Driving on an extremely underinflated tire can cause it to overheat. An overheated
tire can fail. Always inflate your tires to the specified pressure.
NOTICE
Page 131 of 170
124 |
HANDLING THE UNEXPECTED
Tire Pressure Monitoring System (TPMS) - Required Federal Explanation
Each tire, including the spare (if provided), should be checked monthly
when cold and inflated to the inflation pressure recommended by the
vehicle manufacturer on the vehicle placard or tire inflation pressure
label.
(If your vehicle has tires of a different size than the size indicated on the
vehicle placard or tire inflation pressure label, you should determine the
proper tire inflation pressure for those tires.)
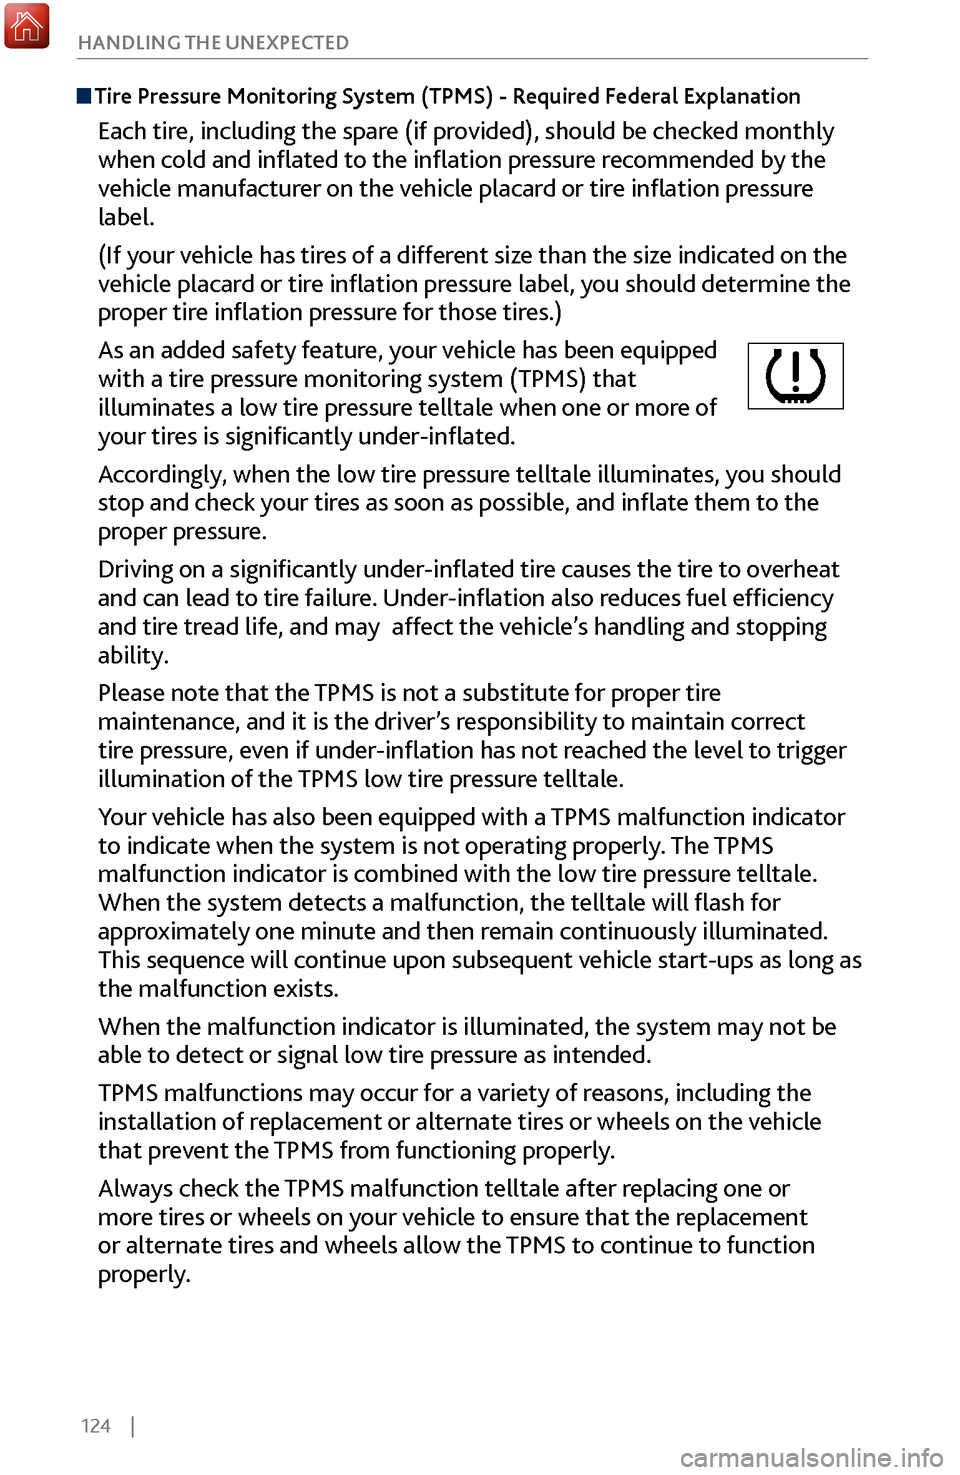
As an added safety feature, your vehicle has been equipped
with a tire pressure monitoring system (TPMS) that
illuminates a low tire pressure telltale when one or more of
your tires is significantly under-inflated.
Accordingly, when the low tire pressure telltale illuminates, you should
stop and check your tires as soon as possible, and inflate them to the
proper pressure.
Driving on a significantly under-inflated tire causes the tire to overheat
and can lead to tire failure. Under-inflation also reduces fuel efficiency
and tire tread life, and may affect the vehicle’s handling and stopping
ability.
Please note that the TPMS is not a substitute for proper tire
maintenance, and it is the driver’s responsibility to maintain correct
tire pressure, even if under-inflation has not reached the level to trigger
illumination of the TPMS low tire pressure telltale.
Your vehicle has also been equipped with a TPMS malfunction indicator
to indicate when the system is not operating properly. The TPMS
malfunction indicator is combined with the low tire pressure telltale.
When the system detects a malfunction, the telltale will flash for
approximately one minute and then remain continuously illuminated.
This sequence will continue upon subsequent vehicle start-ups as long as
the malfunction exists.
When the malfunction indicator is illuminated, the system may not be
able to detect or signal low tire pressure as intended.
TPMS malfunctions may occur for a variety of reasons, including the
installation of replacement or alternate tires or wheels on the vehicle
that prevent the TPMS from functioning properly.
Always check the TPMS malfunction telltale after replacing one or
more tires or wheels on your vehicle to ensure that the replacement
or alternate tires and wheels allow the TPMS to continue to function
properly.
Page 133 of 170
126 |
HANDLING THE UNEXPECTED
Handling a Flat Tire
If a tire goes flat while driving, grasp the steering wheel firmly, and brake gradually
to reduce speed. Stop in a safe place. Replace the flat tire with a compact spare tire.
Go to a dealer as soon as possible to have the full-size tire repaired or replaced.
Changing a Flat Tire*
Before Changing the Tire
1.
Park the
vehicle on firm, level, and non-slippery surface.
2.
Change the gear to P
ark (P), and apply the parking brake.
3.
Turn on the hazard
warning lights and turn the vehicle off.
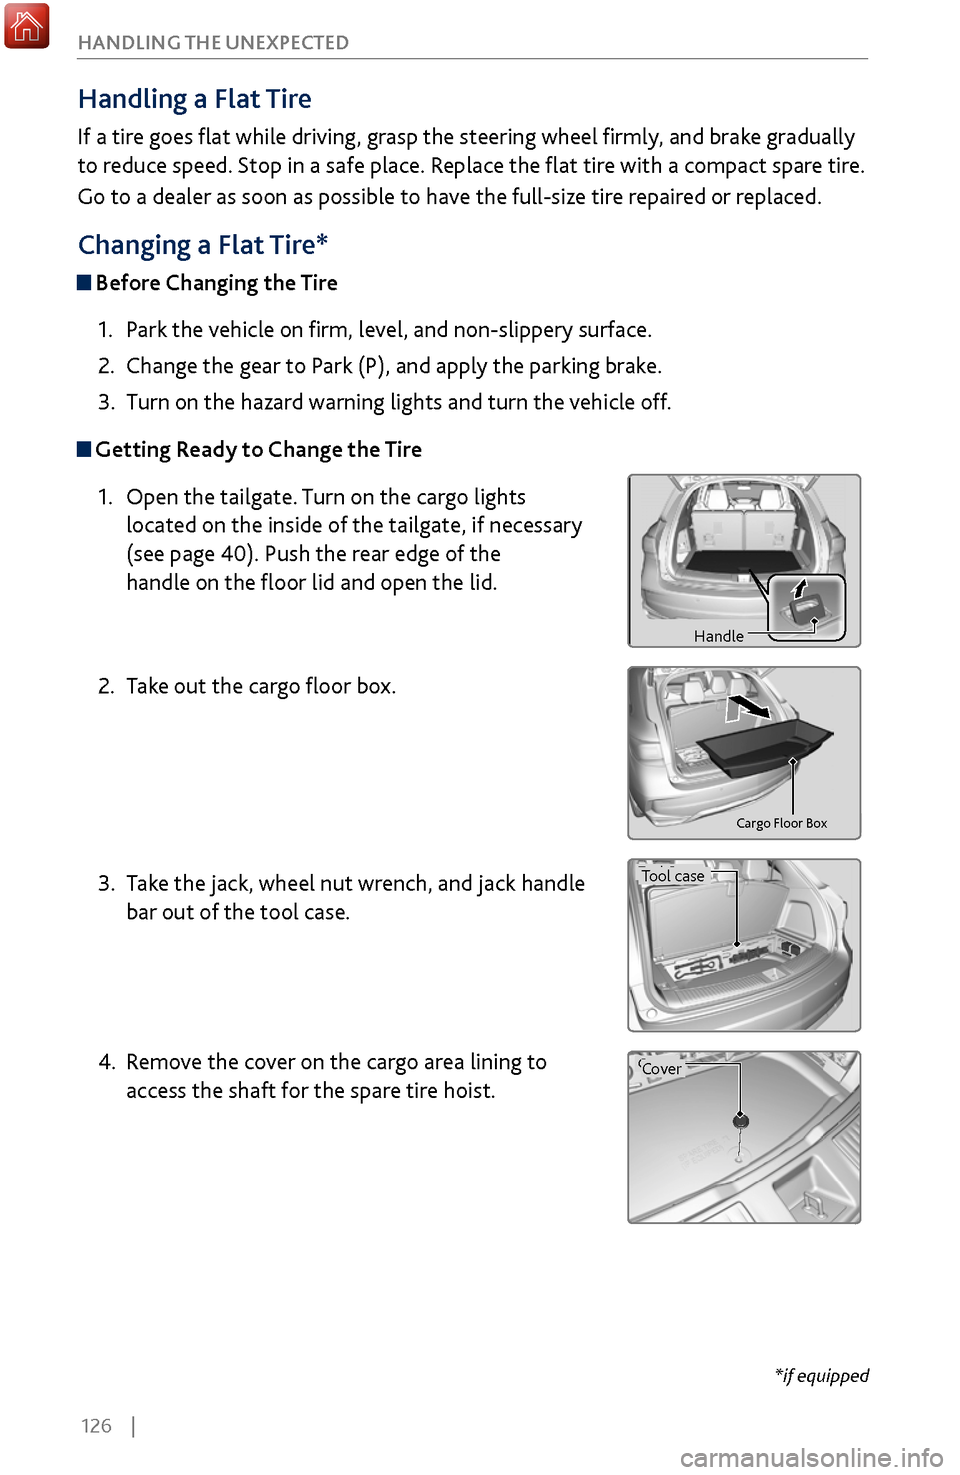
Getting Ready to Change the Tire1.
Open the tailgate. Turn on the car
go lights
located on the inside of the tailgate, if necessary
(see page 40). Push the rear edge of the
handle on the floor lid and open the lid.
2.
Take out the
cargo floor box.
3.
Take
the jack, wheel nut wrench, and jack handle
bar out of the tool case.
4.
Remov
e the cover on the cargo area lining to
access the shaft for the spare tire hoist.
Handl e
Cargo Floor Box
Tool Case
Cove r
Wheel Nut Wrench
Jack Handle Bar
Bracket
Handl e
Cargo Floor Box
Tool Case
Cove r
Wheel Nut Wrench
Jack Handle Bar
Bracket
*if equipped
HandleHandl e
Cargo Floor Box
Tool Case
Cove r
Wheel Nut Wrench
Jack Handle Bar
Bracket
Tool case
Handl e
Cargo Floor Box
Tool Case
Cove r
Wheel Nut Wrench
Jack Handle Bar
Bracket
Cover