accessory mode Acura MDX 2019 User Guide
[x] Cancel search | Manufacturer: ACURA, Model Year: 2019, Model line: MDX, Model: Acura MDX 2019Pages: 701, PDF Size: 38.75 MB
Page 182 of 701
Continued181
uuOperating the Switches Around the Steering Wheel uWipers and Washers
Controls
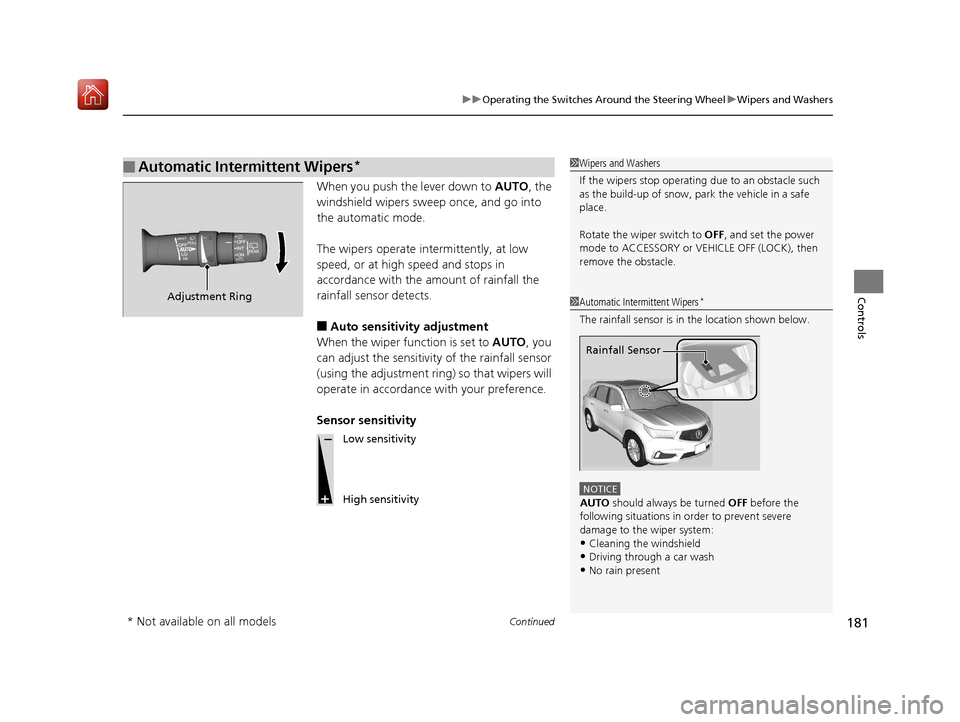
When you push the lever down to AUTO, the
windshield wipers sweep once, and go into
the automatic mode.
The wipers operate intermittently, at low
speed, or at high speed and stops in
accordance with the amount of rainfall the
rainfall sensor detects.
■Auto sensitivity adjustment
When the wiper function is set to AUTO, you
can adjust the sensitivity of the rainfall sensor
(using the adjustment ring) so that wipers will
operate in accordance with your preference.
Sensor sensitivity
■Automatic Intermittent Wipers*1 Wipers and Washers
If the wipers st op operating due to an obstacle such
as the build-up of snow, pa rk the vehicle in a safe
place.
Rotate the wiper switch to OFF, and set the power
mode to ACCESSORY or VEHICLE OFF (LOCK), then
remove the obstacle.
1 Automatic Intermittent Wipers*
The rainfall sensor is in the location shown below.
NOTICE
AUTO should always be turned OFF before the
following situations in order to prevent severe
damage to the wiper system:
•Cleaning the windshield
•Driving through a car wash•No rain present
Rainfall Sensor
Adjustment Ring
Low sensitivity
High sensitivity
* Not available on all models
19 ACURA MDX-31TZ56510.book 181 ページ 2018年12月11日 火曜日 午後4時47分
Page 187 of 701
186
uuOperating the Switches Around the Steering Wheel uDriving Position Memory System
Controls
Driving Position Memory System
You can store two driver’s seat (except fo r power lumbar), steering wheel and door
mirror positions with the driving position memory system.
When you unlock and open th e driver’s door with a remote transmitter, or keyless
access system, door mirrors adjust to one of the two preset positions and the seat
adjusts to retracted positions of one of the two preset positions automatically.
The steering wheel and the seat will move to the stored position when you set the
power mode to ACCESSORY.
When you enter the vehicle, the MID brie fly shows you which remote transmitter
you used to unlock the vehicle.
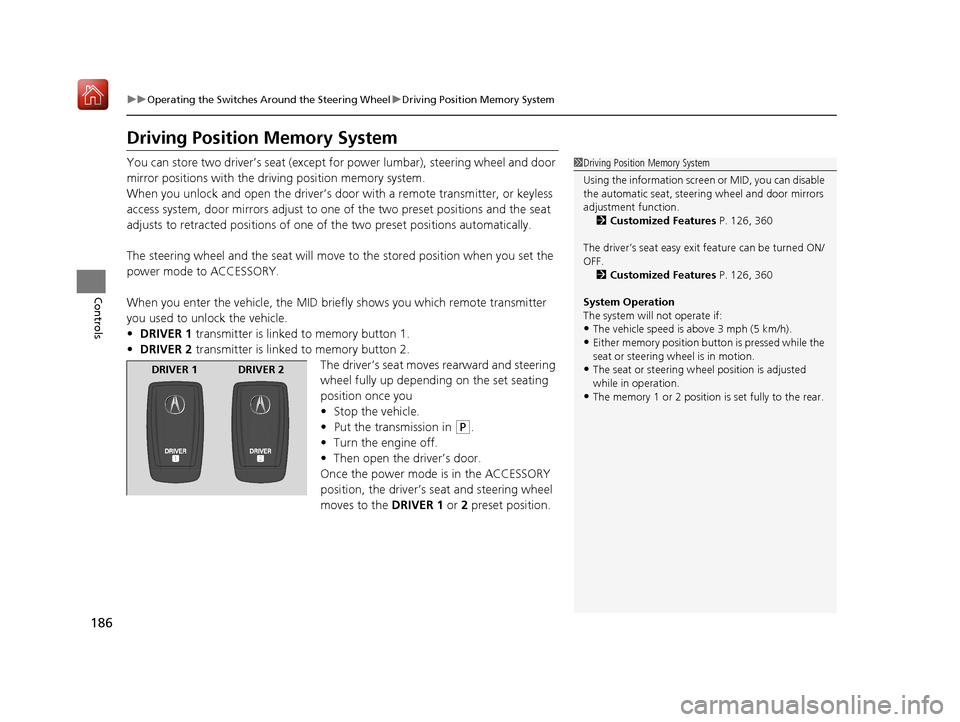
• DRIVER 1 transmitter is linked to memory button 1.
• DRIVER 2 transmitter is linked to memory button 2.
The driver’s seat moves rearward and steering
wheel fully up depending on the set seating
position once you
•Stop the vehicle.
• Put the transmission in
(P.
• Turn the engine off.
• Then open the driver’s door.
Once the power mode is in the ACCESSORY
position, the driver’s seat and steering wheel
moves to the DRIVER 1 or 2 preset position.
1Driving Position Memory System
Using the information screen or MID, you can disable
the automatic seat, steeri ng wheel and door mirrors
adjustment function. 2 Customized Features P. 126, 360
The driver’s seat easy exit feature can be turned ON/
OFF. 2 Customized Features P. 126, 360
System Operation
The system will not operate if:
•The vehicle speed is above 3 mph (5 km/h).•Either memory position button is pressed while the
seat or steering wheel is in motion.
•The seat or steering wheel position is adjusted
while in operation.
•The memory 1 or 2 position is set fully to the rear.
DRIVER 1 DRIVER 2
19 ACURA MDX-31TZ56510.book 186 ページ 2018年12月11日 火曜日 午後4時47分
Page 208 of 701
207Continued
Controls
Interior Lights/Interior Convenience Items
Interior Lights
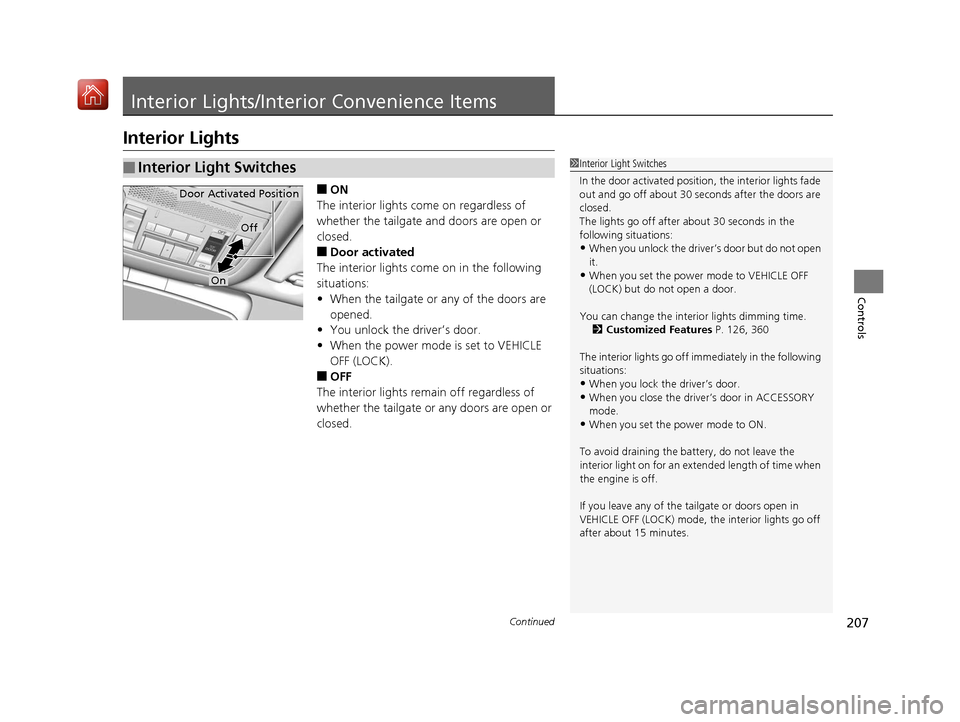
■ON
The interior lights come on regardless of
whether the tailgate and doors are open or
closed.
■Door activated
The interior lights come on in the following
situations:
• When the tailgate or any of the doors are
opened.
• You unlock the driver’s door.
• When the power mode is set to VEHICLE
OFF (LOCK).
■OFF
The interior lights remain off regardless of
whether the tailgate or any doors are open or
closed.
■Interior Light Switches1 Interior Light Switches
In the door activated position, the interior lights fade
out and go off about 30 se conds after the doors are
closed.
The lights go off after about 30 seconds in the
following situations:
•When you unlock the driver’s door but do not open
it.
•When you set the power mode to VEHICLE OFF
(LOCK) but do not open a door.
You can change the interi or lights dimming time.
2 Customized Features P. 126, 360
The interior lights go off i mmediately in the following
situations:
•When you lock the driver’s door.
•When you close the driver’s door in ACCESSORY
mode.
•When you set the power mode to ON.
To avoid draining the ba ttery, do not leave the
interior light on for an extended length of time when
the engine is off.
If you leave any of the tailgate or doors open in
VEHICLE OFF (LOCK) mode, th e interior lights go off
after about 15 minutes.
Door Activated Position
Off
On
19 ACURA MDX-31TZ56510.book 207 ページ 2018年12月11日 火曜日 午後4時47分
Page 215 of 701
uuInterior Lights/Interior Convenience Items uInterior Convenience Items
214
Controls
The accessory power sockets can be used when the power mode is in ACCESSORY
or ON.
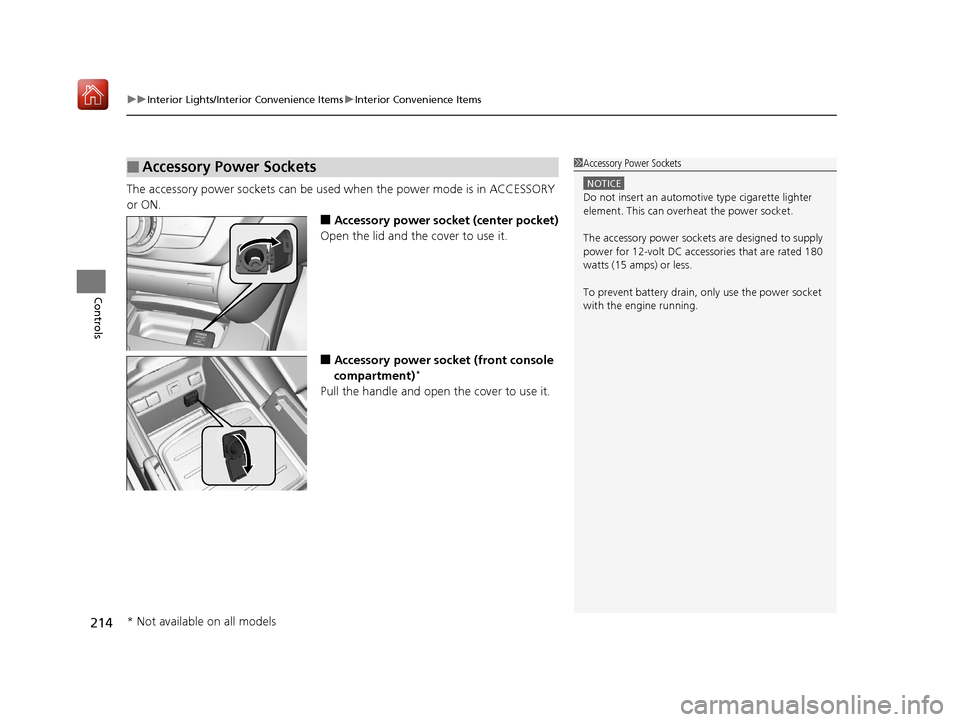
■Accessory power socket (center pocket)
Open the lid and the cover to use it.
■Accessory power socket (front console
compartment)*
Pull the handle and open the cover to use it.
■Accessory Power Sockets1 Accessory Power Sockets
NOTICE
Do not insert an automotive type cigarette lighter
element. This can overheat the power socket.
The accessory power socket s are designed to supply
power for 12-volt DC accessories that are rated 180
watts (15 amps) or less.
To prevent battery drain, only use the power socket
with the engine running.
* Not available on all models
19 ACURA MDX-31TZ56510.book 214 ページ 2018年12月11日 火曜日 午後4時47分
Page 216 of 701

Continued215
uuInterior Lights/Interior Convenience Items uInterior Convenience Items
Controls
■Accessory power socket (cargo area)
Open the cover to use it.
The AC power outlet can be used when the engine is running.
Open the cover to use it. Plug in the appliance
slightly, turn it 90° clockwise, then push it all
the way.
■AC Power Outlet*1AC Power Outlet*
NOTICE
Do not use the AC power outlet for electric
appliances that require hi gh initial peak wattage,
such as cathode-ray tube type televisions,
refrigerators, electric pumps, etc. It is not suitable for
devices that process precis e data, such as medical
equipment, and that require an extremely stable
power supply, such as microcomputer-controlled
electric blankets, touc h sensor lamps, etc.
The AC power outlet is desi gned to supply power for
up to 115 volt appliances that are rated 150 watts or
less.
Continued use of any elec tric appliance/device
exceeding these ratings may result in damage to the
appliance/device.
* Not available on all models
19 ACURA MDX-31TZ56510.book 215 ページ 2018年12月11日 火曜日 午後4時47分
Page 236 of 701
235
uuAudio System uUSB Ports
Continued
Features
USB Ports
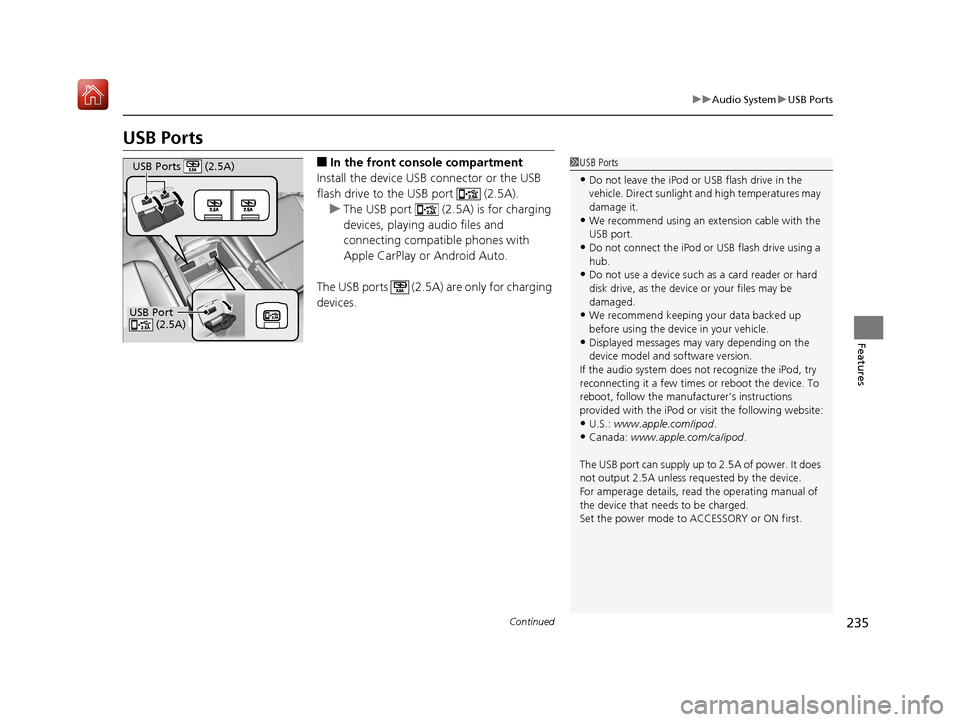
■In the front console compartment
Install the device USB connector or the USB
flash drive to the USB port (2.5A). u The USB port (2.5A) is for charging
devices, playing audio files and
connecting compatib le phones with
Apple CarPlay or Android Auto.
The USB ports (2.5A) are only for charging
devices.1 USB Ports
•Do not leave the iPod or USB flash drive in the
vehicle. Direct sunlight and high temperatures may
damage it.
•We recommend using an extension cable with the
USB port.
•Do not connect the iPod or USB flash drive using a
hub.
•Do not use a device such as a card reader or hard
disk drive, as the device or your files may be
damaged.
•We recommend keeping y our data backed up
before using the device in your vehicle.
•Displayed messages may vary depending on the
device model and software version.
If the audio system does not recognize the iPod, try
reconnecting it a few times or reboot the device. To
reboot, follow the manufac turer’s instructions
provided with the iPod or visit the following website:
•U.S.: www.apple.com/ipod .•Canada: www.apple.com/ca/ipod.
The USB port can supply up to 2.5A of power. It does
not output 2.5A unless requested by the device.
For amperage details, read the operating manual of
the device that ne eds to be charged.
Set the power mode to ACCESSORY or ON first.
USB Port (2.5A)
USB Ports (2.5A)
19 ACURA MDX-31TZ56510.book 235 ページ 2018年12月11日 火曜日 午後4時47分
Page 242 of 701
241
Features
Audio System Basic Operation
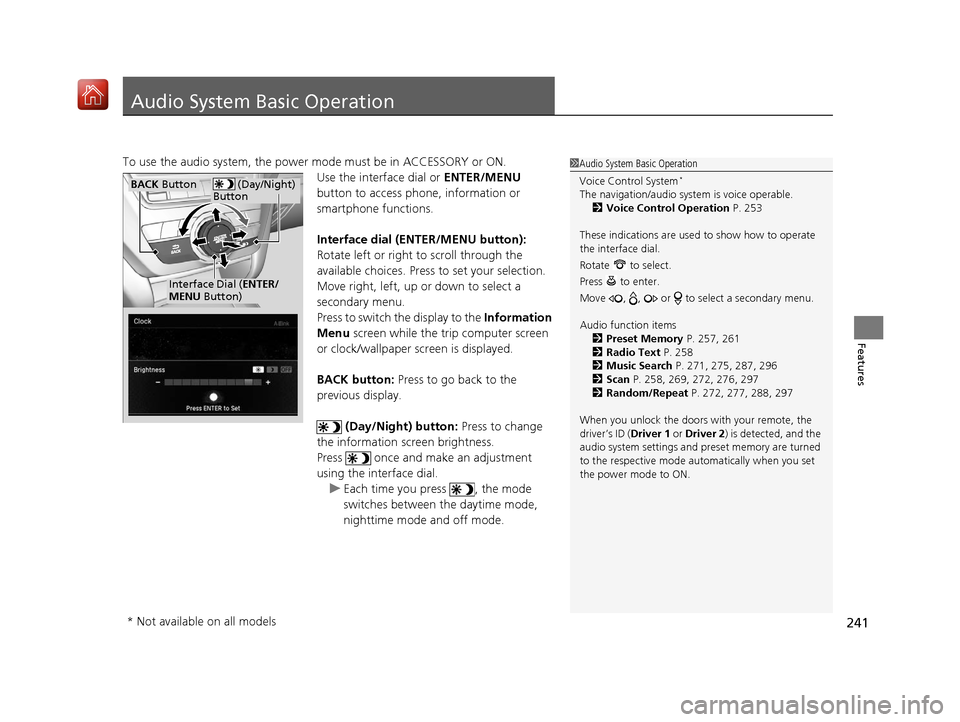
To use the audio system, the power mode must be in ACCESSORY or ON.Use the interface dial or ENTER/MENU
button to access phone, information or
smartphone functions.
Interface dial (E NTER/MENU button):
Rotate left or right to scroll through the
available choices. Press to set your selection.
Move right, left, up or down to select a
secondary menu.
Press to switch the display to the Information
Menu screen while the trip computer screen
or clock/wallpaper screen is displayed.
BACK button: Press to go back to the
previous display.
(Day/Night) button: Press to change
the information screen brightness.
Press once and make an adjustment
using the interface dial. u Each time you press , the mode
switches between the daytime mode,
nighttime mode and off mode.1Audio System Basic Operation
Voice Control System
*
The navigation/audio system is voice operable.
2 Voice Control Operation P. 253
These indications are used to show how to operate
the interface dial.
Rotate to select.
Press to enter.
Move , , or to se lect a secondary menu.
Audio function items 2 Preset Memory P. 257, 261
2 Radio Text P. 258
2 Music Search P. 271, 275, 287, 296
2 Scan P. 258, 269, 272, 276, 297
2 Random/Repeat P. 272, 277, 288, 297
When you unlock the doors with your remote, the
driver’s ID ( Driver 1 or Driver 2) is detected, and the
audio system settings and pr eset memory are turned
to the respective mode automatically when you set
the power mode to ON. (Day/Night)
ButtonBACK Button
Interface Dial ( ENTER/
MENU Button)
* Not available on all models
19 ACURA MDX-31TZ56510.book 241 ページ 2018年12月11日 火曜日 午後4時47分
Page 342 of 701
341
uuRear Entertainment System (RES)*uOperating the System
Features
Operating the System
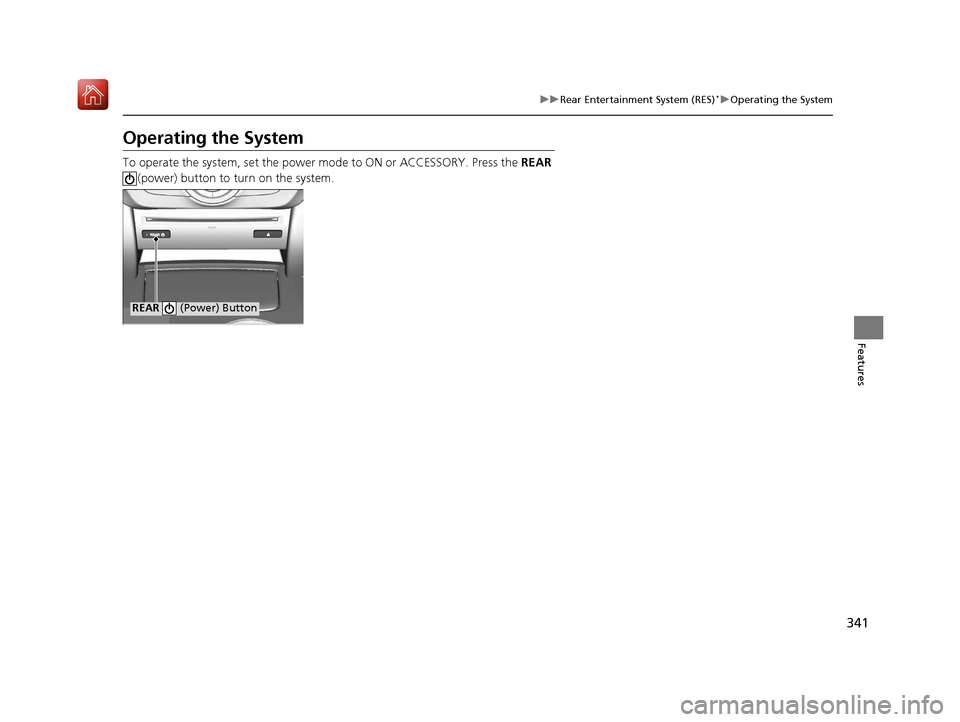
To operate the system, set the power mode to ON or ACCESSORY. Press the REAR
(power) button to turn on the system.
REAR (Power) Button
19 ACURA MDX-31TZ56510.book 341 ページ 2018年12月11日 火曜日 午後4時47分
Page 399 of 701

398
uuBluetooth ® HandsFreeLink ®u HFL Menus
Features
HFL Menus
The power mode must be in ACCESSORY or ON to use HFL.
■Bluetooth/Phone Settings screen
1.Press the SETTINGS button.
2. Rotate to select Bluetooth/Phone
Settings , then press .
1HFL Menus
To use HFL, you must first pair your Bluetooth-
compatible cell phone to th e system while the vehicle
is parked.
Some functions are limited while driving. A message
appears on the screen when the vehicle is moving
and the operation is canceled.
Bluetooth
Replace This Device
Turns the Bluetooth ® on and off.Bluetooth
Edit PIN Create a security PIN for a paired phone.
Replace a previously paired phone with a
new phone.
Delete This DeviceDelete a previously paired phone.
Connect to AudioConnect a phone to use the Bluetooth®
audio and smartphone function.
Connect to PhoneConnect a phone to use the HFL.
Disconnect Disconnect a paired phone from the
system.
Connect Both Connect the device to use the all
functions of Bluetooth® connection.
Cancel/Reset all customized items in the
Bluetooth/Phone Settings group as default.
Default
(Existing
entry list)
Bluetooth
Device List Edit Device Name*Edit the user name of a paired phone.
* Not available on all models
19 ACURA MDX-31TZ56510.book 398 ページ 2018年12月11日 火曜日 午後4時47分
Page 439 of 701
uuAcuraLink ®*u
438
Features
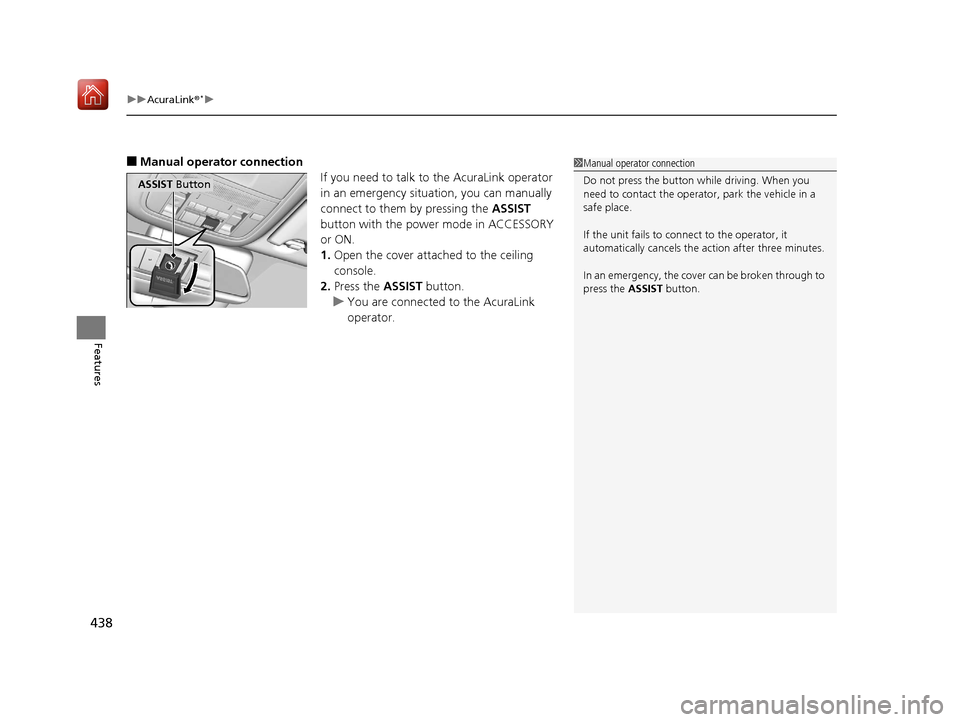
■Manual operator connection
If you need to talk to the AcuraLink operator
in an emergency situation, you can manually
connect to them by pressing the ASSIST
button with the power mode in ACCESSORY
or ON.
1. Open the cover attached to the ceiling
console.
2. Press the ASSIST button.
u You are connected to the AcuraLink
operator.1Manual operator connection
Do not press the button while driving. When you
need to contact the operato r, park the vehicle in a
safe place.
If the unit fails to connect to the operator, it
automatically cancels the action after three minutes.
In an emergency, the cover can be broken through to
press the ASSIST button.
ASSIST Button
19 ACURA MDX-31TZ56510.book 438 ページ 2018年12月11日 火曜日 午後4時47分