clock Acura MDX 2020 User Guide
[x] Cancel search | Manufacturer: ACURA, Model Year: 2020, Model line: MDX, Model: Acura MDX 2020Pages: 701, PDF Size: 38.91 MB
Page 249 of 701
248
uuAudio System Basic Operation uInformation Screen
Features
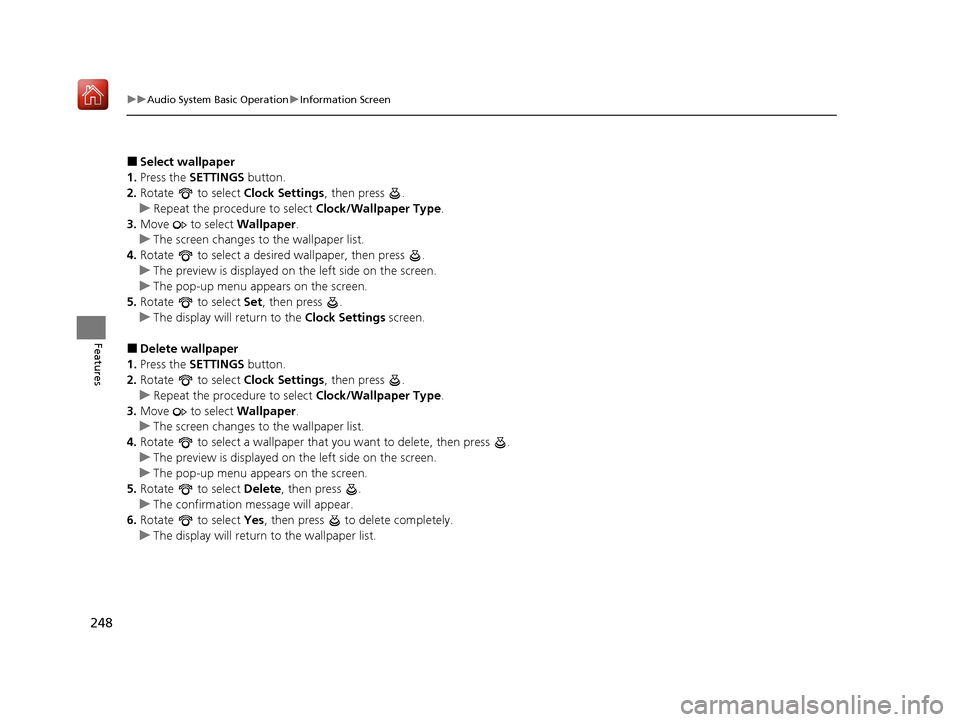
■Select wallpaper
1. Press the SETTINGS button.
2. Rotate to select Clock Settings, then press .
u Repeat the procedure to select Clock/Wallpaper Type.
3. Move to select Wallpaper.
u The screen changes to the wallpaper list.
4. Rotate to select a desired wallpaper, then press .
u The preview is displayed on the left side on the screen.
u The pop-up menu appears on the screen.
5. Rotate to select Set, then press .
u The display will return to the Clock Settings screen.
■Delete wallpaper
1. Press the SETTINGS button.
2. Rotate to select Clock Settings, then press .
u Repeat the procedure to select Clock/Wallpaper Type.
3. Move to select Wallpaper.
u The screen changes to the wallpaper list.
4. Rotate to select a wallpaper that you want to delete, then press .
u The preview is displayed on the left side on the screen.
u The pop-up menu appears on the screen.
5. Rotate to select Delete, then press .
u The confirmation message will appear.
6. Rotate to select Yes, then press to delete completely.
u The display will return to the wallpaper list.
20 ACURA MDX-31TZ56600.book 248 ページ 2019年4月24日 水曜日 午後5時44分
Page 364 of 701
363
uuCustomized Features u
Continued
Features
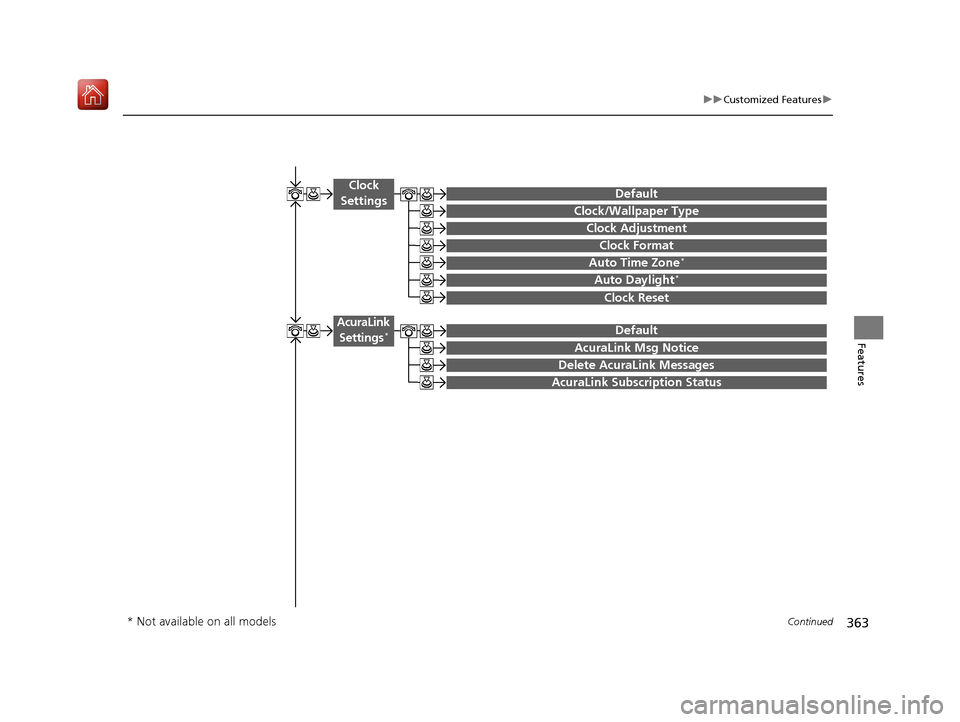
Auto Time Zone*
Clock/Wallpaper Type
Clock Adjustment
Clock
Settings
Clock Format
Default
Auto Daylight*
Clock Reset
AcuraLink Msg Notice
Delete AcuraLink Messages
AcuraLink Settings*
AcuraLink Subscription Status
Default
* Not available on all models
20 ACURA MDX-31TZ56600.book 363 ページ 2019年4月24日 水曜日 午後5時44分
Page 365 of 701
364
uuCustomized Features u
Features
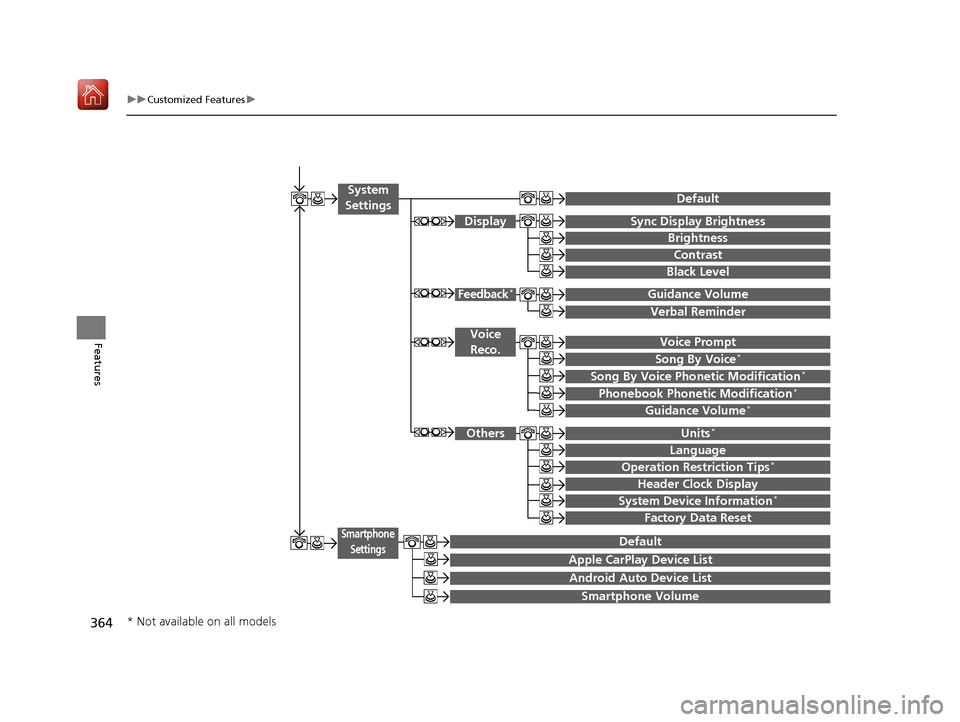
Voice Prompt
Brightness
Contrast
Black Level
Default
Display
System
Settings
Voice Reco.
Sync Display Brightness
System Device Information*Header Clock Display
Language
Operation Restriction Tips*
Others
Default
Apple CarPlay Device List
Android Auto Device List
Smartphone
Settings
Smartphone Volume
Factory Data Reset
Units*
Song By Voice*
Song By Voice Phonetic Modification*
Phonebook Phonet ic Modification*
Guidance Volume*
Feedback*Guidance Volume
Verbal Reminder
* Not available on all models
20 ACURA MDX-31TZ56600.book 364 ページ 2019年4月24日 水曜日 午後5時44分
Page 377 of 701
376
uuCustomized Features u
Features
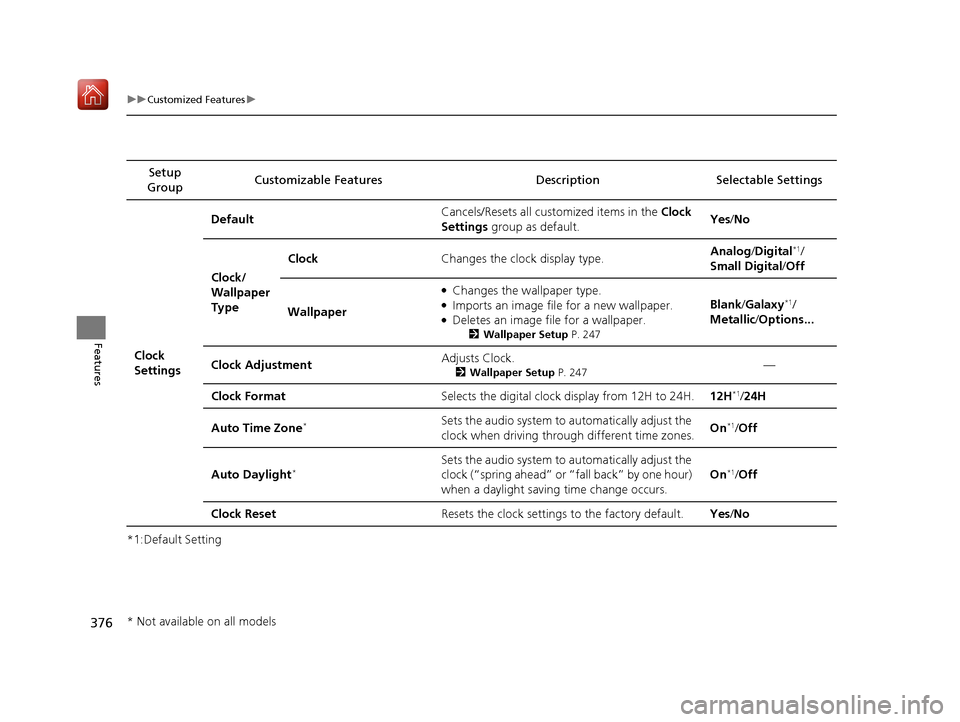
*1:Default SettingSetup
Group Customizable Features Desc
ription Selectable Settings
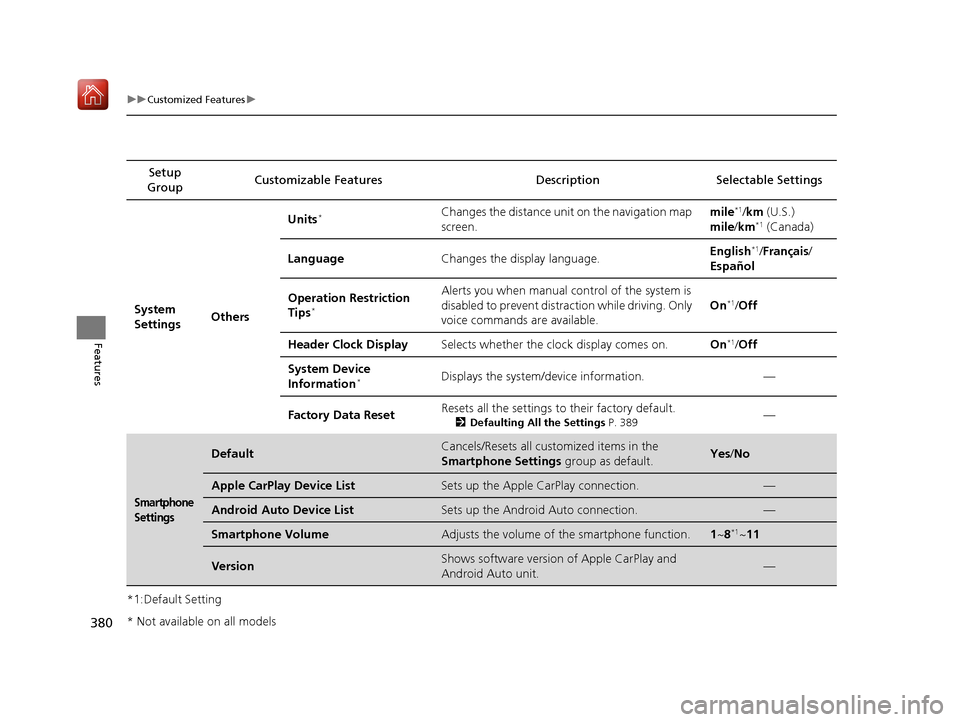
Clock
Settings Default
Cancels/Resets all cust
omized items in the Clock
Settings group as default. Yes
/No
Clock/
Wallpaper
Type Clock
Changes the clock display type. Analog
/Digital
*1/
Small Digital /Off
Wallpaper
●Changes the wallpaper type.●Imports an image file for a new wallpaper.●Deletes an image file for a wallpaper.
2 Wallpaper Setup P. 247
Blank/Galaxy*1/
Metallic /Options...
Clock Adjustment Adjusts Clock.
2
Wallpaper Setup P. 247—
Clock Format Selects the digital clock display from 12H to 24H. 12H
*1/24H
Auto Time Zone
*Sets the audio system to automatically adjust the
clock when driving through different time zones. On*1/
Off
Auto Daylight
*Sets the audio system to automatically adjust the
clock (“spring ahead” or “fall back” by one hour)
when a daylight saving time change occurs. On*1/
Off
Clock Reset Resets the clock settings to the factory default. Yes/No
* Not available on all models
20 ACURA MDX-31TZ56600.book 376 ページ 2019年4月24日 水曜日 午後5時44分
Page 381 of 701
380
uuCustomized Features u
Features
*1:Default SettingSetup
Group Customizable Features Desc
ription Selectable Settings
System
Settings OthersUnits
*Changes the distance unit on the navigation map
screen.
mile*1/
km (U.S.)
mile /km*1 (Canada)
Language Changes the display language. English
*1/
Français /
Español
Operation Restriction
Tips
*
Alerts you when manual control of the system is
disabled to prevent distraction while driving. Only
voice commands are available. On*1/
Off
Header Clock Display Selects whether the clock display comes on. On
*1/Off
System Device
Information
*Displays the system/device information. —
Factory Data Reset Resets all the settings to their factory default.
2
Defaulting All the Settings P. 389—
Smartphone
Settings
DefaultCancels/Resets all customized items in the
Smartphone Settings group as default.Yes/No
Apple CarPlay Device ListSets up the Apple CarPlay connection.—
Android Auto Device ListSets up the Android Auto connection.—
Smartphone VolumeAdjusts the volume of the smartphone function.1 ~8*1~11
VersionShows software version of Apple CarPlay and
Android Auto unit.—
* Not available on all models
20 ACURA MDX-31TZ56600.book 380 ページ 2019年4月24日 水曜日 午後5時44分
Page 591 of 701
uuMaintenance Under the Hood uEngine Coolant
590
Maintenance
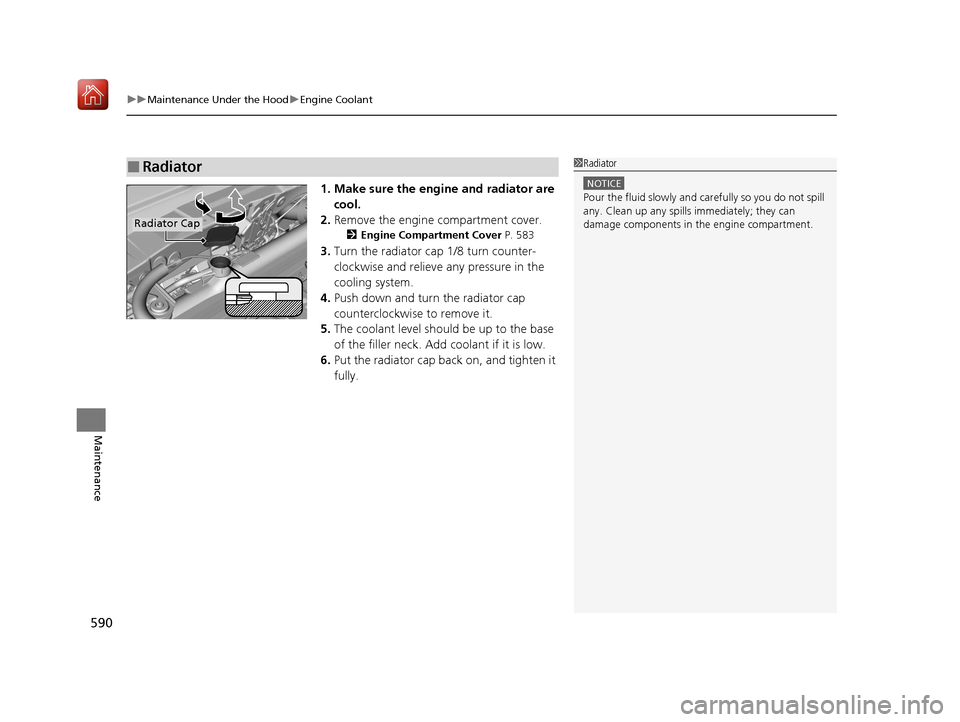
1. Make sure the engine and radiator are
cool.
2. Remove the engine compartment cover.
2 Engine Compartment Cover P. 583
3.Turn the radiator cap 1/8 turn counter-
clockwise and relieve any pressure in the
cooling system.
4. Push down and turn the radiator cap
counterclockwise to remove it.
5. The coolant level should be up to the base
of the filler neck. Add coolant if it is low.
6. Put the radiator cap back on, and tighten it
fully.
■Radiator1Radiator
NOTICE
Pour the fluid slowly and ca refully so you do not spill
any. Clean up any spills immediately; they can
damage components in the engine compartment.
Radiator Cap
20 ACURA MDX-31TZ56600.book 590 ページ 2019年4月24日 水曜日 午後5時44分
Page 596 of 701
595
uuReplacing Light Bulbs uTaillights/Rear Side Marker Lights
Maintenance
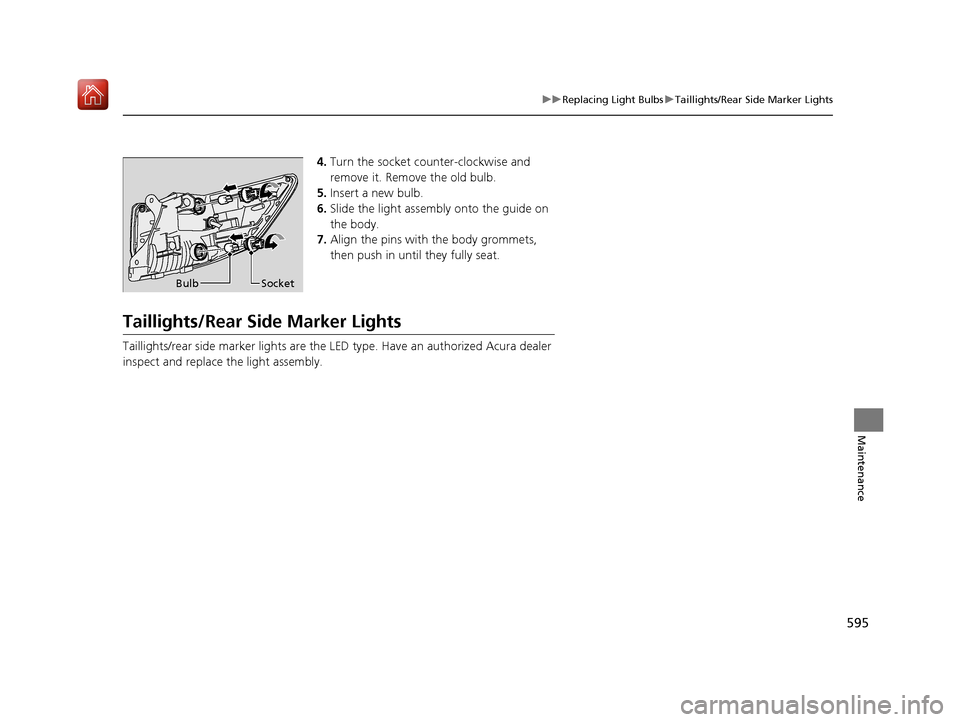
4. Turn the socket counter-clockwise and
remove it. Remove the old bulb.
5. Insert a new bulb.
6. Slide the light assembly onto the guide on
the body.
7. Align the pins with the body grommets,
then push in until they fully seat.
Taillights/Rear Side Marker Lights
Taillights/rear side marker lights are the LE D type. Have an authorized Acura dealer
inspect and replace the light assembly.
Bulb Socket
20 ACURA MDX-31TZ56600.book 595 ページ 2019年4月24日 水曜日 午後5時44分
Page 597 of 701
596
uuReplacing Light Bulbs uBack-Up Light Bulbs
Maintenance
Back-Up Light Bulbs
When replacing, use the following bulbs.
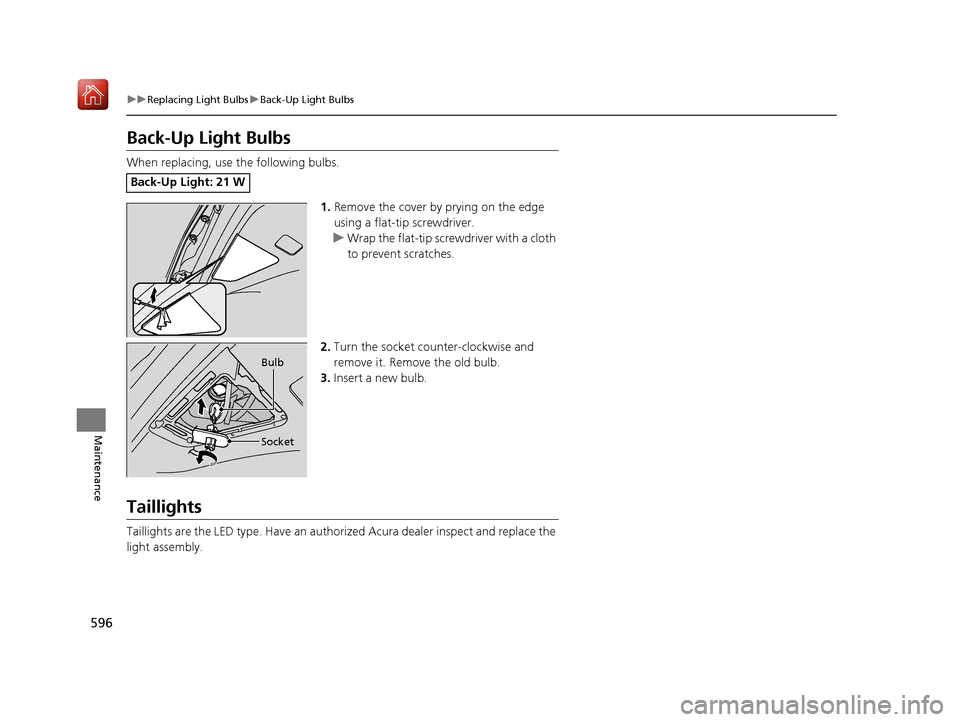
1.Remove the cover by prying on the edge
using a flat-tip screwdriver.
u Wrap the flat-tip screwdriver with a cloth
to prevent scratches.
2. Turn the socket counter-clockwise and
remove it. Remove the old bulb.
3. Insert a new bulb.
Taillights
Taillights are the LED type. Ha ve an authorized Acura dealer inspect and replace the
light assembly.
Back-Up Light: 21 W
Bulb
Socket
20 ACURA MDX-31TZ56600.book 596 ページ 2019年4月24日 水曜日 午後5時44分
Page 612 of 701
611
Maintenance
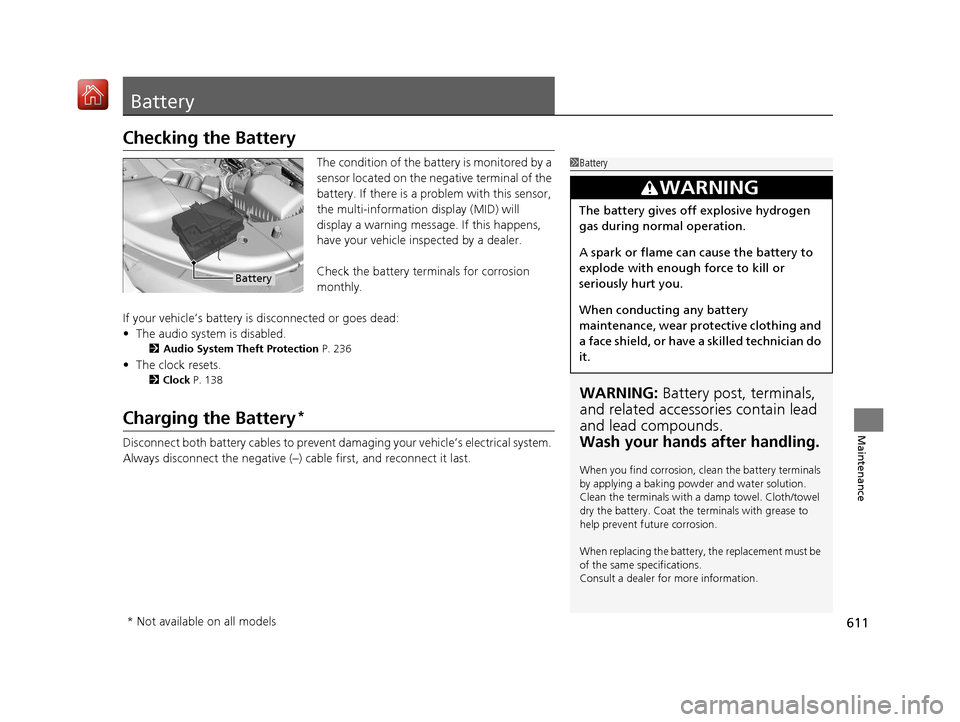
Battery
Checking the Battery
The condition of the battery is monitored by a
sensor located on the negative terminal of the
battery. If there is a problem with this sensor,
the multi-information display (MID) will
display a warning message. If this happens,
have your vehicle inspected by a dealer.
Check the battery terminals for corrosion
monthly.
If your vehicle’s battery is disconnected or goes dead:
• The audio system is disabled.
2 Audio System Theft Protection P. 236
•The clock resets.
2 Clock P. 138
Charging the Battery*
Disconnect both battery cables to prevent damaging your vehicle’s electrical system.
Always disconnect the negative (–) cable first, and reconnect it last.
1Battery
WARNING: Battery post, terminals,
and related accessories contain lead
and lead compounds.
Wash your hands after handling.
When you find corrosion, cl ean the battery terminals
by applying a baking powder and water solution.
Clean the terminals with a damp towel. Cloth/towel
dry the battery. Coat the terminals with grease to
help prevent future corrosion.
When replacing the battery, the replacement must be
of the same specifications.
Consult a dealer for more information.
3WARNING
The battery gives off explosive hydrogen
gas during normal operation.
A spark or flame can cause the battery to
explode with enough force to kill or
seriously hurt you.
When conducting any battery
maintenance, wear prot ective clothing and
a face shield, or have a skilled technician do
it.
Battery
* Not available on all models
20 ACURA MDX-31TZ56600.book 611 ページ 2019年4月24日 水曜日 午後5時44分
Page 634 of 701
Continued633
uuIf a Tire Goes Flat uChanging a Flat Tire
Handling the Unexpected
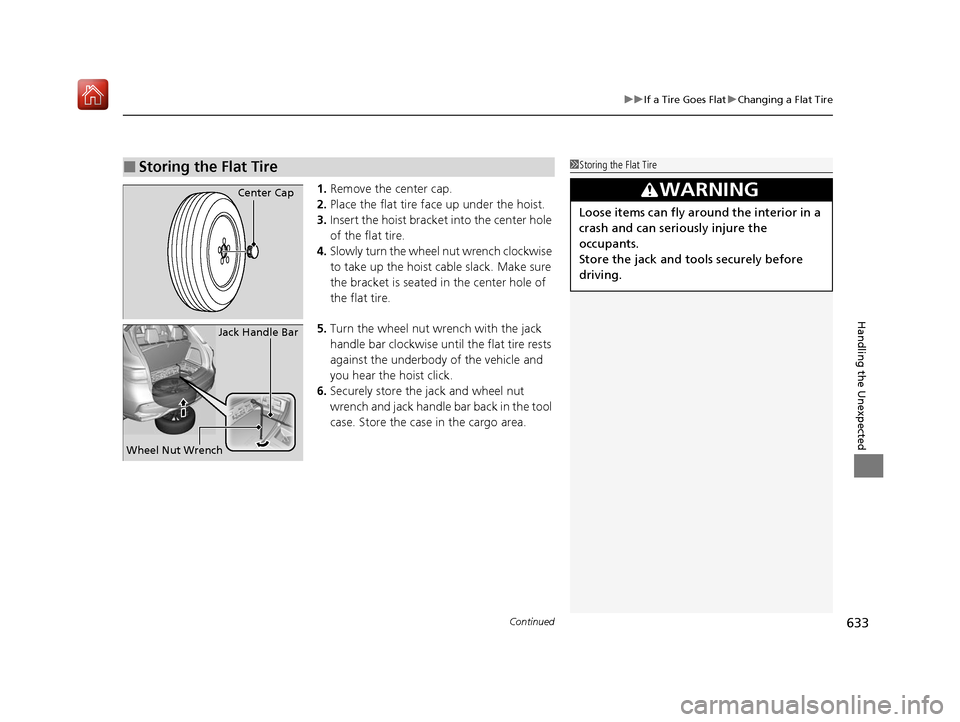
1. Remove the center cap.
2. Place the flat tire face up under the hoist.
3. Insert the hoist bracke t into the center hole
of the flat tire.
4. Slowly turn the wheel nut wrench clockwise
to take up the hoist cable slack. Make sure
the bracket is seated in the center hole of
the flat tire.
5. Turn the wheel nut wrench with the jack
handle bar clockwise until the flat tire rests
against the underbody of the vehicle and
you hear the hoist click.
6. Securely store the jack and wheel nut
wrench and jack handle bar back in the tool
case. Store the case in the cargo area.
■Storing the Flat Tire1Storing the Flat Tire
3WARNING
Loose items can fly around the interior in a
crash and can seriously injure the
occupants.
Store the jack and tools securely before
driving.
Center Cap
Wheel Nut Wrench Jack Handle Bar
20 ACURA MDX-31TZ56600.book 633 ページ 2019年4月24日 水曜日 午後5時44分