light Acura MDX 2020 Owner's Guide
[x] Cancel search | Manufacturer: ACURA, Model Year: 2020, Model line: MDX, Model: Acura MDX 2020Pages: 701, PDF Size: 38.91 MB
Page 164 of 701
Continued163
uuSecurity System uSecurity System Alarm
Controls
■To deactivate the security system alarm
Unlock the vehicle using the key, remote tra nsmitter or keyless access system, or set
the power mode to ON. The system, along with the horn and flashing lights, is
deactivated.
■Setting the security system alarm
The security system alarm automatically sets when the following conditions have
been met:
• The power mode is set to VEHICLE OFF (LOCK).
• The hood is closed.
• All doors and the tailgate are locked from outside with the key, remote
transmitter, or keyle ss access system.
■When the security system alarm sets
The security system alarm in dicator in the instrument panel blinks and the blinking
interval changes after about 15 seconds.
■To cancel the security system alarm
The security system alarm is canceled when the vehicle is unlocked using the remote
transmitter or keyless access system, or when the power mode is set to ON. The
security system alarm indicato r goes off at the same time.
1Security System Alarm
Do not set the security system alarm when someone
is in the vehicle or a window is open. The system can
accidentally activate when:
•Unlocking the door with the lock tab.•Opening the hood with the hood release.
If the battery goes dead after you have set the
security system alarm, the security alarm may go off
once the battery is re charged or replaced.
If this occurs, deactivate the security system alarm by
unlocking a door using the ke y, remote transmitter,
or keyless access system.
20 ACURA MDX-31TZ56600.book 163 ページ 2019年4月24日 水曜日 午後5時44分
Page 165 of 701
164
uuSecurity System uSecurity System Alarm
Controls
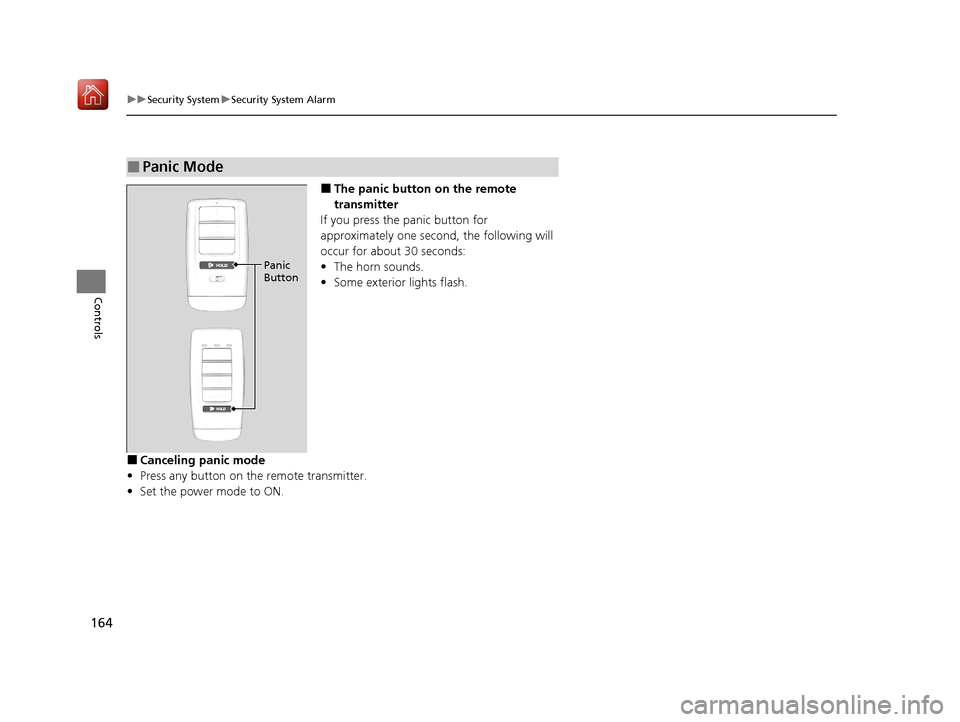
■The panic button on the remote
transmitter
If you press the panic button for
approximately one seco nd, the following will
occur for about 30 seconds:
• The horn sounds.
• Some exterior lights flash.
■Canceling panic mode
• Press any button on the remote transmitter.
• Set the power mode to ON.
■Panic Mode
Panic
Button
20 ACURA MDX-31TZ56600.book 164 ページ 2019年4月24日 水曜日 午後5時44分
Page 166 of 701

165Continued
Controls
Opening and Closing the Windows
Opening/Closing the Power Windows
The power windows can be opened and closed when the power mode is in ON,
using the switches on the doors.
The driver’s side switches can be used to open and close all the windows. The power
window lock button on the driver’s side must be switched off (not pushed in,
indicator off) to open and close the windows from anywhere other than the driver’s
seat.
When the power window lock button is pushed in, the indicator comes on and you
can only operate the driver’s window. Turn the power window lock button on if a
child is in the vehicle.
■Manual operation
To open: Push the switch down lightly, and
hold it until the desired position is reached.
To close: Pull the switch up lightly, and hold it
until the desired position is reached.
■Automatic operation
To open: Push the switch down firmly.
To close: Pull the switch up firmly.
The window opens or closes completely. To
stop the window at any time, push or pull the
switch briefly.
■Opening/Closing the Windows with Auto-Open/Close
Function
1 Opening/Closing the Power Windows
The power windows can be operated for up to 10
minutes after you set the power mode to VEHICLE
OFF (LOCK).
Opening either front door cancels this function.
Auto Reverse
If a power window senses resistance when closing
automatically, it will stop closing and reverse
direction.
The driver’s window auto re verse function is disabled
when you continuously pull up the switch.
The auto reverse function stops sensing when the
window is almost closed to en sure that it fully closes.
3WARNING
Closing a power window on someone’s
hands or fingers can cause serious injury.
Make sure your passengers are away from
the windows before closing them.
ON
OFF
Power Window
Lock Button
Rear Passenger’s
Window Switches
Front Passenger’s
Window Switch
Driver’s Window
Switch
Indicator
20 ACURA MDX-31TZ56600.book 165 ページ 2019年4月24日 水曜日 午後5時44分
Page 168 of 701
167
Controls
Moonroof
Opening/Closing the Moonroof
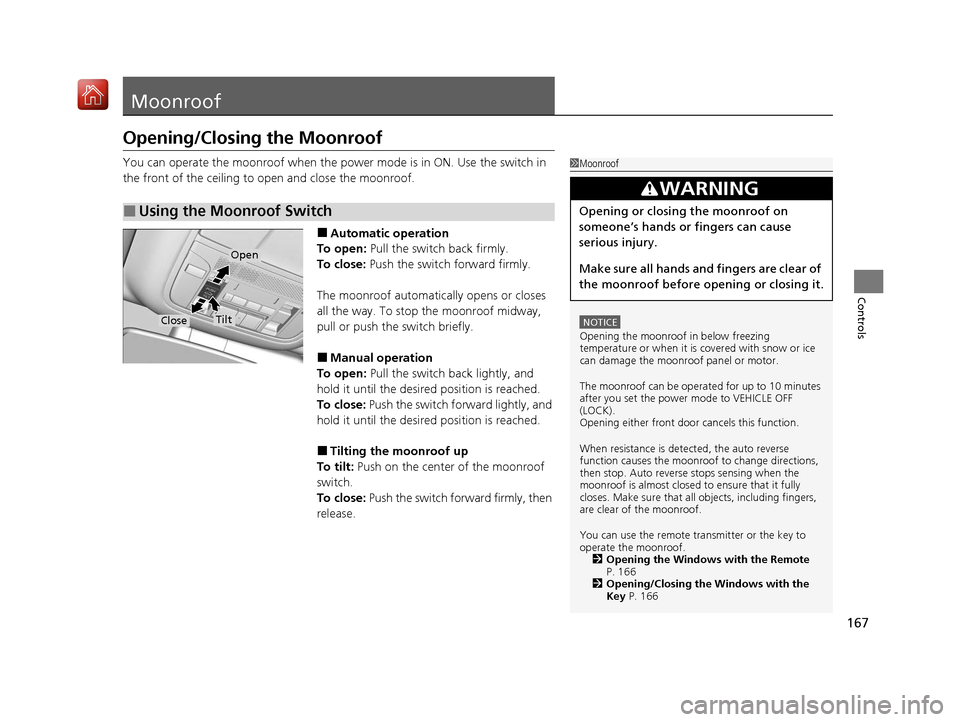
You can operate the moonroof when the power mode is in ON. Use the switch in
the front of the ceiling to open and close the moonroof.
■Automatic operation
To open: Pull the switch back firmly.
To close: Push the switch forward firmly.
The moonroof automatically opens or closes
all the way. To stop the moonroof midway,
pull or push the switch briefly.
■Manual operation
To open: Pull the switch back lightly, and
hold it until the desired position is reached.
To close: Push the switch forward lightly, and
hold it until the desired position is reached.
■Tilting the moonroof up
To tilt: Push on the center of the moonroof
switch.
To close: Push the switch fo rward firmly, then
release.
■Using the Moonroof Switch
1 Moonroof
NOTICE
Opening the moonroof in below freezing
temperature or when it is covered with snow or ice
can damage the moonr oof panel or motor.
The moonroof can be opera ted for up to 10 minutes
after you set the power mode to VEHICLE OFF
(LOCK).
Opening either front door cancels this function.
When resistance is detected, the auto reverse
function causes the moonroof to change directions,
then stop. Auto reverse stops sensing when the
moonroof is almost closed to ensure that it fully
closes. Make sure that al l objects, including fingers,
are clear of the moonroof.
You can use the remote transmitter or the key to
operate the moonroof. 2 Opening the Windows with the Remote
P. 166
2 Opening/Closing the Windows with the
Key P. 166
3WARNING
Opening or closing the moonroof on
someone’s hands or fingers can cause
serious injury.
Make sure all hands and fingers are clear of
the moonroof before opening or closing it.
Open
CloseTilt
20 ACURA MDX-31TZ56600.book 167 ページ 2019年4月24日 水曜日 午後5時44分
Page 172 of 701

171
uuOperating the Switches Around the Steering Wheel uTurn Signals
Controls
Turn Signals
The turn signals can be used when the power
mode is in ON.
■One-touch turn signal
When you lightly push up or down and release
the turn signal lever, th e exterior turn signals
and turn signal indicator blink three times.
This feature can be used when signaling for a
lane change.
Right Turn
Left Turn
20 ACURA MDX-31TZ56600.book 171 ページ 2019年4月24日 水曜日 午後5時44分
Page 173 of 701
172
uuOperating the Switches Around the Steering Wheel uLight Switches
Controls
Light Switches
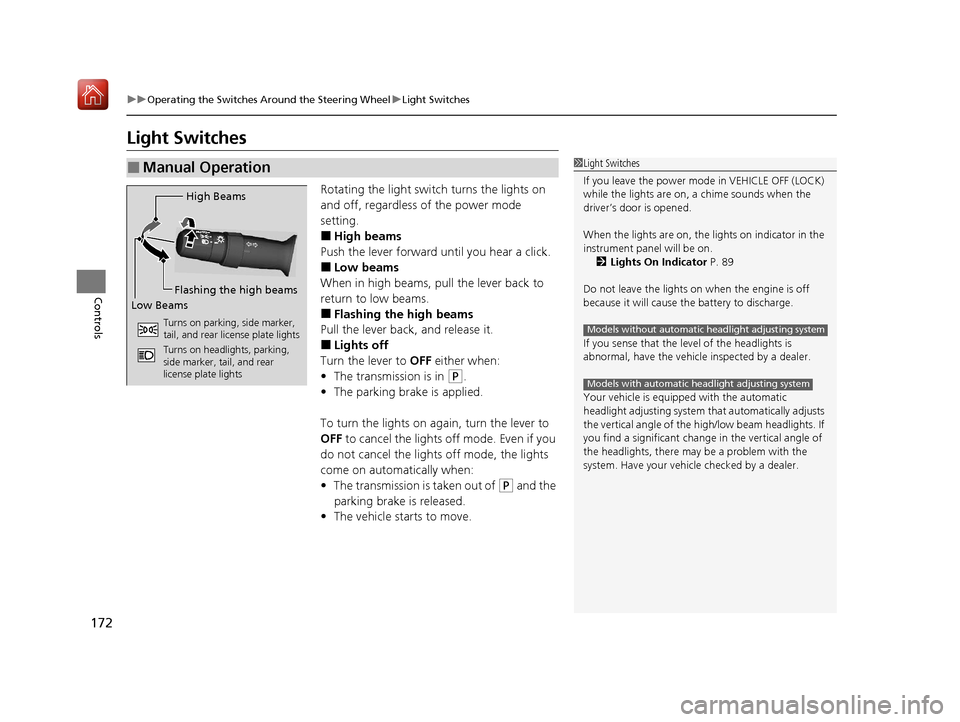
Rotating the light switch turns the lights on
and off, regardless of the power mode
setting.
■High beams
Push the lever forward until you hear a click.
■Low beams
When in high beams, pull the lever back to
return to low beams.
■Flashing the high beams
Pull the lever back, and release it.
■Lights off
Turn the lever to OFF either when:
• The transmission is in
(P.
• The parking brake is applied.
To turn the lights on ag ain, turn the lever to
OFF to cancel the lights off mode. Even if you
do not cancel the lights off mode, the lights
come on automatically when:
• The transmission is taken out of
(P and the
parking brake is released.
• The vehicle starts to move.
■Manual Operation1Light Switches
If you leave the power mode in VEHICLE OFF (LOCK)
while the lights are on, a chime sounds when the
driver’s door is opened.
When the lights are on, the lights on indicator in the
instrument pane l will be on.
2 Lights On Indicator P. 89
Do not leave the lights on when the engine is off
because it will cause the battery to discharge.
If you sense that the le vel of the headlights is
abnormal, have the vehicl e inspected by a dealer.
Your vehicle is equipped with the automatic
headlight adjusting system that automatically adjusts
the vertical angle of the high/low beam headlights. If
you find a significant change in the vertical angle of
the headlights, there may be a problem with the
system. Have your vehicle checked by a dealer.
Models without automatic headlight adjusting system
Models with automatic headlight adjusting system
High Beams
Flashing the high beams
Low Beams
Turns on parking, side marker,
tail, and rear license plate lights
Turns on headlights, parking,
side marker, tail, and rear
license plate lights
20 ACURA MDX-31TZ56600.book 172 ページ 2019年4月24日 水曜日 午後5時44分
Page 174 of 701
Continued173
uuOperating the Switches Around the Steering Wheel uLight Switches
Controls
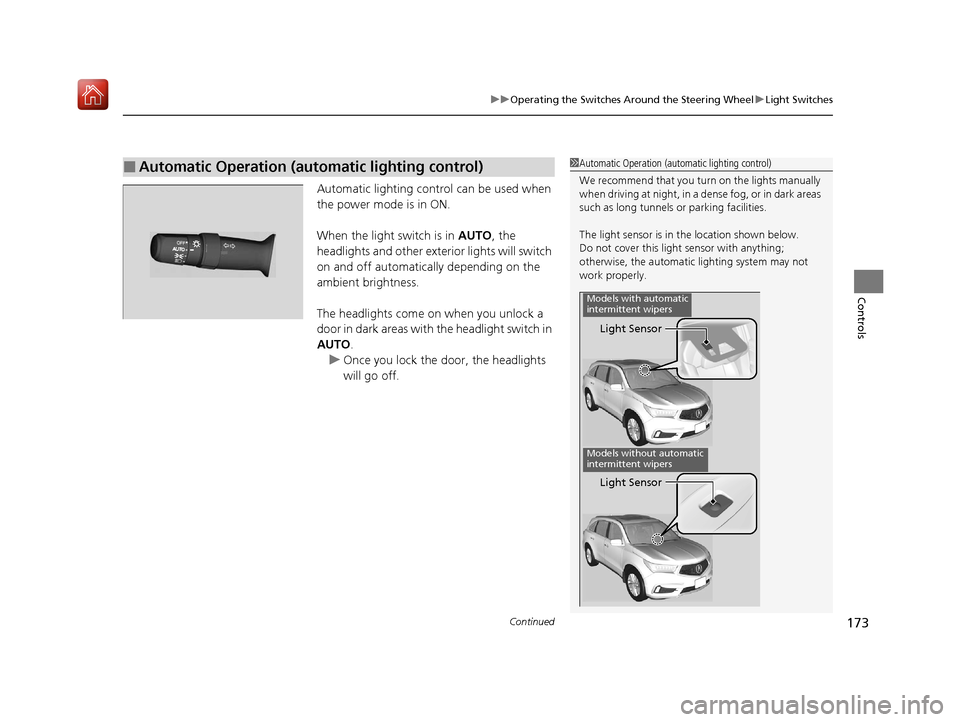
Automatic lighting control can be used when
the power mode is in ON.
When the light switch is in AUTO, the
headlights and other exterior lights will switch
on and off automatically depending on the
ambient brightness.
The headlights come on when you unlock a
door in dark areas with the headlight switch in
AUTO .
u Once you lock the door, the headlights
will go off.
■Automatic Operation (automatic lighting control)1 Automatic Operation (aut omatic lighting control)
We recommend that you tu rn on the lights manually
when driving at night, in a de nse fog, or in dark areas
such as long tunnels or parking facilities.
The light sensor is in the location shown below.
Do not cover this light sensor with anything;
otherwise, the automatic lighting system may not
work properly.
Light Sensor
Models with automatic
intermittent wipers
Models without automatic
intermittent wipers
Light Sensor
20 ACURA MDX-31TZ56600.book 173 ページ 2019年4月24日 水曜日 午後5時44分
Page 175 of 701
uuOperating the Switches Around the Steering Wheel uLight Switches
174
Controls
The headlights automatically come on when the wipers are used several times within
a certain number of intervals wi th the headlight switch in AUTO.
The headlights automatically go off a few minutes later if the wipers are stopped.
The headlights, all other exterior lights, an d the instrument panel lights turn off 15
seconds after you set the power mode to VE HICLE OFF (LOCK), take the remote with
you, and close th e driver’s door.
If you set the power mode to VEHICLE OFF (LOCK) with the headlight switch on, but
do not open the door, the lights turn off after 10 minutes (3 minutes, if the switch
is in the AUTO position).
The lights turn on again when you unlock or open the driver’s door. If you unlock
the door, but do not open it within 15 seconds, the lights go off. If you open the
driver’s door, you will hear a lights on reminder chime.
■Headlight Integration with Wiper
■Automatic Lighting Off Feature
1Automatic Operation (aut omatic lighting control)
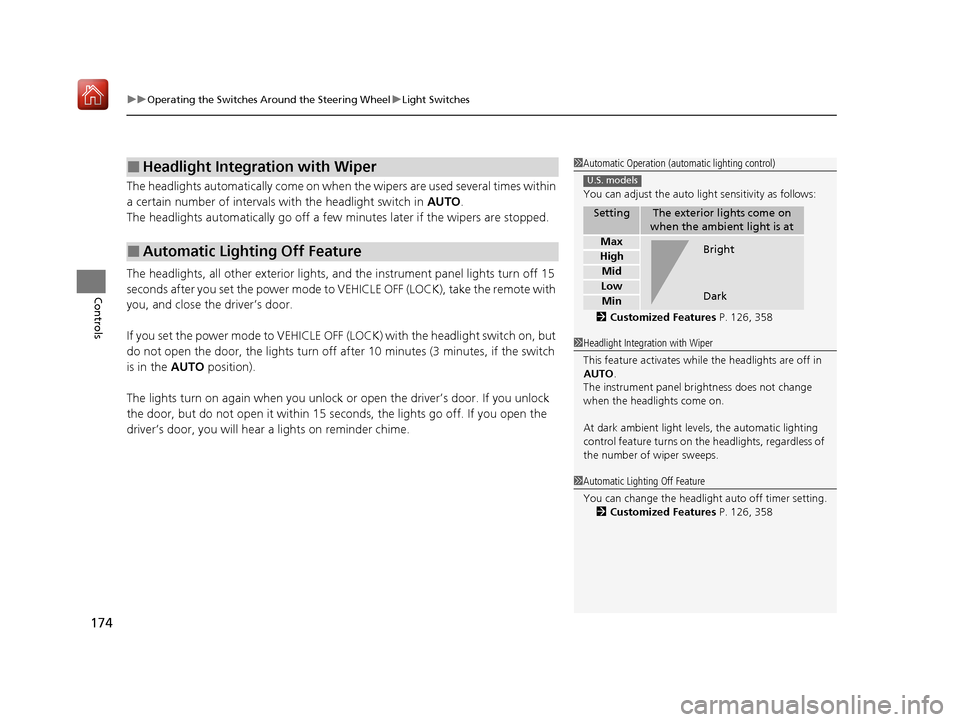
You can adjust the auto li ght sensitivity as follows:
2 Customized Features P. 126, 358
SettingThe exterior lights come on
when the ambient light is at
Max
High
Mid
Low
Min
U.S. models
Bright
Dark
1 Headlight Integration with Wiper
This feature activates while the headlights are off in
AUTO .
The instrument panel br ightness does not change
when the headlights come on.
At dark ambient light levels, the automatic lighting
control feature turns on the headlights, regardless of
the number of wiper sweeps.
1 Automatic Lighting Off Feature
You can change the headlight auto off timer setting.
2 Customized Features P. 126, 358
20 ACURA MDX-31TZ56600.book 174 ページ 2019年4月24日 水曜日 午後5時44分
Page 176 of 701
175
uuOperating the Switches Around the Steering Wheel uFog Lights*
Controls
Fog Lights*
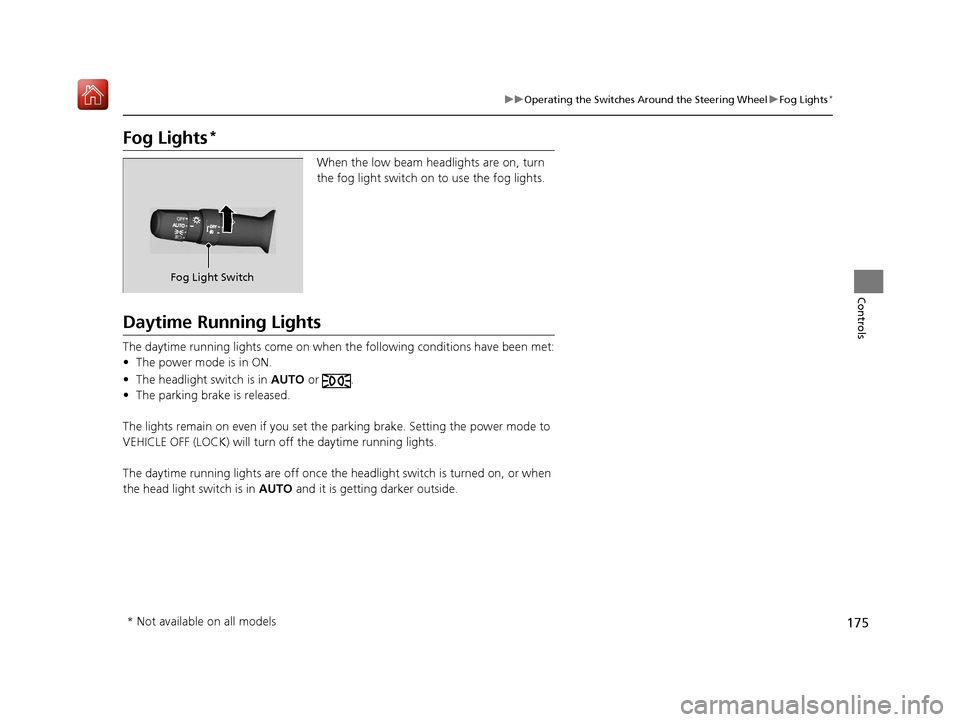
When the low beam headlights are on, turn
the fog light switch on to use the fog lights.
Daytime Running Lights
The daytime running lights come on when th e following conditions have been met:
• The power mode is in ON.
• The headlight switch is in AUTO or .
• The parking brake is released.
The lights remain on even if you set th e parking brake. Setting the power mode to
VEHICLE OFF (LOCK) will turn off the daytime running lights.
The daytime running lights are off once the h eadlight switch is turned on, or when
the head light switch is in AUTO and it is getting darker outside.
Fog Light Switch
* Not available on all models
20 ACURA MDX-31TZ56600.book 175 ページ 2019年4月24日 水曜日 午後5時44分
Page 177 of 701
176
uuOperating the Switches Around the Steering Wheel uAuto High-Beam
Controls
Auto High-Beam
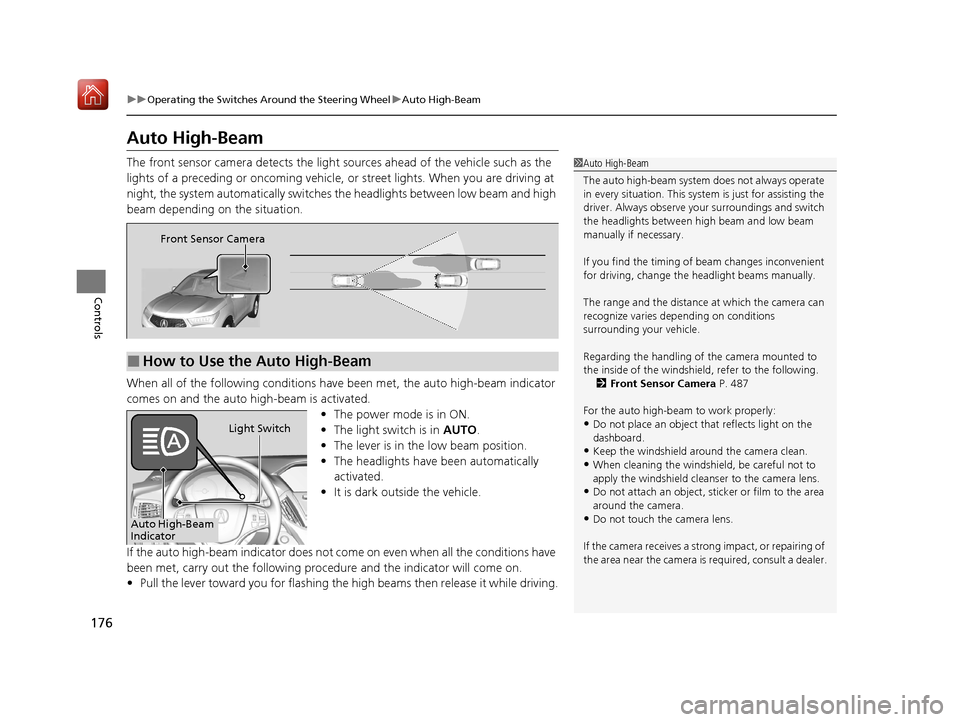
The front sensor camera detects the light sources ahead of the vehicle such as the
lights of a preceding or oncoming vehicle, or street lights. When you are driving at
night, the system automatically switches the headlights between low beam and high
beam depending on the situation.
When all of the following conditions have been met, the auto high-beam indicator
comes on and the auto high-beam is activated. •The power mode is in ON.
• The light switch is in AUTO.
• The lever is in the low beam position.
• The headlights have been automatically
activated.
• It is dark outside the vehicle.
If the auto high-beam indicator does not co me on even when all the conditions have
been met, carry out the following procedure and the indicator will come on.
• Pull the lever toward you for flashing the high beams then release it while driving.1Auto High-Beam
The auto high-beam system does not always operate
in every situation. This syst em is just for assisting the
driver. Always observe your surroundings and switch
the headlights between high beam and low beam
manually if necessary.
If you find the timing of beam changes inconvenient
for driving, change the headlight beams manually.
The range and the distance at which the camera can
recognize varies de pending on conditions
surrounding your vehicle.
Regarding the handling of the camera mounted to
the inside of the windshiel d, refer to the following.
2 Front Sensor Camera P. 487
For the auto high-beam to work properly:
•Do not place an object that reflects light on the
dashboard.
•Keep the windshield around the camera clean.
•When cleaning the windshield, be careful not to
apply the windshield cleans er to the camera lens.
•Do not attach an object, sticker or film to the area
around the camera.
•Do not touch the camera lens.
If the camera receives a st rong impact, or repairing of
the area near the camera is required, consult a dealer.
■How to Use the Auto High-Beam
Front Sensor Camera
Auto High-Beam
IndicatorLight Switch
20 ACURA MDX-31TZ56600.book 176 ページ 2019年4月24日 水曜日 午後5時44分