window Acura RDX 2011 User Guide
[x] Cancel search | Manufacturer: ACURA, Model Year: 2011, Model line: RDX, Model: Acura RDX 2011Pages: 517, PDF Size: 27.89 MB
Page 148 of 517

AUTO-To open or close either
front window fully, push or pull the
window switch firmly down or up to
the second detent, and release it.
The window will automatically go up
or down all the way. To stop the
window, pull or push the window
switch briefly.
To open or close either front window
partially, push down or pull back on
the window switch lightly to the first
detent and hold it. The window will
stop when you release the switch. AUTO REVERSE
-If either front
window senses any obstacle while it
is closing automatically, it will
reverse direction and then stop. To
close the window, remove the
obstacle, then use the window switch
again.
Auto reverse stops sensing when the
window is almost closed. You should
always check that all passengers and
objects are away from the window
before closing it. NOTE:
The driver's window auto
reverse function is disabled when
you continuously pull up the switch.
Power Windows
143
Instruments and Controls
10/06/08 17:42:32 11 ACURA RDX MMC North America Owner's M 50 31STK640 enu
Page 152 of 517

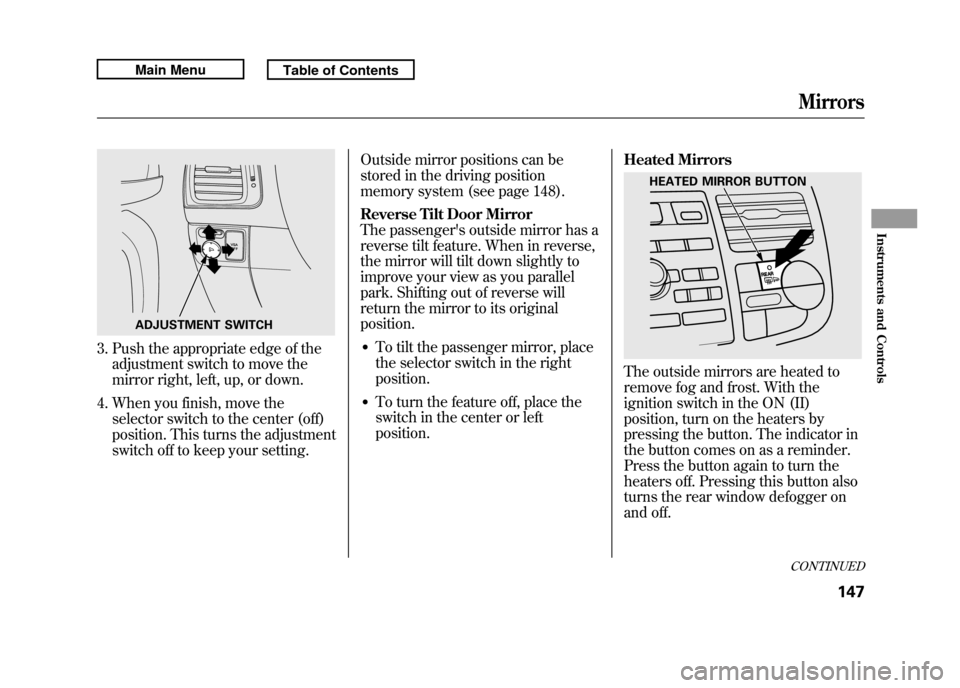
3. Push the appropriate edge of theadjustment switch to move the
mirror right, left, up, or down.
4. When you finish, move the selector switch to the center (off)
position. This turns the adjustment
switch off to keep your setting. Outside mirror positions can be
stored in the driving position
memory system (see page 148).
Reverse Tilt Door Mirror
The passenger's outside mirror has a
reverse tilt feature. When in reverse,
the mirror will tilt down slightly to
improve your view as you parallel
park. Shifting out of reverse will
return the mirror to its original
position.
●To tilt the passenger mirror, place
the selector switch in the right
position.●To turn the feature off, place the
switch in the center or left
position.
Heated Mirrors
The outside mirrors are heated to
remove fog and frost. With the
ignition switch in the ON (II)
position, turn on the heaters by
pressing the button. The indicator in
the button comes on as a reminder.
Press the button again to turn the
heaters off. Pressing this button also
turns the rear window defogger on
and off.
ADJUSTMENT SWITCH
HEATED MIRROR BUTTON
CONTINUEDMirrors
147
Instruments and Controls
10/06/08 17:42:32 11 ACURA RDX MMC North America Owner's M 50 31STK640 enu
Page 162 of 517

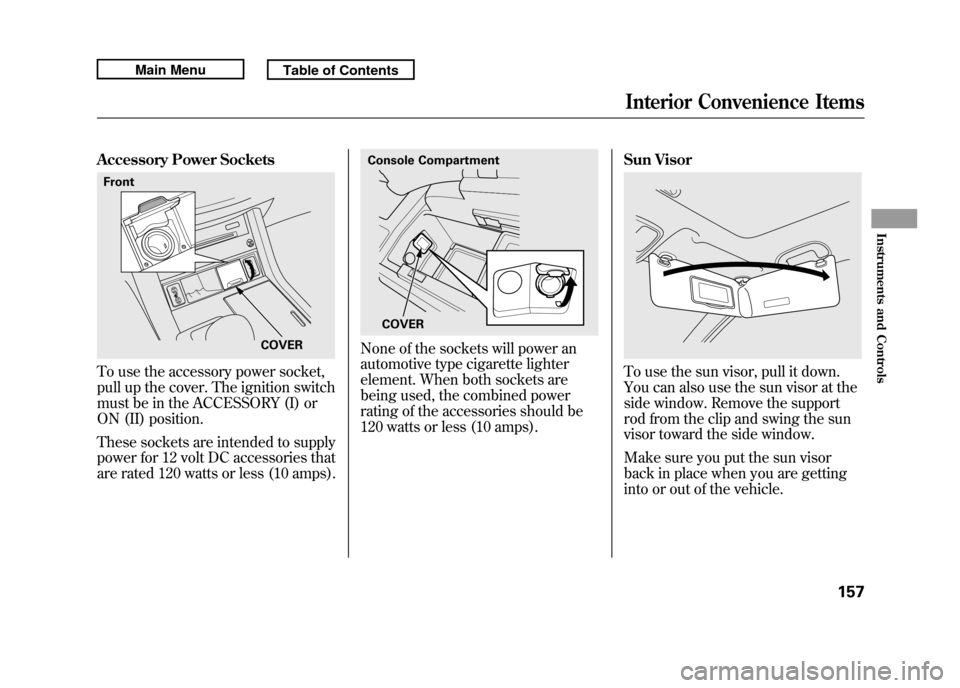
Accessory Power SocketsTo use the accessory power socket,
pull up the cover. The ignition switch
must be in the ACCESSORY (I) or
ON (II) position.
These sockets are intended to supply
power for 12 volt DC accessories that
are rated 120 watts or less (10 amps).
None of the sockets will power an
automotive type cigarette lighter
element. When both sockets are
being used, the combined power
rating of the accessories should be
120 watts or less (10 amps).Sun Visor
To use the sun visor, pull it down.
You can also use the sun visor at the
side window. Remove the support
rod from the clip and swing the sun
visor toward the side window.
Make sure you put the sun visor
back in place when you are getting
into or out of the vehicle.
Front
COVER
Console Compartment
COVER
Interior Convenience Items
157
Instruments and Controls
10/06/08 17:42:32 11 ACURA RDX MMC North America Owner's M 50 31STK640 enu
Page 169 of 517

OFF BUTTON
DUAL BUTTON
FAN CONTROL BUTTONS Models without navigation system
AUTO BUTTON
DRIVER'S SIDE
TEMPERATURE
DISPLAY
RECIRCULATION BUTTON
DRIVER'S SIDE
TEMPERATURE
CONTROL BUTTONS
U.S. model is shown. AIR CONDITIONING (A/C) BUTTONPASSENGER'S SIDE
TEMPERATURE
CONTROL BUTTONS
PASSENGER'S SIDE
TEMPERATURE DISPLAY
PASSENGER
’S SIDE
TEMPERATURE DISPLAY
MODE INDICATOR DRIVER'S SIDE
TEMPERATURE DISPLAY
Models with navigation system
MODE INDICATOR
REAR WINDOW DEFOGGER/HEATED MIRROR BUTTON
WINDSHIELD DEFROSTER BUTTON
MODE BUTTON
Climate Control System16410/06/08 17:42:32 11 ACURA RDX MMC North America Owner's M 50 31STK640 enu
Page 170 of 517

Proper use of the climate control
system can make the interior dry and
comfortable, and keep the windows
clear for best visibility.
For the climate control system to
provide heating and cooling, the
engine must be running.
You can adjust the temperatures of
the driver's side and the passenger's
side independently (see page 169).
Voice Control SystemOn models with navigation systemThe climate control system can also
be operated by voice control. See the
navigation system manual for
complete details.Using Automatic Climate Control
The automatic climate control system
adjusts the fan speed and airflow
levels to maintain the interior
temperature you select.
On models with navigation systemIn AUTO mode, the vehicle's interior
temperature is independently
regulated for the driver and
passenger, based on inputs from
sunlight and temperature sensors
(see page 171). If one side of the
vehicle is getting too much sun, the
system lowers the temperature only
on that side.
1. Press the AUTO button. The
indicator in the button comes on. 2. Set the desired temperature by
pushing the driver's side
temperature control buttons (
or
). The selected temperature will
show in the display.
When you push the passenger's side
temperature control buttons, the
indicator in the DUAL button comes
on and the driver's side and
passenger's side temperature can be
controlled independently (see page
169).
The system automatically selects the
proper mix of conditioned and/or
heated air that will, as quickly as
possible, raise or lower the interior
temperature to your preference.
CONTINUED
Climate Control System
165
Features
10/06/08 17:42:32 11 ACURA RDX MMC North America Owner's M 50 31STK640 enu
Page 172 of 517

Recirculation ButtonWhen the indicator in the button is
on, air from the vehicle's interior is
sent through the system again.
When the indicator is off, air is
brought in from the outside of the
vehicle (fresh air mode).
The outside air intakes for the
climate control system are at the
base of the windshield. Keep this
area clear of leaves and other debris.
The system should be left in fresh air
mode under almost all conditions.
Keeping the system in recirculation
mode, particularly with the A/C off,
can cause the windows to fog up.
Switch to recirculation mode when
driving through dusty or smoky
conditions, then return to fresh air
mode.Windshield Defroster Button
This button turns the windshield
defroster on and off.
When you push this button, air flows
from the defroster vents at the base
of the windshield, and the system
automatically switches to fresh air
mode and turns on the A/C. When
the indicator in the button is on, the
passenger's temperature cannot be
set separately from the driver's.
Rear Window Defogger
Button
This button turns the rear window
defogger on and off. Pushing this
button also turns the mirror heaters
on and off (see page 121).
CONTINUED
Climate Control System
167
Features
10/06/08 17:42:32 11 ACURA RDX MMC North America Owner's M 50 31STK640 enu
Page 312 of 517

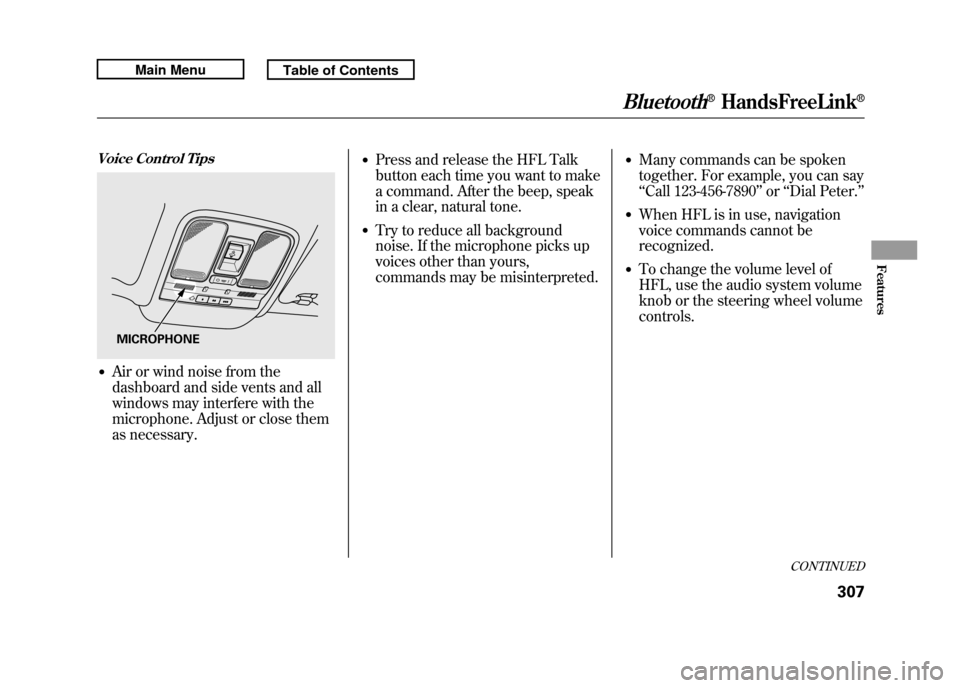
Voice Control Tips●Air or wind noise from the
dashboard and side vents and all
windows may interfere with the
microphone. Adjust or close them
as necessary.
●Press and release the HFL Talk
button each time you want to make
a command. After the beep, speak
in a clear, natural tone.●Try to reduce all background
noise. If the microphone picks up
voices other than yours,
commands may be misinterpreted.
●Many commands can be spoken
together. For example, you can say
‘‘Call 123-456-7890 ’’or ‘‘Dial Peter. ’’●When HFL is in use, navigation
voice commands cannot be
recognized.●To change the volume level of
HFL, use the audio system volume
knob or the steering wheel volume
controls.
MICROPHONE
CONTINUED
Bluetooth
®HandsFreeLink
®
307
Features
10/06/08 17:42:32 11 ACURA RDX MMC North America Owner's M 50 31STK640 enu
Page 367 of 517

Modifying your vehicle, or installing
some non-Acura accessories, can
make your vehicle unsafe. Before
you make any modifications or add
any accessories, be sure to read the
following information.
Accessories
Your dealer has Acura accessories
that allow you to personalize your
vehicle. These accessories have been
designed and approved for your
vehicle, and are covered by warranty.
Although non-Acura accessories may
fit on your vehicle, they may not
meet factory specifications, and could
adversely affect your vehicle's
handling, stability, and reliability.
Improper accessories or
modifications can affect your
vehicle's handling, stability, and
performance, and cause a
crash in which you can be hurt
or killed.
Follow all instructions in this
owner's manual regarding
accessories and modifications.
When properly installed, cellular
phones, alarms, two-way radios, and
low-powered audio systems should
not interfere with your vehicle's
computer controlled systems, such
as your airbags, anti-lock brakes, and
tire pressure monitoring system. Before installing any accessory:
●Make sure the accessory does not
obscure any lights, or interfere
with proper vehicle operation or
performance.●Be sure electronic accessories do
not overload electrical circuits (see
page 469) or interfere with proper
operation of your vehicle.●Before installing any electronic
accessory, have the installer
contact your dealer for assistance.
If possible, have your dealer
inspect the final installation.●Do not install accessories on the
side pillars or across the rear
windows. Accessories installed in
these areas may interfere with
proper operation of the side
curtain airbags.
Accessories and Modifications36210/06/08 17:42:32 11 ACURA RDX MMC North America Owner's M 50 31STK640 enu
Page 372 of 517

Carrying Cargo in the Passenger
Compartment●Store or secure all items that could
be thrown around and hurt
someone during a crash.●Be sure items placed on the floor
behind the front seats cannot roll
underneath and interfere with the
proper operation of the seats, the
sensors under the seats, or the
driver's ability to operate the
pedals.
●If you fold the rear seats down, tie
down items that could be thrown
about the vehicle during a crash or
sudden stop. Also, keep all cargo
below the bottom of the windows.
If it is higher, it could interfere
with the proper operation of the
side curtain airbags.●Keep the glove box closed while
driving. If it is open, a passenger
could injure their knees during a
crash or sudden stop.●Do not put any items on top of the
cargo area cover. They can block
your view and be thrown around
the vehicle during a crash.Carrying Cargo in the Cargo Area
or on a Roof Rack
●Distribute cargo evenly on the
floor of the cargo area, placing the
heaviest items on the bottom and
as far forward as possible. Tie
down items that could be thrown
about the vehicle during a crash or
sudden stop.●If you fold the rear seats down, tie
down items that could be thrown
about the vehicle during a crash or
sudden stop. Keep all cargo below
the bottom of the windows. If it is
higher, it could interfere with the
proper operation of the side
curtain airbags.
CONTINUED
Carrying Cargo
367
Before Driving
10/06/08 17:42:32 11 ACURA RDX MMC North America Owner's M 50 31STK640 enu
Page 378 of 517

You should do these checks and
adjustments before you drive your
vehicle:1. Make sure all windows, mirrors, and outside lights are clean and
unobstructed. Remove frost, snow,
or ice.
2. Check that the hood is fully closed.
3. Visually check the tires. If a tire looks low, use a gauge to check its
pressure.
4. Check that any items you may be carrying are stored properly or
fastened down securely. 5. Check the seat adjustment (see
page 134).
6. Check the adjustment of the inside and outside mirrors (see page
146).
7. Check the steering wheel adjustment (see page 122).
8. Make sure the doors and the tailgate are securely closed and
locked.
9. Fasten your seat belt. Check that your passengers have fastened
their seat belts (see page 15). 10. When you start the engine, check
the gauges and indicators in the
instrument panel, and the
messages on the multi-information
display (see pages 63, 73 and 74).
Preparing to Drive
373
Driving
10/06/08 17:42:32 11 ACURA RDX MMC North America Owner's M 50 31STK640 enu