check engine Acura RDX 2011 Owner's Guide
[x] Cancel search | Manufacturer: ACURA, Model Year: 2011, Model line: RDX, Model: Acura RDX 2011Pages: 517, PDF Size: 27.89 MB
Page 392 of 517

Your vehicle is equipped with disc
brakes at all four wheels. A power
assist using negative pressure
generated by the engine and the
electric vacuum pump helps reduce
the effort needed on the brake pedal.
The anti-lock brake system (ABS)
helps you retain steering control
when braking very hard.
When the electric vacuum pump is in
operation, it makes some mechanical
noises come from the engine
compartment. This is normal.
When you drive in cold weather or
thinner air at high altitude, the
electric vacuum pump operates more
frequently after the engine is started.
For more information about the
electric vacuum pump, see page 468.Resting your foot on the pedal keeps
the brakes applied lightly, builds up
heat, and reduces their effectiveness
and reduces brake pad life. In
addition, fuel economy can be
reduced. It also keeps your brake
lights on all the time, confusing
drivers behind you.
Constant application of the brakes
when going down a long hill builds
up heat and reduces their
effectiveness. Use the engine to
assist the brakes by taking your foot
off the accelerator and downshifting
to a lower gear.
Check your brakes after driving
through deep water. Apply the
brakes moderately to see if they feel
normal. If not, apply them gently and
frequently until they do. Be extra
cautious and alert in your driving.Braking System Design
The hydraulic system that operates
the brakes has two separate circuits.
Each circuit works diagonally across
the vehicle (the left-front brake is
connected with the right-rear brake,
etc.). If one circuit should develop a
problem, you will still have braking
at two wheels.
Brake Pad Wear Indicators
All four brakes have audible brake
wear indicators.
If the brake pads need replacing, you
will hear a distinctive, metallic
screeching sound when you apply
the brake pedal. If you do not have
the brake pads replaced, they will
screech all the time. It is normal for
the brakes to occasionally squeal or
squeak when you apply them.
Braking System
387
Driving
10/06/08 17:42:32 11 ACURA RDX MMC North America Owner's M 50 31STK640 enu
Page 395 of 517

Your vehicle is equipped with a tire
pressure monitoring system (TPMS)
that turns on every time you start the
engine and monitors the pressure in
your tires while driving.
Each tire has its own pressure
sensor. If the air pressure of a tire
becomes significantly low, the sensor
in that tire immediately sends a
signal that causes the low tire
pressure/TPMS indicator in the
instrument panel to come on. If this
happens, you will see which tire is
losing pressure on the multi-
information display along with a
‘‘CHECK TIRE PRESSURE ’’
message.
Low Tire Pressure/TPMS
Indicator
When the low tire pressure/TPMS
indicator is on, one or more of your
tires is significantly underinflated.
You should stop and check your tires
as soon as possible, and inflate them
to the proper pressure as indicated
on the vehicle's tire information
placard.
It is possible that the pressures
shown on the multi-information
display and the pressures you
manually measure are slightly
different.
If the difference is significant or you
cannot make the low tire pressure/
TPMS indicator and message on the
multi-information display go out after
inflating the tires to the specified
values, have your dealer check the
system as soon as possible. If you think you can safely drive a
short distance to a service station,
proceed slowly to the station, then
inflate the tire to the recommended
pressure.
If the tire is flat, or if the tire pressure
is too low to continue driving, replace
the tire with the compact spare tire
(see page 454).
Driving on a significantly under-
inflated tire causes the tire to
overheat and can lead to tire failure.
Under-inflation also reduces fuel
efficiency and tire tread life, and may
affect the vehicle's handling and
stopping ability.
Because tire pressure varies by
temperature and other conditions,
the low tire pressure/TPMS
indicator may come on unexpectedly.
Tire Pressure Monitoring System (TPMS)39010/06/08 17:42:32 11 ACURA RDX MMC North America Owner's M 50 31STK640 enu
Page 400 of 517

The vehicle stability assist (VSA)
system helps to stabilize the vehicle
during cornering if the vehicle turns
more or less than desired. It also
assists you in maintaining traction
while accelerating on loose or
slippery road surfaces. It does this by
regulating the engine's output and by
selectively applying the brakes.
When VSA activates, you may notice
that the engine does not respond to
the accelerator in the same way it
does at other times. There may also
be some noise from the VSA
hydraulic system. You will also see
the VSA activation indicator blink.
The VSA system cannot enhance the
vehicle's driving stability in all
situations and does not control your
vehicle's entire braking system. It is
still your responsibility to drive and
corner at reasonable speeds and to
leave a sufficient margin of safety.
VSA Activation Indicator
When VSA activates, you will see the
VSA activation indicator blink (see
page 69).Vehicle Stability Assist
(VSA) System Indicator
If this indicator comes on while
driving, pull to the side of the road
when it is safe, and turn off the
engine. Reset the system by
restarting the engine. If the VSA
system indicator stays on or comes
back on while driving, have the VSA
system inspected by your dealer.
NOTE : The main function of the VSA
system is generally known as
Electronic Stability Control (ESC).
The system also includes a traction
control function. If the indicator does not come on
when the ignition switch is turned to
the ON (II) position, there may be a
problem with the VSA system. Have
your dealer inspect your vehicle as
soon as possible.
You will also see a
‘‘CHECK VSA
SYSTEM ’’message on the multi-
information display if there is a
problem with the VSA system.
If the low tire pressure/TPMS
indicator comes on (see page 390),
or the multi-information display
shows a ‘‘CHECK TPMS SYSTEM ’’
message with the indicator flashing
(see page 393), the VSA system
automatically turns on even if the
VSA system is turned off with the
VSA OFF switch. In this case, you
cannot turn the VSA system off by
pressing the VSA OFF switch again.
CONTINUED
Vehicle Stability Assist (VSA
®), aka Electronic Stability Control (ESC), System
395
Driving
10/06/08 17:42:32 11 ACURA RDX MMC North America Owner's M 50 31STK640 enu
Page 402 of 517

Your vehicle has been designed
primarily to carry passengers and
their cargo. You can also use it to tow
a trailer if you carefully observe the
load limits, use the proper
equipment, and follow the guidelines
in this section.Break-In PeriodAvoid towing a trailer during your
vehicle's first 600 miles (1,000 km)
(see page 352).Be sure to read the
Off-Highway
Driving Guidelines section on page
405 if you plan to tow off paved
surfaces.
Exceeding any load limit or
improperly loading your vehicle
and trailer can cause a crash in
which you can be seriously hurt
or killed.
Check the loading of your
vehicle and trailer carefully
before starting to drive. Load Limits
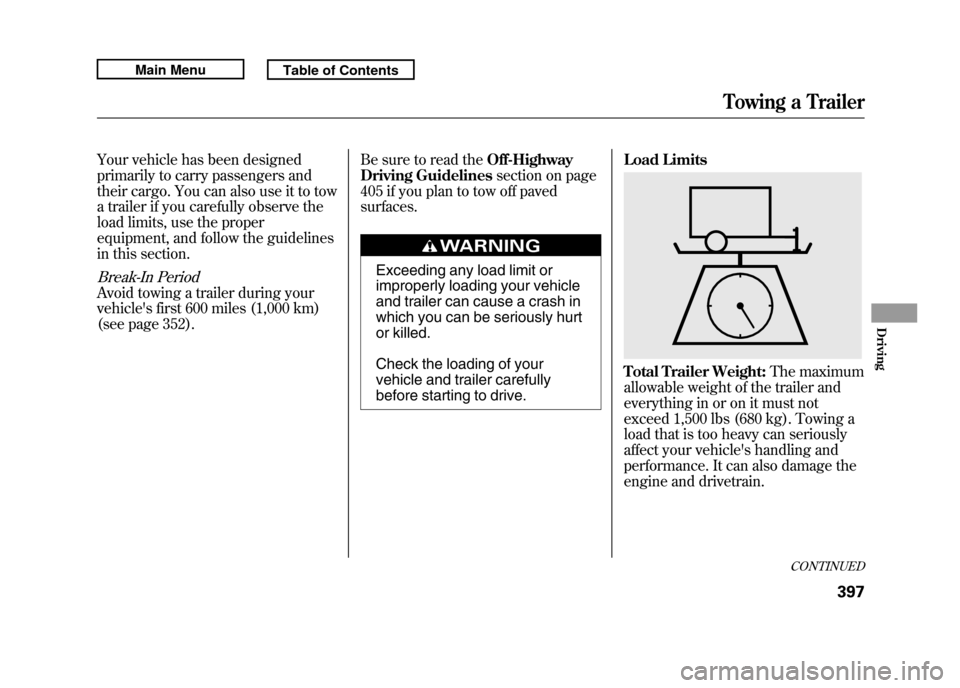
Total Trailer Weight:
The maximum
allowable weight of the trailer and
everything in or on it must not
exceed 1,500 lbs (680 kg). Towing a
load that is too heavy can seriously
affect your vehicle's handling and
performance. It can also damage the
engine and drivetrain.
CONTINUED
Towing a Trailer
397
Driving
10/06/08 17:42:32 11 ACURA RDX MMC North America Owner's M 50 31STK640 enu
Page 414 of 517

This section explains why it is
important to keep your vehicle well
maintained and how to follow basic
maintenance safety precautions.
This section also includes
instructions on how to read the
maintenance minder messages on
the multi-information display, and
instructions for simple maintenance
tasks you may want to take care of
yourself.
If you have the skills and tools to
perform more complex maintenance
tasks on your vehicle, you may want
to purchase the service manual. See
page 497 for information on how to
obtain a copy, or see your dealer.U.S. Vehicles:
Maintenance,
replacement, or repair of
emissions control devices and
systems may be done by any
automotive repair establishment
or individual using parts that are
‘‘certified’’ to EPA standards. Maintenance Safety
.....................
410
Maintenance Minder ™
................
411
Fluid Locations
...........................
419
Adding Engine Oil
......................
420
Required Engine Oil
...............
420
Changing the Engine Oil and
Filter
.......................................
422
Engine Coolant
...........................
424
Windshield Washers
...................
426
Automatic Transmission Fluid
....
427
Brake Fluid
.................................
429
Power Steering Fluid
..................
430
Lights
..........................................
431
Cleaning the Seat Belts
...............
438
Floor Mats
..................................
438
Audio Antenna
............................
439
Intercooler
..................................
439
Dust and Pollen Filter
.................
439
Wiper Blades
..............................
440
Wheels
........................................
443
Tires
...........................................
444
Checking the Battery
..................
450
Vehicle Storage
...........................
451
Interior Care
...............................
452
Maintenance
409
Maintenance
10/06/08 17:42:32 11 ACURA RDX MMC North America Owner's M 50 31STK640 enu
Page 421 of 517

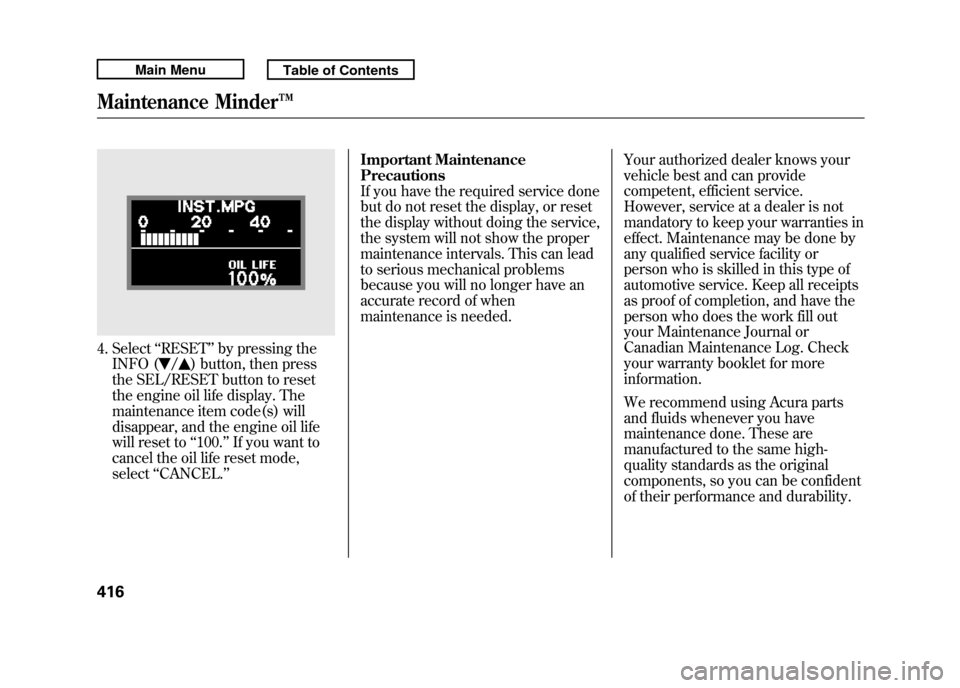
4. Select‘‘RESET ’’by pressing the
INFO (
/
) button, then press
the SEL/RESET button to reset
the engine oil life display. The
maintenance item code(s) will
disappear, and the engine oil life
will reset to ‘‘100. ’’If you want to
cancel the oil life reset mode,
select ‘‘CANCEL. ’’ Important Maintenance
Precautions
If you have the required service done
but do not reset the display, or reset
the display without doing the service,
the system will not show the proper
maintenance intervals. This can lead
to serious mechanical problems
because you will no longer have an
accurate record of when
maintenance is needed.
Your authorized dealer knows your
vehicle best and can provide
competent, efficient service.
However, service at a dealer is not
mandatory to keep your warranties in
effect. Maintenance may be done by
any qualified service facility or
person who is skilled in this type of
automotive service. Keep all receipts
as proof of completion, and have the
person who does the work fill out
your Maintenance Journal or
Canadian Maintenance Log. Check
your warranty booklet for more
information.
We recommend using Acura parts
and fluids whenever you have
maintenance done. These are
manufactured to the same high-
quality standards as the original
components, so you can be confident
of their performance and durability.
Maintenance Minder™41610/06/08 17:42:32 11 ACURA RDX MMC North America Owner's M 50 31STK640 enu
Page 422 of 517

U.S. Vehicles:
According to state and federal
regulations, failure to perform
maintenance on the items marked
with#will not void your emissions
warranties. However, Acura
recommends that all maintenance
services be performed in accordance
with the intervals indicated by the
multi-information display. Owner's Maintenance Checks
You should check the following
items at the specified intervals. If you
are unsure of how to perform any
check, turn to the appropriate page
listed.
●Engine oil level
-Check every
time you fill the fuel tank. See page
356.●Engine coolant level -Check the
radiator reserve tank every time
you fill the fuel tank. See page 357.●Automatic transmission -Check
the fluid level monthly. See page
427.
●Brakes -Check the fluid level
monthly. See page 429.●Tires -Check the tire pressure
monthly. Examine the tread for
wear and foreign objects. See page
445.●Lights -Check the operation of
the headlights, parking lights,
taillights, high-mount brake light,
and license plate lights monthly.
See page 431.
Maintenance Minder™
417
Maintenance
10/06/08 17:42:32 11 ACURA RDX MMC North America Owner's M 50 31STK640 enu
Page 423 of 517

SymbolMaintenance Main Items
A
●Replace engine oil
ꭧ 1
B
●Replace engine oil
ꭧ1and oil filter
●Inspect front and rear brakes●Check parking brake adjustment●Inspect these items:●Tie rod ends, steering gear box, and boots●Suspension components●Driveshaft boots●Brake hoses and lines (including ABS/VSA)●All fluid levels and condition of fluids●Exhaust system
#
●Fuel lines and connections
#
ꭧ1: If the message ‘‘SERVICE ’’does not appear more than 12 months after
the display is reset, change the engine oil every year.
#: See information on maintenance and emissions warranty on page 417.
NOTE:
●Independent of maintenance message in the Information Display,
replace the brake fluid every 3 years.●Inspect idle speed every 160,000 miles (256,000 km).●Adjust the valves during services A, B, 1, 2, or 3 if they are noisy. Symbol Maintenance Sub Items
1
●Rotate tires
2●Replace air cleaner element If you drive in dusty conditions, replace every 15,000
miles (24,000 km).●Replace dust and pollen filterIf you drive primarily in urban areas that have high
concentrations of soot in the air from industry and from
diesel-powered vehicles, replace every 15,000 miles
(24,000 km).●Inspect drive belt
3●Replace transmission and transfer
ꭧ 2fluid
Driving in mountainous areas at very low vehicle speeds
or trailer towing results in higher transmission and
transfer temperatures. This requires transmission and
transfer fluid changes more frequently than
recommended by the Maintenance Minder. If you
regularly drive your vehicle under these conditions, have
the transmission and transfer fluid changed at 60,000
miles (100,000 km), then every 30,000 miles (48,000 km).
4
●Replace spark plugs●Inspect valve clearance
5●Replace engine coolant
6●Replace rear differential fluid
ꭧ 2
Driving in mountainous areas at very low vehicle speeds
or trailer towing results in higher level of mechanical
(shear) stress to fluid. This requires differential fluid
changes more frequently than recommended by the
Maintenance Minder. If you regularly drive your vehicle
under these conditions, have the differential fluid
changed at 7,500 miles (12,000 km), then every 15,000
miles (24,000 km).
ꭧ2: SH-AWD only
Maintenance Minder™
Maintenance Minder
41810/06/08 17:42:32 11 ACURA RDX MMC North America Owner's M 50 31STK640 enu
Page 425 of 517

Unscrew and remove the engine oil
fill cap on top of the valve cover. Pour
in the oil slowly and carefully so you
do not spill any. Clean up any spills
immediately. Spilled oil could
damage components in the engine
compartment.Reinstall the engine oil fill cap, and
tighten it securely. Wait a few
minutes, and recheck the oil level on
the engine oil dipstick. Do not fill
above the upper mark; you could
damage the engine.
Required Engine Oil
Oil is a major contributor to your
engine's performance and longevity.
Your vehicle is equipped with a high-
performance turbocharged engine
that requires the use of synthetic
motor oil. Always use Mobil 1
®
5W-30 or an equivalent oil that meets
the Acura HTO-06 standard. Not all
synthetic oils will meet this standard.
Only use oils that display the HTO-06
standard on the label.
Failure to use Mobil 1
®or an
equivalent oil that meets the HTO-06
standard can lead to a reduction in
engine performance or durability,
and can cause engine damage not
covered by your warranty.
ENGINE OIL FILL CAPAdding Engine Oil42010/06/08 17:42:32 11 ACURA RDX MMC North America Owner's M 50 31STK640 enu
Page 427 of 517

Always change the oil and filter
according to the maintenance
messages shown on the multi-
information display. The oil and filter
collect contaminants that can
damage your engine if they are not
removed regularly.
Changing the oil and filter requires
special tools and access from
underneath the vehicle. The vehicle
should be raised on a service station-
type hydraulic lift for this service.
Unless you have the knowledge and
proper equipment, you should have
this maintenance done by a skilled
technician.
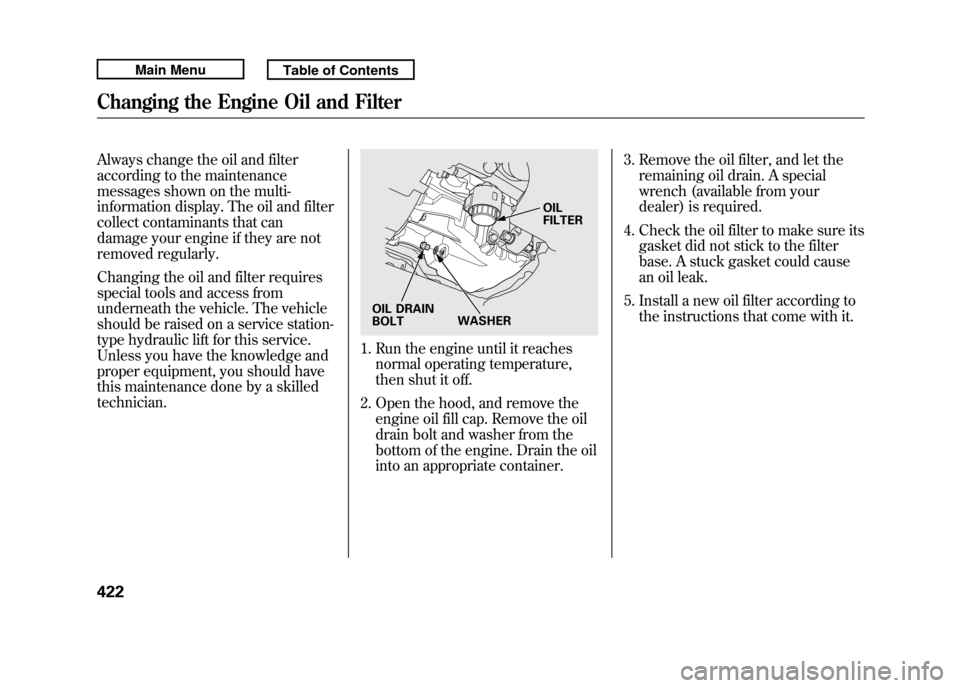
1. Run the engine until it reachesnormal operating temperature,
then shut it off.
2. Open the hood, and remove the engine oil fill cap. Remove the oil
drain bolt and washer from the
bottom of the engine. Drain the oil
into an appropriate container. 3. Remove the oil filter, and let the
remaining oil drain. A special
wrench (available from your
dealer) is required.
4. Check the oil filter to make sure its gasket did not stick to the filter
base. A stuck gasket could cause
an oil leak.
5. Install a new oil filter according to the instructions that come with it.
OIL
FILTER
OIL DRAIN
BOLT WASHER
Changing the Engine Oil and Filter42210/06/08 17:42:32 11 ACURA RDX MMC North America Owner's M 50 31STK640 enu