ECO mode Acura RDX 2013 Navigation Manual
[x] Cancel search | Manufacturer: ACURA, Model Year: 2013, Model line: RDX, Model: Acura RDX 2013Pages: 260, PDF Size: 24.3 MB
Page 145 of 260
144
Playing XM® RadioNote Function
Audio
Note Function
Record a 10-second sound file from the current channel that contains the channel,
category, name, and title information.
1.When tuned to the channel you want to record, press and hold the XM button for
a few seconds to start recording.
2. Press the XM button again to stop the recording if less than 10 seconds have
elapsed.
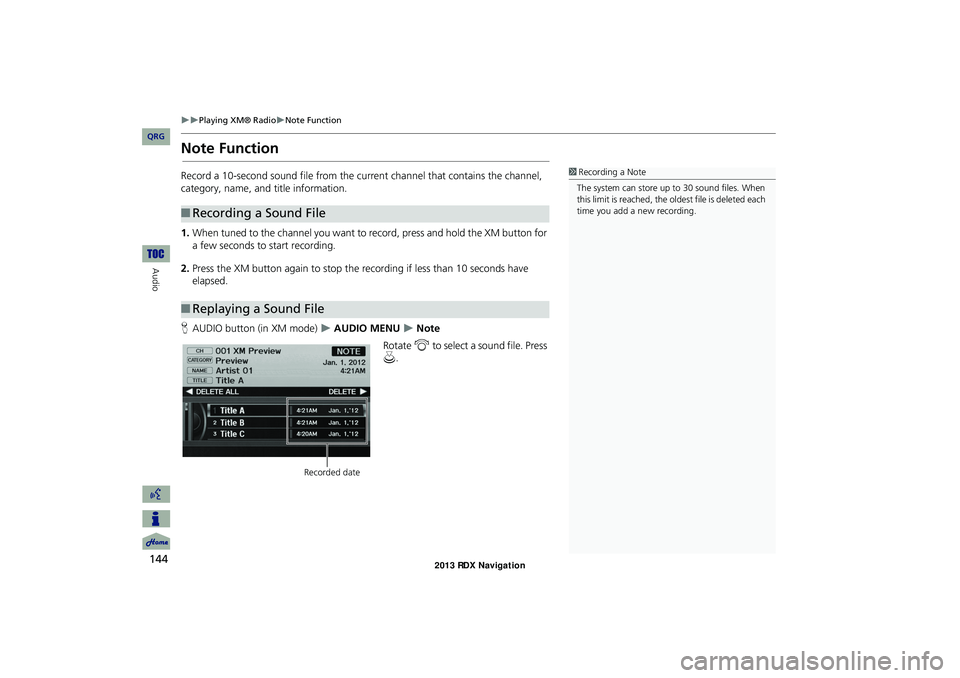
H AUDIO button (in XM mode)
AUDIO MENU Note
Rotate i to select a sound file. Press
u .
■Recording a Sound File
■Replaying a Sound File
1 Recording a Note
The system can store up to 30 sound files. When
this limit is reached, the ol dest file is deleted each
time you add a new recording.
Recorded date
RDX_KA-31TX4800.book Page 144 Monday, January 30, 2012 11:32 PM
QRG
Page 148 of 260
147
Audio
Playing a Disc
Selecting Disc Mode
1.Press the DISC button to play a CD or other disc.
2. Insert a disc into the disc slot.
The disc automatically begins playing.
3. Select a track using the bars (S KIP, TUNE, CATEGORY, SCAN/A.SEL).
The track number and elapsed time ar e displayed on the display. Title
information for audio CDs is displayed if found in the Gracenote® Album Info
(Gracenote® Media Database) stored on the built-in hard disc drive (HDD). Text
information stored on MP3/WMA/ AAC discs is also displayed.
Audio Screen Control
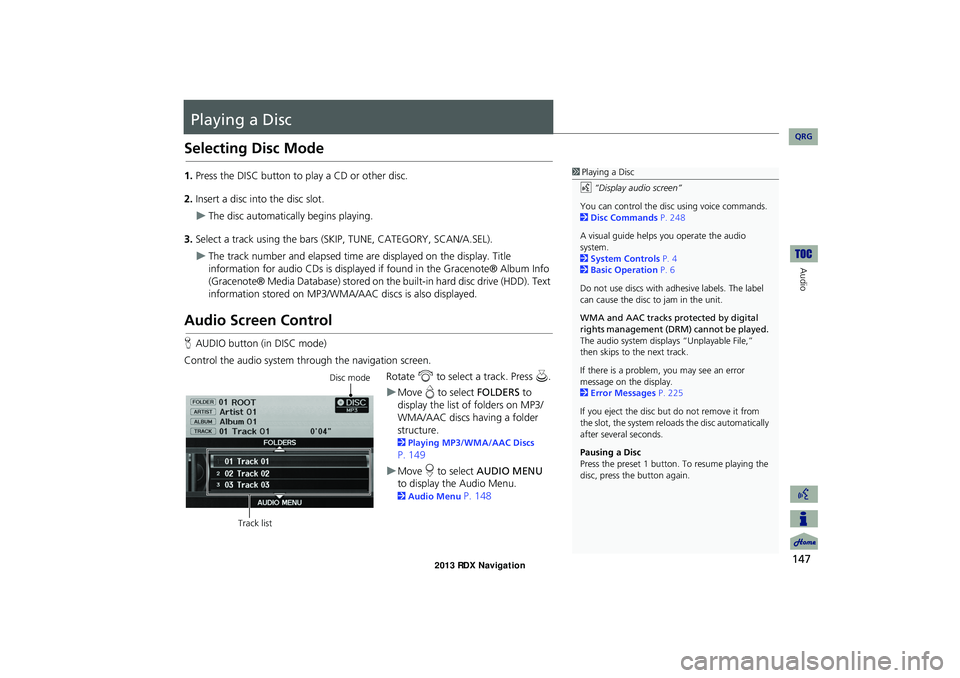
HAUDIO button (in DISC mode)
Control the audio system through the navigation screen. Rotate i to select a track. Press u .
Move e to select FOLDERS to
display the list of folders on MP3/
WMA/AAC discs having a folder
structure.
2 Playing MP3/WMA/AAC Discs
P. 149
Move r to select AUDIO MENU
to display the Audio Menu.
2 Audio Menu P. 148
1Playing a Disc
d “Display audio screen”
You can control the disc using voice commands.
2 Disc Commands P. 248
A visual guide helps you operate the audio
system.
2 System Controls P. 4
2 Basic Operation P. 6
Do not use discs with a dhesive labels. The label
can cause the disc to jam in the unit.
WMA and AAC tracks protected by digital
rights management (DRM) cannot be played.
The audio system displa ys “Unplayable File,”
then skips to the next track.
If there is a problem, you may see an error
message on the display.
2 Error Messages P. 225
If you eject the disc but do not remove it from
the slot, the system reloads the disc automatically
after severa l seconds.
Pausing a Disc
Press the preset 1 button. To resume playing the
disc, press the button again.
Disc mode
Track list
RDX_KA-31TX4800.book Page 147 Monday, January 30, 2012 11:32 PM
QRG
Page 149 of 260
148
Playing a DiscAudio Menu
Audio
Audio Menu
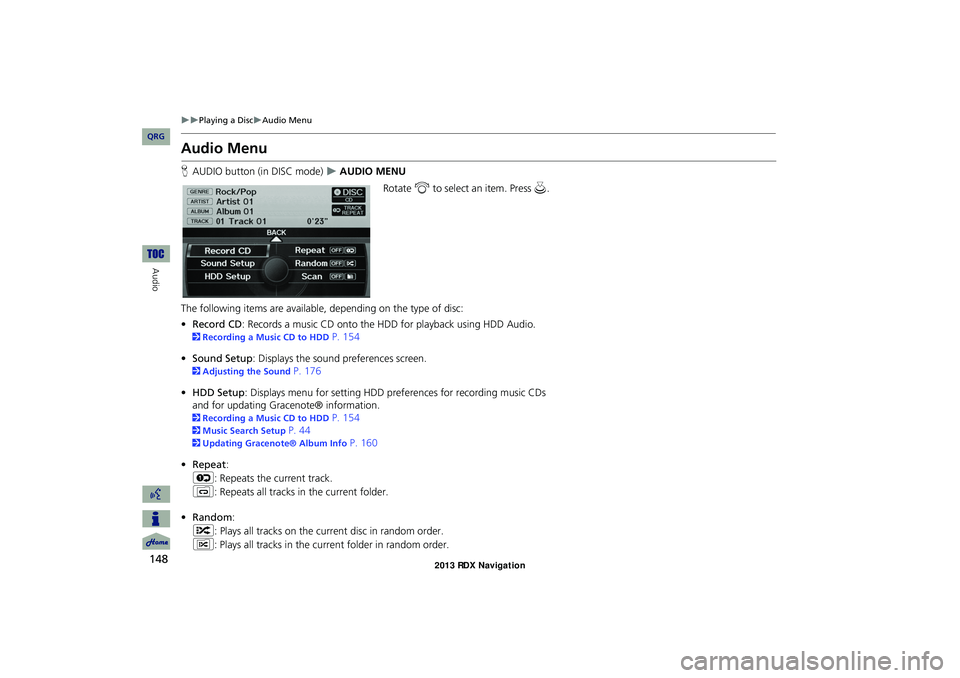
HAUDIO button (in DISC mode) AUDIO MENU
Rotate i to select an item. Press u .
The following items are available, depending on the type of disc:
• Record CD : Records a music CD onto the HDD for playback using HDD Audio.
2Recording a Music CD to HDD P. 154
• Sound Setup: Displays the sound preferences screen.
2 Adjusting the Sound P. 176
• HDD Setup : Displays menu for setting HDD pref erences for recording music CDs
and for updating Gracenote® information.
2 Recording a Music CD to HDD P. 154
2Music Search Setup P. 44
2Updating Gracenote® Album Info P. 160
• Repeat :
6 : Repeats the current track.
7 : Repeats all tracks in the current folder.
• Random :
F : Plays all tracks on the curre nt disc in random order.
I : Plays all tracks in the curr ent folder in random order.
RDX_KA-31TX4800.book Page 148 Monday, January 30, 2012 11:32 PM
QRG
Page 150 of 260
149
Playing a DiscPlaying MP3/WMA/AAC Discs
Audio
•Scan :
1 : Scans all tracks on the disc (or in the se lected folder) in the order they were
recorded (stored) and plays a 10-second sample. Select OFF to stop scanning and
play the current selection.
2 : Scans the first track in each folder on the disc and plays a 10-second
sample. Select OFF to stop scanning and play the current selection.
Playing MP3/WMA/AAC Discs
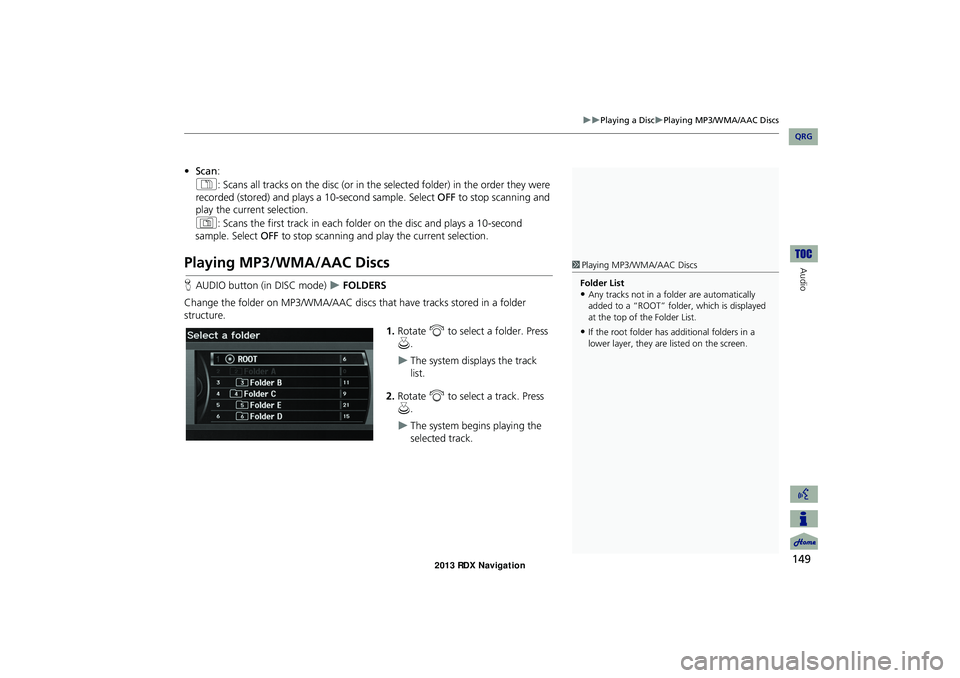
HAUDIO button (in DISC mode) FOLDERS
Change the folder on MP3/WMA/AAC discs th at have tracks stored in a folder
structure.
1.Rotate i to select a folder. Press
u .
The system displays the track
list.
2. Rotate i to select a track. Press
u .
The system begins playing the
selected track.
1Playing MP3/WMA/AAC Discs
Folder List
•Any tracks not in a folder are automatically
added to a “ROOT” folder, which is displayed
at the top of the Folder List.
•If the root folder has additional folders in a
lower layer, they are listed on the screen.
RDX_KA-31TX4800.book Page 149 Monday, January 30, 2012 11:32 PM
QRG
Page 152 of 260
151
Audio
Playing Hard Disc Drive (HDD) Audio
The Hard Disc Drive (HDD) Audio function plays tracks from music CDs that have
been recorded onto the built-in HDD. You ca n arrange the tracks in playlists or play
the tracks using various search methods.
Selecting HDD Mode
1. Press the HDD/AUX button to play tracks stored on the HDD.
2. Select a track by genre, artist, album, recording date, playlist, or track list.
The track number and elapsed time ar e displayed on the display. Title
information is displayed if found in the Gracenote® Album Info (Gracenote®
Media Database) stored on the HDD.
The HDD has two types of playlists: original playlists and user playlists. An
original playlist is automatically created for each album when a music CD is
recorded. You can customize up to six us er playlists provided on the HDD by
adding tracks from your original playlists.
1 Playing Hard Disc Drive (HDD) Audio
d “Display audio screen”
You can control the HDD audio using voice
commands.
2 HDD Commands P. 248
A visual guide helps you operate the audio
system.
2 System Controls P. 4
2 Basic Operation P. 6
Music tracks recorded on HDD cannot be
recorded onto CDs or other devices.
Tracks are recorded at four times the playback
speed using ultra-eff icient compression
technology; therefore, sound quality may vary
slightly from the original.
If the HDD is ever replaced, all music data is lost
and cannot be recovered.
If there is a problem, you may see an error
message on the display.
2 Error Messages P. 225
RDX_KA-31TX4800.book Page 151 Monday, January 30, 2012 11:32 PM
QRG
Page 156 of 260
155
Playing Hard Disc Drive (HDD) AudioRecording a Music CD to HDD
Audio
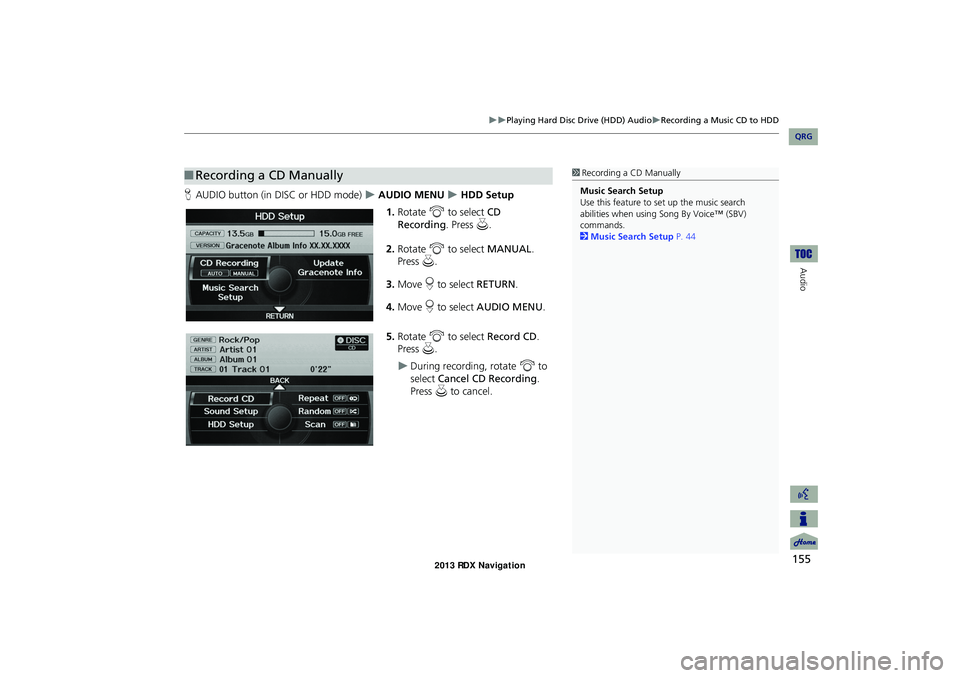
HAUDIO button (in DISC or HDD mode) AUDIO MENU HDD Setup
1. Rotate i to select CD
Recording. Press u.
2. Rotate i to select MANUAL .
Press u.
3. Move r to select RETURN.
4. Move r to select AUDIO MENU .
5. Rotate i to select Record CD .
Press u.
During recording, rotate i to
select Cancel CD Recording .
Press u to cancel.
■Recording a CD Manually1 Recording a CD Manually
Music Search Setup
Use this feature to set up the music search
abilities when using Song By Voice™ (SBV)
commands.
2 Music Search Setup P. 44
RDX_KA-31TX4800.book Page 155 Monday, January 30, 2012 11:32 PM
QRG
Page 157 of 260
156
Playing Hard Disc Drive (HDD) AudioSearching for Music
Audio
Searching for Music
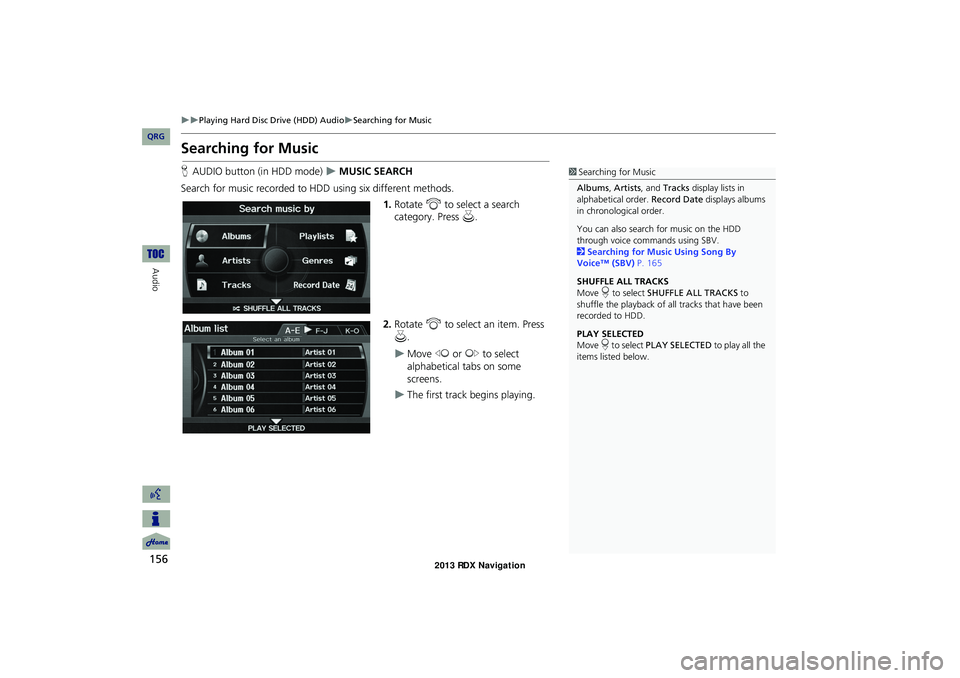
HAUDIO button (in HDD mode) MUSIC SEARCH
Search for music recorded to HDD using six different methods. 1.Rotate i to select a search
category. Press u.
2. Rotate i to select an item. Press
u .
Move w or y to select
alphabetical tabs on some
screens.
The first track begins playing.
1 Searching for Music
Albums , Artists, and Tracks display lists in
alphabetical order. Record Date displays albums
in chronological order.
You can also search for music on the HDD
through voice commands using SBV.
2 Searching for Music Using Song By
Voice™ (SBV) P. 165
SHUFFLE ALL TRACKS
Move r to select SHUFFLE ALL TRACKS to
shuffle the playback of al l tracks that have been
recorded to HDD.
PLAY SELECTED
Move r to select PLAY SELECTED to play all the
items listed below.
RDX_KA-31TX4800.book Page 156 Monday, January 30, 2012 11:32 PM
QRG
Page 162 of 260
161
Audio
Playing an iPod®
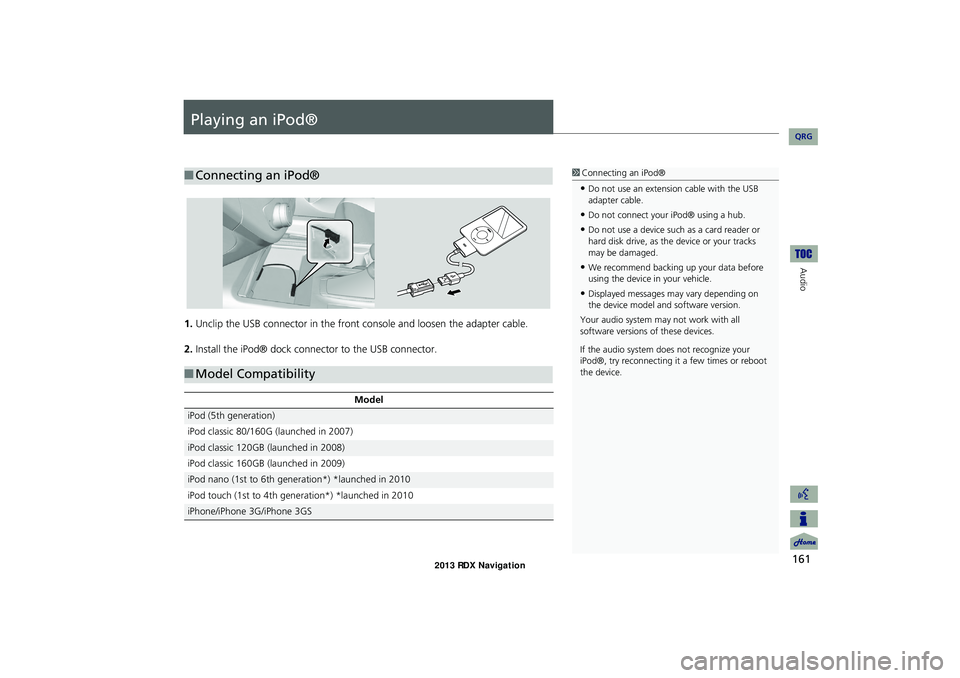
1.Unclip the USB connector in the front console and loosen the adapter cable.
2. Install the iPod® dock connector to the USB connector.
■Connecting an iPod®1 Connecting an iPod®
•Do not use an extension cable with the USB
adapter cable.
•Do not connect your iPod® using a hub.
•Do not use a device such as a card reader or
hard disk drive, as th e device or your tracks
may be damaged.
•We recommend backing up your data before
using the device in your vehicle.
•Displayed messages ma y vary depending on
the device model and software version.
Your audio system ma y not work with all
software versions of these devices.
If the audio system do es not recognize your
iPod®, try reconne cting it a few times or reboot
the device.
■ Model Compatibility
Model
iPod (5th generation)
iPod classic 80/160G (launched in 2007)
iPod classic 120GB (launched in 2008)
iPod classic 160GB (launched in 2009)
iPod nano (1st to 6th generation*) *launched in 2010
iPod touch (1st to 4th generation*) *launched in 2010
iPhone/iPhone 3G/iPhone 3GS
RDX_KA-31TX4800.book Page 161 Monday, January 30, 2012 11:32 PM
QRG
Page 166 of 260
165
Audio
Searching for Music Using Song By Voice™ (SBV)
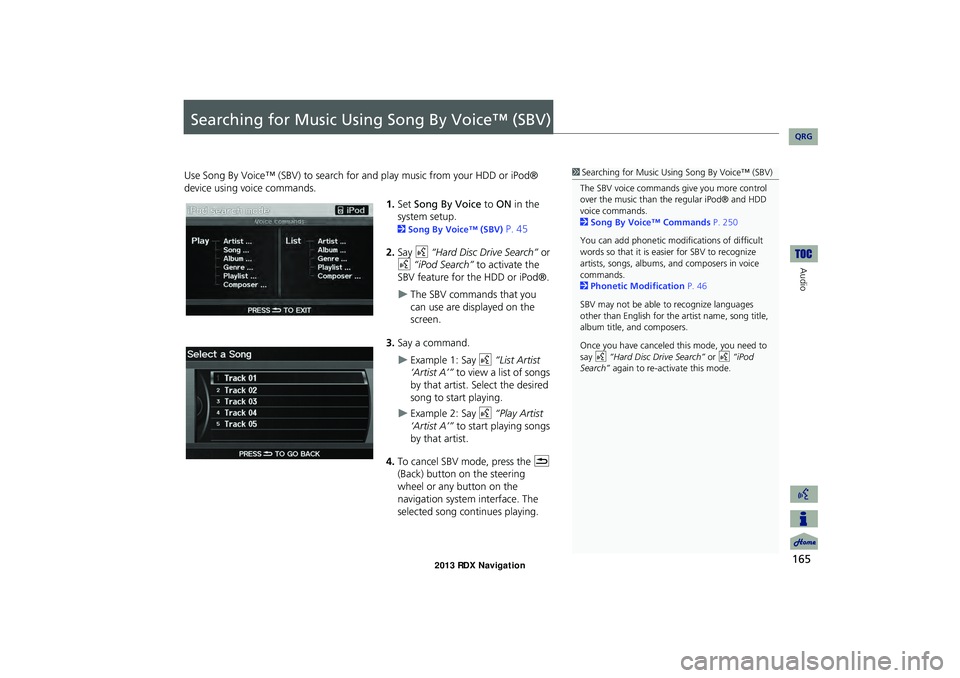
Use Song By Voice™ (SBV) to search for and play music from your HDD or iPod®
device using voice commands.
1.Set Song By Voice to ON in the
system setup.
2 Song By Voice™ (SBV) P. 45
2. Say d “Hard Disc Drive Search” or
d “iPod Search” to activate the
SBV feature for the HDD or iPod®.
The SBV commands that you
can use are displayed on the
screen.
3. Say a command.
Example 1: Say d “List Artist
‘Artist A’” to view a list of songs
by that artist. Select the desired
song to start playing.
Example 2: Say d “Play Artist
‘Artist A’” to start playing songs
by that artist.
4. To cancel SBV mode, press the K
(Back) button on the steering
wheel or any button on the
navigation system interface. The
selected song continues playing.
1 Searching for Music Using Song By Voice™ (SBV)
The SBV voice commands give you more control
over the music than the regular iPod® and HDD
voice commands.
2 Song By Voice™ Commands P. 250
You can add phonetic modi fications of difficult
words so that it is easier for SBV to recognize
artists, songs, albums, and composers in voice
commands.
2 Phonetic Modification P. 46
SBV may not be able to recognize languages
other than English for the artist name, song title,
album title, and composers.
Once you have canceled this mode, you need to
say d “Hard Disc Drive Search” or d “iPod
Search” again to re-activate this mode.
RDX_KA-31TX4800.book Page 165 Monday, January 30, 2012 11:32 PM
QRG
Page 173 of 260
172
Playing a USB Flash DriveAudio Menu
Audio
Audio Menu
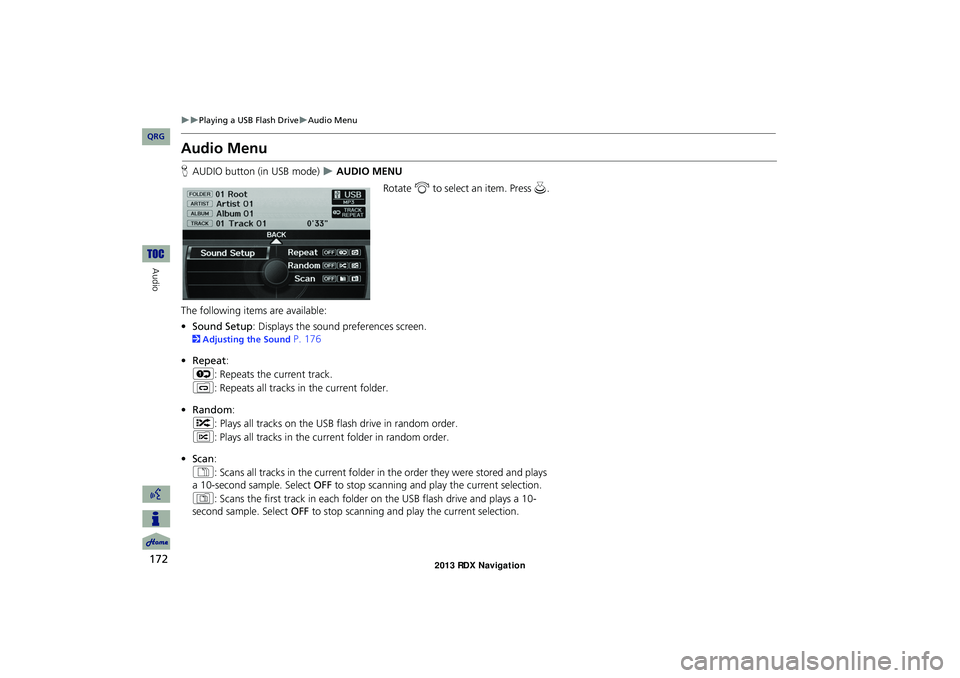
HAUDIO button (in USB mode) AUDIO MENU
Rotate i to select an item. Press u .
The following item s are available:
• Sound Setup: Displays the sound preferences screen.
2 Adjusting the Sound P. 176
• Repeat :
6 : Repeats the current track.
7 : Repeats all tracks in the current folder.
• Random :
F : Plays all tracks on the USB flash drive in random order.
I : Plays all tracks in the curr ent folder in random order.
• Scan :
1 : Scans all tracks in the current folder in the order they were stored and plays
a 10-second sample. Select OFF to stop scanning and play the current selection.
2 : Scans the first track in each folder on the USB flash drive and plays a 10-
second sample. Select OFF to stop scanning and play the current selection.
RDX_KA-31TX4800.book Page 172 Monday, January 30, 2012 11:32 PM
QRG