ECO mode Acura RDX 2016 Navigation Manual
[x] Cancel search | Manufacturer: ACURA, Model Year: 2016, Model line: RDX, Model: Acura RDX 2016Pages: 363, PDF Size: 17.77 MB
Page 174 of 363
173
Audio
This section describes how to operate the audio system. You can play music from a wide
array of media sources, and control the audio system using the audio buttons, the
Interface Dial, or voice control.
Audio System.................................................. 174
About Your Audio System .............................. 174
USB Port ........................................................ 175
Auxiliary Input Jack ......... .......................... ..... 176
Audio System Theft Protection ....................... 176
Setting Audio Shortcuts ................................. 177
Customizing Audio Source ............................. 178
Audio Remote Controls .................................. 179
Steering Wheel Controls ................................ 179
Audio Settings ................................................. 181
Adjusting the Sound ...................................... 183
Playing FM/AM Radio ..................................... 184
Selecting FM/AM Mode.................................. 184
Audio Screen Control ..................................... 185
Audio Menu .................................................. 188
Playing SiriusXM ® Radio ................................. 190
Selecting SiriusXM ® Mode .............................. 190
Audio Screen Control ..................................... 191 Audio Menu ................................................... 200
SiriusXM®
Radio Service.................................. 203
Playing a Disc ................................................... 205
Selecting Disc Mode ....................................... 205
Audio Screen Control ..................................... 206
Audio Menu ................................................... 207
Recommended CDs ........................................ 210
Playing Hard Disc Drive (HDD) Audio ............ 212
Selecting HDD Mode ...................................... 212
Recording a Music CD to HDD........................ 213
Audio Screen Control ..................................... 214
Audio Menu ................................................... 215
Playing an iPod ................................................ 224
Selecting iPod Mode....................................... 225
Audio Screen Control ..................................... 226
Audio Menu ................................................... 228
Song By Voice
TM (SBV) .................................... 231 Playing Internet Radio
.................................... 236
Selecting Internet Radio Mode ....................... 236
Pandora ® Menu
*............................................ 237
AhaTM Radio Menu ......................................... 239
Playing a USB Flash Drive ............................... 241
Selecting USB Mode....................................... 242
Audio Screen Control..................................... 243
Audio Menu .................................................. 244
Playing Bluetooth ® Audio .............................. 247
Selecting Bluetooth ® Audio Mode.................. 247
Audio Screen Control..................................... 248
16 ACURA RDX NAVI-31TX48300.book 173 ページ 2015年3月6日 金曜日 午後1時26分
Page 176 of 363
175
uuAudio System uUSB Port
Audio
USB Port
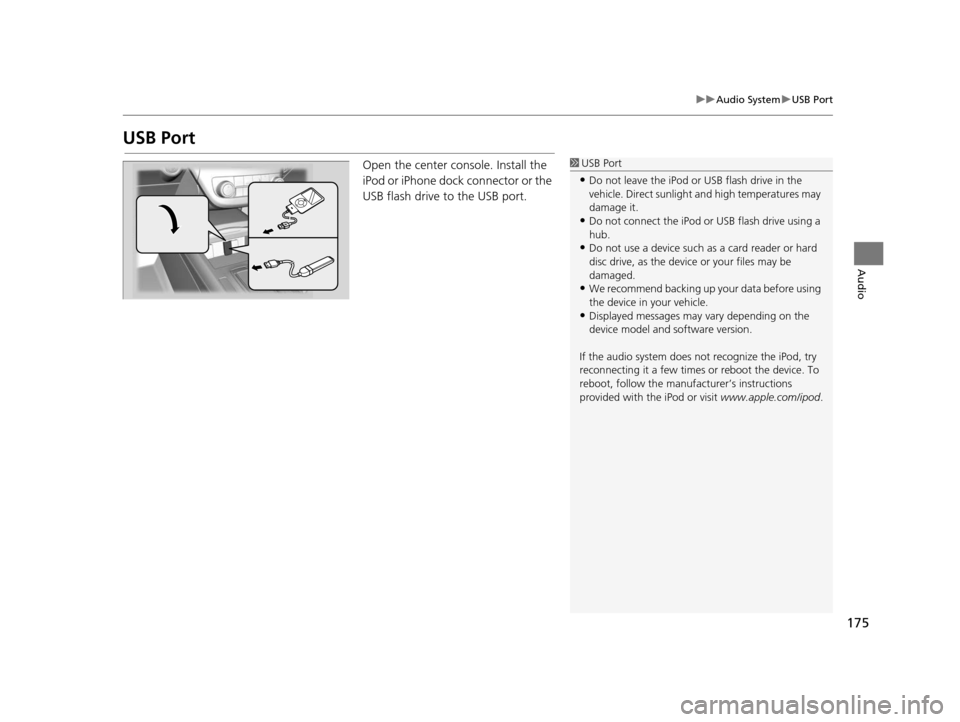
Open the center console. Install the
iPod or iPhone dock connector or the
USB flash drive to the USB port.1 USB Port
•Do not leave the iPod or USB flash drive in the
vehicle. Direct sunlight and high temperatures may
damage it.
•Do not connect the iPod or USB flash drive using a
hub.
•Do not use a device such as a card reader or hard
disc drive, as the device or your files may be
damaged.
•We recommend backing up yo ur data before using
the device in your vehicle.
•Displayed messages may vary depending on the
device model and software version.
If the audio system does not recognize the iPod, try
reconnecting it a few times or reboot the device. To
reboot, follow the manufac turer’s instructions
provided with the iPod or visit www.apple.com/ipod.
16 ACURA RDX NAVI-31TX48300.book 175 ページ 2015年3月6日 金曜日 午後1時26分
Page 177 of 363
176
uuAudio System uAuxiliary Input Jack
Audio
Auxiliary Input Jack
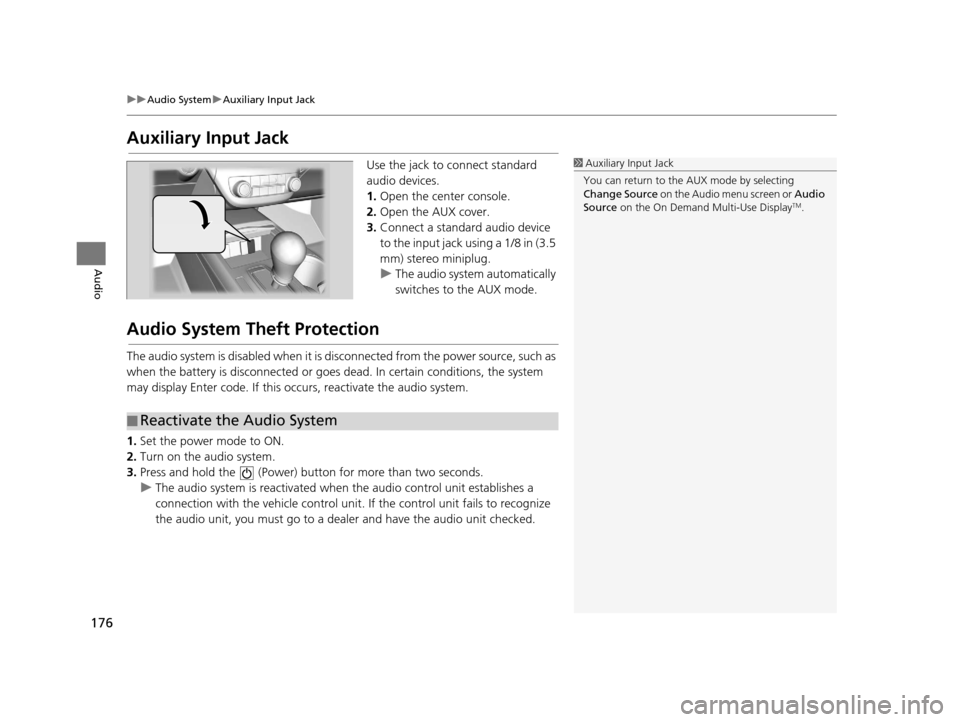
Use the jack to connect standard
audio devices.
1. Open the center console.
2. Open the AUX cover.
3. Connect a standard audio device
to the input jack using a 1/8 in (3.5
mm) stereo miniplug.
u The audio system automatically
switches to the AUX mode.
Audio System Theft Protection
The audio system is disabled when it is di sconnected from the power source, such as
when the battery is disconnected or goes dead. In certain conditions, the system
may display Enter code. If this occurs, reactivate the audio system.
1. Set the power mode to ON.
2. Turn on the audio system.
3. Press and hold the (Power) bu tton for more than two seconds.
u The audio system is reactivated when the audio control unit establishes a
connection with the vehicle control unit . If the control unit fails to recognize
the audio unit, you must go to a deal er and have the audio unit checked.
1Auxiliary Input Jack
You can return to the AUX mode by selecting
Change Source on the Audio menu screen or Audio
Source on the On Demand Multi-Use Display
TM.
■Reactivate the Audio System
16 ACURA RDX NAVI-31TX48300.book 176 ページ 2015年3月6日 金曜日 午後1時26分
Page 183 of 363
uuAudio Settings u
182
Audio
CD/HDD tab
• Recording from CD (CD mode): Selects whether the songs on music CDs are
automatically recorded to the HDD.
• Recording Quality (CD mode): Selects the quality of the music files recorded to
the HDD.
• HDD Info (HDD mode): Displays the HDD capacity.
• Update Gracenote Album Info (CD or HDD mode): Updates the Gracenote ®
Album Info (Gracenote ® Media Database) from CD or from USB.
2Updating Gracenote® Album Info P. 222
•Delete All HDD Data (HDD mode): Resets all the menu and customized
settings, and delete all music data on the HDD.
Bluetooth tab
• Bluetooth Device List (Bluetooth ® Audio mode): Edits or deletes Bluetooth
Audio device paired.
• Connect Bluetooth Audio Device (Bluetooth ® Audio, Pandora ®
* or AhaTM
mode): Connects, disconnects or pairs a Bluetooth® Audio device to HFL.
Other tab
• Source Select Popup : Selects whether the list of selectable audio sources comes
on when the AUDIO button is pressed.
• HD Radio Mode
* (AM/FM mode): Selects whether the audio system
automatically switches to the digital ra dio waves or receives the analogue waves
only.
• Cover Art (CD (MP3/WMA/AAC), iPod, USB, Pandora ®
* or AhaTM mode): Turns
on and off the cover art display.
• Default : Cancels/Resets all customized items in the Audio Settings group as
default.
1 Audio Settings
*: This function is availa ble on U.S. models only.
16 ACURA RDX NAVI-31TX48300.book 182 ページ 2015年3月6日 金曜日 午後1時26分
Page 187 of 363
uuPlaying FM/AM Radio uAudio Screen Control
186
Audio
The following items are available:
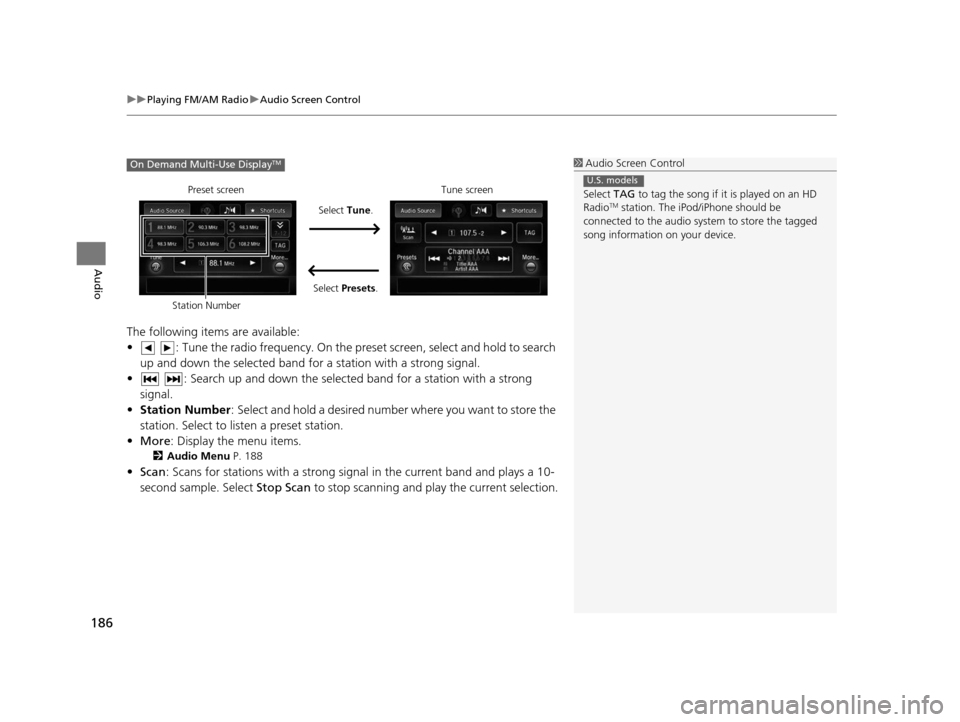
• : Tune the radio frequency. On the pres et screen, select and hold to search
up and down the selected band for a station with a strong signal.
• : Search up and down the selected band for a station with a strong signal.
• Station Number : Select and hold a desired number where you want to store the
station. Select to listen a preset station.
• More : Display the menu items.
2Audio Menu P. 188
•Scan : Scans for stations with a strong signal in the current band and plays a 10-
second sample. Select Stop Scan to stop scanning and play the current selection.
1Audio Screen Control
Select TAG to tag the song if it is played on an HD
Radio
TM station. The iPod/iPhone should be
connected to the audio system to store the tagged
song information on your device.
U.S. models
On Demand Multi-Use DisplayTM
Preset screen
Select Tune.
Select Presets. Tune screen
Station Number
16 ACURA RDX NAVI-31TX48300.book 186 ページ 2015年3月6日 金曜日 午後1時26分
Page 189 of 363
188
uuPlaying FM/AM Radio uAudio Menu
Audio
Audio Menu
H MENU button (in FM/AM mode)
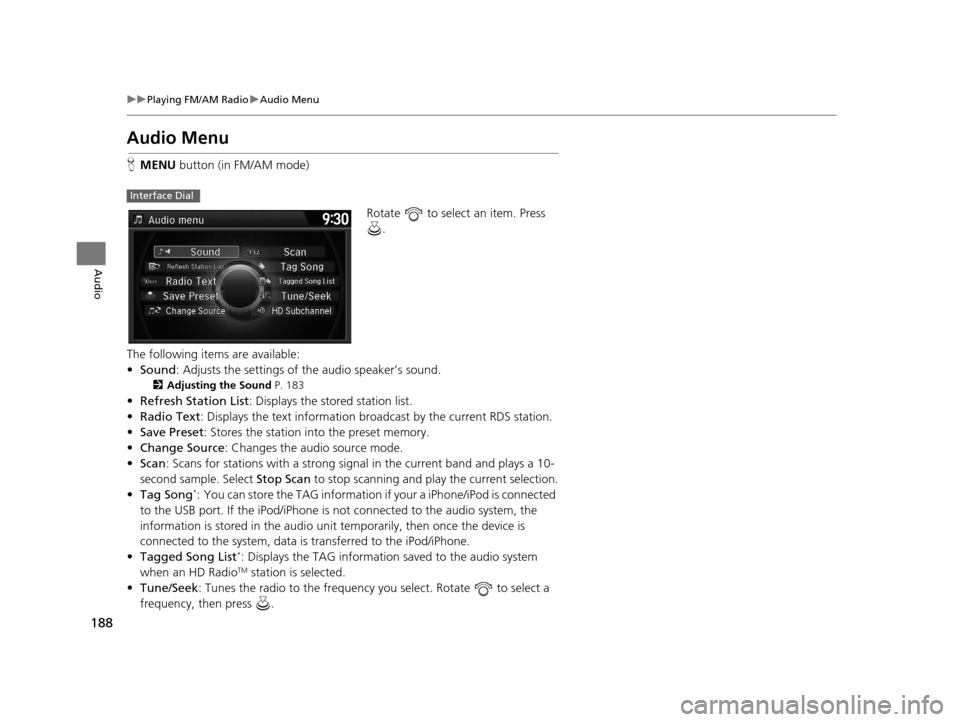
Rotate to select an item. Press .
The following items are available:
• Sound : Adjusts the settings of the audio speaker’s sound.
2Adjusting the Sound P. 183
•Refresh Station List : Displays the stored station list.
• Radio Text : Displays the text information broa dcast by the current RDS station.
• Save Preset : Stores the station into the preset memory.
• Change Source: Changes the audio source mode.
• Scan : Scans for stations with a strong signal in the current band and plays a 10-
second sample. Select Stop Scan to stop scanning and play the current selection.
• Tag Song
*: You can store the TAG information if your a iPhone/iPod is connected
to the USB port. If the iPod/iPhone is not connected to the audio system, the
information is stored in the audio unit temporarily, then once the device is
connected to the system, data is transferred to the iPod/iPhone.
• Tagged Song List
*: Displays the TAG information saved to the audio system
when an HD RadioTM station is selected.
• Tune/Seek : Tunes the radio to the frequency you select. Rotate to select a
frequency, then press .
Interface Dial
16 ACURA RDX NAVI-31TX48300.book 188 ページ 2015年3月6日 金曜日 午後1時26分
Page 190 of 363
189
uuPlaying FM/AM Radio uAudio Menu
Audio
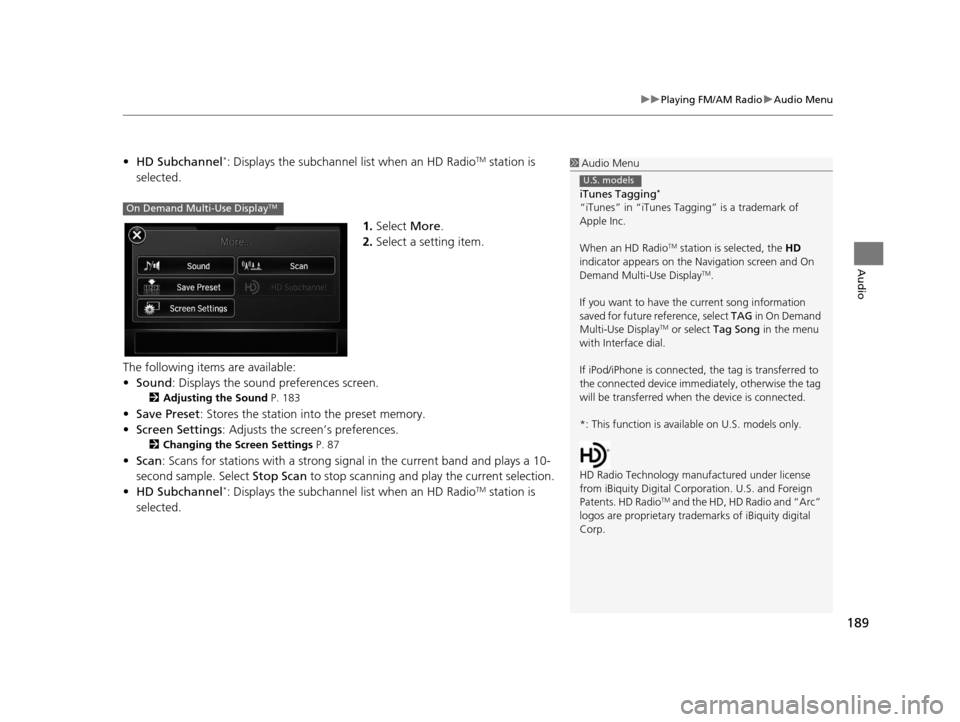
• HD Subchannel*: Displays the subchannel list when an HD RadioTM station is
selected.
1.Select More.
2. Select a setting item.
The following items are available:
• Sound : Displays the sound preferences screen.
2Adjusting the Sound P. 183
•Save Preset : Stores the station into the preset memory.
• Screen Settings : Adjusts the screen’s preferences.
2Changing the Screen Settings P. 87
•Scan : Scans for stations with a strong signal in the current band and plays a 10-
second sample. Select Stop Scan to stop scanning and play the current selection.
• HD Subchannel
*: Displays the subchannel list when an HD RadioTM station is
selected.
1 Audio Menu
iTunes Tagging
*
“iTunes” in “iTunes Ta gging” is a trademark of
Apple Inc.
When an HD Radio
TM station is selected, the HD
indicator appears on the Navigation screen and On
Demand Multi-Use Display
TM.
If you want to have the current song information
saved for future reference, select TAG i n O n D e m a n d
Multi-Use Display
TM or select Tag Song in the menu
with Interface dial.
If iPod/iPhone is connected, the tag is transferred to
the connected device immedi ately, otherwise the tag
will be transferred when the device is connected.
*: This function is availa ble on U.S. models only.
HD Radio Technology manufactured under license
from iBiquity Digi tal Corporation. U.S. and Foreign
Patents. HD Radio
TM and the HD, HD Radio and “Arc”
logos are propr ietary trademarks of iBiquity digital
Corp.
U.S. models
On Demand Multi-Use DisplayTM
16 ACURA RDX NAVI-31TX48300.book 189 ページ 2015年3月6日 金曜日 午後1時26分
Page 193 of 363
uuPlaying SiriusXM ® Radio uAudio Screen Control
192
Audio
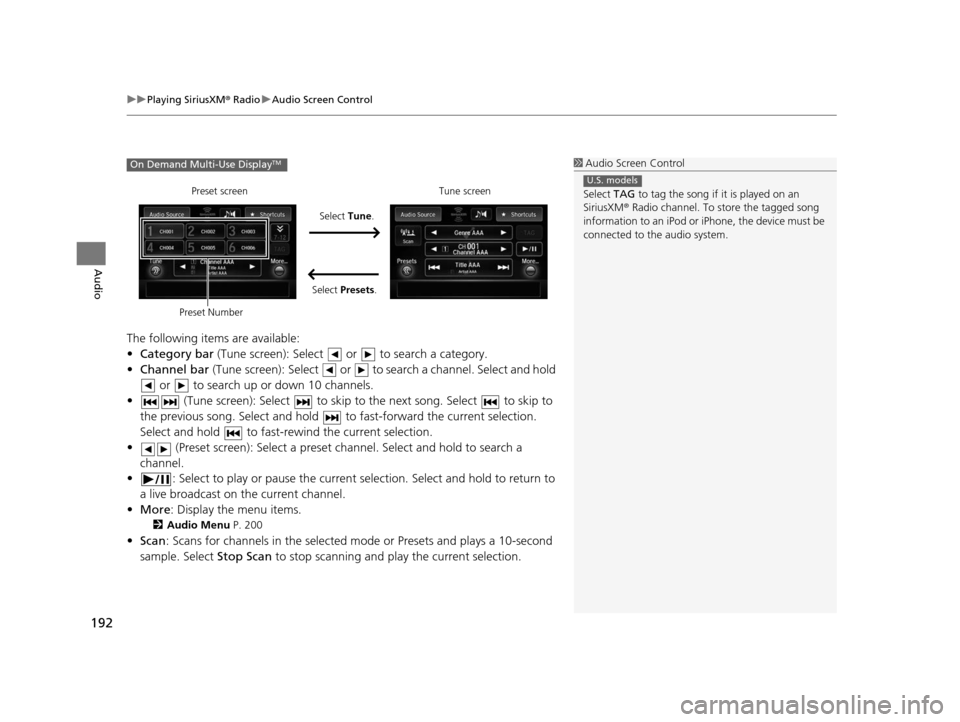
The following items are available:
• Category bar (Tune screen): Select or to search a category.
• Channel bar (Tune screen): Select or to s earch a channel. Select and hold
or to search up or down 10 channels.
• (Tune screen): Select to skip to the next song. Select to skip to
the previous song. Select and hold to fast-forward the current selection.
Select and hold to fast-rewind the current selection.
• (Preset screen): Select a preset chan nel. Select and hold to search a
channel.
• : Select to play or pause the current selection. Select and hold to return to
a live broadcast on the current channel.
• More : Display the menu items.
2Audio Menu P. 200
•Scan : Scans for channels in the selected mode or Presets and plays a 10-second
sample. Select Stop Scan to stop scanning and play the current selection.
1Audio Screen Control
Select TAG to tag the song if it is played on an
SiriusXM ® Radio channel. To store the tagged song
information to an iPod or iPhone, the device must be
connected to the audio system.
U.S. models
On Demand Multi-Use DisplayTM
Select Tune.
Preset screen Tune screen
Select Presets.
Preset Number
16 ACURA RDX NAVI-31TX48300.book 192 ページ 2015年3月6日 金曜日 午後1時26分
Page 195 of 363
uuPlaying SiriusXM ® Radio uAudio Screen Control
194
Audio
H MENU button (in SiriusXM ® mode)uPlayback
The system can record up to the last 60 minutes broadcast of your currently tuned
channel as well as the last 30 minutes br oadcast of preset channels, starting from
the moment you turn the vehicle on. If yo u tuned to preset channel, the system
records up to 60 minutes of a broadcast instead of up to 30 minutes. You can
rewind and replay the last 30 or 60 minutes of a broadcast.
Select OK and rotate to select a channel. Press .
To play or pause in playback mode:
1. Press the MENU button.
2. Rotate to select Play/Pause, press .
Select the icon.
■ Returning to real-time broadcast
1. Press the MENU button.
2. Rotate to select Go to Live, then press .
Select and hold the icon or select More then, select Go to Live.
■Replay Function1
Replay Function
The system starts storing broadcast in memory when
the vehicle is turned on. You can go back to the
program from that point.
You can no longer repl ay any program once the
vehicle is turned off or if the non-preset channel has
been changed.
The audio/information screen displays how long the
station has been recording in the replay status bar.
Interface Dial
On Demand Multi-Use DisplayTM
Interface Dial
On Demand Multi-Use DisplayTM
16 ACURA RDX NAVI-31TX48300.book 194 ページ 2015年3月6日 金曜日 午後1時26分
Page 197 of 363
uuPlaying SiriusXM ® Radio uAudio Screen Control
196
Audio
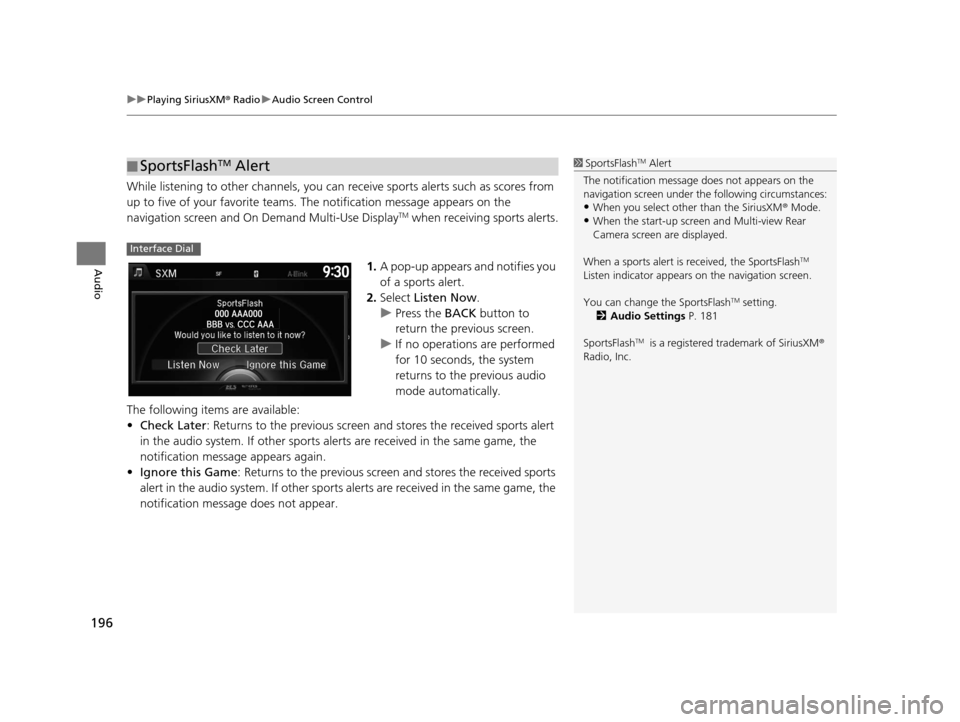
While listening to other channels, you can receive sports alerts such as scores from
up to five of your favorite teams. The notification message appears on the
navigation screen and On Demand Multi-Use Display
TM when receiving sports alerts.
1. A pop-up appears and notifies you
of a sports alert.
2. Select Listen Now .
u Press the BACK button to
return the previous screen.
u If no operations are performed
for 10 seconds, the system
returns to the previous audio
mode automatically.
The following items are available:
• Check Later : Returns to the previous screen an d stores the received sports alert
in the audio system. If other sports alerts are received in the same game, the
notification message appears again.
• Ignore this Game : Returns to the previous screen and stores the received sports
alert in the audio system. If other sports alerts are received in the same game, the
notification message does not appear.
■ SportsFlashTM Alert1
SportsFlashTM Alert
The notification message does not appears on the
navigation screen under th e following circumstances:
•When you select other than the SiriusXM ® Mode.
•When the start-up screen and Multi-view Rear
Camera screen are displayed.
When a sports alert is received, the SportsFlash
TM
Listen indicator appears on the navigation screen.
You can change the SportsFlash
TM setting.
2 Audio Settings P. 181
SportsFlash
TM is a registered trademark of SiriusXM ®
Radio, Inc.
Interface Dial
16 ACURA RDX NAVI-31TX48300.book 196 ページ 2015年3月6日 金曜日 午後1時26分