and Acura RDX 2017 Navigation Manual
[x] Cancel search | Manufacturer: ACURA, Model Year: 2017, Model line: RDX, Model: Acura RDX 2017Pages: 357, PDF Size: 12.4 MB
Page 61 of 357
60
uuRouting uAvoided Area
System Setup
Avoided Area
H SETTINGS buttonuNavi Settings uRouting uAvoided Area
Specify up to five areas to avoid (e.g., road construction, closures), if possible, when
the system calculates routes to your destination.
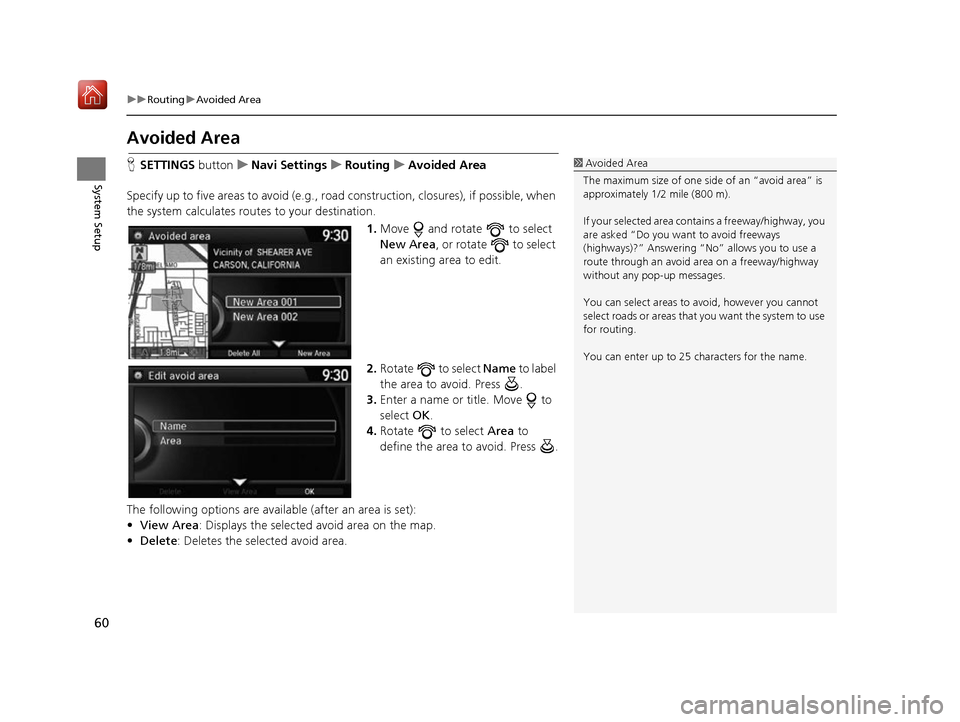
1.Move and rotate to select
New Area , or rotate to select
an existing area to edit.
2. Rotate to select Name to label
the area to avoid. Press .
3. Enter a name or title. Move to
select OK.
4. Rotate to select Area to
define the area to avoid. Press .
The following options are available (after an area is set):
• View Area : Displays the selected avoid area on the map.
• Delete: Deletes the selected avoid area.1Avoided Area
The maximum size of one side of an “avoid area” is
approximately 1/2 mile (800 m).
If your selected area cont ains a freeway/highway, you
are asked “Do you want to avoid freeways
(highways)?” Answering “No” allows you to use a
route through an avoid ar ea on a freeway/highway
without any pop-up messages.
You can select areas to avoid, however you cannot
select roads or areas that you want the system to use
for routing.
You can enter up to 25 ch aracters for the name.
16 ACURA RDX NAVI-31TX48300.book 60 ページ 2015年8月5日 水曜日 午後4時12分
Page 64 of 357
63
uuGuidance uGuidance Mode
Continued
System Setup
Guidance Mode
H SETTINGS button uNavi Settings uGuidance uGuidance mode
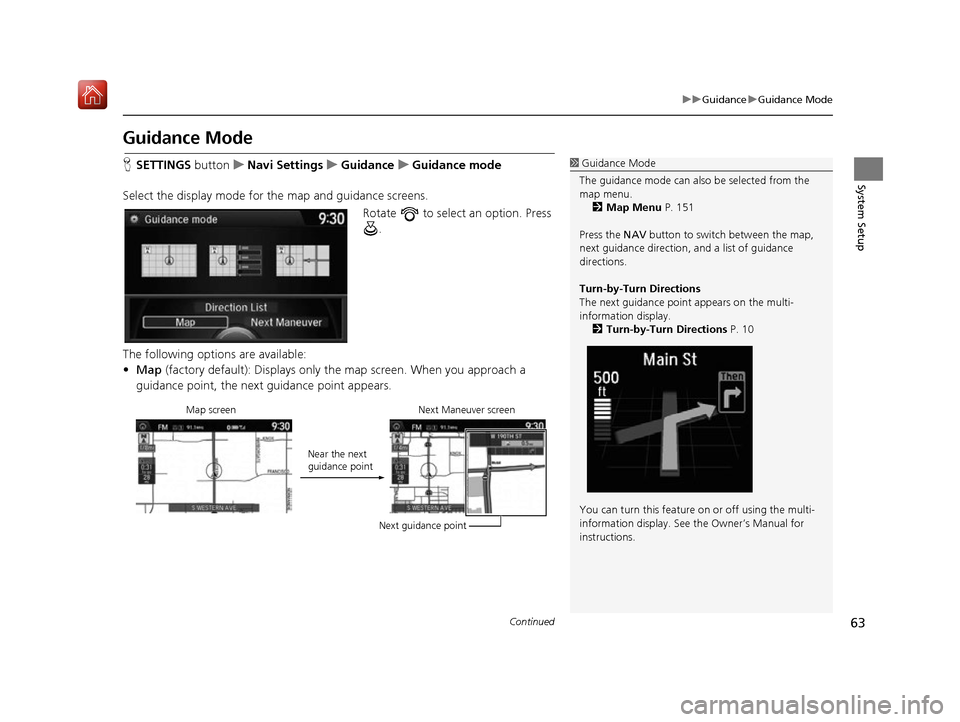
Select the display mode for the map and guidance screens. Rotate to select an option. Press .
The following options are available:
• Map (factory default): Displays only the map screen. When you approach a
guidance point, the next guidance point appears.1Guidance Mode
The guidance mode can also be selected from the
map menu. 2 Map Menu P. 151
Press the NAV button to switch between the map,
next guidance direction, and a list of guidance
directions.
Turn-by-Turn Directions
The next guidance point appears on the multi-
information display.
2 Turn-by-Turn Directions P. 10
You can turn this feature on or off using the multi-
information display. See the Owner’s Manual for
instructions.
Map screen Near the next
guidance pointNext Maneuver screen
Next guidance point
16 ACURA RDX NAVI-31TX48300.book 63 ページ 2015年8月5日 水曜日 午後4時12分
Page 65 of 357
64
uuGuidance uGuidance Mode
System Setup
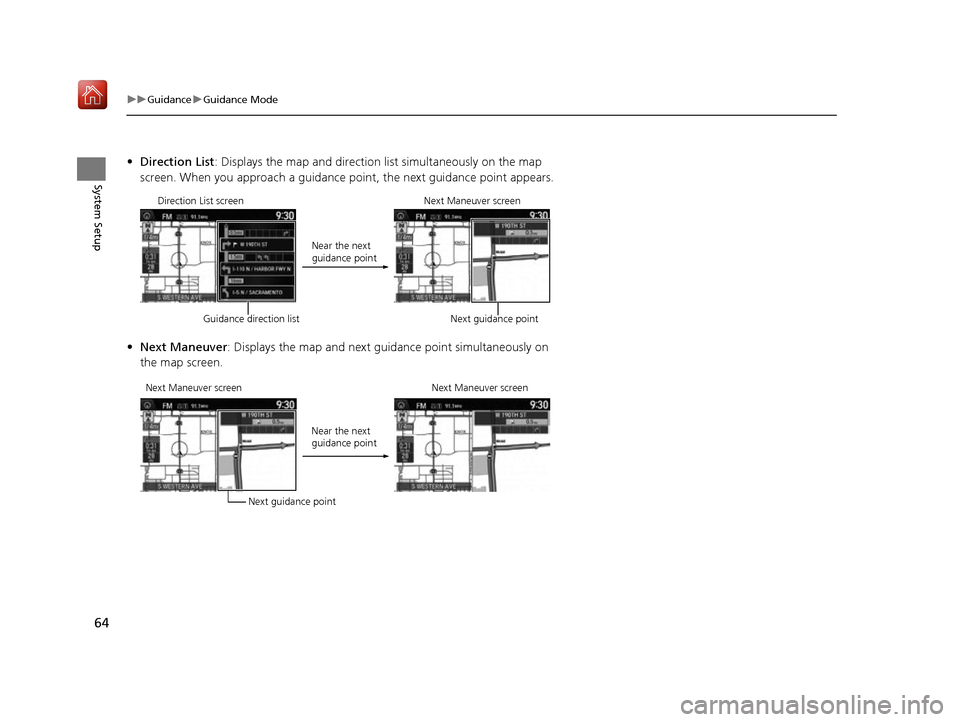
• Direction List : Displays the map and direction list simultaneously on the map
screen. When you approach a guidance point, the next guidance point appears.
• Next Maneuver : Displays the map and next guidance point simultaneously on
the map screen.
Direction List screen
Guidance direction list Near the next
guidance point
Next Maneuver screen
Next guidance point
Next Maneuver screen Next guidance pointNear the next
guidance point
Next Maneuver screen
16 ACURA RDX NAVI-31TX48300.book 64 ページ 2015年8月5日 水曜日 午後4時12分
Page 68 of 357
67
uuGuidance uGuidance Point
System Setup
Guidance Point
H SETTINGS button uNavi Settings uGuidance uGuidance Point
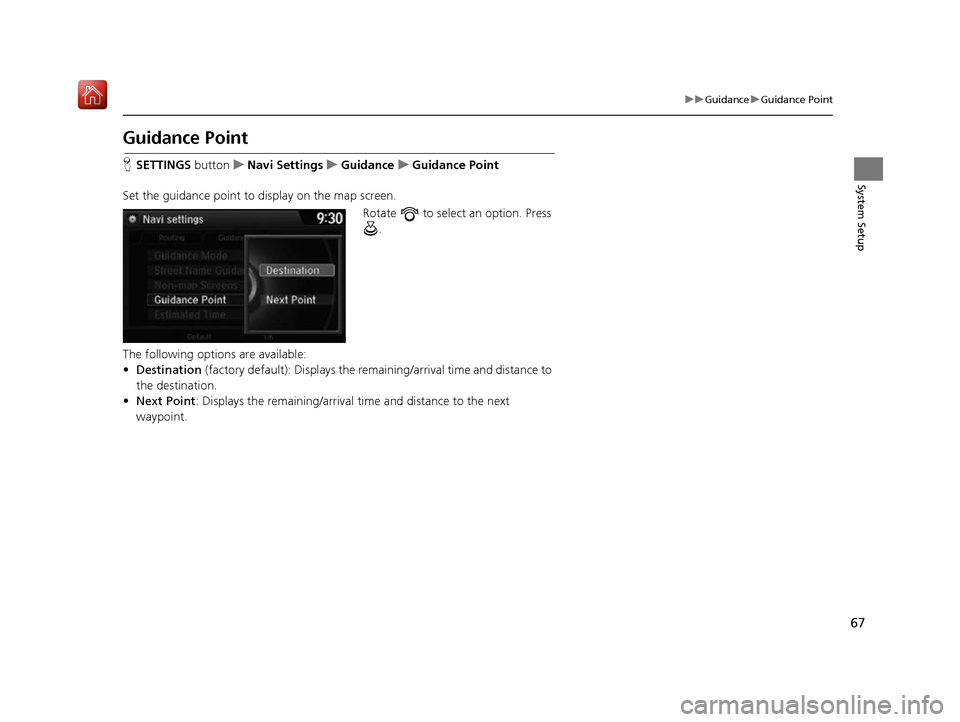
Set the guidance point to display on the map screen. Rotate to select an option. Press .
The following options are available:
• Destination (factory default): Disp lays the remaining/arriva l time and distance to
the destination.
• Next Point : Displays the remaining/arrival time and distance to the next
waypoint.
16 ACURA RDX NAVI-31TX48300.book 67 ページ 2015年8月5日 水曜日 午後4時12分
Page 70 of 357
69Continued
System Setup
Map
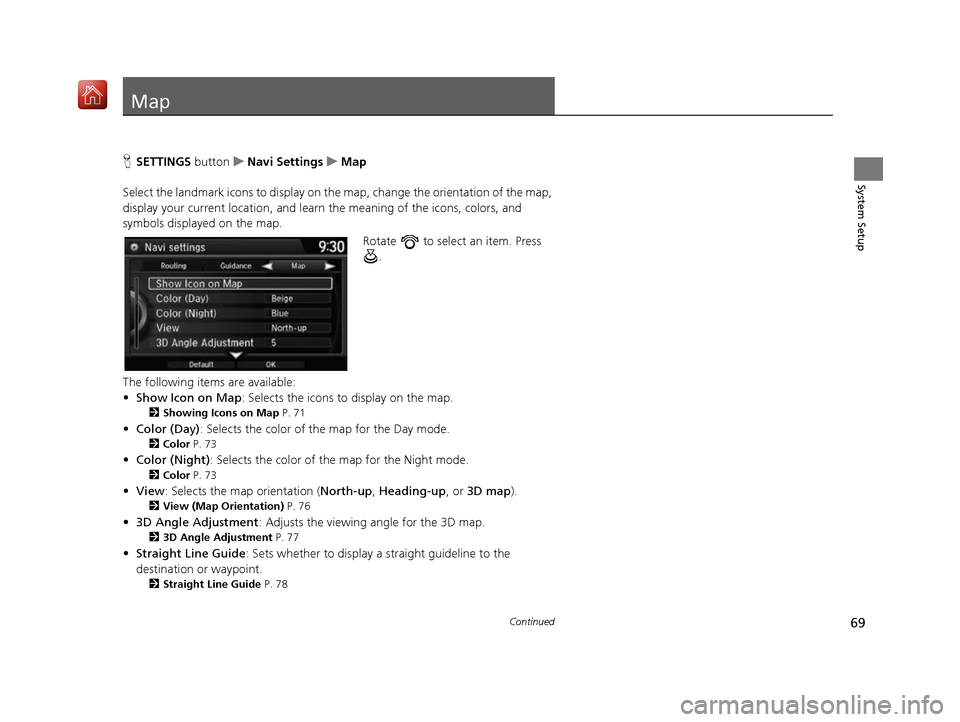
HSETTINGS button uNavi Settings uMap
Select the landmark icons to display on the map, change the orientation of the map,
display your current location, and learn the meaning of the icons, colors, and
symbols displayed on the map.
Rotate to select an item. Press .
The following items are available:
• Show Icon on Map : Selects the icons to display on the map.
2Showing Icons on Map P. 71
•Color (Day) : Selects the color of the map for the Day mode.
2Color P. 73
•Color (Night) : Selects the color of th e map for the Night mode.
2Color P. 73
•View : Selects the map orientation ( North-up, Heading-up , or 3D map).
2View (Map Orientation) P. 76
•3D Angle Adjustment : Adjusts the viewing angle for the 3D map.
23D Angle Adjustment P. 77
•Straight Line Guide : Sets whether to display a straight guideline to the
destination or waypoint.
2 Straight Line Guide P. 78
16 ACURA RDX NAVI-31TX48300.book 69 ページ 2015年8月5日 水曜日 午後4時12分
Page 71 of 357
70
uuMap u
System Setup
•Current Location : Displays and saves your current location.
2Current Location P. 79
•Map Legend : Displays an overview of the map features.
2Map Legend P. 80
•Display Tracking : Sets whether to display the tracking dots on the map.
2Display Tracking P. 84
•Delete Tracking : Deletes the trackin g dots on the map.
2Deleting Tracking Dots P. 85
•Correct Vehicle Position : Adjusts the position of the vehicle on the map.
2Correct Vehicle Position P. 86
•System Device Information : Views database, software, device, and vehicle
identification information.
2 System Device Information P. 312
•Map Data Update : Checks the map data update status when updating the map
database.
2 Map Data Update P. 312
16 ACURA RDX NAVI-31TX48300.book 70 ページ 2015年8月5日 水曜日 午後4時12分
Page 72 of 357
71
uuMap uShowing Icons on Map
Continued
System Setup
Showing Icons on Map
H SETTINGS button uNavi Settings uMap uShow Icon on Map
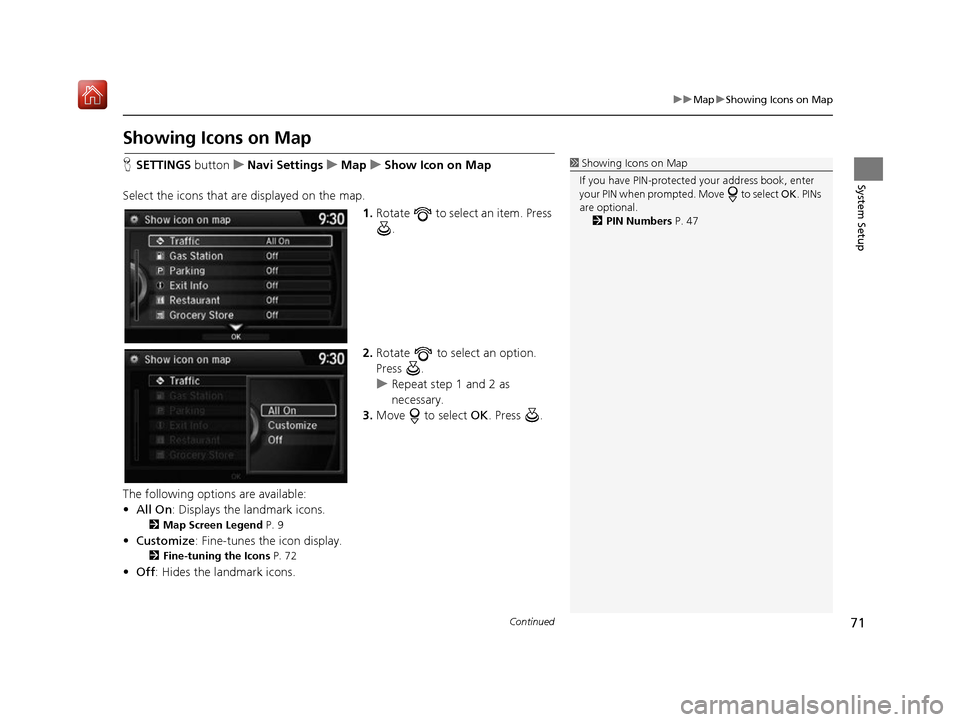
Select the icons that ar e displayed on the map.
1.Rotate to select an item. Press
.
2. Rotate to select an option.
Press .
u Repeat step 1 and 2 as
necessary.
3. Move to select OK. Press .
The following options are available:
• All On : Displays the landmark icons.
2Map Screen Legend P. 9
•Customize : Fine-tunes the icon display.
2Fine-tuning the Icons P. 72
•Off : Hides the landmark icons.
1Showing Icons on Map
If you have PIN-protecte d your address book, enter
your PIN when prompted. Move to select OK. PINs
are optional. 2 PIN Numbers P. 47
16 ACURA RDX NAVI-31TX48300.book 71 ページ 2015年8月5日 水曜日 午後4時12分
Page 73 of 357
72
uuMap uShowing Icons on Map
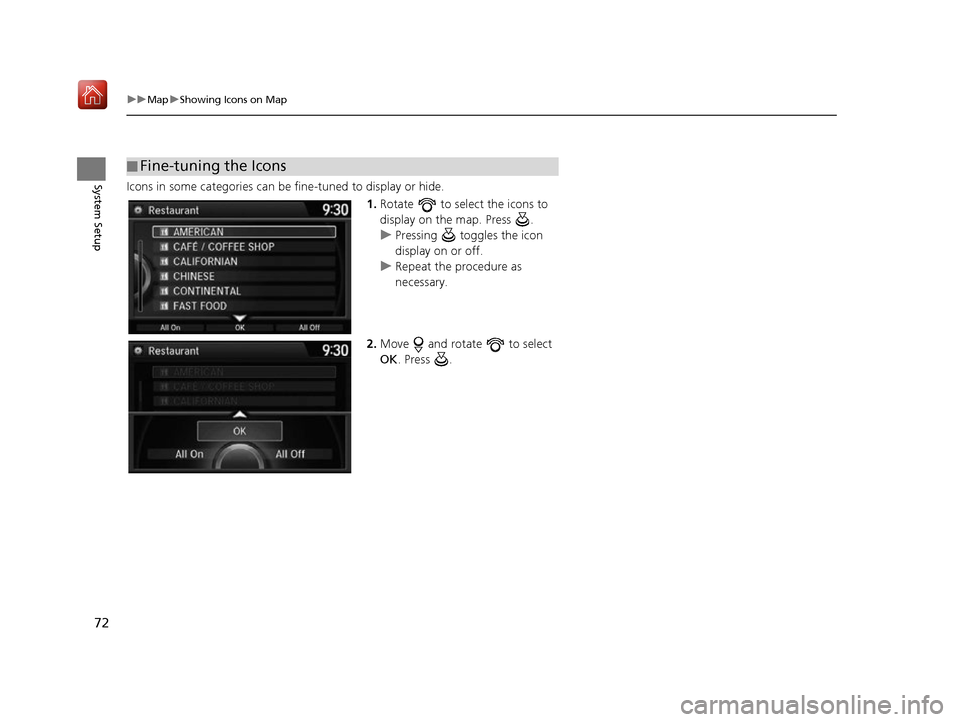
System SetupIcons in some categories can be fine-tuned to display or hide.
1.Rotate to select the icons to
display on the map. Press .
u Pressing toggles the icon
display on or off.
u Repeat the procedure as
necessary.
2. Move and rotate to select
OK . Press .
■Fine-tuning the Icons
16 ACURA RDX NAVI-31TX48300.book 72 ページ 2015年8月5日 水曜日 午後4時12分
Page 74 of 357
73
uuMap uColor
Continued
System Setup
Color
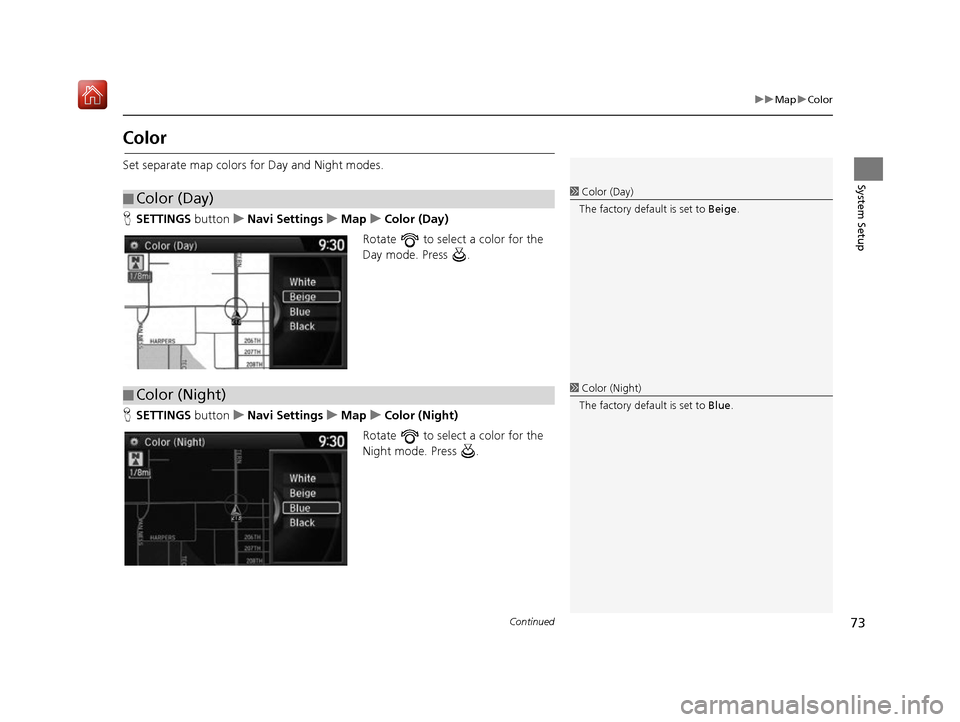
Set separate map colors for Day and Night modes.
H SETTINGS button uNavi Settings uMap uColor (Day)
Rotate to select a color for the
Day mode. Press .
H SETTINGS button uNavi Settings uMap uColor (Night)
Rotate to select a color for the
Night mode. Press .
■ Color (Day)1
Color (Day)
The factory default is set to Beige.
■Color (Night)1
Color (Night)
The factory default is set to Blue.
16 ACURA RDX NAVI-31TX48300.book 73 ページ 2015年8月5日 水曜日 午後4時12分
Page 75 of 357
uuMap uColor
74
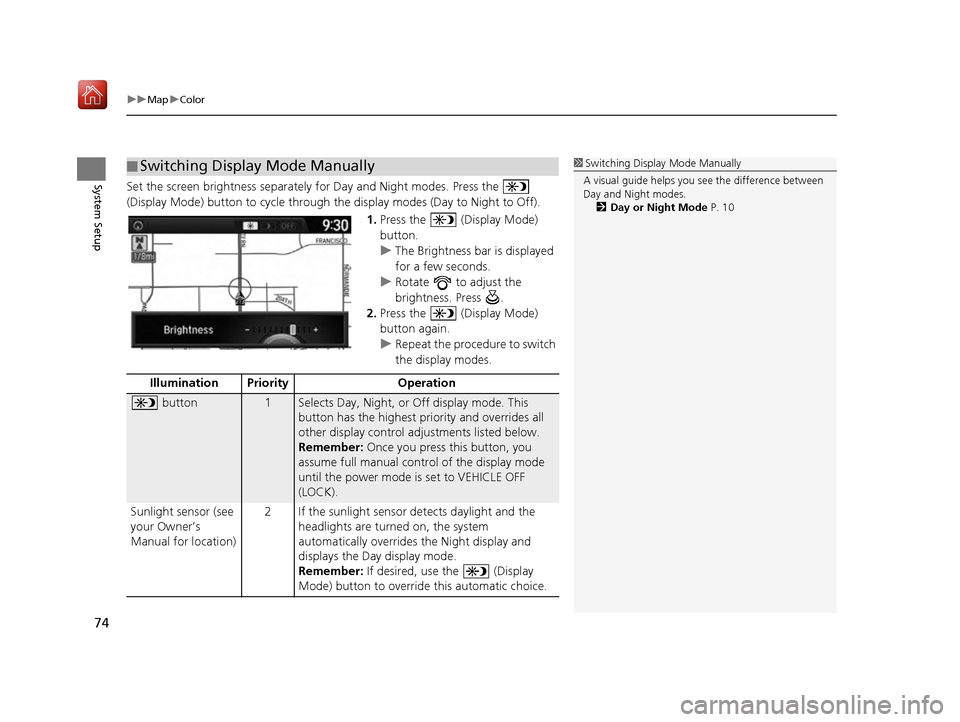
System SetupSet the screen brightness separately for Day and Night modes. Press the
(Display Mode) button to cycle through the display modes (Day to Night to Off).
1.Press the (Display Mode)
button.
u The Brightness bar is displayed
for a few seconds.
u Rotate to adjust the
brightness. Press .
2. Press the (Display Mode)
button again.
u Repeat the procedure to switch
the display modes.
■Switching Display Mode Manually1
Switching Display Mode Manually
A visual guide helps you se e the difference between
Day and Night modes.
2 Day or Night Mode P. 10
Illumination Priority Operation
button1Selects Day, Night, or Off display mode. This
button has the highest priority and overrides all
other display control adjustments listed below.
Remember: Once you press this button, you
assume full manual cont rol of the display mode
until the power mode is set to VEHICLE OFF
(LOCK).
Sunlight sensor (see
your Owner’s
Manual for location) 2 If the sunlight sensor detects daylight and the
headlights are turned on, the system
automatically overrides the Night display and
displays the Day display mode.
Remember: If desired, use the (Display
Mode) button to override this automatic choice.
16 ACURA RDX NAVI-31TX48300.book 74 ページ 2015年8月5日 水曜日 午後4時12分