sensor Acura RDX 2017 Owner's Guide
[x] Cancel search | Manufacturer: ACURA, Model Year: 2017, Model line: RDX, Model: Acura RDX 2017Pages: 449, PDF Size: 10.88 MB
Page 135 of 449
uuOpening and Closing the Tailgate uOpening/Closing the Power Tailgate
134
Controls
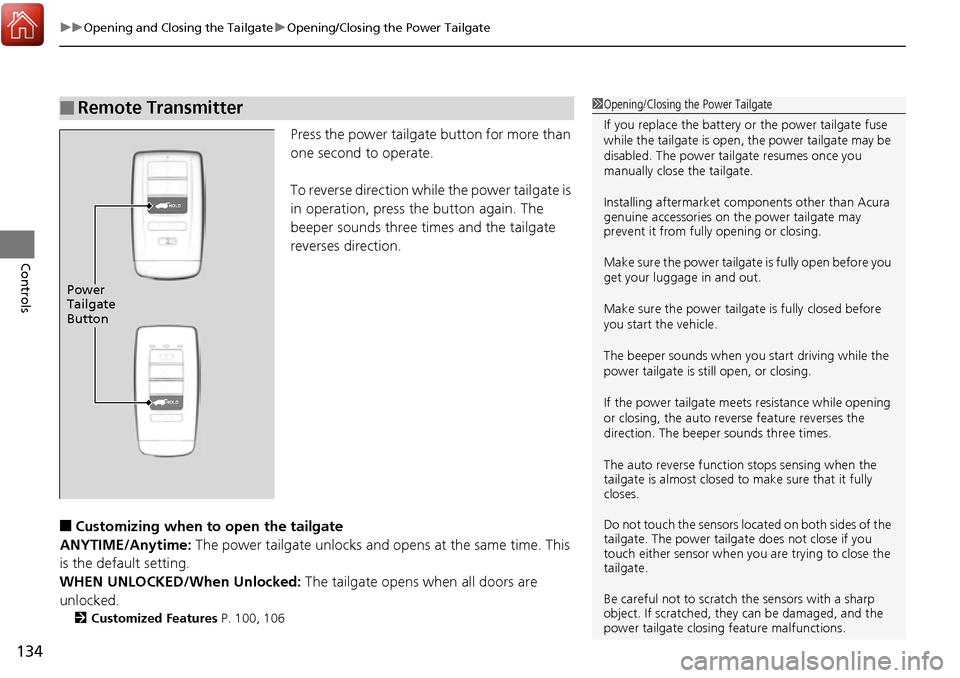
Press the power tailgate button for more than
one second to operate.
To reverse direction while the power tailgate is
in operation, press the button again. The
beeper sounds three times and the tailgate
reverses direction.
■Customizing when to open the tailgate
ANYTIME/Anytime: The power tailgate unlocks and opens at the same time. This
is the default setting.
WHEN UNLOCKED/When Unlocked: The tailgate opens when all doors are
unlocked.
2 Customized Features P. 100, 106
■Remote Transmitter1Opening/Closing the Power Tailgate
If you replace the battery or the power tailgate fuse
while the tailgate is open, the power tailgate may be
disabled. The power tail gate resumes once you
manually close the tailgate.
Installing aftermarket com ponents other than Acura
genuine accessories on the power tailgate may
prevent it from fully opening or closing.
Make sure the power tailgate is fully open before you
get your luggage in and out.
Make sure the power tailgate is fully closed before
you start the vehicle.
The beeper sounds when you start driving while the
power tailgate is still open, or closing.
If the power tailgate meet s resistance while opening
or closing, the auto reverse feature reverses the
direction. The beeper sounds three times.
The auto reverse function stops sensing when the
tailgate is almost closed to make sure that it fully
closes.
Do not touch the sensors located on both sides of the
tailgate. The power tailga te does not close if you
touch either sensor when you are trying to close the
tailgate.
Be careful not to scratch the sensors with a sharp
object. If scratched, they can be damaged, and the
power tailgate closing feature malfunctions.
HOLD
HOLD
Power
Tailgate
Button
Page 149 of 449
uuOperating the Switches Around the Steering Wheel uLight Switches
148
Controls
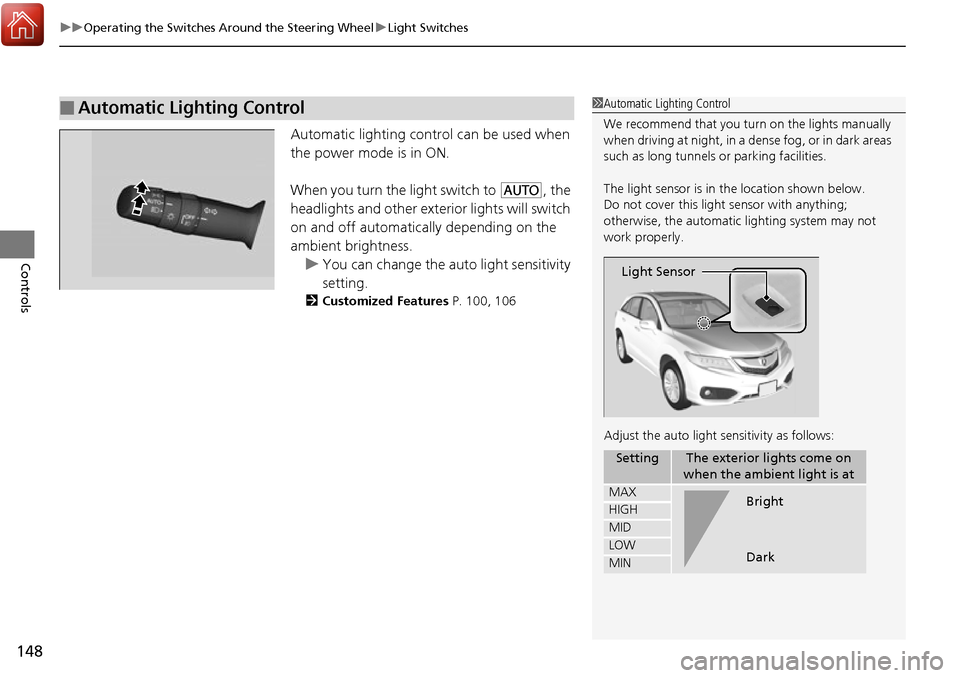
Automatic lighting control can be used when
the power mode is in ON.
When you turn the light switch to
#Y, the
headlights and other exte rior lights will switch
on and off automatically depending on the
ambient brightness. u You can change the au to light sensitivity
setting.
2 Customized Features P. 100, 106
■Automatic Lighting Control1Automatic Lighting Control
We recommend that you tu rn on the lights manually
when driving at night, in a dense fog, or in dark areas
such as long tunnels or parking facilities.
The light sensor is in the location shown below.
Do not cover this light sensor with anything;
otherwise, the automatic lighting system may not
work properly.
Adjust the auto light sensitivity as follows:
SettingThe exterior lights come on
when the ambient light is at
MAX
HIGH
MID
LOW
MIN
Light Sensor
Bright
Dark
Page 153 of 449
uuOperating the Switches Around the Steering Wheel uWipers and Washers
152
Controls
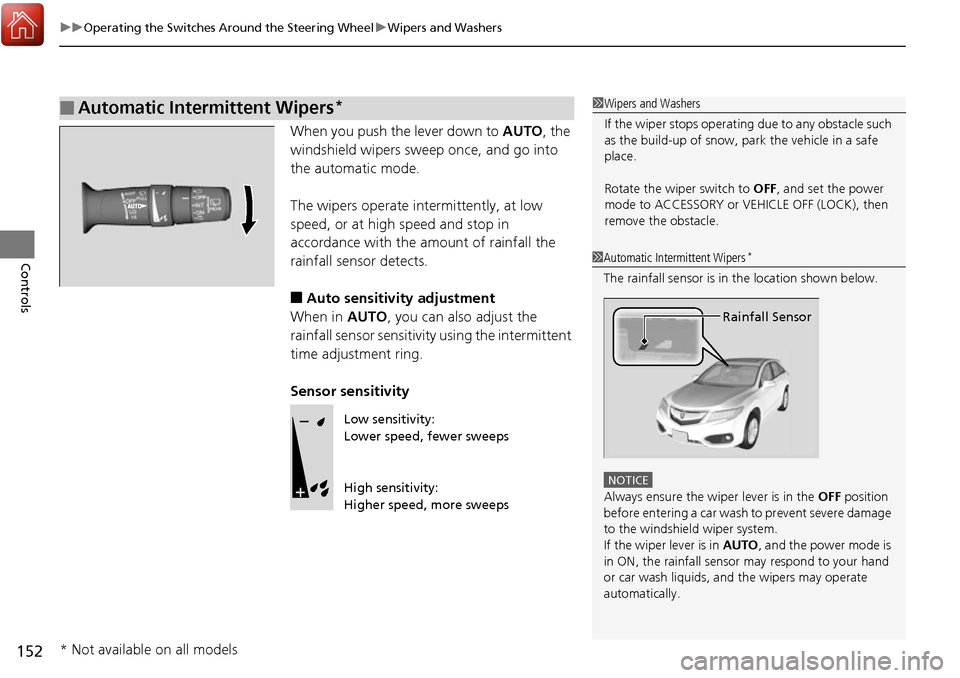
When you push the lever down to AUTO, the
windshield wipers sweep once, and go into
the automatic mode.
The wipers operate intermittently, at low
speed, or at high speed and stop in
accordance with the am ount of rainfall the
rainfall sensor detects.
■Auto sensitivity adjustment
When in AUTO, you can also adjust the
rainfall sensor sensitivity using the intermittent
time adjustment ring.
Sensor sensitivity
■Automatic Intermittent Wipers*1 Wipers and Washers
If the wiper stops operating due to any obstacle such
as the build-up of snow, pa rk the vehicle in a safe
place.
Rotate the wiper switch to OFF, and set the power
mode to ACCESSORY or VEHICLE OFF (LOCK), then
remove the obstacle.
1 Automatic Intermittent Wipers*
The rainfall sensor is in the location shown below.
NOTICE
Always ensure the wiper lever is in the OFF position
before entering a car wash to prevent severe damage
to the windshiel d wiper system.
If the wiper lever is in AUTO , and the power mode is
in ON, the rainfall sensor may respond to your hand
or car wash liquids, and the wipers may operate
automatically.
Rainfall Sensor
Low sensitivity:
Lower speed, fewer sweeps
High sensitivity:
Higher speed, more sweeps
* Not available on all models
Page 160 of 449
159
Controls
Adjusting the Mirrors
Interior Rearview Mirror
Adjust the angle of the rearview mirror when you are sitting in the correct driving
position.
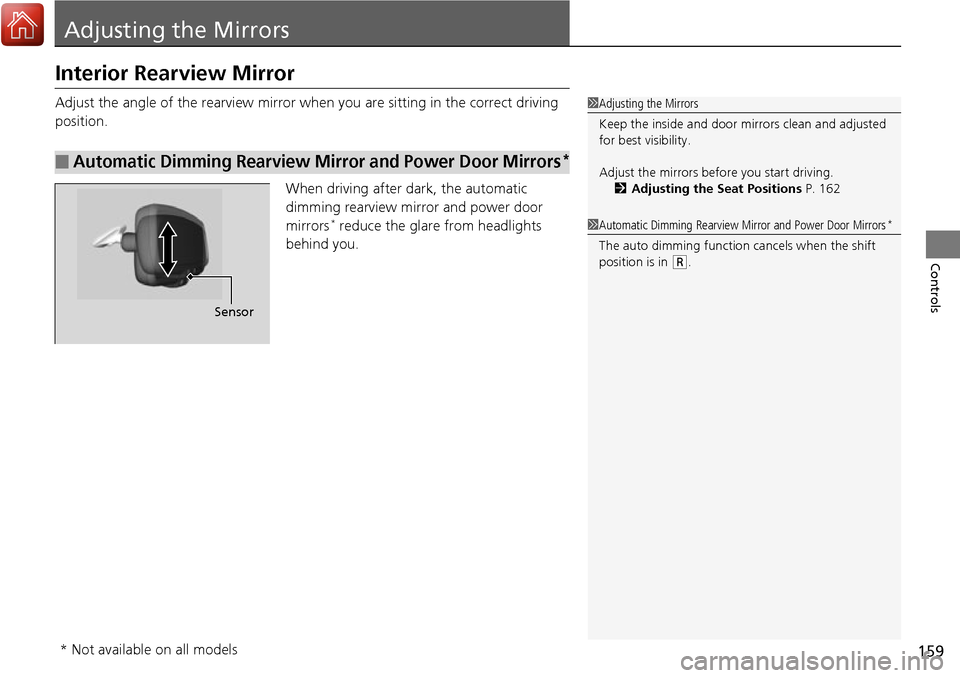
When driving after dark, the automatic
dimming rearview mirror and power door
mirrors
* reduce the glare from headlights
behind you.
■Automatic Dimming Rearview Mi rror and Power Door Mirrors*
1Adjusting the Mirrors
Keep the inside and door mi rrors clean and adjusted
for best visibility.
Adjust the mirrors befo re you start driving.
2 Adjusting the Seat Positions P. 162
Sensor
1Automatic Dimming Rearview Mirror and Power Door Mirrors*
The auto dimming function cancels when the shift
position is in (R.
* Not available on all models
Page 183 of 449
182
uuClimate Control System uSynchronized Mode
Controls
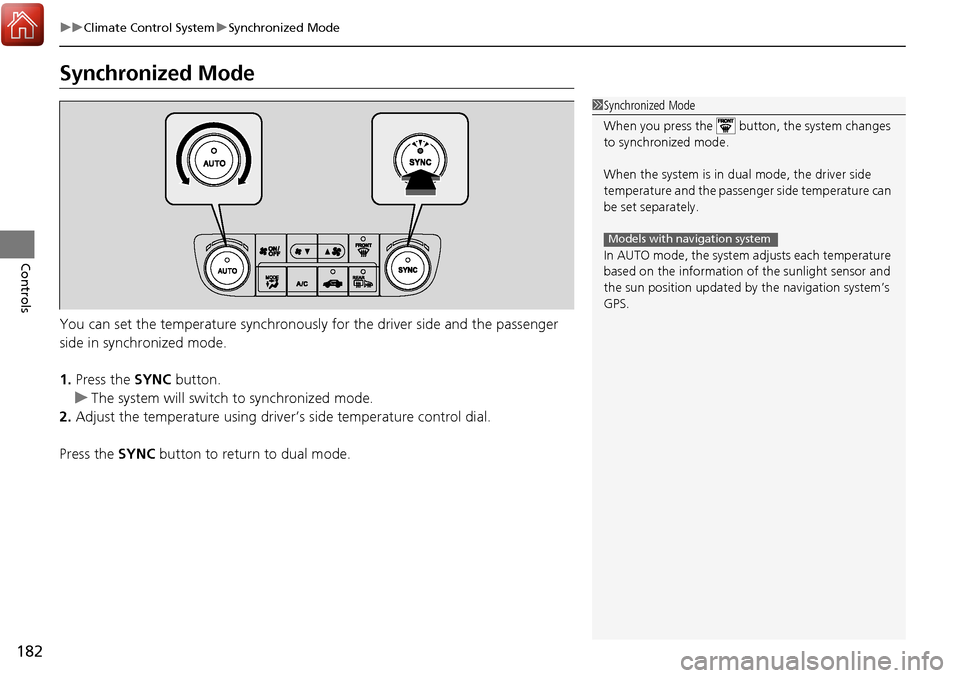
Synchronized Mode
You can set the temperature synchronously for the driver side and the passenger
side in synchronized mode.
1. Press the SYNC button.
u The system will switch to synchronized mode.
2. Adjust the temperature using driver ’s side temperature control dial.
Press the SYNC button to return to dual mode.
1Synchronized Mode
When you press the button, the system changes
to synchronized mode.
When the system is in dua l mode, the driver side
temperature and the passenger side temperature can
be set separately.
In AUTO mode, the system adjusts each temperature
based on the information of the sunlight sensor and
the sun position updated by the navigation system’s
GPS.
Models with navigation system
Page 184 of 449
183
uuClimate Control System uAutomatic Climate Control Sensors
Controls
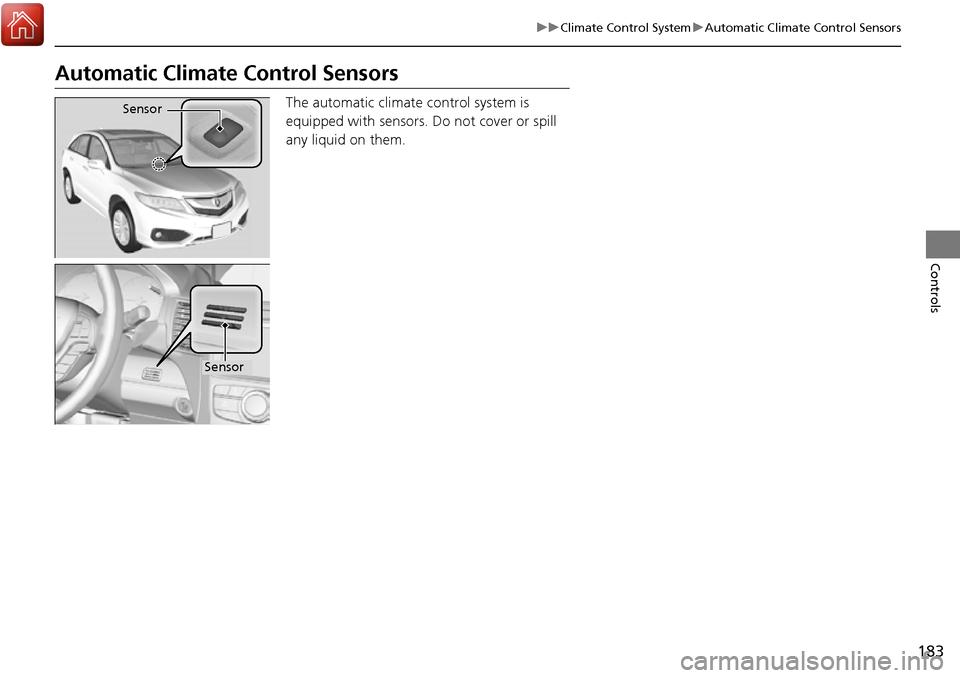
Automatic Climate Control Sensors
The automatic climate control system is
equipped with sensors. Do not cover or spill
any liquid on them.Sensor
Sensor
Page 256 of 449
255
Driving
This chapter discusses driving, refueling, and information on items such as accessories.
Before Driving................................... 256
Towing a Trailer ................................ 261
Off-Highway Driving Guidelines ..... 266
When Driving Starting the Engine .......................... 268
Precautions While Driving................. 273
Automatic Transmission ................... 274
Shifting ............................................ 275
Cruise Control
*................................ 279
Front Sensor Camera*...................... 282
Adaptive Cruise Control (ACC)*....... 284
Lane Departure Warning (LDW)*...... 297Lane Keeping Assist System (LKAS)*..... 301 Vehicle Stability Assist (VSA
®), aka Electronic
Stability Control (ESC), System ........... 309
Blind spot information (BSI) System
*.... 311All-Wheel Drive (AWD) with Intelligent Control System*..................................................... 314Tire Pressure Monitoring System (TPMS) ... 314Tire Pressure Monitoring System (TPMS) - Required Federal Explanation ......... 316
Braking Brake System ................................... 318
Anti-lock Brake System (ABS) ........... 320
Brake Assist System.......................... 321 Collision Mitigation Braking System
TM
(CMBSTM)*..................................... 322
Parking Your Vehicle When Stopped ................................ 330
Parking Sensor System
*................... 331
Cross Traffic Monitor*..................... 335
Multi-View Rear Camera .................. 338
Refueling Fuel Information .............................. 339
How to Refuel ................................. 340
Fuel Economy and CO
2 Emissions .... 341
Accessories and Modifications ........ 342
* Not available on all models
Page 259 of 449
258
uuBefore Driving uDriving Preparation
Driving
• Be sure items placed on the floor behind the front seats cannot roll under the
seats.
u They can interfere with the driver’s ability to operate the pedals, the operation
of the seats, or the operation of the sensors under the seats.
• Everyone in the vehicle must fasten their seat belt.
2Fastening a Seat Belt P. 32
•Make sure that the indicators in the ins trument panel come on when you start the
vehicle, and go off soon after.
u Always have a dealer check the vehicle if a problem is indicated.
2 Indicators P. 66
Page 283 of 449
282
uuWhen Driving uFront Sensor Camera*
Driving
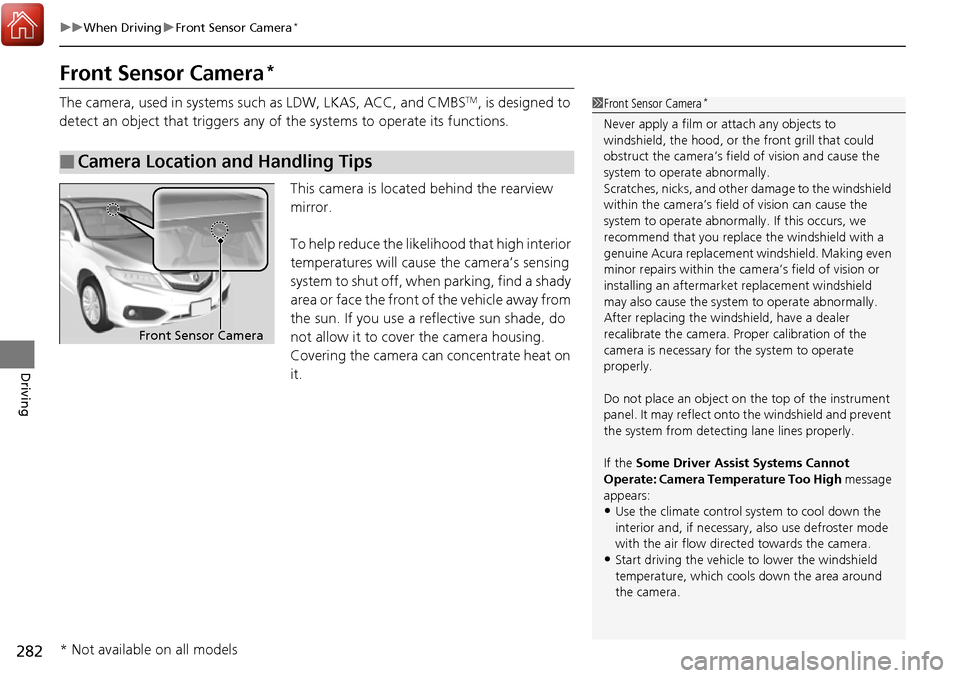
Front Sensor Camera*
The camera, used in systems su ch as LDW, LKAS, ACC, and CMBSTM, is designed to
detect an object that triggers any of the systems to operate its functions.
This camera is located behind the rearview
mirror.
To help reduce the likelihood that high interior
temperatures will cause the camera’s sensing
system to shut off, when parking, find a shady
area or face the front of the vehicle away from
the sun. If you use a re flective sun shade, do
not allow it to cover the camera housing.
Covering the camera can concentrate heat on
it.
■Camera Location and Handling Tips
1 Front Sensor Camera*
Never apply a film or attach any objects to
windshield, the hood, or the front grill that could
obstruct the camera’s fiel d of vision and cause the
system to operate abnormally.
Scratches, nicks, and othe r damage to the windshield
within the camera’s fiel d of vision can cause the
system to operate abnormall y. If this occurs, we
recommend that you replac e the windshield with a
genuine Acura replacement windshield. Making even
minor repairs within the ca mera’s field of vision or
installing an aftermarke t replacement windshield
may also cause the system to operate abnormally.
After replacing the winds hield, have a dealer
recalibrate the camera. Pr oper calibration of the
camera is necessary for the system to operate
properly.
Do not place an object on the top of the instrument
panel. It may reflect onto the windshield and prevent
the system from detecting lane lines properly.
If the Some Driver Assist Systems Cannot
Operate: Camera Temperature Too High message
appears:
•Use the climate control system to cool down the
interior and, if necessary, also use defroster mode
with the air flow directed towards the camera.
•Start driving the vehicle to lower the windshield
temperature, which cool s down the area around
the camera.
Front Sensor Camera
* Not available on all models
Page 284 of 449

283
uuWhen Driving uFront Sensor Camera*
Driving
1Front Sensor Camera*
If the Some Driver Assist Systems Cannot
Operate: Clean Front Windshield message
appears:
•Park your vehicle in a sa fe place, and clean the
windshield. If the message does not disappear after
you have cleaned the winds hield and driven for a
while, have your vehicle checked by a dealer.
* Not available on all models