Acura RDX 2018 Repair Manual
Manufacturer: ACURA, Model Year: 2018, Model line: RDX, Model: Acura RDX 2018Pages: 453, PDF Size: 20.13 MB
Page 61 of 453
uuChild Safety uSafety of Infants and Small Children
60
Safe Driving
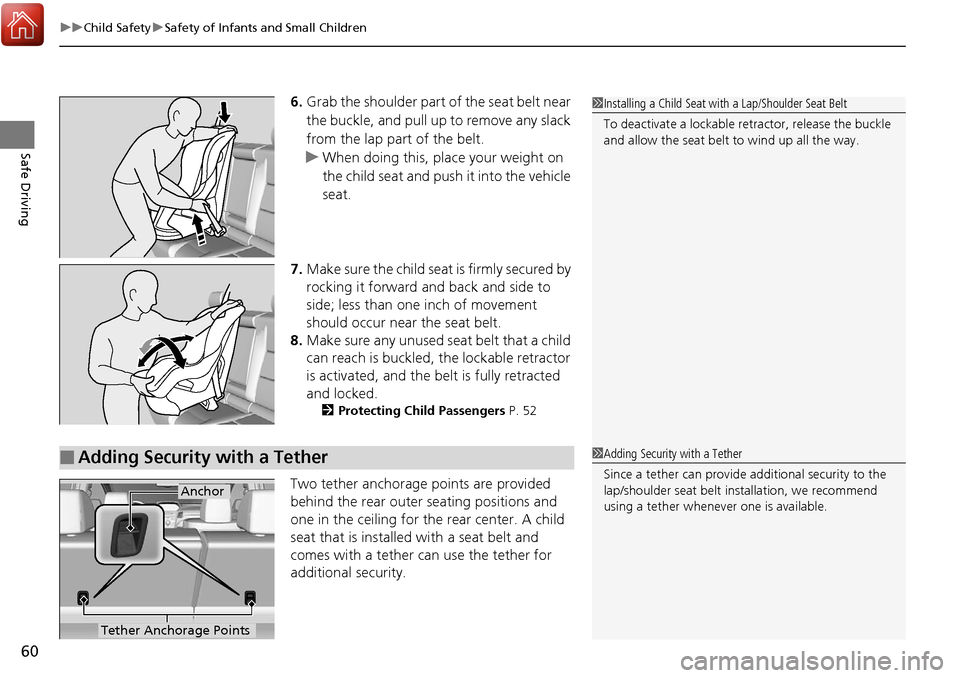
6. Grab the shoulder part of the seat belt near
the buckle, and pull up to remove any slack
from the lap part of the belt.
u When doing this, place your weight on
the child seat and push it into the vehicle
seat.
7. Make sure the child seat is firmly secured by
rocking it forward and back and side to
side; less than one inch of movement
should occur near the seat belt.
8. Make sure any unused se at belt that a child
can reach is buckled, the lockable retractor
is activated, and the be lt is fully retracted
and locked.
2 Protecting Child Passengers P. 52
Two tether anchorage points are provided
behind the rear outer seating positions and
one in the ceiling for the rear center. A child
seat that is installed with a seat belt and
comes with a tether can use the tether for
additional security.
1Installing a Child Seat with a Lap/Shoulder Seat Belt
To deactivate a lockable retractor, release the buckle
and allow the seat belt to wind up all the way.
■Adding Security with a Tether1 Adding Security with a Tether
Since a tether can provide additional security to the
lap/shoulder seat belt in stallation, we recommend
using a tether whenever one is available.
Tether Anchorage Points
Anchor
Page 62 of 453
61
uuChild Safety uSafety of Infants and Small Children
Safe Driving
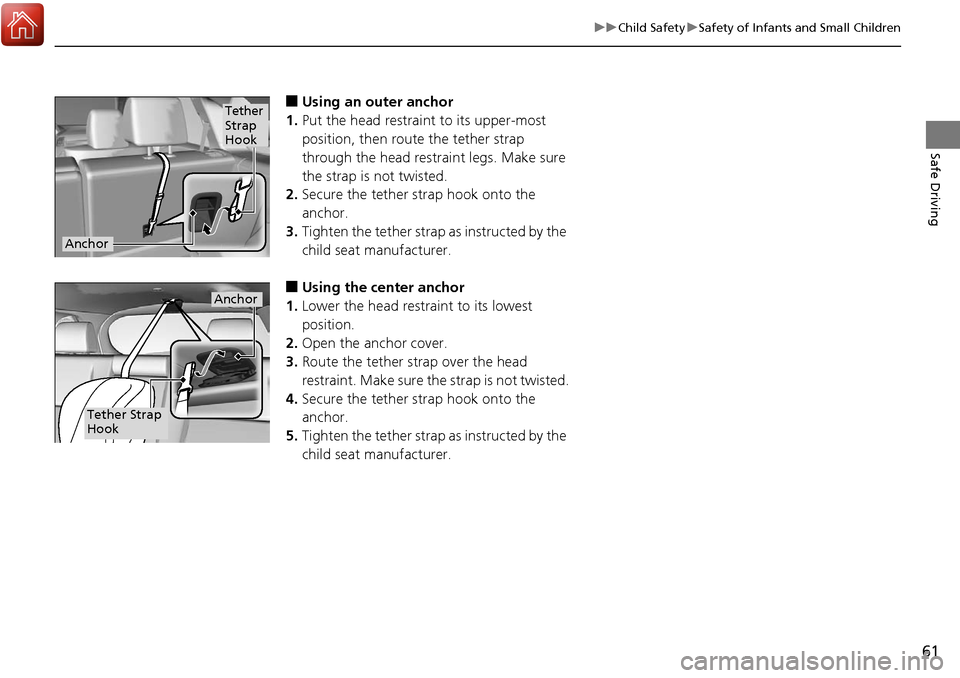
■Using an outer anchor
1. Put the head restraint to its upper-most
position, then route the tether strap
through the head restraint legs. Make sure
the strap is not twisted.
2. Secure the tether strap hook onto the
anchor.
3. Tighten the tether strap as instructed by the
child seat manufacturer.
■Using the center anchor
1. Lower the head restraint to its lowest
position.
2. Open the anchor cover.
3. Route the tether strap over the head
restraint. Make sure the strap is not twisted.
4. Secure the tether strap hook onto the
anchor.
5. Tighten the tether strap as instructed by the
child seat manufacturer.
Tether
Strap
Hook
Anchor
Tether Strap
Hook
Anchor
Page 63 of 453
62
uuChild Safety uSafety of Larger Children
Safe Driving
Safety of Larger Children
The following pages give instructions on how to check proper seat belt fit, what kind
of booster seat to use if one is needed , and important precautions for a child who
must sit in front.
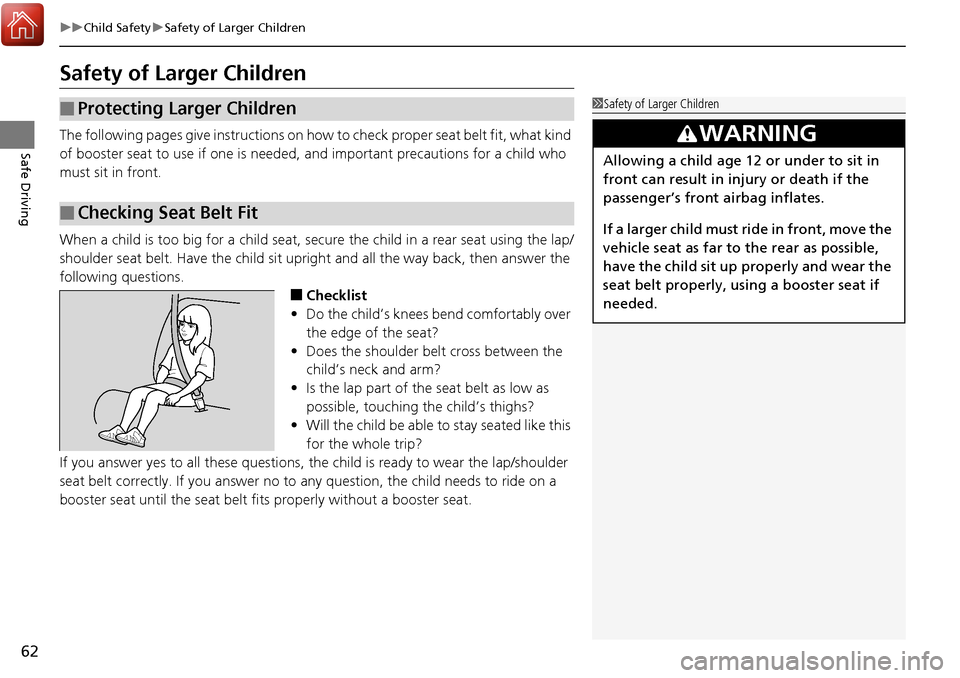
When a child is too big for a child seat, secure the child in a rear seat using the lap/
shoulder seat belt. Have the child sit upright and all the way back, then answer the
following questions.
■Checklist
• Do the child’s knees bend comfortably over
the edge of the seat?
• Does the shoulder belt cross between the
child’s neck and arm?
• Is the lap part of the seat belt as low as
possible, touching the child’s thighs?
• Will the child be able to stay seated like this
for the whole trip?
If you answer yes to all these questions, the child is ready to wear the lap/shoulder
seat belt correctly. If you answer no to any question, the child needs to ride on a
booster seat until the seat belt fits properly without a booster seat.
■Protecting Larger Children
■Checking Seat Belt Fit
1 Safety of Larger Children
3WARNING
Allowing a child age 12 or under to sit in
front can result in injury or death if the
passenger’s front airbag inflates.
If a larger child must ri de in front, move the
vehicle seat as far to the rear as possible,
have the child sit up properly and wear the
seat belt properly, us ing a booster seat if
needed.
Page 64 of 453
63
uuChild Safety uSafety of Larger Children
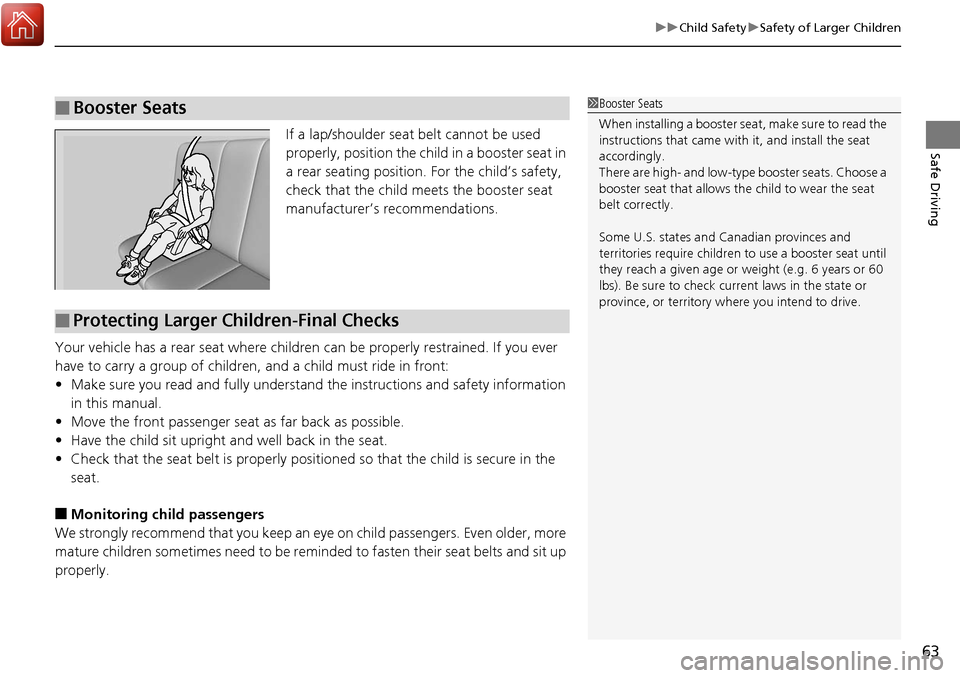
Safe DrivingIf a lap/shoulder seat belt cannot be used
properly, position the child in a booster seat in
a rear seating position. For the child’s safety,
check that the child meets the booster seat
manufacturer’s recommendations.
Your vehicle has a rear seat where children can be properly restrained. If you ever
have to carry a group of children, and a child must ride in front:
• Make sure you read and fully understand the instructions and safety information
in this manual.
• Move the front passenger seat as far back as possible.
• Have the child sit upright and well back in the seat.
• Check that the seat belt is properly positi oned so that the child is secure in the
seat.
■Monitoring child passengers
We strongly recommend that you keep an ey e on child passengers. Even older, more
mature children sometimes need to be remind ed to fasten their seat belts and sit up
properly.
■Booster Seats1 Booster Seats
When installing a booster seat, make sure to read the
instructions that came with it, and install the seat
accordingly.
There are high- and low-type booster seats. Choose a
booster seat that allows the child to wear the seat
belt correctly.
Some U.S. states and Canadian provinces and
territories require children to use a booster seat until
they reach a given age or weight (e.g. 6 years or 60
lbs). Be sure to check current laws in the state or
province, or territory where you intend to drive.
■Protecting Larger Children-Final Checks
Page 65 of 453
64
Safe Driving
Exhaust Gas Hazard
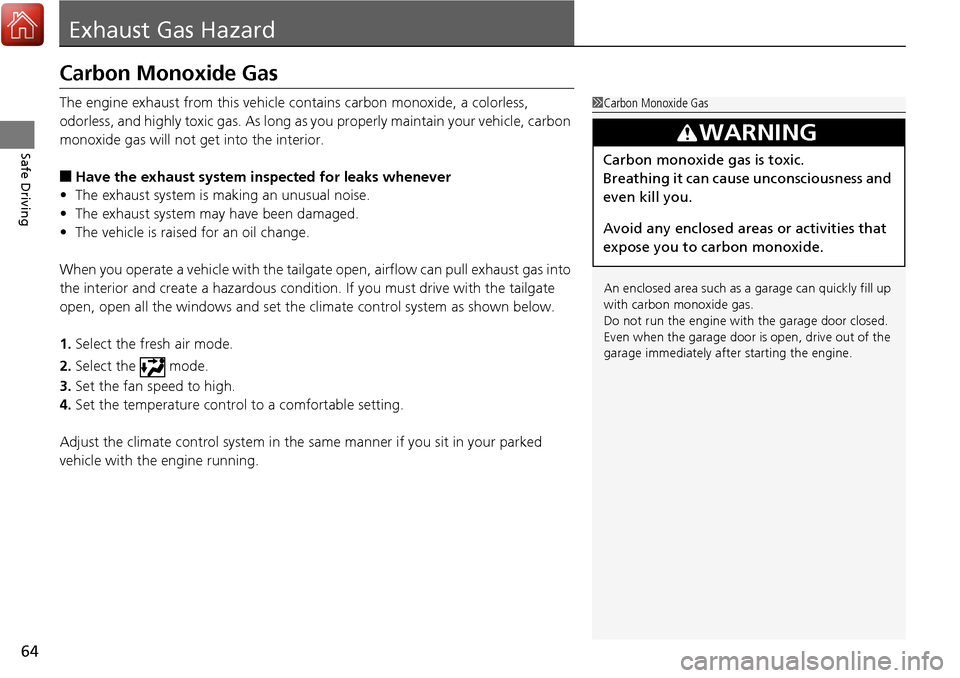
Carbon Monoxide Gas
The engine exhaust from this vehicle contains carbon monoxide, a colorless,
odorless, and highly toxic gas. As long as you properly maintain your vehicle, carbon
monoxide gas will not get into the interior.
■Have the exhaust system in spected for leaks whenever
• The exhaust system is m aking an unusual noise.
• The exhaust system may have been damaged.
• The vehicle is raised for an oil change.
When you operate a vehicle with the tailgat e open, airflow can pull exhaust gas into
the interior and create a hazardous conditio n. If you must drive with the tailgate
open, open all the windows and set the climate control system as shown below.
1. Select the fresh air mode.
2. Select the mode.
3. Set the fan speed to high.
4. Set the temperature control to a comfortable setting.
Adjust the climate control system in the same manner if you sit in your parked
vehicle with the engine running.
1 Carbon Monoxide Gas
An enclosed area such as a garage can quickly fill up
with carbon monoxide gas.
Do not run the engine with the garage door closed.
Even when the garage door is open, drive out of the
garage immediately afte r starting the engine.
3WARNING
Carbon monoxide gas is toxic.
Breathing it can cause unconsciousness and
even kill you.
Avoid any enclosed areas or activities that
expose you to carbon monoxide.
Page 66 of 453
65
Safe Driving
Safety Labels
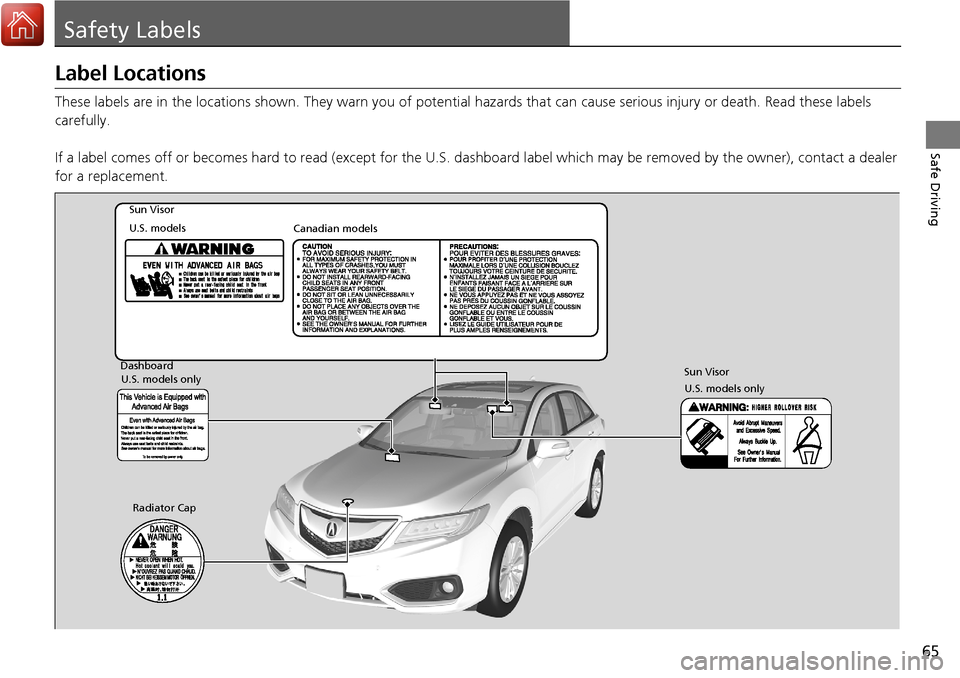
Label Locations
These labels are in the locations shown. They warn you of potenti al hazards that can cause serious injury or death. Read these labels
carefully.
If a label comes off or becomes hard to read (except for the U. S. dashboard label which may be removed by the owner), contact a dealer
for a replacement.
Sun Visor
U.S. models Canadian models
Radiator Cap
U.S. models only
Dashboard
U.S. models only
Sun Visor
Page 67 of 453

66
Page 68 of 453
67
Instrument Panel
This chapter describes the buttons, indicators, and gauges that are used while driving.
Indicators............................................ 68
Multi-Information Display Warning and Information Messages ...................... 84
Gauges and Multi-Information Display Gauges .............................................. 95
Multi-Information Display .................. 96
Page 69 of 453
68
Instrument Panel
Indicators
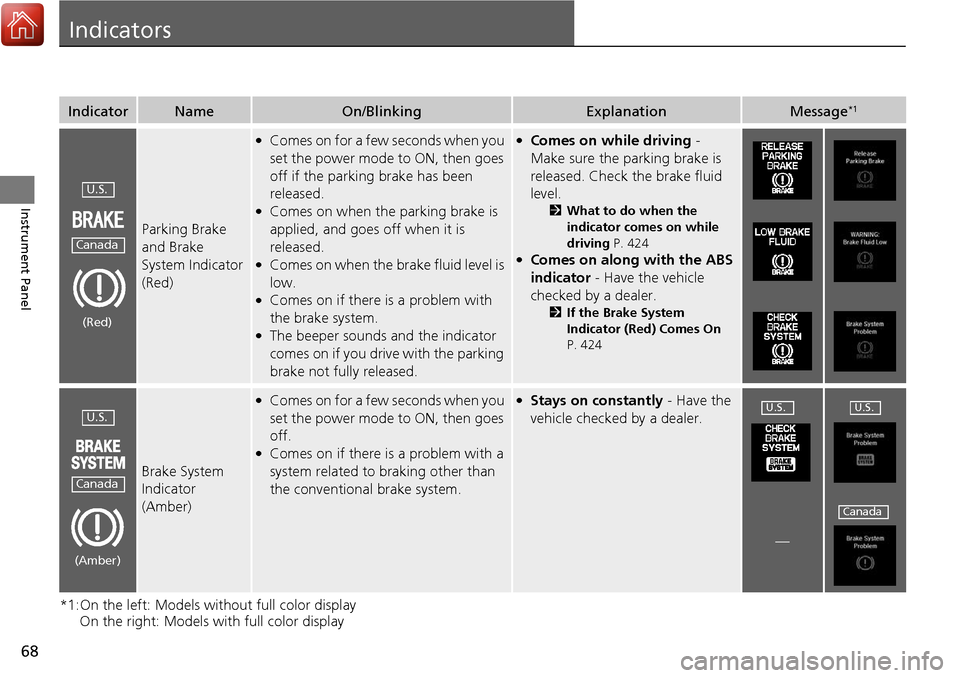
*1:On the left: Models without full color display On the right: Models with full color display
IndicatorNameOn/BlinkingExplanationMessage*1
Parking Brake
and Brake
System Indicator
(Red)
●Comes on for a few seconds when you
set the power mode to ON, then goes
off if the parking brake has been
released.
●Comes on when the parking brake is
applied, and goes off when it is
released.
●Comes on when the brake fluid level is
low.
●Comes on if there is a problem with
the brake system.
●The beeper sounds and the indicator
comes on if you drive with the parking
brake not fully released.
●Comes on while driving -
Make sure the parking brake is
released. Check the brake fluid
level.
2 What to do when the
indicator comes on while
driving P. 424
●Comes on along with the ABS
indicator - Have the vehicle
checked by a dealer.
2 If the Brake System
Indicator (Red) Comes On
P. 424
Brake System
Indicator
(Amber)
●Comes on for a few seconds when you
set the power mode to ON, then goes
off.
●Comes on if there is a problem with a
system related to braking other than
the conventional brake system.
●Stays on constantly - Have the
vehicle checked by a dealer.
—
U.S.
Canada
(Red)
U.S.
Canada
(Amber)
U.S.U.S.
Canada
Page 70 of 453
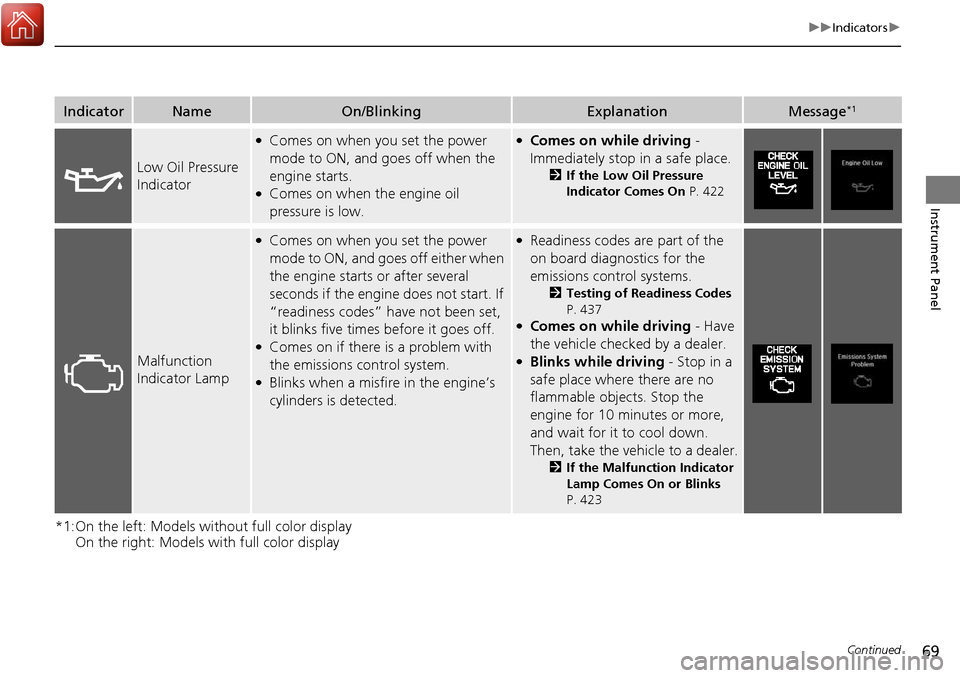
69
uuIndicators u
Continued
Instrument Panel
*1:On the left: Models wi thout full color display
On the right: Models with full color display
IndicatorNameOn/BlinkingExplanationMessage*1
Low Oil Pressure
Indicator
●Comes on when you set the power
mode to ON, and goes off when the
engine starts.
●Comes on when the engine oil
pressure is low.
●Comes on while driving -
Immediately stop in a safe place.
2If the Low Oil Pressure
Indicator Comes On P. 422
Malfunction
Indicator Lamp
●Comes on when you set the power
mode to ON, and goes off either when
the engine starts or after several
seconds if the engine does not start. If
“readiness codes” have not been set,
it blinks five times before it goes off.
●Comes on if there is a problem with
the emissions control system.
●Blinks when a misfire in the engine’s
cylinders is detected.
●Readiness codes are part of the
on board diagnostics for the
emissions control systems.
2Testing of Readiness Codes
P. 437
●Comes on while driving - Have
the vehicle checked by a dealer.
●Blinks while driving - Stop in a
safe place where there are no
flammable objects. Stop the
engine for 10 minutes or more,
and wait for it to cool down.
Then, take the vehicle to a dealer.
2 If the Malfunction Indicator
Lamp Comes On or Blinks
P. 423