clock Acura RDX 2020 Owner's Manual
[x] Cancel search | Manufacturer: ACURA, Model Year: 2020, Model line: RDX, Model: Acura RDX 2020Pages: 657, PDF Size: 33.2 MB
Page 3 of 657
Contents
This owner’s manual should be considered a permanent part of the
vehicle and should remain with the vehicle when it is sold.
This owner’s manual covers all models of your vehicle. You may find
descriptions of equipment and features that are not on your
particular model.
Images throughout this owner’s manual (including the front cover)
represent features and equipment that are available on some, but
not all, models. Your particular mo del may not have some of these
features.
This owner’s manual is for vehicles sold in the United States and
Canada.
The information and specifications in cluded in this publication were
in effect at the time of approval for printing. Honda Motor Co., Ltd.
reserves the right, however, to discontinue or change specifications
or design at any time without notice and without incurring any
obligation.2 Safe Driving P. 29
For Safe Driving P. 30 Seat Belts P. 35 Airbags P. 42
2Instrument Panel P. 73
Indicators P. 74 Gauges and Displays P. 126
2Controls P. 143
Clock P. 144 Locking and Unlocking the Doors P. 146
Panoramic Roof P. 179
Adjusting the Seats P. 207
2 Features P. 237
Audio System P. 238 Audio System Basic Operation P. 245
Customized Features P. 335 HomeLink® Universal Transceiver P. 358
2 Driving P. 399
Before Driving P. 400 Towing a Trailer P. 405
Braking P. 492Parking Your Vehicle P. 501
Fuel Economy and CO2 Emissions P. 524 Turbo Engine Vehicle P. 525
2 Maintenance P. 527
Before Performing Maintenance P. 528 Maintenance MinderTM P. 531
Checking and Maintaining Wiper Blades P. 555
Climate Control System Main tenance P. 573 Cleaning P. 575
2Handling the Unexpected P. 583
Tools P. 584 If a Tire Goes Flat P. 585
Indicator, Coming On/Blinking P. 614 Fuses P. 621
2 Information P. 633
Specifications P. 634 Identification Numbers P. 636
Warranty Coverages P. 641 Authorized Manuals P. 643
20 ACURA RDX-31TJB6111.book 2 ページ 2020年2月11日 火曜日 午後2時6分
Page 13 of 657
12
Quick Reference Guide
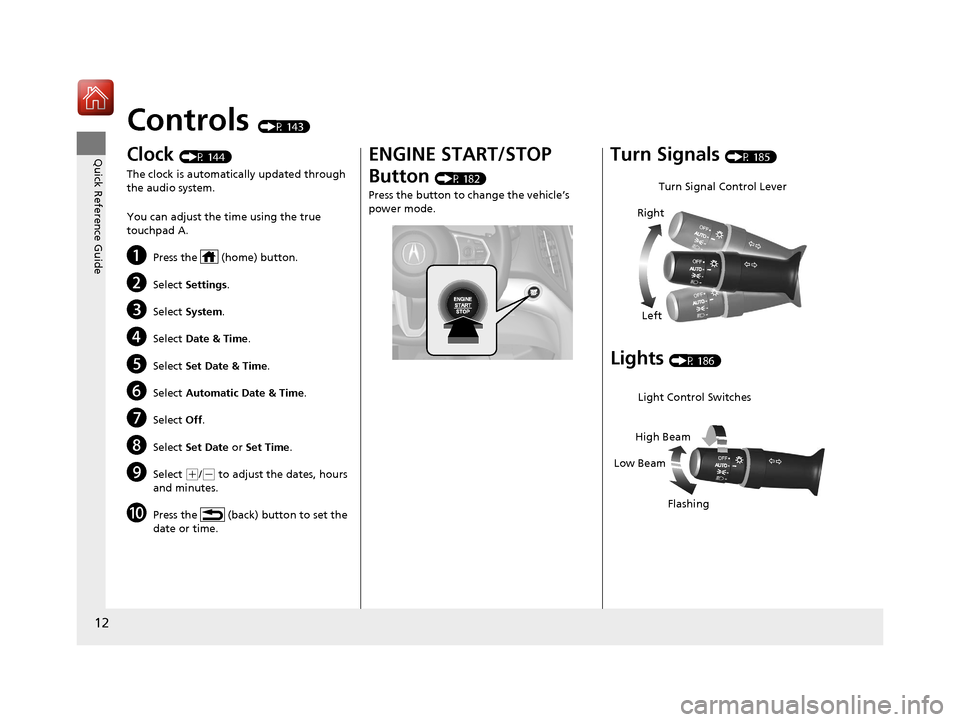
Controls (P 143)
Clock (P 144)
The clock is automatically updated through
the audio system.
You can adjust the time using the true
touchpad A.
aPress the (home) button.
bSelect Settings .
cSelect System .
dSelect Date & Time .
eSelect Set Date & Time .
fSelect Automatic Date & Time .
gSelect Off.
hSelect Set Date or Set Time .
iSelect (+/(- to adjust the dates, hours
and minutes.
jPress the (back) button to set the
date or time.
ENGINE START/STOP
Button
(P 182)
Press the button to change the vehicle’s
power mode.
Turn Signals (P 185)
Lights (P 186)
Turn Signal Control Lever
Right
Left
Light Control Switches
Low Beam High Beam
Flashing
20 ACURA RDX-31TJB6111.book 12 ページ 2020年2月11日 火曜日 午後2時6分
Page 144 of 657
143
Controls
This chapter explains how to operate the various controls necessary for driving.
Clock.................................................. 144
Locking and Unlocking the Doors
Key Types and Functions .................. 146
Low Keyless Access Remote Signal Strength ......................................... 149
Locking/Unlocking the Doors from the Outside .......................................... 150
Locking/Unlocking the Doors from the
Inside ............................................. 159
Childproof Door Locks ..................... 161
Auto Door Locking/Unlocking .......... 162
Opening and Closing the Tailgate ... 163
Security System Immobilizer System .......................... 173 Security System Alarm...................... 173
Opening and Closing the Windows ... 176
Panoramic Roof ................................. 179
Operating the Switches Around the Steering Wheel
ENGINE START/STOP Button............. 182
Turn Signals ..................................... 185
Light Switches.................................. 186
Adaptive Front Lighting System (AFS)*.. 189Fog Lights*...................................... 190
Daytime Running Lights ................... 190
Auto High-Beam .............................. 191
Wipers and Washers ........................ 194
Brightness Control ........................... 198
Rear Defogger/Heated Door Mirror Button ........................................ 200
Heated Windshield Button ............... 200
Driving Position Memory System ...... 201
Adjusting the Steering Wheel .......... 203
Adjusting the Mirrors Interior Rearview Mirror ................... 204
Power Door Mirrors ......................... 205
Adjusting the Seats .......................... 207
Interior Lights/Interior Convenience Items ................................................ 219
Climate Control System Using Automatic Climate Control .... 230
Automatic Climate Control Sensors ... 235
* Not available on all models
20 ACURA RDX-31TJB6111.book 143 ページ 2020年2月11日 火曜日 午後2時6分
Page 145 of 657
144
Controls
Clock
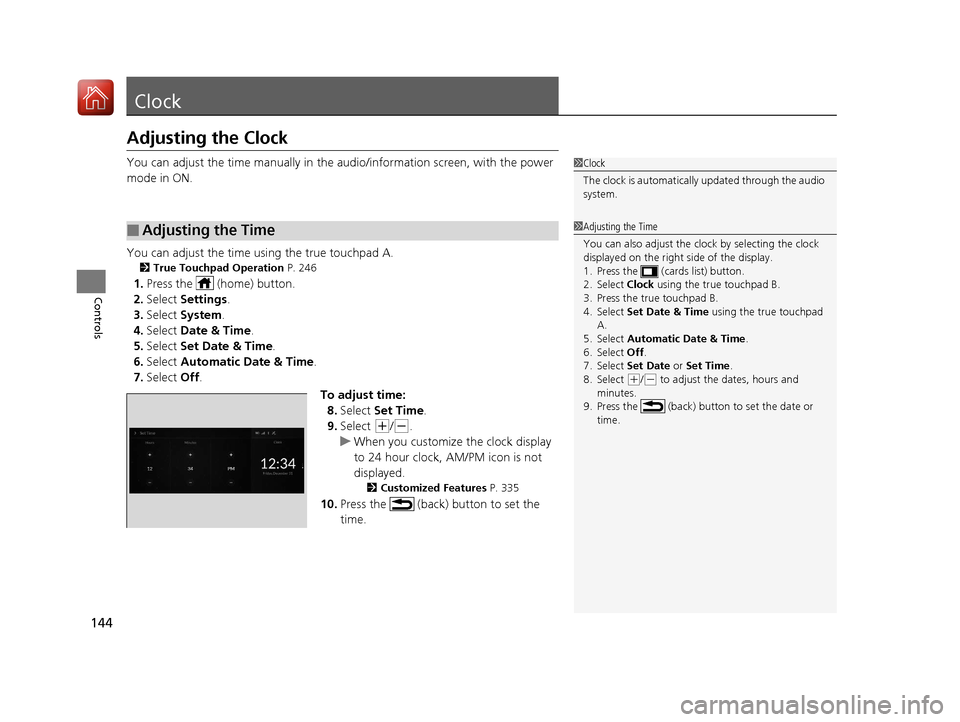
Adjusting the Clock
You can adjust the time manually in the audio/information screen, with the power
mode in ON.
You can adjust the time using the true touchpad A.
2 True Touchpad Operation P. 246
1.Press the (home) button.
2. Select Settings .
3. Select System.
4. Select Date & Time .
5. Select Set Date & Time .
6. Select Automatic Date & Time .
7. Select Off.
To adjust time:8. Select Set Time .
9. Select
(+/(-.
u When you customize the clock display
to 24 hour clock, AM/PM icon is not
displayed.
2 Customized Features P. 335
10.Press the (back) button to set the
time.
■Adjusting the Time
1Clock
The clock is automatically updated through the audio
system.
1Adjusting the Time
You can also adjust the clock by selecting the clock
displayed on the right side of the display.
1. Press the (cards list) button.
2. Select Clock using the true touchpad B.
3. Press the true touchpad B.
4. Select Set Date & Time using the true touchpad
A.
5. Select Automatic Date & Time .
6. Select Off .
7. Select Set Date or Set Time.
8. Select
( +/(- to adjust the dates, hours and
minutes.
9. Press the (back) button to set the date or
time.
20 ACURA RDX-31TJB6111.book 144 ページ 2020年2月11日 火曜日 午後2時6分
Page 146 of 657
145
uuClock uAdjusting the Clock
Controls
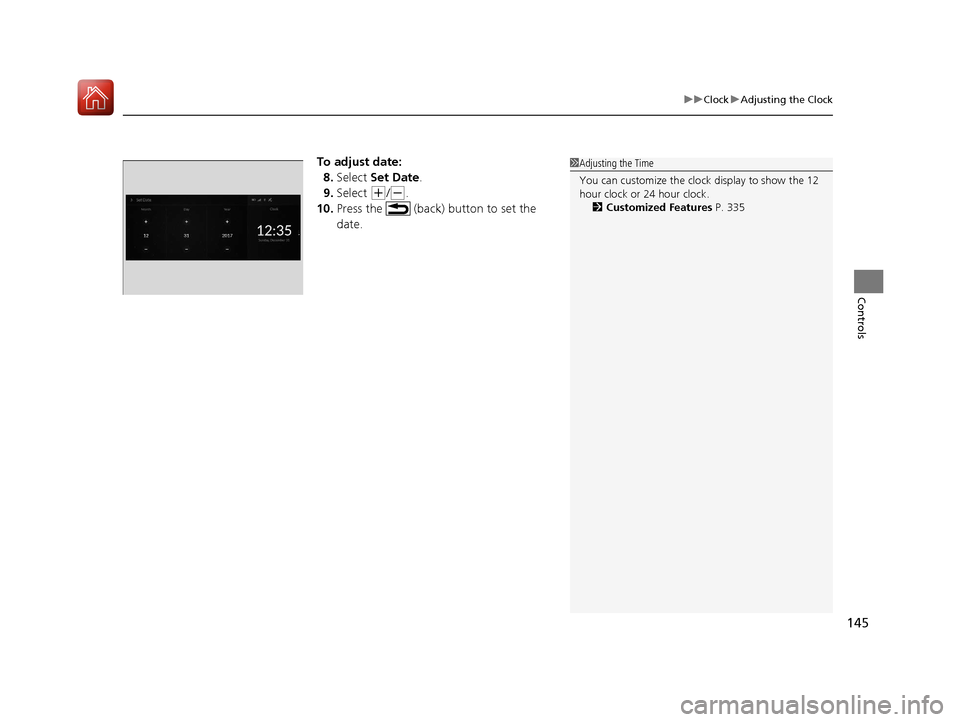
To adjust date:
8. Select Set Date .
9. Select
(+/(-.
10. Press the (back) button to set the
date.
1Adjusting the Time
You can customize the clock display to show the 12
hour clock or 24 hour clock.
2 Customized Features P. 335
20 ACURA RDX-31TJB6111.book 145 ページ 2020年2月11日 火曜日 午後2時6分
Page 252 of 657
Continued251
uuAudio System Basic Operation uAudio/Information Screen
Features
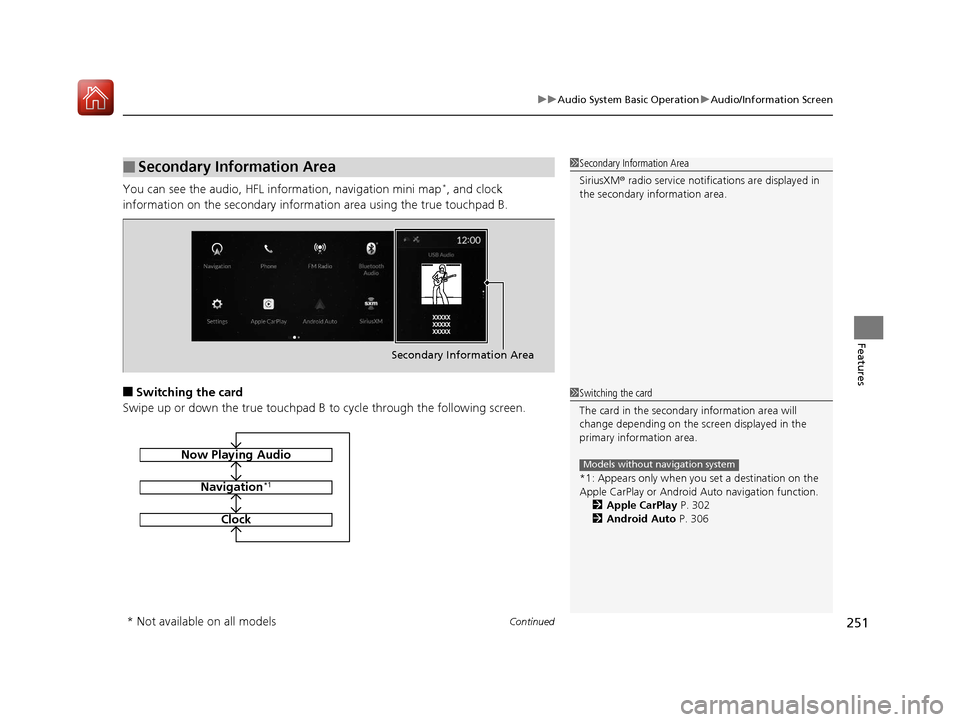
You can see the audio, HFL information, navigation mini map*, and clock
information on the secondary informa tion area using the true touchpad B.
■Switching the card
Swipe up or down the true touchpad B to cycle through the following screen.
■Secondary Information Area1Secondary Information Area
SiriusXM ® radio service notifications are displayed in
the secondary information area.
Secondary Information Area
1 Switching the card
The card in the secondary information area will
change depending on the sc reen displayed in the
primary information area.
*1: Appears only when you set a destination on the
Apple CarPlay or Android Auto navigation function.
2 Apple CarPlay P. 302
2 Android Auto P. 306
Models without navigation systemNow Playing Audio
Navigation*1
Clock
* Not available on all models
20 ACURA RDX-31TJB6111.book 251 ページ 2020年2月11日 火曜日 午後2時6分
Page 343 of 657
342
uuCustomized Features u
Features
■List of customizable options
*1:Default Setting Setup Group Customizable Features Description Selectable Settings
System
System
Volumes
System SoundsChanges the system sounds volume.—
Phone CallsChanges the phone call volume.—
Voice RecognitionChanges the voice recognition volume.—
Navigation GuidanceChanges the navigation guidance
volume.—
Touchpad SensitivitySets the sensitivity of the true
touchpad.High
/Low*1
Date & Time
Time FormatSelects the digital clock display from
12H to 24H.12 Hour*1/ 24 Hour
Set Date &
Time
Automatic
Date & TimeSelects On to have the GPS
automatically adjust the clock. Select
Off to cancel this function.
On*1/Off
Set DateAdjusts date.
2 Adjusting the Clock P. 144—
Set TimeAdjusts clock.
2Adjusting the Clock P. 144—
20 ACURA RDX-31TJB6111.book 342 ページ 2020年2月11日 火曜日 午後2時6分
Page 344 of 657
343
uuCustomized Features u
Continued
Features
*1:Default SettingSetup Group Customizable Features
Description Selectable Settings
System
Date & TimeSet Time
Zone
Automatic
Time ZoneSets the audio system to automatically
adjust the clock when driving through
different time zones.
On*1/Off
(Select time
zone)Changes the time zone manually.—
System Units
Changes the speed/distance unit on
the multi-information display, head-up
display
* and audio/information screen.
Miles*1/KM (U.S.)
Miles/ KM*1 (Canada)
LanguageChanges the display language.English*1/Français /
Español
Factory Data Reset
Resets all the settings to their factory
default.
2 Defaulting All the Settings P. 357
Continue/Cancel
AboutDisplays the Android setting items.—
Advanced
OptionsLocation Access
Selects Off not to allow apps including
the navigation system* to access the
vehicle’s location.On*1/ Off
* Not available on all models
20 ACURA RDX-31TJB6111.book 343 ページ 2020年2月11日 火曜日 午後2時6分
Page 545 of 657
544
uuMaintenance Under the Hood uChanging the Engine Oil and Oil Filter
Maintenance
Changing the Engine Oil and Oil Filter
You must change the engine oil and oil f ilter regularly in order to maintain the
engine’s lubrication. The engine may be damaged if they are not changed regularly.
Change the oil and filter in accordance with the maintenance message on the multi-
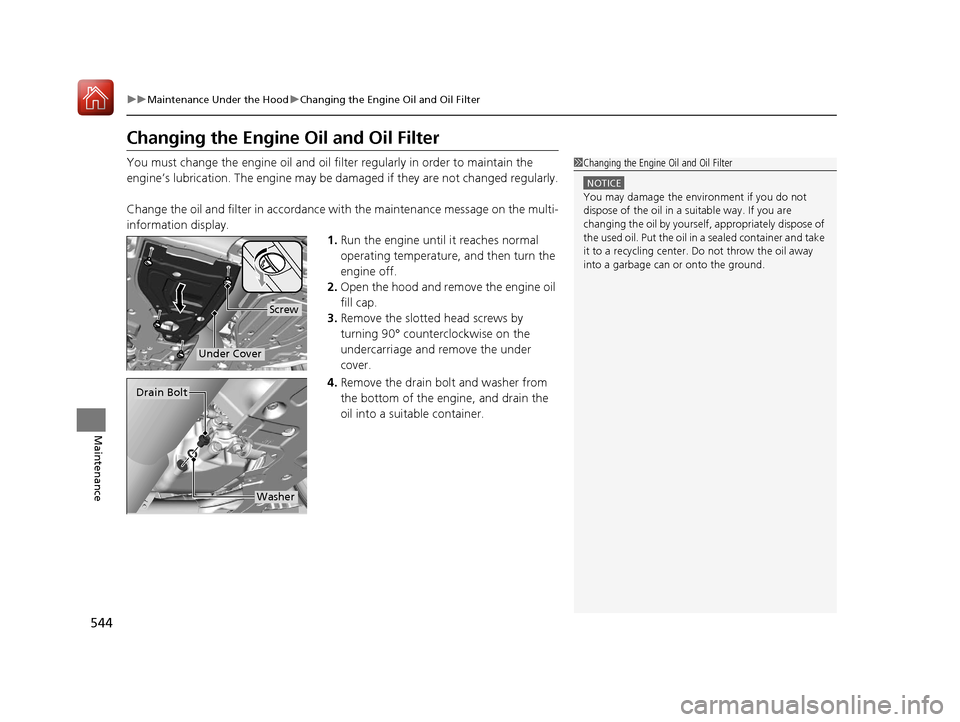
information display. 1.Run the engine until it reaches normal
operating temperature, and then turn the
engine off.
2. Open the hood and remove the engine oil
fill cap.
3. Remove the slotted head screws by
turning 90° counterclockwise on the
undercarriage and remove the under
cover.
4. Remove the drain bolt and washer from
the bottom of the engine, and drain the
oil into a suitable container.1Changing the Engine Oil and Oil Filter
NOTICE
You may damage the environment if you do not
dispose of the oil in a suitable way. If you are
changing the oil by yourself , appropriately dispose of
the used oil. Put the oil in a sealed container and take
it to a recycling center. Do not throw the oil away
into a garbage can or onto the ground.
Screw
Under Cover
Drain Bolt
Washer
20 ACURA RDX-31TJB6111.book 544 ページ 2020年2月11日 火曜日 午後2時6分
Page 548 of 657
547
uuMaintenance Under the Hood uEngine Coolant
Maintenance
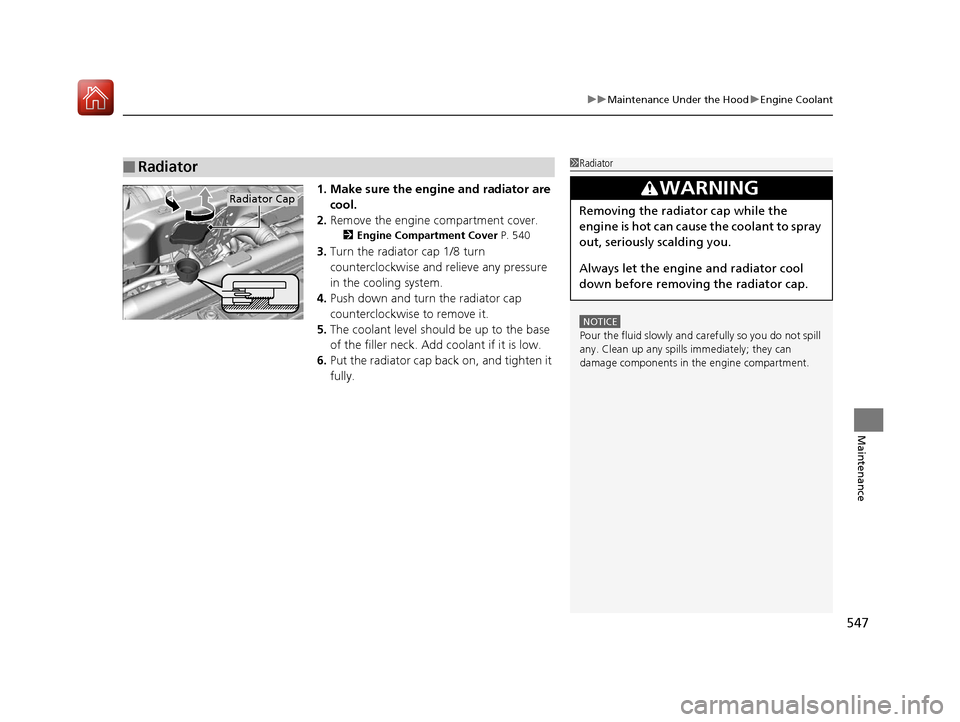
1. Make sure the engine and radiator are
cool.
2. Remove the engine compartment cover.
2 Engine Compartment Cover P. 540
3.Turn the radiator cap 1/8 turn
counterclockwise and re lieve any pressure
in the cooling system.
4. Push down and turn the radiator cap
counterclockwise to remove it.
5. The coolant level should be up to the base
of the filler neck. Add coolant if it is low.
6. Put the radiator cap back on, and tighten it
fully.
■Radiator1Radiator
NOTICE
Pour the fluid slowly and ca refully so you do not spill
any. Clean up any spills immediately; they can
damage components in the engine compartment.
3WARNING
Removing the radiator cap while the
engine is hot can cause the coolant to spray
out, seriously scalding you.
Always let the engine and radiator cool
down before removing the radiator cap.Radiator Cap
20 ACURA RDX-31TJB6111.book 547 ページ 2020年2月11日 火曜日 午後2時6分