settings ACURA RDX 2023 Owner's Guide
[x] Cancel search | Manufacturer: ACURA, Model Year: 2023, Model line: RDX, Model: ACURA RDX 2023Pages: 713, PDF Size: 21.99 MB
Page 321 of 713
319
uuAudio System Basic Operation uWi-Fi Connection
Continued
Features
Wi-Fi Connection
This vehicle is equipped wi th Wi-Fi connectivity. You ca n connect to an external
Wi-Fi hotspot or communication device. In a ddition, the vehicle can be used by other
communication devices as a Wi-Fi hotspot via the telematics unit (TCU).
• Connect the vehicle to a Wi-Fi hotspot
• Use Wi-Fi inside the vehicle
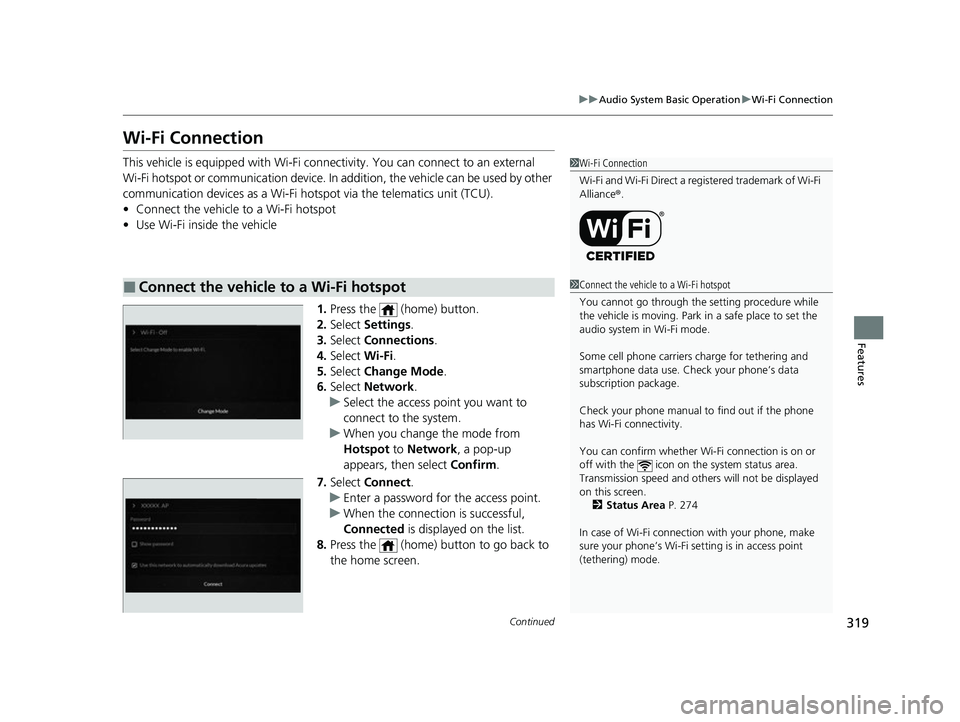
1.Press the (home) button.
2. Select Settings .
3. Select Connections .
4. Select Wi-Fi.
5. Select Change Mode .
6. Select Network .
u Select the access point you want to
connect to the system.
u When you change the mode from
Hotspot to Network, a pop-up
appears, then select Confirm.
7. Select Connect .
u Enter a password for the access point.
u When the connection is successful,
Connected is displayed on the list.
8. Press the (home) button to go back to
the home screen.
■Connect the vehicle to a Wi-Fi hotspot
1Wi-Fi Connection
Wi-Fi and Wi-Fi Direct a registered trademark of Wi-Fi
Alliance® .
1Connect the vehicle to a Wi-Fi hotspot
You cannot go through the setting procedure while
the vehicle is moving. Park in a safe place to set the
audio system in Wi-Fi mode.
Some cell phone carriers charge for tethering and
smartphone data use. Check your phone’s data
subscription package.
Check your phone manual to find out if the phone
has Wi-Fi connectivity.
You can confirm whether Wi -Fi connection is on or
off with the icon on the system status area.
Transmission speed and others will not be displayed
on this screen. 2 Status Area P. 274
In case of Wi-Fi connect ion with your phone, make
sure your phone’s Wi-Fi se tting is in access point
(tethering) mode.
23 ACURA RDX-31TJB6400.book 319 ページ 2022年8月4日 木曜日 午後1時51分
Page 322 of 713
320
uuAudio System Basic Operation uWi-Fi Connection
Features
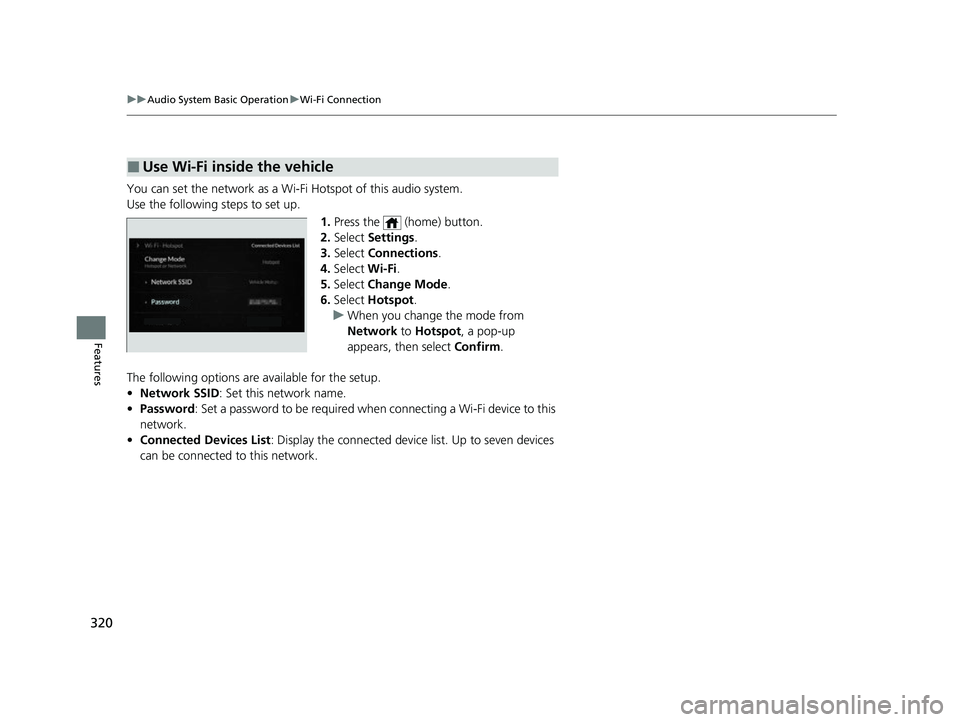
You can set the network as a Wi-F i Hotspot of this audio system.
Use the following steps to set up.
1.Press the (home) button.
2. Select Settings .
3. Select Connections .
4. Select Wi-Fi.
5. Select Change Mode .
6. Select Hotspot .
u When you change the mode from
Network to Hotspot, a pop-up
appears, then select Confirm.
The following options are available for the setup.
• Network SSID : Set this network name.
• Password : Set a password to be required when connecting a Wi-Fi device to this
network.
• Connected Devices List : Display the connected device list. Up to seven devices
can be connected to this network.
■Use Wi-Fi inside the vehicle
23 ACURA RDX-31TJB6400.book 320 ページ 2022年8月4日 木曜日 午後1時51分
Page 323 of 713
321
uuAudio System Basic Operation uAT&T Hotspot
Features
AT&T Hotspot
If you have subscribed to AT&T hotspot services, your vehicle will provide data to
connect your mobile devices to the Internet. You can use the AT&T Hotspot app to
turn on/off vehicle data and monitor da ta usage left on your subscription.
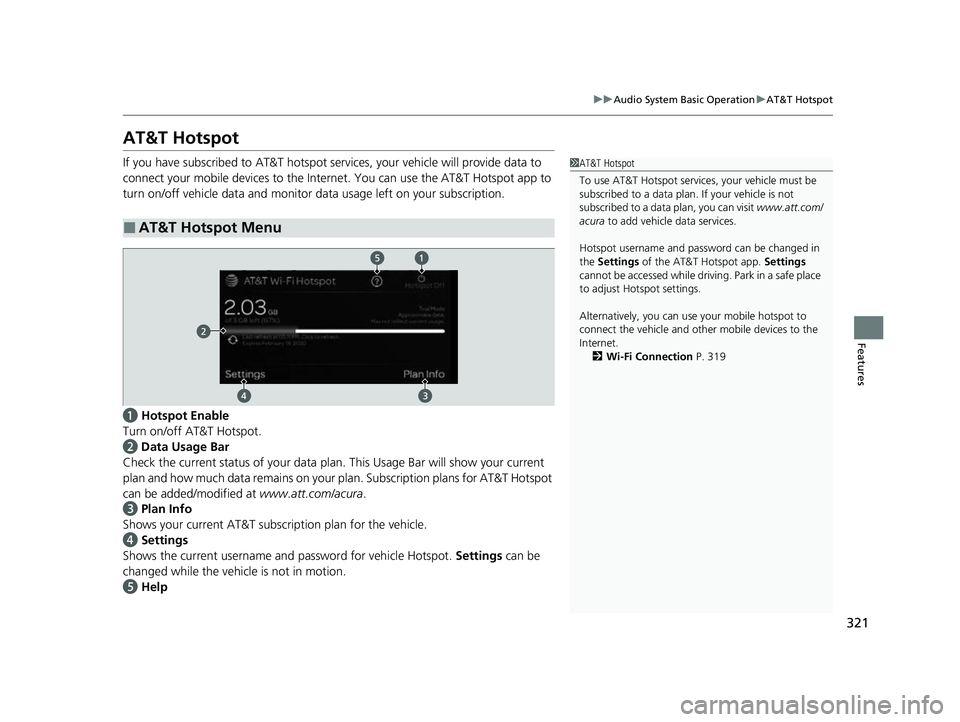
a Hotspot Enable
Turn on/off AT&T Hotspot.
b Data Usage Bar
Check the current status of your data pl an. This Usage Bar will show your current
plan and how much data remains on your plan. Subscription plans for AT&T Hotspot
can be added/modified at www.att.com/acura.
c Plan Info
Shows your current AT&T subscription plan for the vehicle.
d Settings
Shows the current username and password for vehicle Hotspot. Settings can be
changed while the vehicle is not in motion.
e Help
■AT&T Hotspot Menu
1AT&T Hotspot
To use AT&T Hotspot servic es, your vehicle must be
subscribed to a data plan . If your vehicle is not
subscribed to a data plan, you can visit www.att.com/
acura to add vehicle data services.
Hotspot username and pass word can be changed in
the Settings of the AT&T Hotspot app. Settings
cannot be accessed while driving. Park in a safe place
to adjust Hotspot settings.
Alternatively, you can use your mobile hotspot to
connect the vehicle and other mobile devices to the
Internet. 2 Wi-Fi Connection P. 319
23 ACURA RDX-31TJB6400.book 321 ページ 2022年8月4日 木曜日 午後1時51分
Page 326 of 713
uuAudio System Basic Operation uApple CarPlay
324
Features
■Connecting Apple CarPlay using the USB cable to the USB port in the
console compartment
1. Ensure Siri is enabled on your iPhone.
2. Connect the iPhone to the USB port using the USB cable.
2 USB Ports P. 255
uThe confirmation screen will be displayed.
3. Select Enable Apple CarPlay .
u If prompted on your device, click Allow to allow Apple CarPlay while your
phone is locked.
You may change the consent settings under the Connections settings menu.
■Set up Apple CarPlay wirelessly by Bluetooth® pairing
1. Ensure Siri is enabled on your iPhone.
2. Pair and connect the iPhone to the vehicle’s Bluetooth® HandsFreeLink ®.
2Phone Setup P. 395
3.A screen with option to select Continue with Bluetooth or Change to CarPlay
is provided.
4. Select Change to CarPlay .
5. Your iPhone will request your permission to accept wireless Apple CarPlay. Accept
the request to complete setup.
■Enabling Apple CarPlay1 Enabling Apple CarPlay
You can use the method below to access Apple
CarPlay settings. Here you can connect to/
disconnect from devices, de lete a device or change
permissions to enable or disable a device:
Press the (home) button Select Settings
Connections Apple CarPlay Select device
Use of user and vehicle information
The use and handling of user and vehicle information
transmitted to/from your iP hone by Apple CarPlay is
governed by the Apple iOS terms and conditions and
Apple’s Privacy Policy.
23 ACURA RDX-31TJB6400.book 324 ページ 2022年8月4日 木曜日 午後1時51分
Page 331 of 713
Continued329
uuAudio System Basic Operation uAndroid AutoTM
Features
•
Operate Android Auto with your voice.
•
You can check Android notifications.
• (Android Auto Home)
Display useful information organized by Android Auto into simple cards that
appear just when they’re needed.
When you connect an Android phone to the unit via the USB port in the console
compartment or wirelessly, Android Auto is automatically initiated.
Before setting up a connection, ensure that the Android Auto app is closed on the
phone.
■Connecting Android Auto using the USB cable to the USB port
To enable Android Auto after connecting an Android phone to the system, select
Enable Android Auto on the screen.
You may change the consent settings under the Connections settings menu.
■Set up Android Auto wi relessly by Bluetooth® pairing
1. Pair and connect the Android phone to the vehicle’s Bluetooth ® HandsFreeLink®.
2 Phone Setup P. 395
2.A privacy policy statemen t will appear. Select Change to Android Auto .
3. Your phone will display various screens that request your permissions needed for
Android Auto. Accept the requests to complete setup.
■Android Auto Setup1Android Auto Setup
Only initialize Android Auto when you safely parked.
When Android Auto first detects your phone, you will
need to set up your phone so that auto pairing is
possible. Refer to the inst ruction manual that came
with your phone.
You can use the method below to change Android
Auto settings after you ha ve completed the initial
setup:
Press the (home) button Select Settings
Connections Android Auto Select device
Use of user and vehicle information
The use and handling of user and vehicle information
transmitted to/from your phone by Android Auto is
governed by the Google’s Privacy Policy.
23 ACURA RDX-31TJB6400.book 329 ページ 2022年8月4日 木曜日 午後1時51分
Page 335 of 713
333
uuAudio Error Messages uAndroid/Apps
Features
Android/Apps
If an error occurs while using the audio system or apps, you may see the following
error messages. If you cannot clear the error message, contact a dealer.
*1:****part is variable characters, and will change depending upon where an error
occurs.
Error MessageSolution
Unfortunately, **** has
stopped.*1Error has occurred within app, select OK on the screen to close the app.
**** isn't responding. Do
you want to close it?*1
App is not responding.
Select Wait if you can wait for a response from app a little longer. If it does not respond even if you keep
waiting, select OK to close the app and start it up. If the error message continues, perform Factory Data
Reset .
2Defaulting All the Settings P. 385
23 ACURA RDX-31TJB6400.book 333 ページ 2022年8月4日 木曜日 午後1時51分
Page 355 of 713
353
uuGeneral Information on the Audio System uAbout Open Source Licenses
Features
About Open Source Licenses
To see the open source licens e information, follow these steps.
1. Press the (home) button.
2. Select Settings .
3. Select System.
4. Select About .
5. Select Legal Information .1About Open Source Licenses
For Amplifier Equipment
For open source information, please visit:
http://www.hondaopensource2.com/18.5MY_AMP
For Telematics Control Unit
Free/Open Source Software Information.
This product contains Free/Open Source
Software(FOSS).
The license information and/ or the source code of
such FOSS can be found at the following URL.
https://www.denso.com/global/en/opensource/tcu/
honda/
23 ACURA RDX-31TJB6400.book 353 ページ 2022年8月4日 木曜日 午後1時51分
Page 361 of 713
359Continued
Features
Customized Features
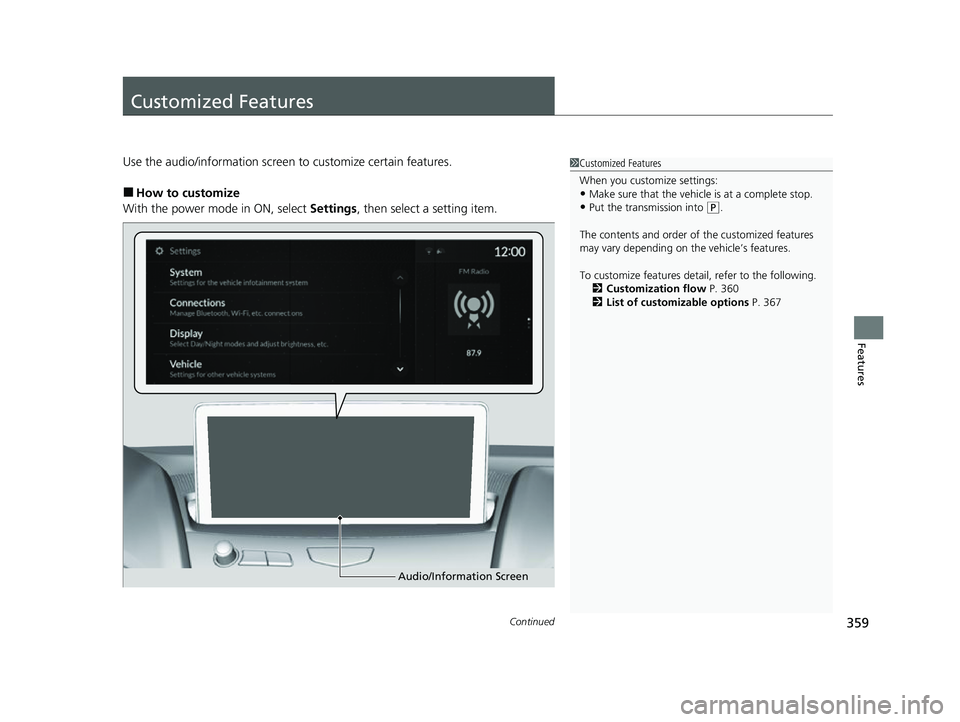
Use the audio/information screen to customize certain features.
■How to customize
With the power mode in ON, select Settings, then select a setting item.
1Customized Features
When you customize settings:
•Make sure that the vehicle is at a complete stop.
•Put the transmission into (P.
The contents and order of the customized features
may vary depending on th e vehicle’s features.
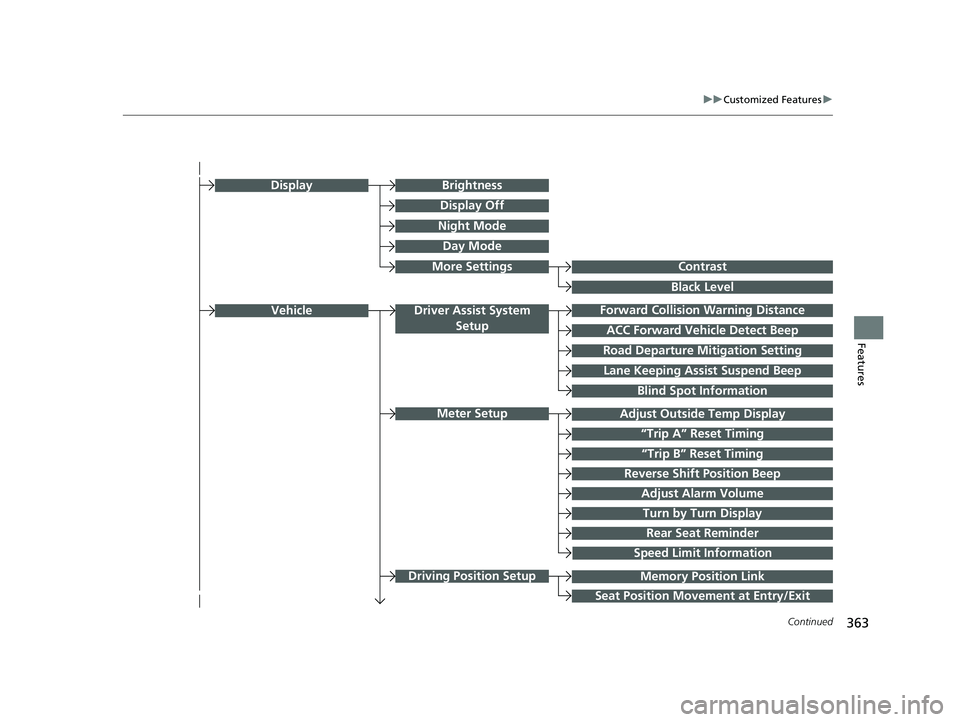
To customize features detail, refer to the following. 2 Customization flow P. 360
2 List of customizable options P. 367
Audio/Information Screen
23 ACURA RDX-31TJB6400.book 359 ページ 2022年8月4日 木曜日 午後1時51分
Page 362 of 713

360
uuCustomized Features u
Features
■Customization flow
Press the (Home) button.
Select Settings.
Touchpad Sensitivity
System
System SoundsSystem Volumes
Phone Calls
Voice Recognition
Navigation Guidance
Date & Time
System Units
Factory Data Reset
Language
Time Format
Set Date & Time
Set Time
Set Date
Automatic Date &
Time
About
(Select Time Zone)
Automatic Time ZoneSet Time Zone
23 ACURA RDX-31TJB6400.book 360 ページ 2022年8月4日 木曜日 午後1時51分
Page 365 of 713
363
uuCustomized Features u
Continued
Features
Memory Position Link
“Trip B” Reset Timing
Seat Position Movement at Entry/Exit
Adjust Outside Temp Display
“Trip A” Reset Timing
Meter Setup
Vehicle
Driving Position Setup
Reverse Shift Position Beep
Adjust Alarm Volume
Turn by Turn Display
Road Departure Mitigation Setting
Forward Collision Warning Distance
ACC Forward Vehicle Detect Beep
Lane Keeping Assist Suspend Beep
Blind Spot Information
Driver Assist System
Setup
Night Mode
Day Mode
BrightnessDisplay
Contrast
Black Level
More Settings
Display Off
Rear Seat Reminder
Speed Limit Information
23 ACURA RDX-31TJB6400.book 363 ページ 2022年8月4日 木曜日 午後1時51分