steering Acura RL 2000 3.5 Owner's Guide
[x] Cancel search | Manufacturer: ACURA, Model Year: 2000, Model line: RL, Model: Acura RL 2000Pages: 330, PDF Size: 4.53 MB
Page 104 of 330
Drivin
g Positio n Memor y Syste m
Doing any of the following after
pressing the MEMO button will cancel the storing procedure. Not pressing a memory button
within 5 seconds. Readjusting the seat or steering
position.
Readjusting the outside mirror
position.
Each memory button stores only one driving position. Storing a new
position erases the previous setting stored in that button's memory. If
you want to add a new position while retaining the current one, use theother memory button.
All stored driving positions will be lost if your car's battery goes dead or
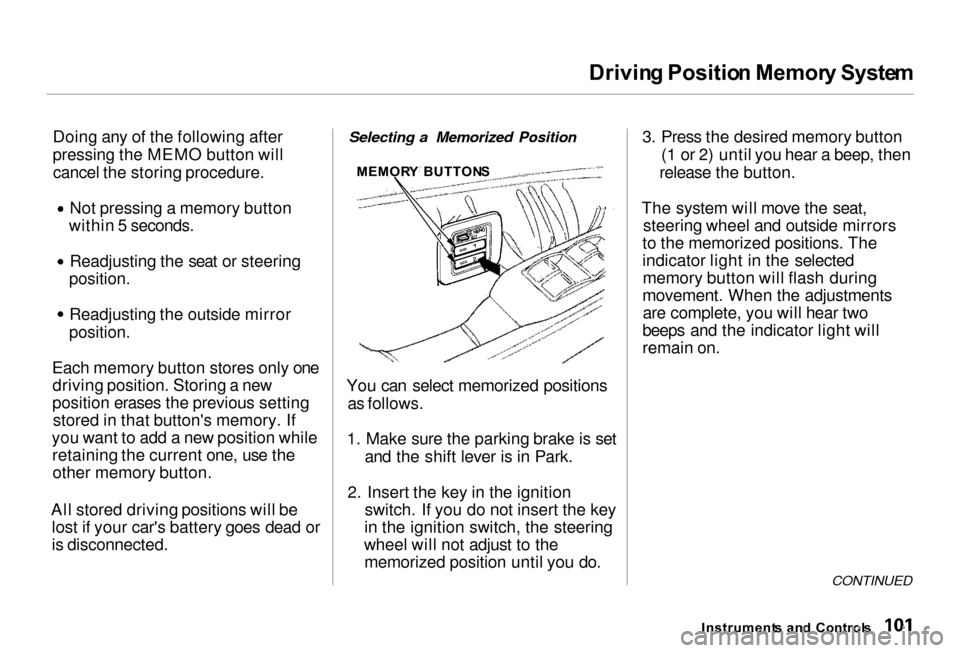
is disconnected. Selecting a Memorized Position
You can select memorized positions as follows.
1. Make sure the parking brake is set and the shift lever is in Park.
2. Insert the key in the ignition switch. If you do not insert the key
in the ignition switch, the steering
wheel will not adjust to the memorized position until you do. 3. Press the desired memory button
(1 or 2) until you hear a beep, then
release the button.
The system will move the seat, steering wheel and outside mirrors
to the memorized positions. The
indicator light in the selected memory button will flash during
movement. When the adjustments are complete, you will hear two
beeps and the indicator light will
remain on.
CONTINUED
Instrument s an d Control s
MEMOR
Y BUTTON S
Page 105 of 330
Drivin
g Positio n Memor y System , Sea t Heater s
To stop the system's automatic ad-
justment; Press any button on the control
panel: MEMO, 1 or 2. Push any of the adjustment
switches for the seat or steering
wheel. Shift out of Park.
Adjust the outside mirrors.
If you select a memorized position
without inserting the key in the ignition switch, only the seat and
outside mirrors will adjust. To get
the system to also adjust the steering
wheel, insert the key in the ignition switch. You will hear two beeps
when it is complete. If desired, you can use the adjust-
ment switches to change the posi-
tions of the seat, steering wheel or outside mirrors after they are in
their memorized position. To keep
this driving position for later use,
you must store it in the driving posi-
tion memory. Sea
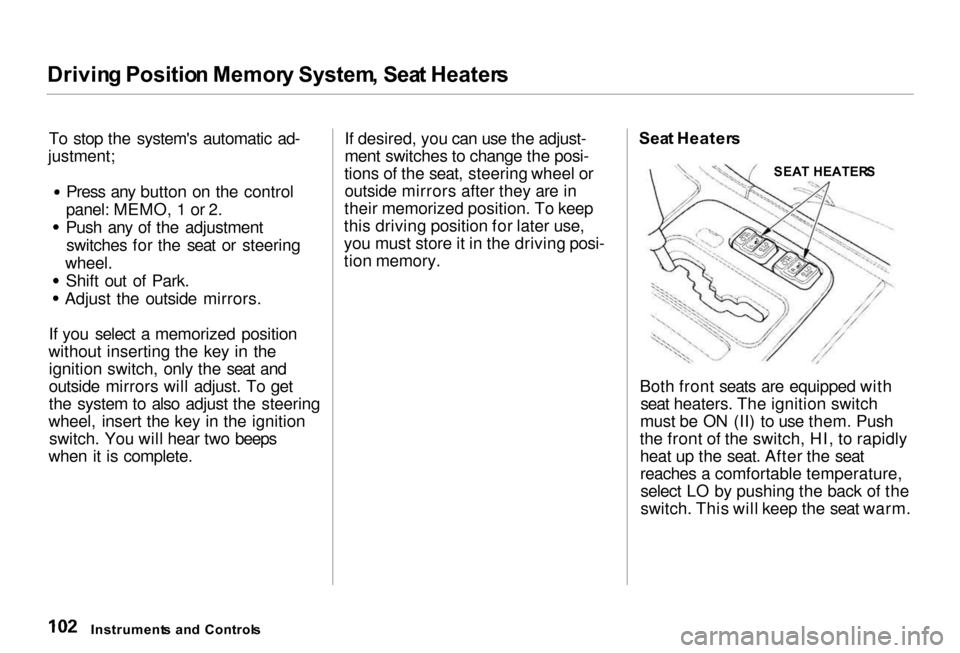
t Heater s
SEAT HEATER S
Both front seats are equipped with seat heaters. The ignition switch
must be ON (II) to use them. Push
the front of the switch, HI, to rapidly heat up the seat. After the seat
reaches a comfortable temperature,select LO by pushing the back of the
switch. This will keep the seat warm.
Instrument s an d Control s
Page 136 of 330
Climat
e Contro l Syste m
Sunligh t Sensor/Temperatur e
Senso r
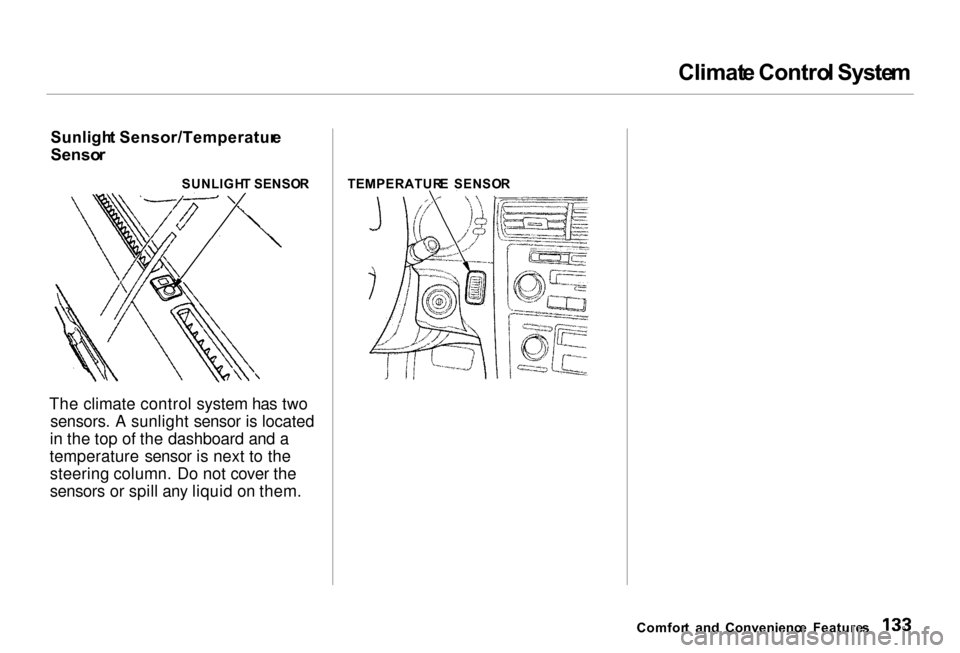
The climate control system has two sensors. A sunlight sensor is located
in the top of the dashboard and a
temperature sensor is next to the steering column. Do not cover the
sensors or spill any liquid on them.
Comfort an d Convenienc e Feature s
SUNLIGH
T SENSO R TEMPERATUR E SENSO R
Page 164 of 330
Audi
o Syste m
Remot e Audi o Control s
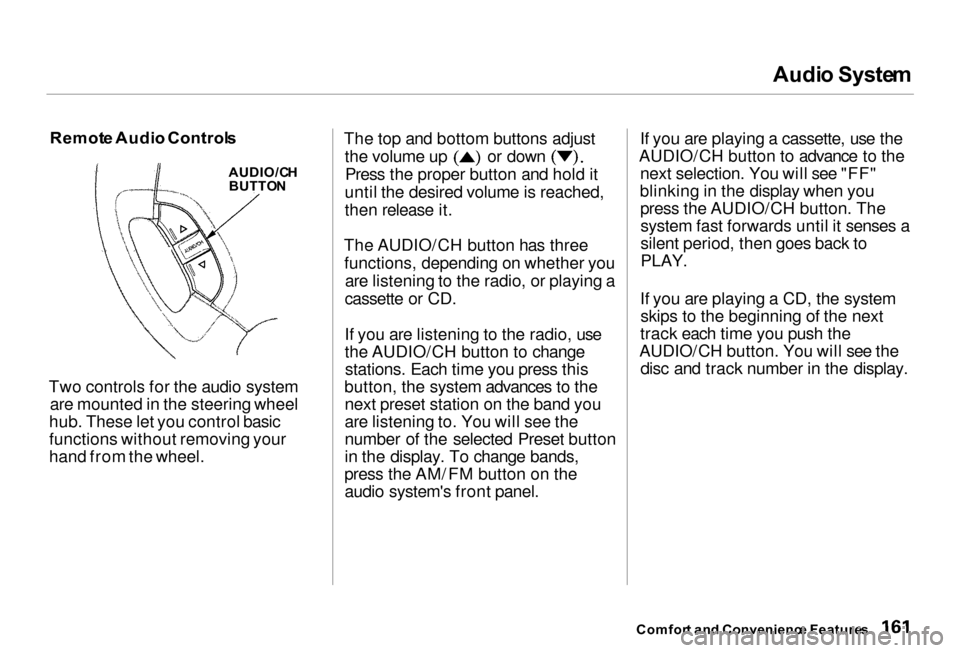
AUDIO/C H
BUTTO N
Two controls for the audio system are mounted in the steering wheel
hub. These let you control basic
functions without removing your
hand from the wheel. The top and bottom buttons adjust the volume up or down
Press the proper button and hold it
until the desired volume is reached,
then release it.
The AUDIO/CH button has three functions, depending on whether you are listening to the radio, or playing a
cassette or CD.
If you are listening to the radio, use
the AUDIO/CH button to change stations. Each time you press this
button, the system advances to the next preset station on the band you
are listening to. You will see the
number of the selected Preset button
in the display. To change bands,
press the AM/FM button on the audio system's front panel. If you are playing a cassette, use the
AUDIO/CH button to advance to the next selection. You will see "FF"
blinking in the display when you press the AUDIO/CH button. Thesystem fast forwards until it senses a
silent period, then goes back to
PLAY.
If you are playing a CD, the system skips to the beginning of the next
track each time you push the
AUDIO/CH button. You will see the disc and track number in the display.
Comfor t an d Convenienc e Feature s
Page 176 of 330

Accessorie
s an d Modification s
Modification s
Do not remove any original
equipment or modify your car in any
way that would alter its design or operation. This could make your car
unsafe and illegal to drive.
For example, do not make any
modifications that would change the
ride height of your car, or install
wheels and tires with a different overall diameter.
Such modifications can adversely
affect handling, and interfere with
the operation of the car's anti-lock
brakes and other systems.
In addition, any modifications that
decrease ground clearance increase
the chance of undercarriage parts striking a curb, speed bump, or other
raised object, which could cause
your airbags to deploy. Do not modify your steering wheel
or any other part of your
Supplemental Restraint System.
Modifications could make the system ineffective.
Additiona l Safet y Precaution s
Do not attach or place objects on
the front airbag covers. Any object
attached to or placed on the covers
marked "SRS AIRBAG," in the center of the steering wheel and
on top of the dashboard, could
interfere with the proper operation of the airbags. Or, if the airbags
inflate, the objects could be
propelled inside the car and hurt
someone.
Do not attach hard objects on or
near a front door. If a side airbag
inflates, a cup holder or other hard object attached on or near the
door could be propelled inside the
car and hurt someone. Do not place any objects over the
outside edge of a front seat-back.
Covering the outside edge of a
front seat-back, with a non-Acura seat cover for example, could
prevent the airbag from inflating
properly.
Before Drivin g
Page 181 of 330

Preparin
g to Driv e
You should do the following checks and adjustments every day before
you drive your car.
1. Make sure all windows, mirrors,
and outside lights are clean and
unobstructed. Remove frost, snow, or ice.
2. Check that the hood and trunk are
fully closed.
3. Visually check the tires. If a tire
looks low, use a gauge to check itspressure.
4. Check that any items you may be
carrying with you inside are stored
properly or fastened down
securely.
5. Check the adjustment of the seat
(see page 93 ).
6. Check the adjustment of the
inside and outside mirrors (see
page 98 ).
7. Check the adjustment of the
steering wheel (see page 71).
8. Make sure the doors are securely
closed and locked.
9. Fasten your seat belt. Check that
your passengers have fastened their seat belts (see page 15 ).
10.Turn the ignition switch ON (II).
Check the indicator lights in the
instrument panel.
11.Start the engine (see page 179 ).
12.Check the gauges and indicator
lights in the instrument panel (see
page 53).
Drivin g
Page 188 of 330

Th
e Brakin g Syste m
Your Acura is equipped with disc brakes at all four wheels. A powerassist helps reduce the effort needed
on the brake pedal. The ABS helps
you retain steering control when braking very hard.
Put your foot on the brake pedal only
when you intend to brake. Resting
your foot on the pedal keeps the brakes applied lightly, causing them
to build up heat. Heat build-up can
reduce how well your brakes work. Italso keeps your brake lights on all
the time, confusing drivers behind
you.
Constant application of the brakes
when going down a long hill builds up heat and reduces their effective-
ness. Use the engine to assist the
brakes by downshifting to a lower
gear and taking your foot off the accelerator pedal.
Check your brakes after driving
through deep water. Apply the
brakes moderately to see if they feel normal. If not, apply them gently and
frequently until they do. Since a
longer distance is needed to stop
with wet brakes, be extra cautious and alert in your driving. Brak
e Wea r Indicator s
All four brakes have audible brake wear indicators.
When the brake pads need replacing, you will hear a distinctive metallic "screeching" sound when you apply
the brakes. If you do not have the
brake pads replaced, they will begin screeching all the time.
Your brakes may sometimes squeal or squeak when you apply them
lightly. Do not confuse this with the
brake wear indicators. They make a
very audible "screeching."
Driving
Page 189 of 330
Th
e Brakin g Syste m
Brak e Syste m Desig n
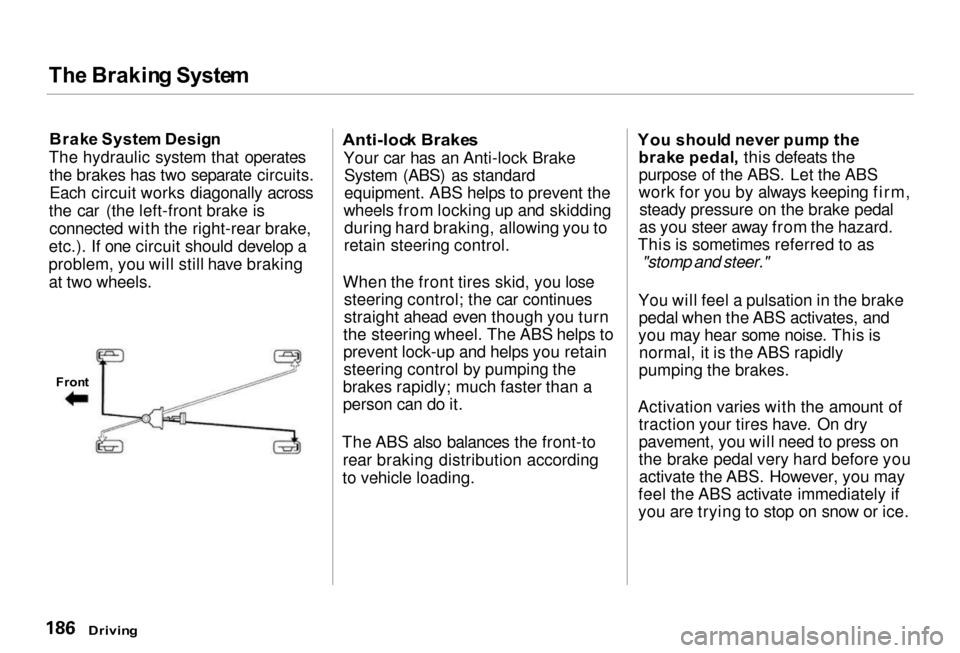
The hydraulic system that operates the brakes has two separate circuits.Each circuit works diagonally across
the car (the left-front brake is connected with the right-rear brake,
etc.). If one circuit should develop a
problem, you will still have braking at two wheels.
Anti-loc
k Brake s
Your car has an Anti-lock Brake System (ABS) as standard
equipment. ABS helps to prevent the
wheels from locking up and skidding during hard braking, allowing you to
retain steering control.
When the front tires skid, you lose steering control; the car continues
straight ahead even though you turn
the steering wheel. The ABS helps to
prevent lock-up and helps you retain steering control by pumping the
brakes rapidly; much faster than a
person can do it.
The ABS also balances the front-to rear braking distribution according
to vehicle loading. Yo
u shoul d neve r pum p th e
brak e pedal , this defeats the
purpose of the ABS. Let the ABS
work for you by always keeping firm, steady pressure on the brake pedal
as you steer away from the hazard.
This is sometimes referred to as
"stomp and steer."
You will feel a pulsation in the brake pedal when the ABS activates, and
you may hear some noise. This is normal, it is the ABS rapidly
pumping the brakes.
Activation varies with the amount of traction your tires have. On dry
pavement, you will need to press on
the brake pedal very hard before youactivate the ABS. However, you may
feel the ABS activate immediately if
you are trying to stop on snow or ice.
Drivin g
Fron
t
Page 190 of 330
Th
e Brakin g Syste m
Important Safety Reminders
AB S doe s no t reduc e th e tim e o r
distanc e i t take s t o sto p th e car , it
only helps with steering control
during braking. You should always
maintain a safe following distance
from other vehicles.
AB S wil l no t preven t a ski d tha t
result s fro m changin g directio n
abruptly , such as trying to take a
corner too fast or making a sudden
lane change. Always drive at a safe,
prudent speed for the road and
weather conditions.
AB S canno t preven t a los s o f
stability . Always steer moderately
when you are braking hard. Severe or sharp steering wheel movement
can still cause your car to veer into
oncoming traffic or off the road. A
vehicl e wit h AB S ma y requir e a
longe r distanc e t o sto p on loose or
uneven surfaces, such as gravel or snow, than a vehicle without anti-
lock. Slow down and allow a greater distance between vehicles under
those conditions.
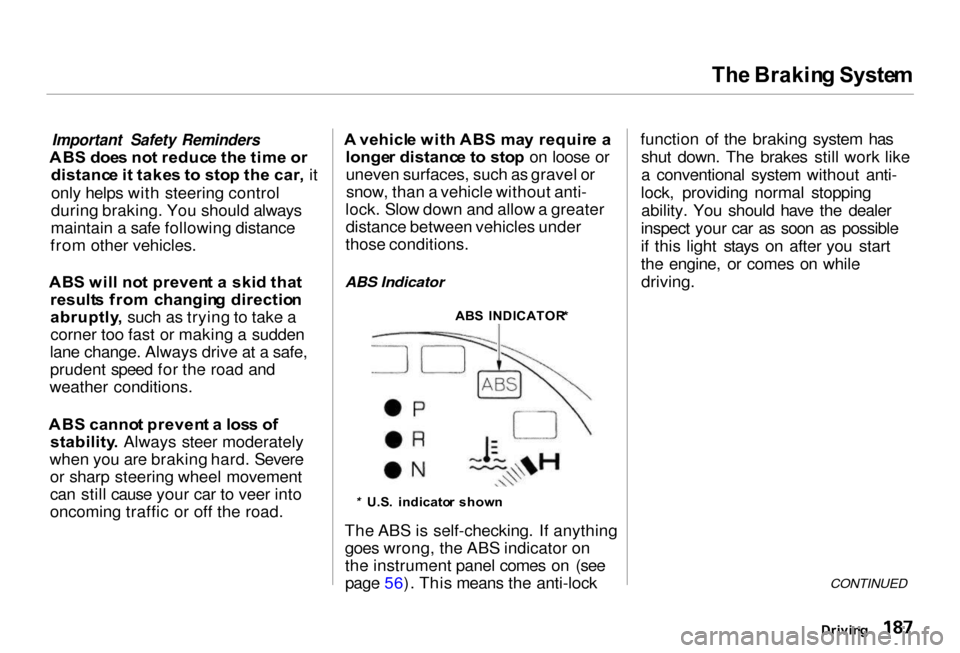
ABS Indicator
* U.S . indicato r show n
The ABS is self-checking. If anything goes wrong, the ABS indicator on
the instrument panel comes on (see
page 56). This means the anti-lock function of the braking system has
shut down. The brakes still work like
a conventional system without anti-
lock, providing normal stopping ability. You should have the dealer
inspect your car as soon as possible
if this light stays on after you start
the engine, or comes on while driving.
CONTINUED
Drivin g
AB
S INDICATOR *
Page 195 of 330
Drivin
g in Ba d Weathe r
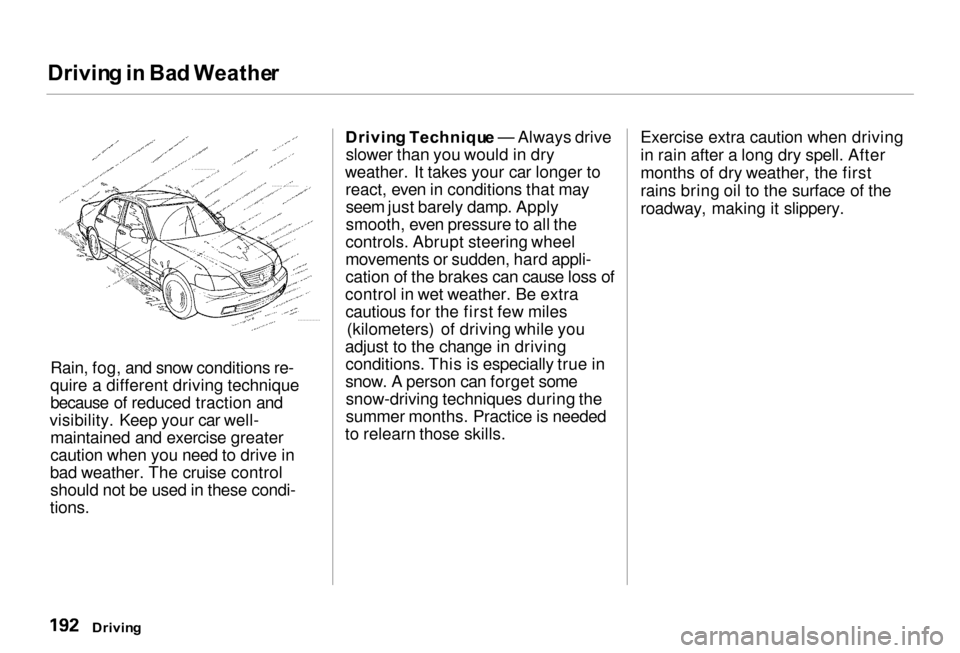
Rain, fog, and snow conditions re-
quire a different driving technique
because of reduced traction and
visibility. Keep your car well- maintained and exercise greater
caution when you need to drive in
bad weather. The cruise control should not be used in these condi-
tions. Drivin
g Techniqu e — Always drive
slower than you would in dry
weather. It takes your car longer to react, even in conditions that mayseem just barely damp. Apply
smooth, even pressure to all the
controls. Abrupt steering wheel
movements or sudden, hard appli-
cation of the brakes can cause loss of
control in wet weather. Be extra cautious for the first few miles (kilometers) of driving while you
adjust to the change in driving conditions. This is especially true in
snow. A person can forget somesnow-driving techniques during the
summer months. Practice is needed
to relearn those skills. Exercise extra caution when driving
in rain after a long dry spell. After
months of dry weather, the first
rains bring oil to the surface of the
roadway, making it slippery.
Drivin g