mirror Acura RL 2000 3.5 Owner's Manual
[x] Cancel search | Manufacturer: ACURA, Model Year: 2000, Model line: RL, Model: Acura RL 2000Pages: 330, PDF Size: 4.53 MB
Page 54 of 330
Instrument
s an d Control s
This section gives information about the controls and displays thatcontribute to the daily operation of
your Acura. All the essential controls are within easy reach.
Control Locations............................ 52
Indicator Lights................................ 53
Gauges.............................................. 58
Speedometer................................ 58
Tachometer.................................. 58
Odometer...................................... 59
Trip Meter/Outside Temperature Indicator............ 59
Temperature Gauge.................... 60 Fuel Gauge................................... 60
Maintenance Required Indicator.................................... 61
Controls Near the Steering Wheel........................................ 62
Headlights.................................... 63
Automatic Lighting..................... 64
Daytime Running Lights............. 65
Instrument Panel Brightness..... 66
Turn Signals................................. 66
Fog Lights.................................... 67 Windshield Wipers...................... 68
Windshield Washers................... 70
Hazard Warning........................... 70
Rear Window Defogger.............. 71
Steering Wheel Adjustments..... 71
Steering Wheel Controls ................ 73 Cruise Control.............................. 73
Remote Audio Controls .............. 76
Keys and Locks................................ 77 Keys............................................... 77
Immobilizer System..................... 78
Ignition Switch............................. 80
Power Door Locks....................... 81
Remote Transmitter.................... 82
Childproof Door Locks............... 85
Trunk............................................86
Glove Box..................................... 87
HomeLink Universal Transmitter......... 88
Customer Assistance.................. 88
Important Safety Precautions.... 88
Training the Transmitter............ 89
Training With a Rolling Code System....................................... 91
Erasing Codes.............................. 92
Seat Adjustments............................. 93
Driver's Seat Adjustments.......... 93
Driver's Lumbar Support............ 95
Front Passenger's Seat
Adjustments............................. 95
Head Restraints........................... 95
Armrest............................................. 96
Mirrors.............................................. 98
Adjusting the Power Mirrors..... 98
Driving Position Memory
System......................................... 100
Seat Heaters................................... 102
Ski Sleeve........................................ 103
Power Windows............................. 105
Moonroof........................................ 106
Parking Brake................................ 108
Digital Clock................................... 108
Sunglasses Holder......................... 110
Beverage Holder............................111
Console Compartment.................. 112
Coin Box......................................... 112
Sun Visor......................................... 113
Vanity Mirror................................. 113
Accessory Power Socket.............. 114 Cigarette Lighter........................... 115
Ashtrays.......................................... 116
Ceiling Lights................................. 117
Courtesy Lights............................. 118
Instrument s an d Control s
Page 101 of 330
Mirror
s
Keep the inside and outside mirrors
clean and adjusted for best visibility. Be sure to adjust the mirrors before
you start driving.
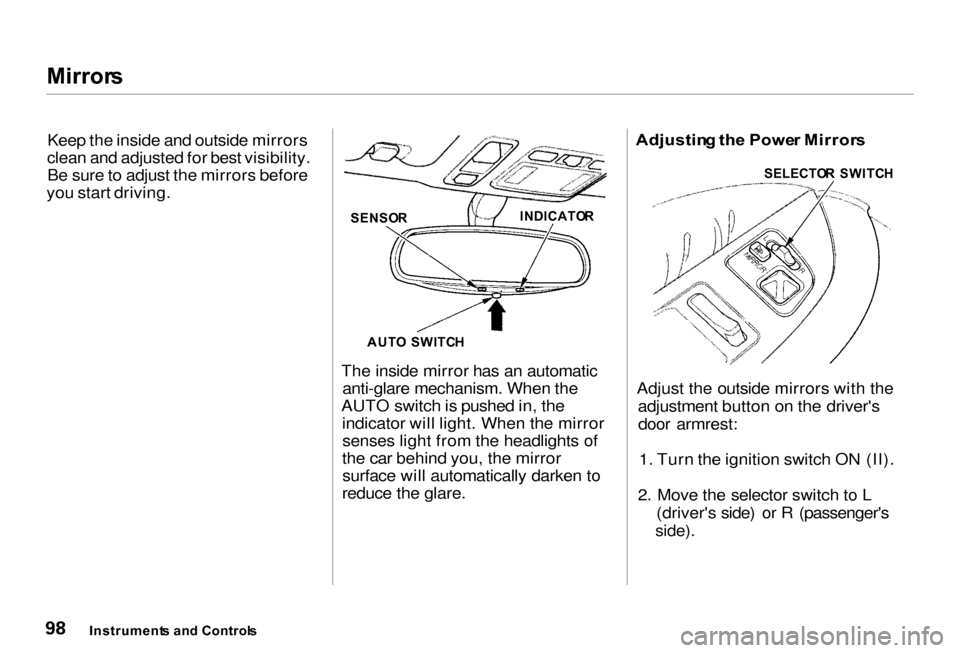
The inside mirror has an automaticanti-glare mechanism. When the
AUTO switch is pushed in, the indicator will light. When the mirrorsenses light from the headlights of
the car behind you, the mirror surface will automatically darken to
reduce the glare. Adjustin
g th e Powe r Mirror s
Adjust the outside mirrors with the adjustment button on the driver'sdoor armrest:
1. Turn the ignition switch ON (II).
2. Move the selector switch to L (driver's side) or R (passenger's
side).
Instrument s an d Control s
SENSO
R
AUT O SWITC H
INDICATO
R SELECTO
R SWITC H
Page 102 of 330

Mirror
s
ADJUSTMEN T BUTTO N
3. Move the mirror right, left, up or
down by pushing the adjustment
button in that direction. 4. When you finish, move the
selector switch to the center (off)
position. This turns off the adjustment button so you can't
move a mirror out of position by accidentally bumping the button.
Outside mirror positions can be
stored in the driving position
memory system (see page 100). HEATE
D MIRRO R BUTTO N
The outside mirrors are heated to re- move fog and frost. With the ignitionswitch ON (II), turn on the heaters
by pressing the button. The light in the button comes on as a reminder.
Press the button again to turn the
heaters off.
Instrument s an d Control s
Page 103 of 330
Drivin
g Positio n Memor y Syste m
Your Acura has a memory feature for the steering wheel, driver's seatand outside mirror positions.
Two seat, steering wheel, and outside mirror positions, for
different drivers or driving
conditions, can be stored in separate
memories. You select a memorized
position by pushing the appropriate
button.
Storing a Driving Position in Memory
Store a driving position as explained
in this section only when the car is
parked.
1. Turn the ignition switch ON (II). You cannot add a new drivingposition in the memory unless the
ignition switch is ON (II). You can
recall a memorized position with
the ignition switch in any position.
2. Adjust the seat to a comfortable position (see page 93). Adjust
the steering wheel to acomfortable position (see page 71).
Adjust the outside mirrors for best
visibility (see page 98).
MEM
O BUTTO N
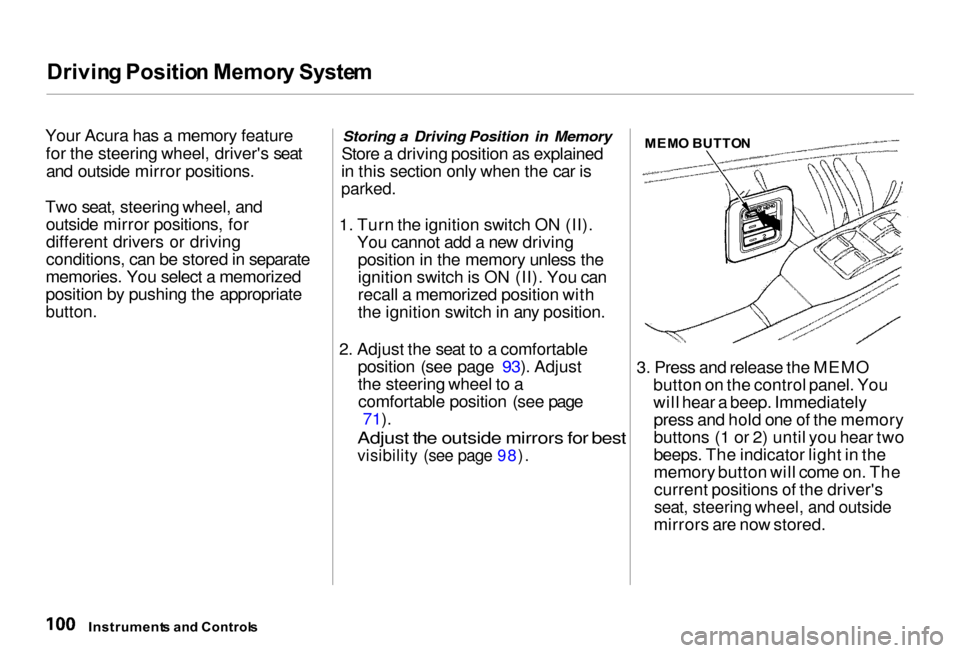
3. Press and release the MEMO button on the control panel. You
will hear a beep. Immediatelypress and hold one of the memory
buttons (1 or 2) until you hear two
beeps. The indicator light in the
memory button will come on. Thecurrent positions of the driver's
seat, steering wheel, and outside
mirrors are now stored.
Instrument s an d Control s
Page 104 of 330
Drivin
g Positio n Memor y Syste m
Doing any of the following after
pressing the MEMO button will cancel the storing procedure. Not pressing a memory button
within 5 seconds. Readjusting the seat or steering
position.
Readjusting the outside mirror
position.
Each memory button stores only one driving position. Storing a new
position erases the previous setting stored in that button's memory. If
you want to add a new position while retaining the current one, use theother memory button.
All stored driving positions will be lost if your car's battery goes dead or
is disconnected. Selecting a Memorized Position
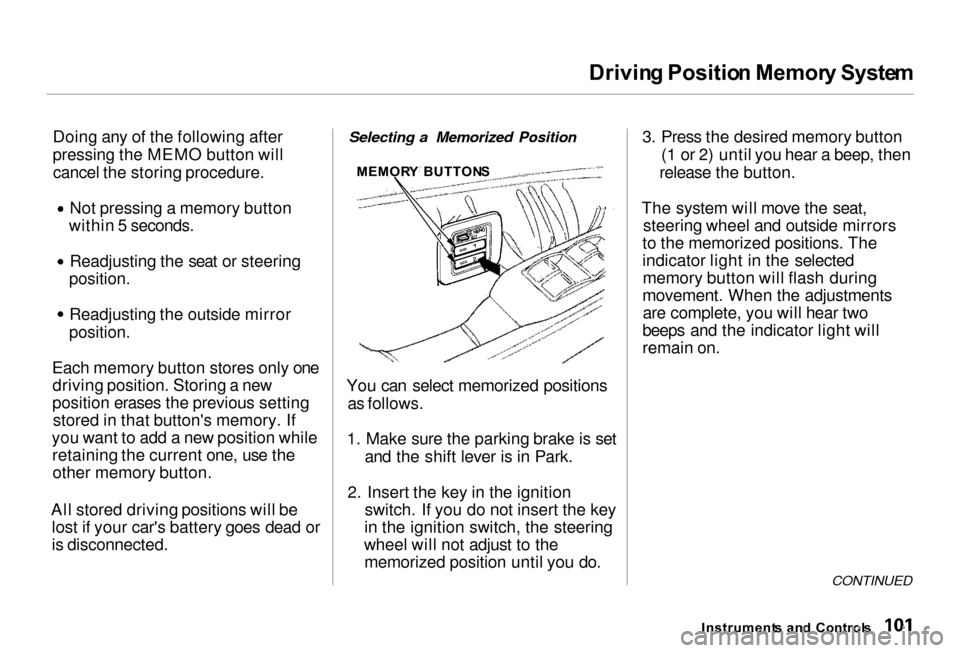
You can select memorized positions as follows.
1. Make sure the parking brake is set and the shift lever is in Park.
2. Insert the key in the ignition switch. If you do not insert the key
in the ignition switch, the steering
wheel will not adjust to the memorized position until you do. 3. Press the desired memory button
(1 or 2) until you hear a beep, then
release the button.
The system will move the seat, steering wheel and outside mirrors
to the memorized positions. The
indicator light in the selected memory button will flash during
movement. When the adjustments are complete, you will hear two
beeps and the indicator light will
remain on.
CONTINUED
Instrument s an d Control s
MEMOR
Y BUTTON S
Page 105 of 330
Drivin
g Positio n Memor y System , Sea t Heater s
To stop the system's automatic ad-
justment; Press any button on the control
panel: MEMO, 1 or 2. Push any of the adjustment
switches for the seat or steering
wheel. Shift out of Park.
Adjust the outside mirrors.
If you select a memorized position
without inserting the key in the ignition switch, only the seat and
outside mirrors will adjust. To get
the system to also adjust the steering
wheel, insert the key in the ignition switch. You will hear two beeps
when it is complete. If desired, you can use the adjust-
ment switches to change the posi-
tions of the seat, steering wheel or outside mirrors after they are in
their memorized position. To keep
this driving position for later use,
you must store it in the driving posi-
tion memory. Sea
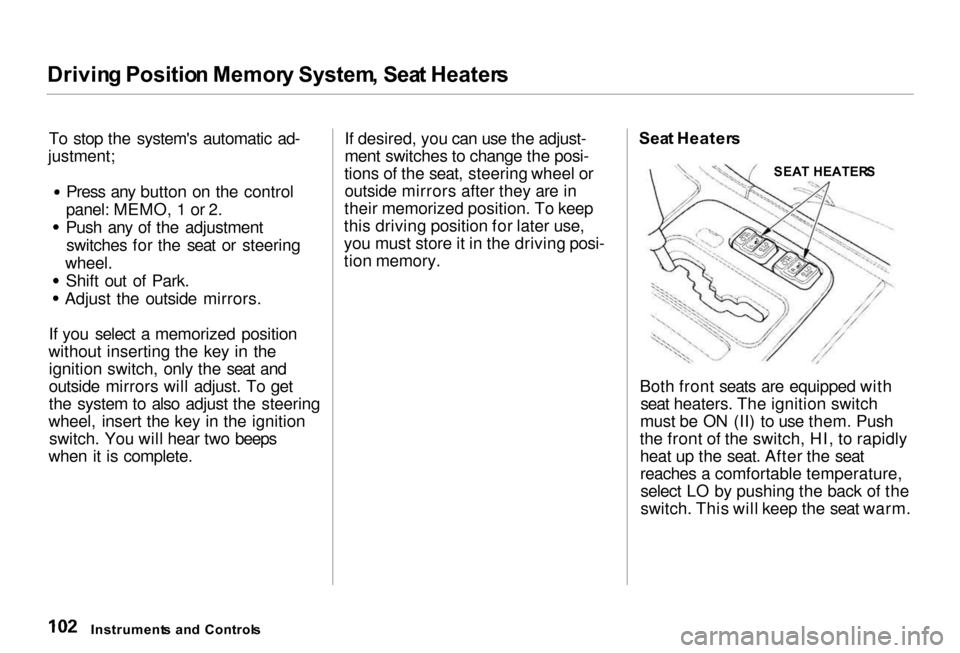
t Heater s
SEAT HEATER S
Both front seats are equipped with seat heaters. The ignition switch
must be ON (II) to use them. Push
the front of the switch, HI, to rapidly heat up the seat. After the seat
reaches a comfortable temperature,select LO by pushing the back of the
switch. This will keep the seat warm.
Instrument s an d Control s
Page 116 of 330
Su
n Visor , Vanit y Mirro r
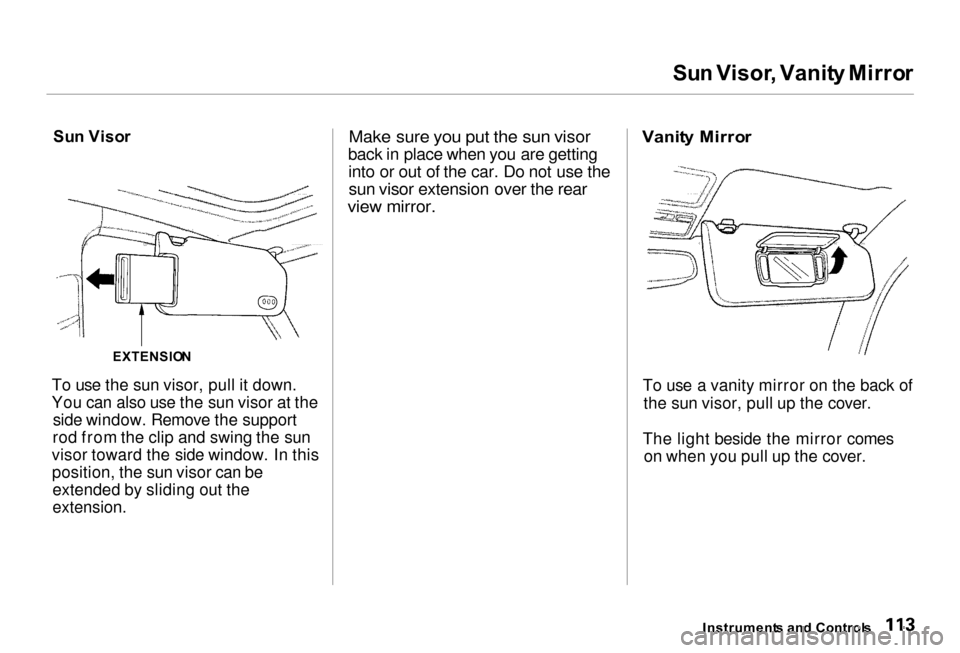
Su n Viso r
To use the sun visor, pull it down.
You can also use the sun visor at the side window. Remove the support
rod from the clip and swing the sun
visor toward the side window. In this position, the sun visor can beextended by sliding out the
extension.
Make sure you put the sun visor
back in place when you are getting into or out of the car. Do not use the
sun visor extension over the rear
view mirror. Vanit
y Mirro r
To use a vanity mirror on the back of the sun visor, pull up the cover.
The light beside the mirror comes on when you pull up the cover.
Instrument s an d Control s
EXTENSIO
N
Page 181 of 330
Preparin
g to Driv e
You should do the following checks and adjustments every day before
you drive your car.
1. Make sure all windows, mirrors,
and outside lights are clean and
unobstructed. Remove frost, snow, or ice.
2. Check that the hood and trunk are
fully closed.
3. Visually check the tires. If a tire
looks low, use a gauge to check itspressure.
4. Check that any items you may be
carrying with you inside are stored
properly or fastened down
securely.
5. Check the adjustment of the seat
(see page 93 ).
6. Check the adjustment of the
inside and outside mirrors (see
page 98 ).
7. Check the adjustment of the
steering wheel (see page 71).
8. Make sure the doors are securely
closed and locked.
9. Fasten your seat belt. Check that
your passengers have fastened their seat belts (see page 15 ).
10.Turn the ignition switch ON (II).
Check the indicator lights in the
instrument panel.
11.Start the engine (see page 179 ).
12.Check the gauges and indicator
lights in the instrument panel (see
page 53).
Drivin g
Page 201 of 330
Towin
g a Traile r
Additional Trailer Equipment Many states and Canadian provinces
require special outside mirrors when
towing a trailer. Even if they don't,
you should install special mirrors if
you cannot clearly see behind you, or if the trailer creates a blind spot.
Ask your trailer sales or rental agency if any other items are
recommended or required for your
towing situation.
Pre-To
w Checklis t
When preparing to tow, and before driving away, be sure to check the
following: The vehicle has been properly
serviced, and the tires, brakes,
suspension, and cooling system
are in good operating condition.
All weights and loads are within limits (see pages 194 and 195 ).
The hitch, safety chain, and any other attachments are secure. All items on and in the trailer are
properly secured and cannot shift
while you drive. The lights and brakes on your
vehicle and the trailer are working
properly. Your vehicle tires and spare are
properly inflated (see page 242 ),and the trailer tires and spare are
inflated as recommended by the
trailer maker.
Drivin g
Page 320 of 330
Inde
x
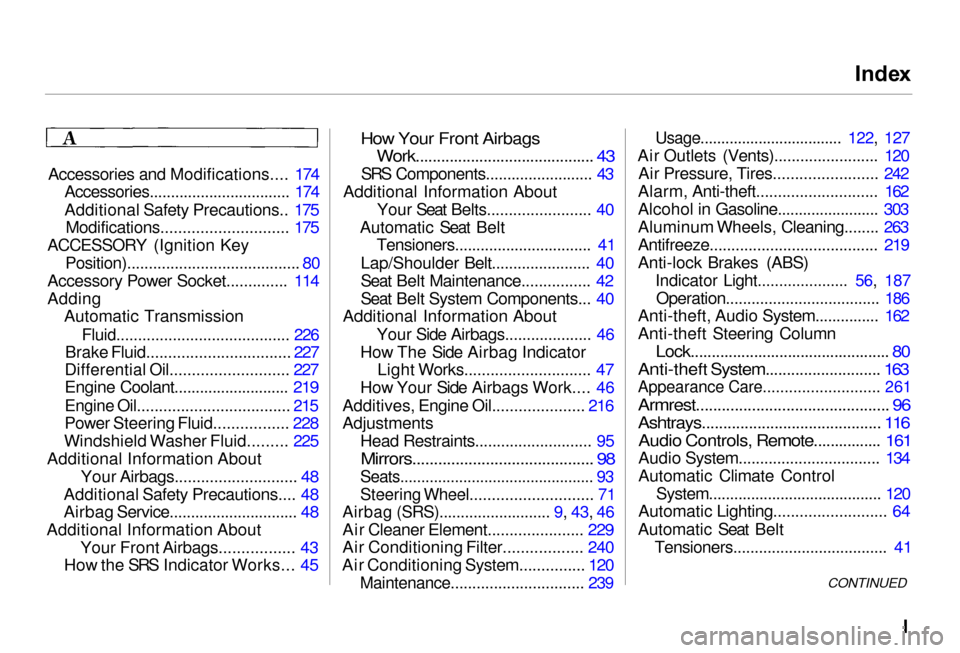
Accessories and Modifications.... 174 Accessories................................. 174
Additional Safety Precautions.. 175Modifications............................. 175
ACCESSORY (Ignition Key Position)........................................ 80
Accessory Power Socket.............. 114
Adding Automatic Transmission
Fluid........................................ 226
Brake Fluid................................. 227
Differential Oil........................... 227
Engine Coolant........................... 219
Engine Oil................................... 215
Power Steering Fluid................. 228
Windshield Washer Fluid......... 225
Additional Information About Your Airbags............................ 48
Additional Safety Precautions.... 48
Airbag Service.............................. 48
Additional Information About Your Front Airbags................. 43
How the SRS Indicator Works... 45
How Your Front Airbags
Work.......................................... 43
SRS Components......................... 43
Additional Information About Your Seat Belts........................ 40
Automatic Seat Belt Tensioners................................ 41
Lap/Shoulder Belt....................... 40
Seat Belt Maintenance................ 42
Seat Belt System Components... 40
Additional Information About
Your Side Airbags.................... 46
How The Side Airbag Indicator Light Works............................. 47
How Your Side Airbags Work.... 46
Additives, Engine Oil..................... 216
Adjustments Head Restraints........................... 95
Mirrors.......................................... 98
Seats.............................................. 93
Steering Wheel............................ 71
Airbag (SRS).......................... 9, 43, 46
Air Cleaner Element...................... 229
Air Conditioning Filter.................. 240
Air Conditioning System............... 120
Maintenance............................... 239
Usage.................................. 122, 127
Air Outlet
s (Vents)........................ 120
Air Pressure, Tires........................ 242
Alarm, Anti-theft............................ 162
Alcohol in Gasoline........................ 303
Aluminum Wheels, Cleaning........ 263
Antifreeze....................................... 219
Anti-lock Brakes (ABS)
Indicator Light..................... 56, 187
Operation.................................... 18
6
Anti-theft, Audio System............... 162
Anti-theft Steering Column
Lock............................................... 80
Anti-theft System........................... 163
Appearance Care........................... 261
Armrest............................................. 96
Ashtrays.......................................... 116 Audio Controls, Remote................ 161
Audio System................................. 134
Automatic Climate Control System......................................... 120
Automatic Lighting.......................... 64
Automatic Seat Belt Tensioners.................................... 41
CONTINUED