lock Acura RL 2000 3.5 Owner's Guide
[x] Cancel search | Manufacturer: ACURA, Model Year: 2000, Model line: RL, Model: Acura RL 2000Pages: 330, PDF Size: 4.53 MB
Page 90 of 330
Key
s an d Lock s
2. Lock the glove box with the master key.
3. Make sure the trunk pass-through cover is locked (see page 97).
4. Give the person the valet key. Even if the trunk main switch is
turned off, you can open the trunk
with the master key or the remote transmitter. Glov
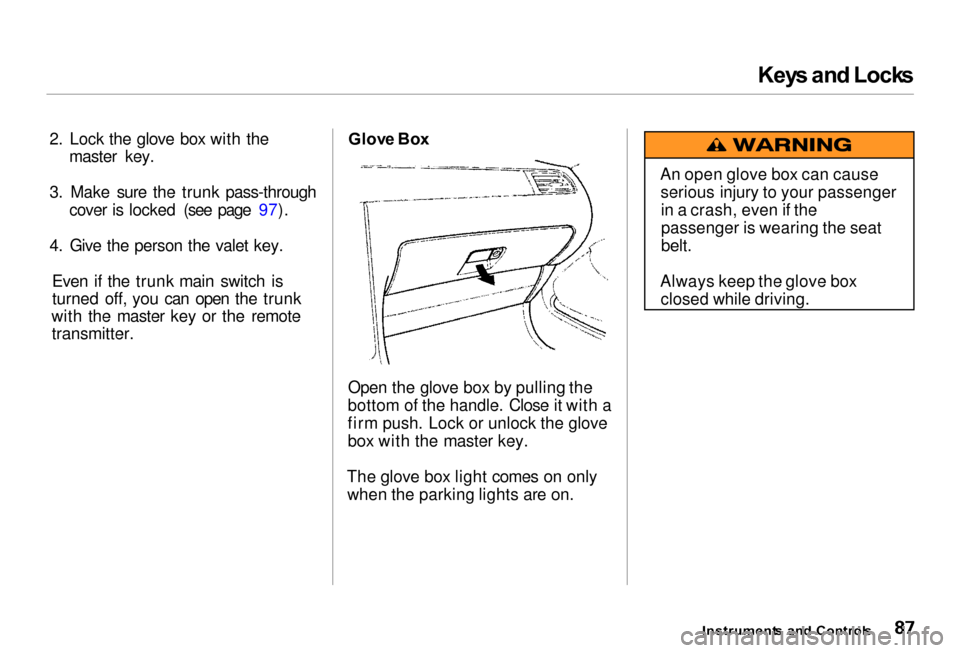
e Bo x
Open the glove box by pulling the
bottom of the handle. Close it with a
firm push. Lock or unlock the glove
box with the master key.
The glove box light comes on only when the parking lights are on.
Instruments an d Control s
An open glove box can cause
serious injury to your passengerin a crash, even if the
passenger is wearing the seat
belt.
Always keep the glove box closed while driving.
Page 92 of 330
HomeLin
k Universa l Transmitte r
Trainin g th e Transmitte r
Before you can use the HomeLink
Universal Transmitter to operate
devices around your home, it must
"learn" the proper codes. For
example, to train the transmitter to
open and close the garage door:
1. This step erases all previously learned
codes. Perform this step before
training the transmitter for the very
first time. Press and hold the two
outside buttons until the red light
in the transmitter flashes (approximately 20 seconds).
Release the buttons.
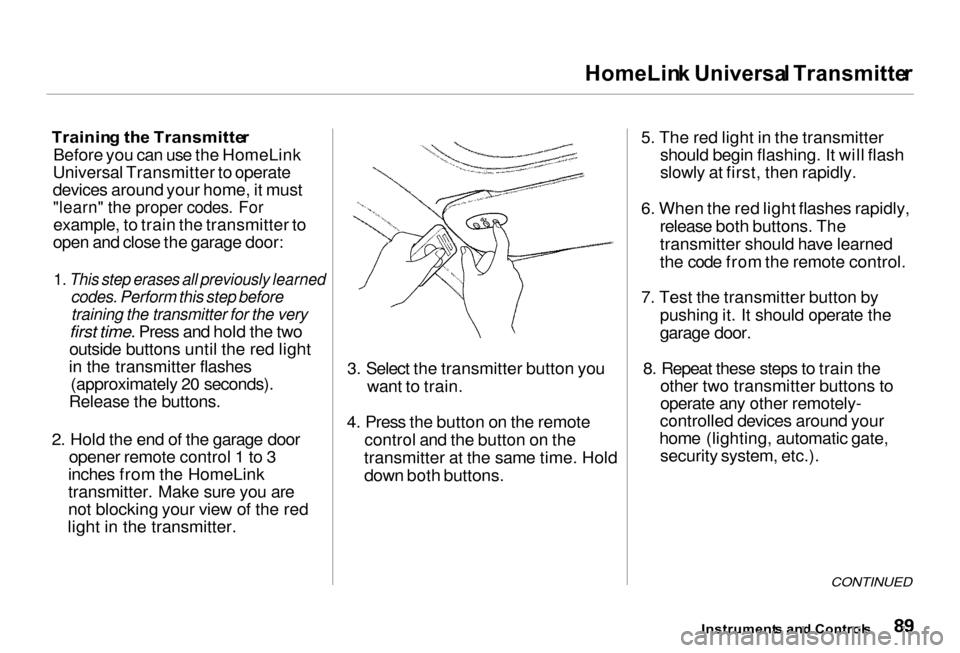
2. Hold the end of the garage door opener remote control 1 to 3
inches from the HomeLink
transmitter. Make sure you are
not blocking your view of the red
light in the transmitter. 3. Select the transmitter button you
want to train.
4. Press the button on the remote control and the button on the
transmitter at the same time. Hold down both buttons. 5. The red light in the transmitter
should begin flashing. It will flash
slowly at first, then rapidly.
6. When the red light flashes rapidly, release both buttons. The
transmitter should have learned
the code from the remote control.
7. Test the transmitter button by pushing it. It should operate the
garage door.
8. Repeat these steps to train the other two transmitter buttons to
operate any other remotely-
controlled devices around your
home (lighting, automatic gate, security system, etc.).
CONTINUED
Instrument s an d Control s
Page 100 of 330
Armres
t
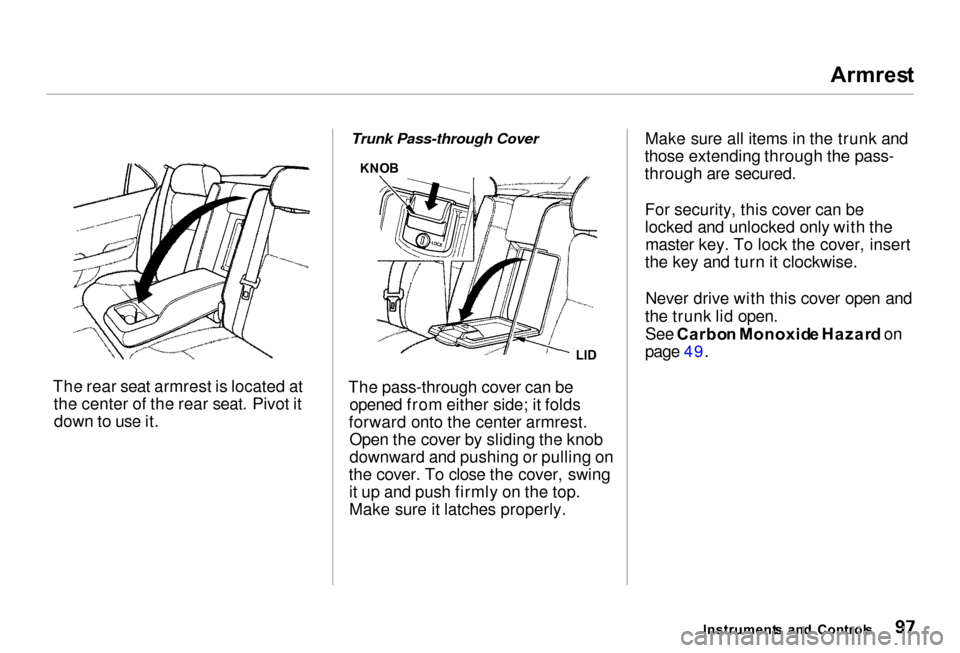
The rear seat armrest is located at the center of the rear seat. Pivot itdown to use it.
Trunk Pass-through Cover
The pass-through cover can be opened from either side; it folds
forward onto the center armrest. Open the cover by sliding the knob
downward and pushing or pulling on
the cover. To close the cover, swing it up and push firmly on the top.
Make sure it latches properly. Make sure all items in the trunk and
those extending through the pass-
through are secured.
For security, this cover can be
locked and unlocked only with themaster key. To lock the cover, insert
the key and turn it clockwise.
Never drive with this cover open and
the trunk lid open. See Carbo n Monoxid e Hazar d on
page 49.
Instrument s an d Control s
LI
D
KNO
B
Page 111 of 330
Parkin
g Brake , Digita l Cloc k
Parkin g Brak e
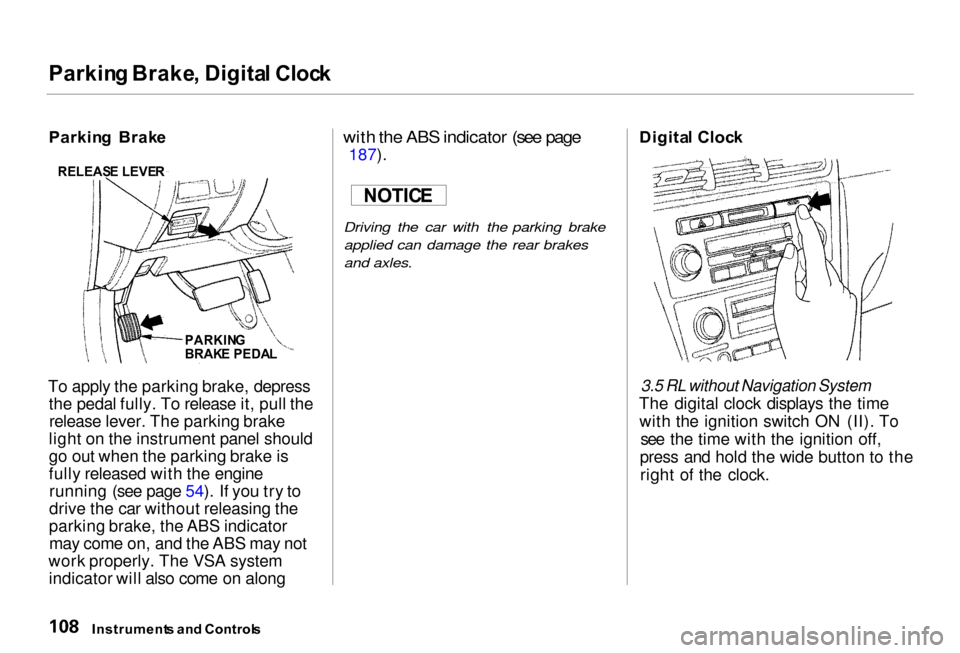
To apply the parking brake, depress the pedal fully. To release it, pull therelease lever. The parking brake
light on the instrument panel should
go out when the parking brake is
fully released with the engine running (see page 54). If you try to
drive the car without releasing the
parking brake, the ABS indicator may come on, and the ABS may not
work properly. The VSA system indicator will also come on along
with the ABS indicator (see page
187).
Driving the car with the parking brake applied can damage the rear brakes
and axles.
Digita
l Cloc k
3.5 RL without Navigation System
The digital clock displays the time with the ignition switch ON (II). To see the time with the ignition off,
press and hold the wide button to the right of the clock.
Instrument s an d Control s
RELEAS
E LEVE R
PARKIN G
BRAK E PEDA L
NOTIC
E
Page 112 of 330
Digita
l Cloc k
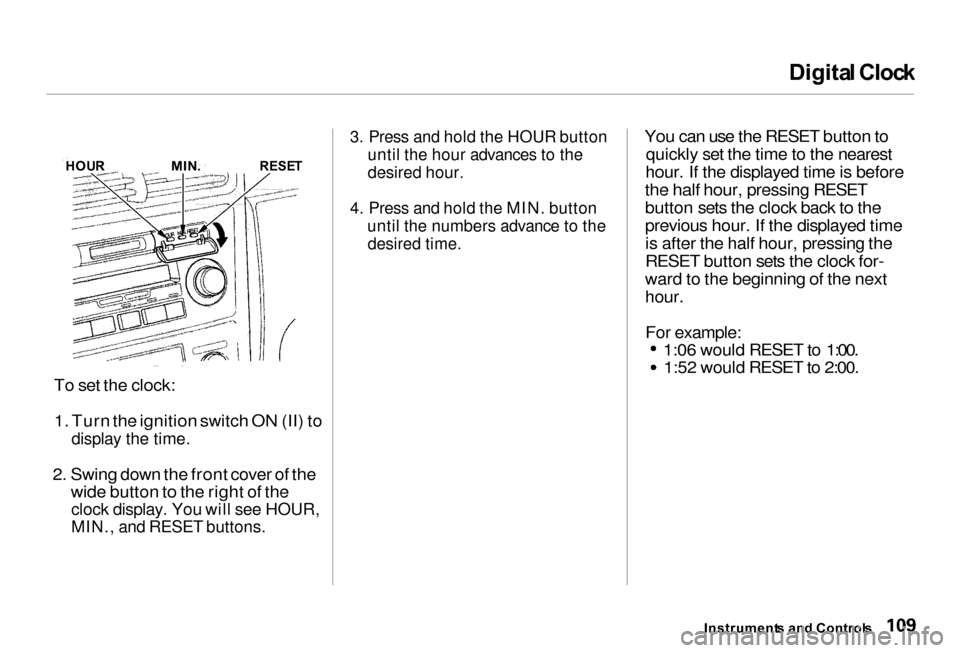
To set the clock: 1. Turn the ignition switch ON (II) to
display the time.
2. Swing down the front cover of the wide button to the right of the
clock display. You will see HOUR,
MIN., and RESET buttons.
3. Press and hold the HOUR button
until the hour advances to the
desired hour.
4. Press and hold the MIN. button until the numbers advance to the
desired time.
You can use the RESET button to
quickly set the time to the nearest
hour. If the displayed time is before
the half hour, pressing RESET
button sets the clock back to the
previous hour. If the displayed time is after the half hour, pressing the
RESET button sets the clock for-
ward to the beginning of the next
hour.
For example: 1:06 would RESET to 1:00.
1:52 would RESET to 2:00.
Instrument s an d Control s
HOU
R
MIN.
RESET
Page 121 of 330
Courtes
y Light s
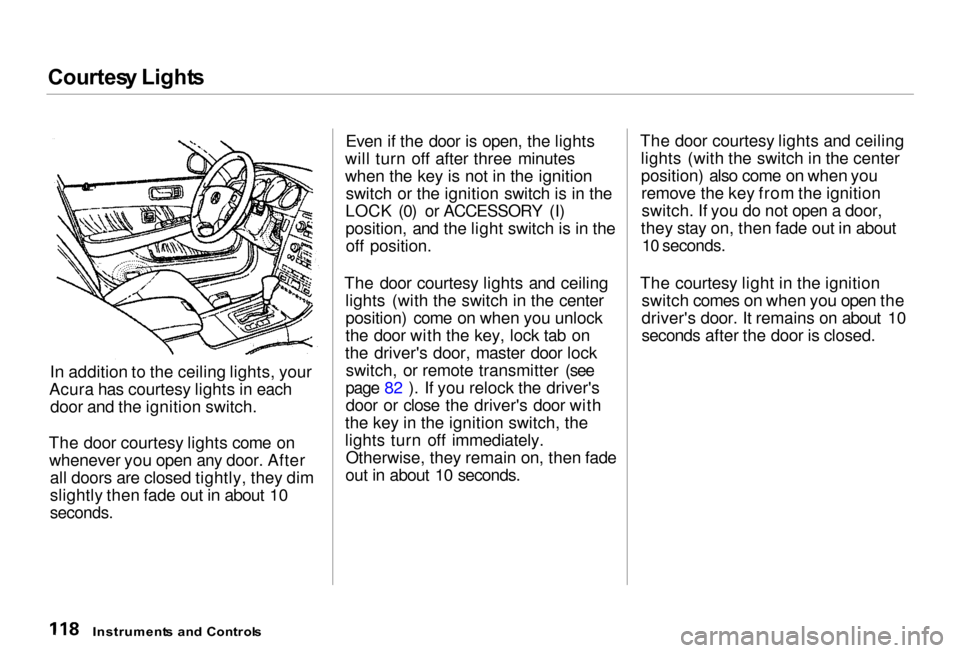
In addition to the ceiling lights, your
Acura has courtesy lights in each door and the ignition switch.
The door courtesy lights come on whenever you open any door. After all doors are closed tightly, they dim
slightly then fade out in about 10
seconds.
Even if the door is open, the lights
will turn off after three minutes
when the key is not in the ignition switch or the ignition switch is in the
LOCK (0) or ACCESSORY (I)
position, and the light switch is in the off position.
The door courtesy lights and ceiling lights (with the switch in the center
position) come on when you unlock
the door with the key, lock tab on
the driver's door, master door lock switch, or remote transmitter (see
page 82 ). If you relock the driver's door or close the driver's door with
the key in the ignition switch, the
lights turn off immediately. Otherwise, they remain on, then fade
out in about 10 seconds. The door courtesy lights and ceiling
lights (with the switch in the center
position) also come on when youremove the key from the ignitionswitch. If you do not open a door,
they stay on, then fade out in about
10 seconds.
The courtesy light in the ignition switch comes on when you open the
driver's door. It remains on about 10
seconds after the door is closed.
Instrument s an d Control s
Page 127 of 330
Climat
e Control System
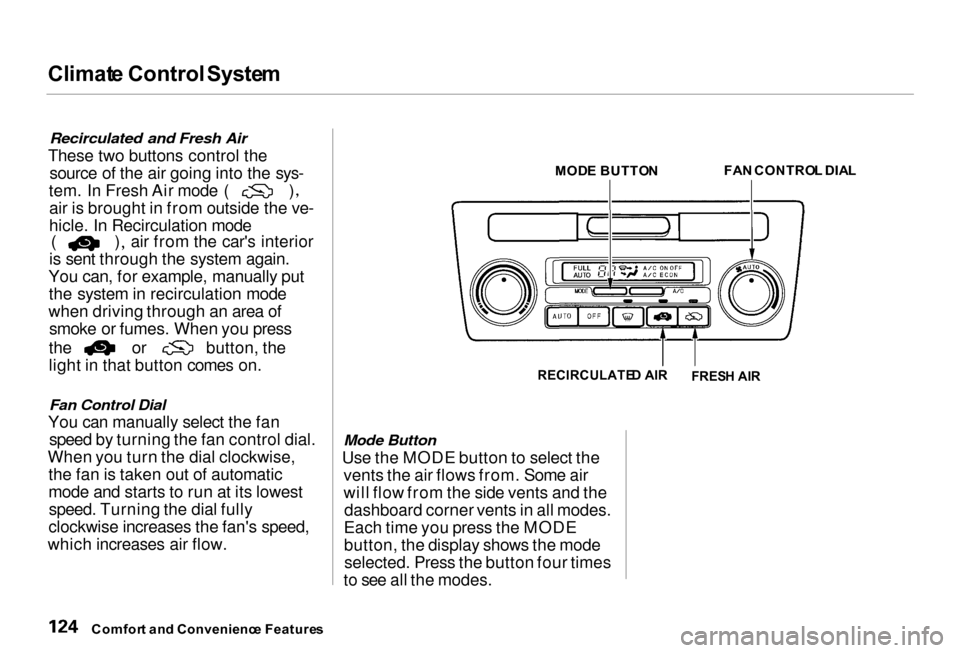
Recirculated and Fresh Air
These two buttons control the source of the air going into the sys- tem. In Fresh Air mode ( )
air is brought in from outside the ve-
hicle. In Recirculation mode ( ) air from the car's interior
is sent through the system again.
You can, for example, manually put the system in recirculation mode
when driving through an area of smoke or fumes. When you press the or button, the
light in that button comes on.
Fan Control Dial
You can manually select the fan speed by turning the fan control dial.
When you turn the dial clockwise, the fan is taken out of automatic
mode and starts to run at its lowestspeed. Turning the dial fully
clockwise increases the fan's speed,
which increases air flow. MOD
E BUTTO N
FA
N CONTRO L DIA L
RECIRCULATE D AI R
Mode Button
Use the MODE button to select the vents the air flows from. Some air
will flow from the side vents and thedashboard corner vents in all modes.
Each time you press the MODE
button, the display shows the mode selected. Press the button four times
to see all the modes.
Comfor t an d Convenienc e Feature s
FRES
H AI R
Page 132 of 330
Climat
e Control System
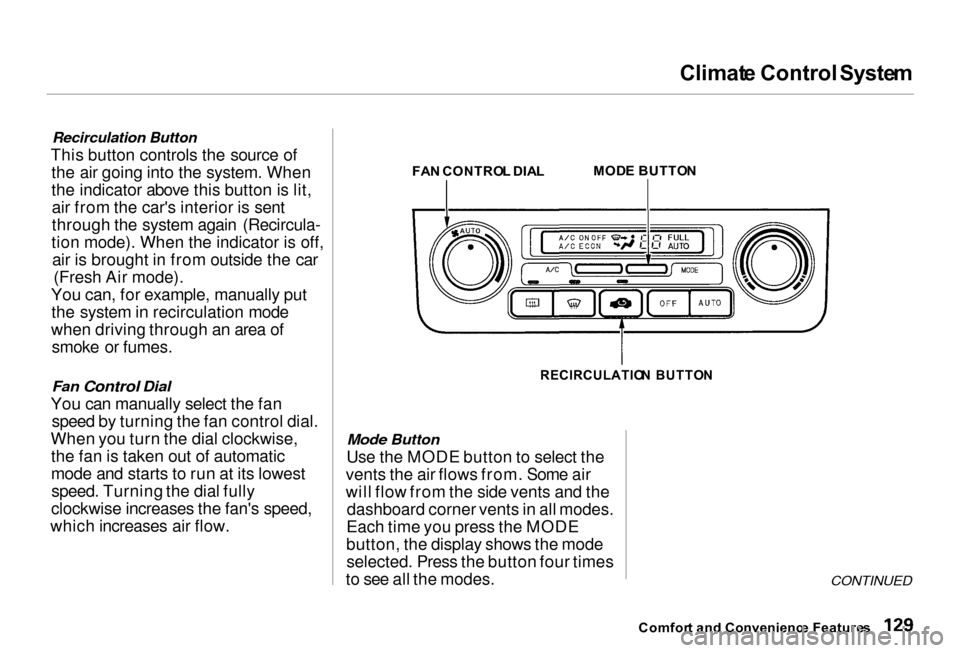
Recirculation Button
This button controls the source of the air going into the system. When
the indicator above this button is lit,air from the car's interior is sent
through the system again (Recircula-
tion mode). When the indicator is off, air is brought in from outside the car (Fresh Air mode).
You can, for example, manually put the system in recirculation mode
when driving through an area of smoke or fumes.
Fan Control Dial
You can manually select the fan speed by turning the fan control dial.
When you turn the dial clockwise, the fan is taken out of automatic
mode and starts to run at its lowestspeed. Turning the dial fully
clockwise increases the fan's speed,
which increases air flow. FA
N CONTRO L DIA L MOD
E BUTTO N
RECIRCULATIO N BUTTO N
Mode Button
Use the MODE button to select the
vents the air flows from. Some air
will flow from the side vents and the dashboard corner vents in all modes.
Each time you press the MODE
button, the display shows the mode selected. Press the button four times
to see all the modes.
CONTINUED
Comfor t an d Convenienc e Feature s
Page 166 of 330
Securit
y Syste m
The security system helps to protect your car and valuables from theft.
The horn sounds and a combination of headlights, parking lights, side
marker lights and taillights flashes if
someone attempts to break into your
car or remove the radio. This alarm continues for two minutes, then the
system resets. To reset an alarming
system before the two minutes have
elapsed, unlock either front door
with the key or the remote
transmitter.
The security system sets auto- matically fifteen seconds after you
lock the doors, hood, and trunk. For
the system to activate, you must lock
the doors from the outside with the key, lock tab, door lock switch, or
remote transmitter. The security
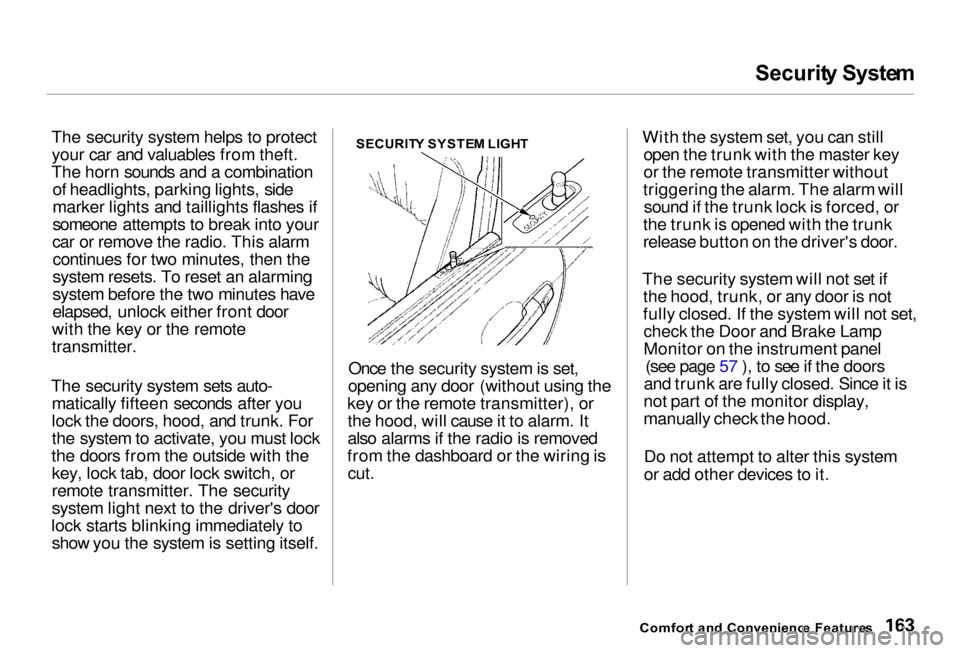
system light next to the driver's door
lock starts blinking immediately to show you the system is setting itself. SECURIT
Y SYSTE M LIGH T
Once the security system is set,
opening any door (without using the
key or the remote transmitter), or the hood, will cause it to alarm. It
also alarms if the radio is removed
from the dashboard or the wiring is
cut.
With the system set, you can still
open the trunk with the master key
or the remote transmitter without
triggering the alarm. The alarm will sound if the trunk lock is forced, or
the trunk is opened with the trunk
release button on the driver's door.
The security system will not set if the hood, trunk, or any door is not
fully closed. If the system will not set,check the Door and Brake Lamp
Monitor on the instrument panel (see page 57 ), to see if the doors
and trunk are fully closed. Since it is
not part of the monitor display,
manually check the hood.
Do not attempt to alter this system
or add other devices to it.
Comfor t an d Convenienc e Feature s
Page 175 of 330
Accessorie
s an d Modification s
Modifying your car, or installing
some non-Acura accessories, can
make your car unsafe. Before you
make any modifications or add any accessories, be sure to read the
following information.
Accessorie s
Your dealer has Genuine Acura accessories that allow you to
personalize your car. These accessories have been designed and
approved for your car, and are
covered by warranty.
Non-Acura accessories are usuallydesigned for universal applications.
Although aftermarket accessories may fit on your car, they may not
meet factory specifications, and
could adversely affect your car's
handling and stability. (See "Modifications" on the page 173 for
additional information.) When properly installed, cellular
phones, alarms, two-way radios, and
low-powered audio systems shouldnot interfere with your car's
computer-controlled systems, such
as the SRS and anti-lock brake
system. However, if electronic accessories
are improperly installed, or exceed
your car's electrical system capacity, they can interfere with the operationof your car, or even cause the
airbags to deploy.
Before installing any accessory: Make sure the accessory does not
obscure any lights, or interfere
with proper car operation or performance.
Be sure electronic accessories do
not overload electrical circuits (see page 287).
Have the installer contact yourAcura dealer for assistance before
installing any electronic accessory.
If possible, have your dealer inspect
the final installation.
Befor e Drivin g
Improper accessories or
modifications can affect your
car's handling, stability and performance, and cause a
crash in which you can be hurt
or killed.
Follow all instructions in this
owner's manual regarding
accessories and modifications.