headlight Acura RL 2000 3.5 Owner's Manual
[x] Cancel search | Manufacturer: ACURA, Model Year: 2000, Model line: RL, Model: Acura RL 2000Pages: 330, PDF Size: 4.53 MB
Page 6 of 330
You
r Ca r a t a Glanc e
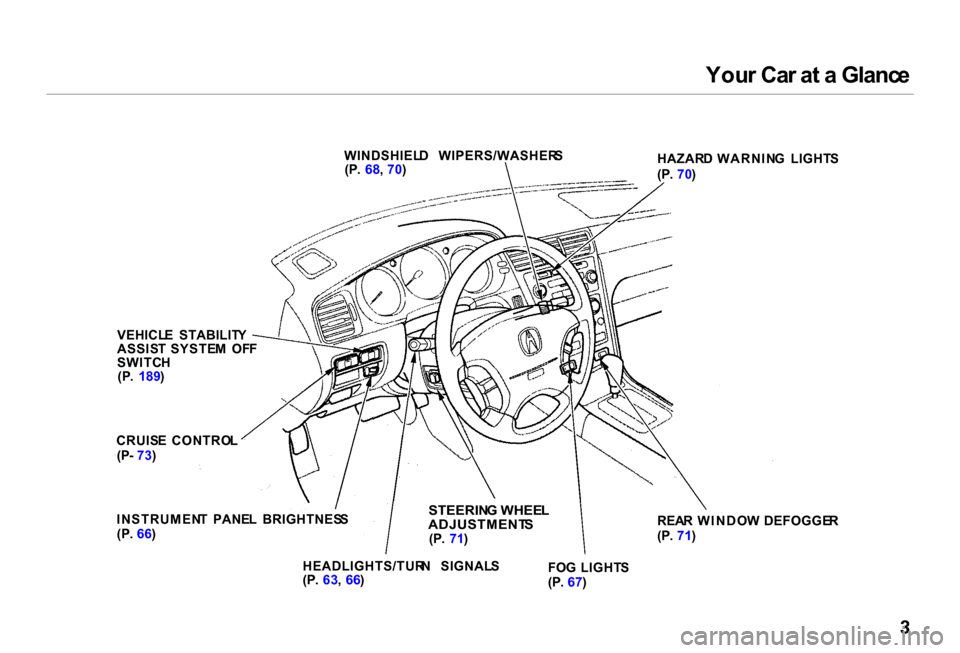
WINDSHIEL D WIPERS/WASHER S
(P . 68 , 70 ) HAZAR
D WARNIN G LIGHT S
(P . 70 )
REA R WINDO W DEFOGGE R
(P . 71 )
FO G LIGHT S
(P . 67 )
STEERIN
G WHEE L
ADJUSTMENT S
(P . 71 )
HEADLIGHTS/TUR N SIGNAL S
(P . 63 , 66 )
INSTRUMEN
T PANE L BRIGHTNES S
(P . 66 )
CRUIS
E CONTRO L
(P - 73 )
VEHICL
E STABILIT Y
ASSIS T SYSTE M OF F
SWITC H
(P . 189 )
Page 54 of 330
Instrument
s an d Control s
This section gives information about the controls and displays thatcontribute to the daily operation of
your Acura. All the essential controls are within easy reach.
Control Locations............................ 52
Indicator Lights................................ 53
Gauges.............................................. 58
Speedometer................................ 58
Tachometer.................................. 58
Odometer...................................... 59
Trip Meter/Outside Temperature Indicator............ 59
Temperature Gauge.................... 60 Fuel Gauge................................... 60
Maintenance Required Indicator.................................... 61
Controls Near the Steering Wheel........................................ 62
Headlights.................................... 63
Automatic Lighting..................... 64
Daytime Running Lights............. 65
Instrument Panel Brightness..... 66
Turn Signals................................. 66
Fog Lights.................................... 67 Windshield Wipers...................... 68
Windshield Washers................... 70
Hazard Warning........................... 70
Rear Window Defogger.............. 71
Steering Wheel Adjustments..... 71
Steering Wheel Controls ................ 73 Cruise Control.............................. 73
Remote Audio Controls .............. 76
Keys and Locks................................ 77 Keys............................................... 77
Immobilizer System..................... 78
Ignition Switch............................. 80
Power Door Locks....................... 81
Remote Transmitter.................... 82
Childproof Door Locks............... 85
Trunk............................................86
Glove Box..................................... 87
HomeLink Universal Transmitter......... 88
Customer Assistance.................. 88
Important Safety Precautions.... 88
Training the Transmitter............ 89
Training With a Rolling Code System....................................... 91
Erasing Codes.............................. 92
Seat Adjustments............................. 93
Driver's Seat Adjustments.......... 93
Driver's Lumbar Support............ 95
Front Passenger's Seat
Adjustments............................. 95
Head Restraints........................... 95
Armrest............................................. 96
Mirrors.............................................. 98
Adjusting the Power Mirrors..... 98
Driving Position Memory
System......................................... 100
Seat Heaters................................... 102
Ski Sleeve........................................ 103
Power Windows............................. 105
Moonroof........................................ 106
Parking Brake................................ 108
Digital Clock................................... 108
Sunglasses Holder......................... 110
Beverage Holder............................111
Console Compartment.................. 112
Coin Box......................................... 112
Sun Visor......................................... 113
Vanity Mirror................................. 113
Accessory Power Socket.............. 114 Cigarette Lighter........................... 115
Ashtrays.......................................... 116
Ceiling Lights................................. 117
Courtesy Lights............................. 118
Instrument s an d Control s
Page 60 of 330
Indicato
r Light s
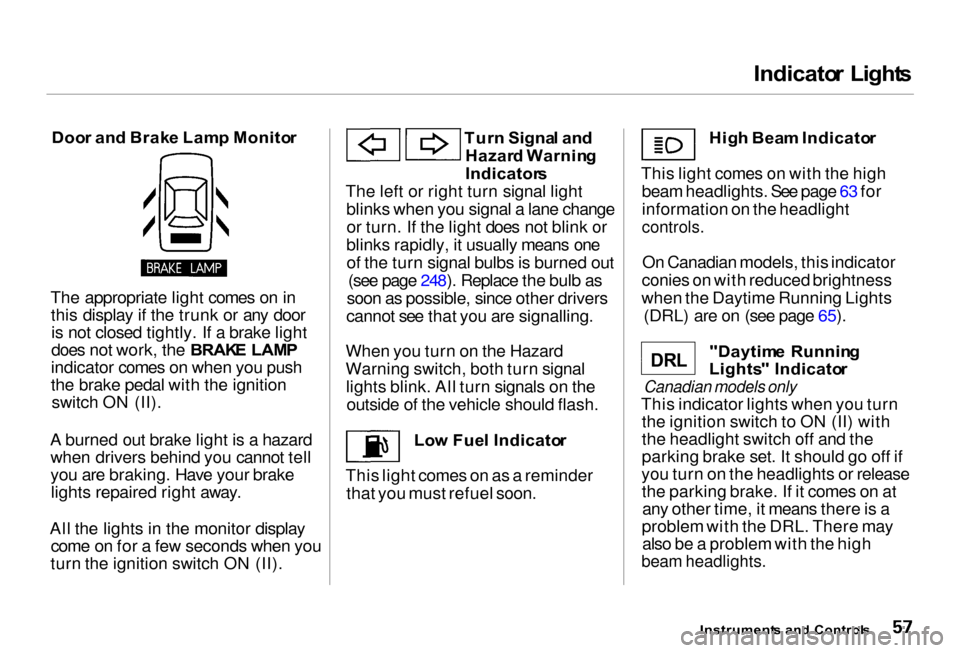
Doo r an d Brak e Lam p Monito r
The appropriate light comes on in this display if the trunk or any dooris not closed tightly. If a brake light
does not work, the BRAK E LAM P
indicator comes on when you push
the brake pedal with the ignition switch ON (II).
A burned out brake light is a hazard when drivers behind you cannot tell
you are braking. Have your brakelights repaired right away.
All the lights in the monitor display come on for a few seconds when you
turn the ignition switch ON (II). Tur
n Signa l an d
Hazar d Warnin g
Indicator s
The left or right turn signal light blinks when you signal a lane changeor turn. If the light does not blink or
blinks rapidly, it usually means one of the turn signal bulbs is burned out (see page 248). Replace the bulb as
soon as possible, since other drivers
cannot see that you are signalling.
When you turn on the Hazard
Warning switch, both turn signal lights blink. All turn signals on the outside of the vehicle should flash.
Low Fue l Indicato r
This light comes on as a reminder that you must refuel soon. Hig
h Bea m Indicato r
This light comes on with the high beam headlights. See page 63 for
information on the headlight
controls.
On Canadian models, this indicator
conies on with reduced brightness
when the Daytime Running Lights (DRL) are on (see page 65).
"Daytim e Runnin g
Lights " Indicato r
Canadian models only
This indicator lights when you turn the ignition switch to ON (II) with
the headlight switch off and the
parking brake set. It should go off if
you turn on the headlights or release the parking brake. If it comes on atany other time, it means there is a
problem with the DRL. There may also be a problem with the high
beam headlights.
Instrument s an d Control s
D R L
Page 65 of 330
Control
s Nea r th e Steerin g Whee l
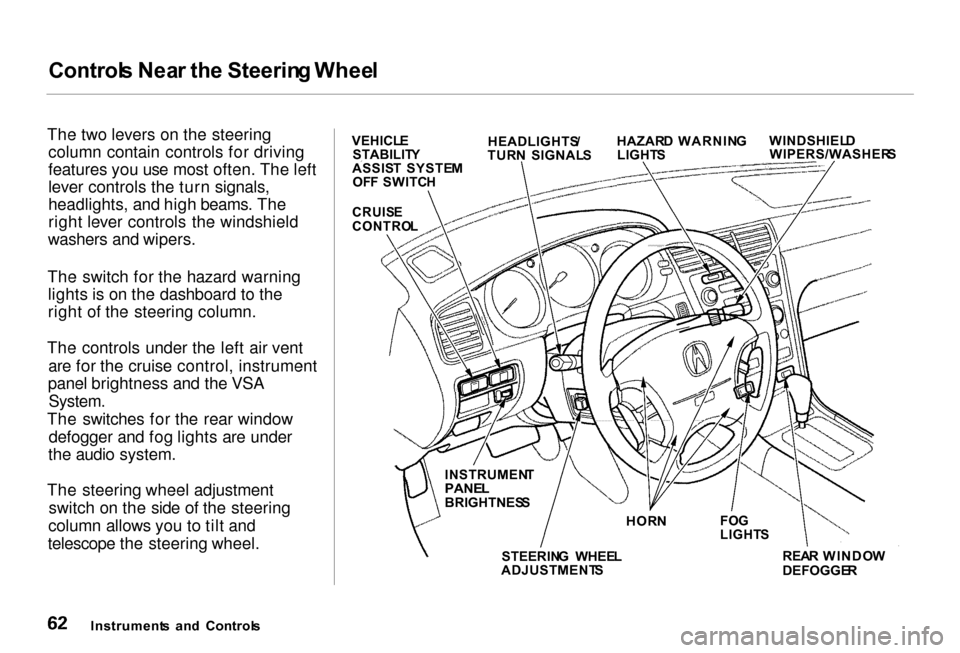
The two levers on the steering column contain controls for driving
features you use most often. The left
lever controls the turn signals,
headlights, and high beams. The
right lever controls the windshield
washers and wipers.
The switch for the hazard warning lights is on the dashboard to the
right of the steering column.
The controls under the left air vent are for the cruise control, instrument
panel brightness and the VSA
System.
The switches for the rear window defogger and fog lights are under
the audio system.
The steering wheel adjustment switch on the side of the steering
column allows you to tilt and
telescope the steering wheel.
Instrument s an d Control s WINDSHIEL
D
WIPERS/WASHER S
HAZAR
D WARNIN G
LIGHT S
HEADLIGHTS
/
TUR N SIGNAL S
VEHICL
E
STABILIT Y
ASSIS T SYSTE M
OF F SWITC H
CRUIS E
CONTRO L
REAR WINDO W
DEFOGGE R
FO
G
LIGHT S
HOR
N
INSTRUMEN
T
PANE L
BRIGHTNES S
STEERIN G WHEE L
ADJUSTMENT S
Page 66 of 330
Control
s Nea r th e Steerin g Whee l
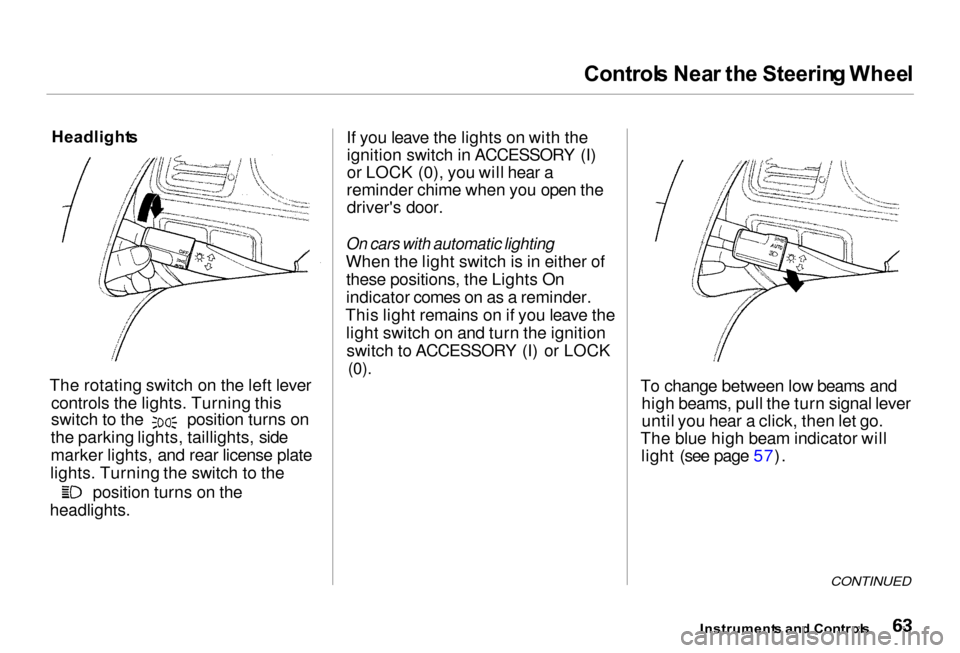
Headlight s
The rotating switch on the left lever controls the lights. Turning this switch to the position turns on
the parking lights, taillights, side
marker lights, and rear license plate
lights. Turning the switch to the position turns on the
headlights. If you leave the lights on with the
ignition switch in ACCESSORY (I)
or LOCK (0), you will hear a
reminder chime when you open the driver's door.
On cars with automatic lighting
When the light switch is in either of these positions, the Lights On
indicator comes on as a reminder.
This light remains on if you leave the light switch on and turn the ignitionswitch to ACCESSORY (I) or LOCK
(0).
To change between low beams andhigh beams, pull the turn signal lever
until you hear a click, then let go.
The blue high beam indicator will light (see page 57).
CONTINUED
Instrument s an d Control s
Page 67 of 330
Control
s Nea r th e Steerin g Whee l
To flash the high beams, pull the turn signal lever back lightly, then
release it. The high beams will comeon and go off.
The high beams will stay on for as long as you hold the lever back, nomatter what position the headlightswitch is in. Automati
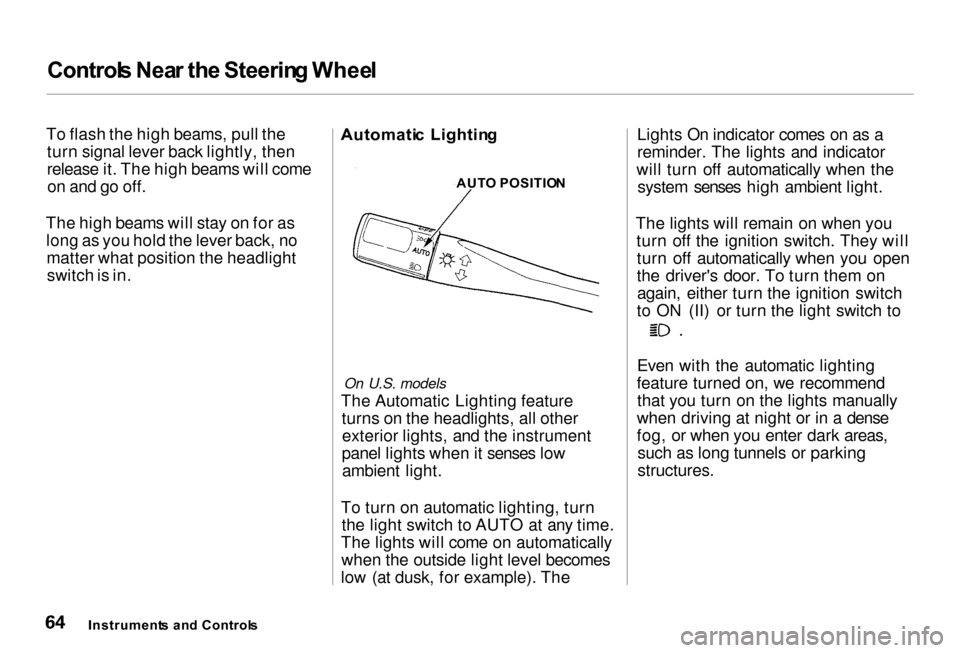
c Lightin g
On U.S. models
The Automatic Lighting feature turns on the headlights, all otherexterior lights, and the instrument
panel lights when it senses low ambient light.
To turn on automatic lighting, turn the light switch to AUTO at any time.
The lights will come on automatically when the outside light level becomes
low (at dusk, for example). The Lights On indicator comes on as a
reminder. The lights and indicator
will turn off automatically when the system senses high ambient light.
The lights will remain on when you turn off the ignition switch. They willturn off automatically when you open
the driver's door. To turn them onagain, either turn the ignition switch
to ON (II) or turn the light switch to Even with the automatic lighting
feature turned on, we recommend that you turn on the lights manually
when driving at night or in a dense
fog, or when you enter dark areas, such as long tunnels or parking
structures.
Instrument s an d Control s AUT
O POSITIO N
Page 68 of 330
Control
s Nea r th e Steerin g Whee l
Do not leave the light switch in
AUTO if you will not be driving the car for an extended period (a week
or more). You should also turn off
the lights if you plan to leave the engine idling or the engine off for a
long time. This will prevent the
battery from discharging.
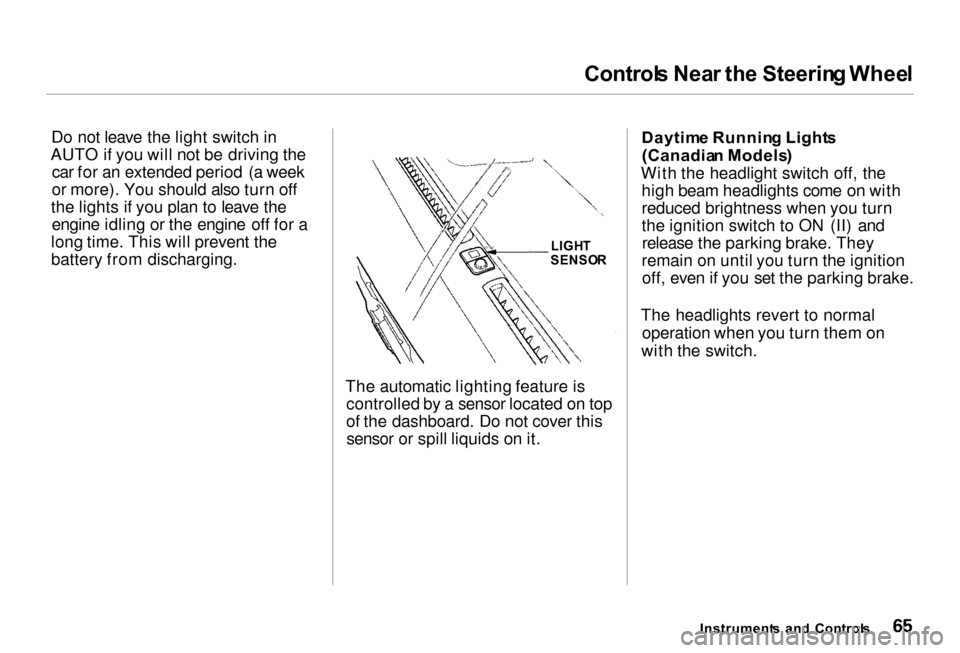
The automatic lighting feature iscontrolled by a sensor located on top
of the dashboard. Do not cover thissensor or spill liquids on it. Daytim
e Runnin g Light s
(Canadia n Models )
With the headlight switch off, the high beam headlights come on with
reduced brightness when you turn
the ignition switch to ON (II) andrelease the parking brake. They
remain on until you turn the ignition off, even if you set the parking brake.
The headlights revert to normal operation when you turn them on
with the switch.
Instrument s an d Control s
LIGH
T
SENSO R
Page 70 of 330
Control
s Nea r th e Steerin g Whee l
To signal a lane change, push lightly on the turn signal lever in the proper
direction and hold it. The lever will
return to the center position as soon
as you release it.
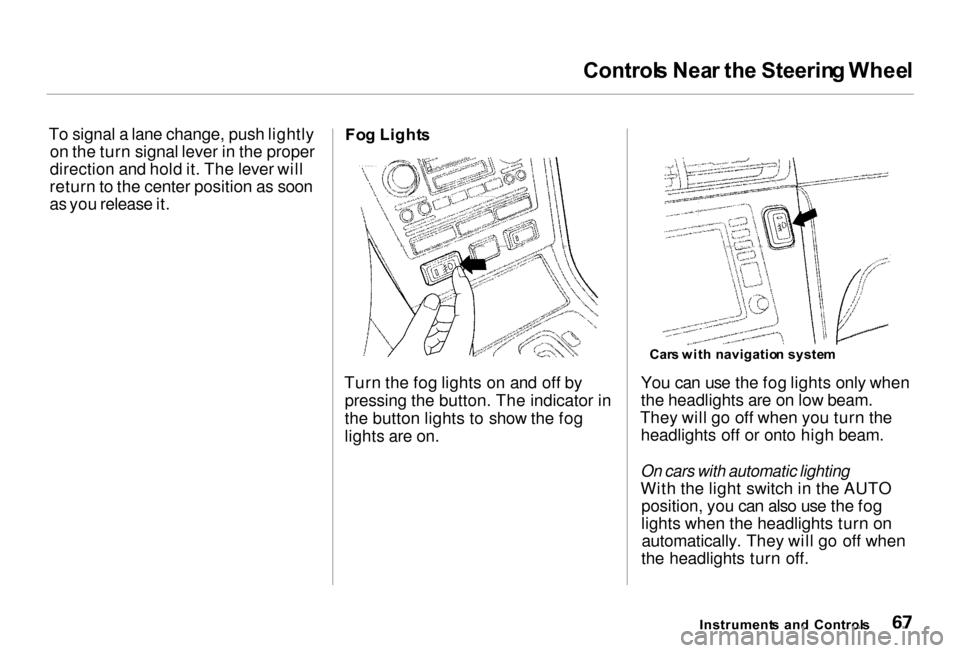
Fo
g Light s
Turn the fog lights on and off by pressing the button. The indicator in
the button lights to show the fog
lights are on. You can use the fog lights only when
the headlights are on low beam.
They will go off when you turn the headlights off or onto high beam.
On cars with automatic lighting
With the light switch in the AUTO position, you can also use the fog
lights when the headlights turn onautomatically. They will go off when
the headlights turn off.
Instrument s an d Control s
Car
s wit h navigatio n syste m
Page 101 of 330
Mirror
s
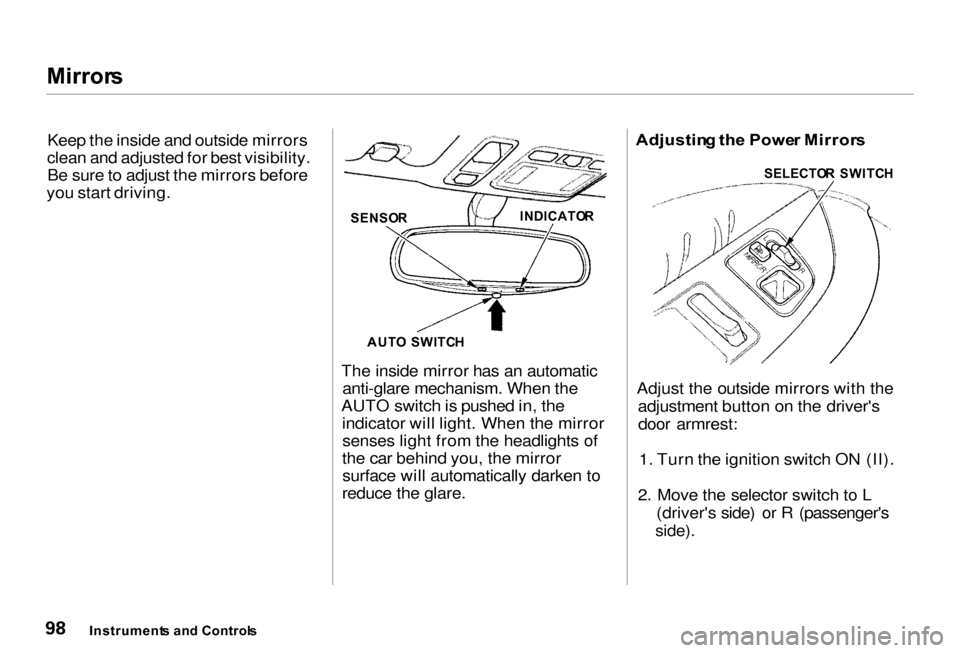
Keep the inside and outside mirrors
clean and adjusted for best visibility. Be sure to adjust the mirrors before
you start driving.
The inside mirror has an automaticanti-glare mechanism. When the
AUTO switch is pushed in, the indicator will light. When the mirrorsenses light from the headlights of
the car behind you, the mirror surface will automatically darken to
reduce the glare. Adjustin
g th e Powe r Mirror s
Adjust the outside mirrors with the adjustment button on the driver'sdoor armrest:
1. Turn the ignition switch ON (II).
2. Move the selector switch to L (driver's side) or R (passenger's
side).
Instrument s an d Control s
SENSO
R
AUT O SWITC H
INDICATO
R SELECTO
R SWITC H
Page 109 of 330
Powe
r Windows , Moonroo f
The master control panel also con- tains these extra features:
AUT O — To open the driver's
window fully, push the window switch firmly down and release it.
The window automatically goes all the way down. To stop the window
from going all the way down, pull
back on the window switch briefly.
To open the driver's window only partially, push the window switchdown lightly and hold it. The window
will stop as soon as you release the
switch.
The AUTO function only works to lower the driver's window. To raise
the window, you must pull back on
the window switch and hold it until the window reaches the desired
position.
The MAIN switch controls power to
the passengers'windows. With thisswitch off, the passengers'windows
cannot be raised or lowered. The
MAIN switch does not affect the driv- er's window. Keep the MAIN switch
off when you have children in the carso they do not injure themselves by
operating the windows unintentional-
ly. The lights inside the switches come on when you turn the parking
lights or headlights on.
The power window system has a key- off delay function. The windows willstill operate for up to ten minutes
after you turn off the ignition. Opening either front door cancels
the delay function. You must turn
the ignition switch ON (II) again
before you can raise or lower the
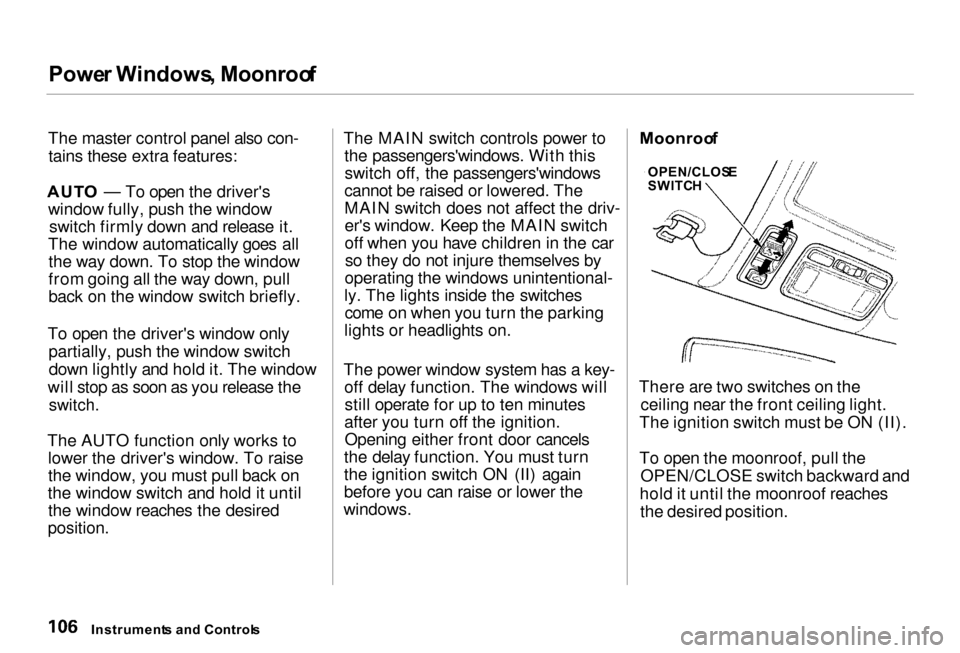
windows. There are two switches on the
ceiling near the front ceiling light.
The ignition switch must be ON (II).
To open the moonroof, pull the OPEN/CLOSE switch backward and
hold it until the moonroof reaches the desired position.
Instrument s an d Control s Moonroo
f
OPEN/CLOS E
SWITC H