heater Acura RL 2001 3.5 Owner's Manual
[x] Cancel search | Manufacturer: ACURA, Model Year: 2001, Model line: RL, Model: Acura RL 2001Pages: 333, PDF Size: 4.28 MB
Page 54 of 333

Instruments and Controls
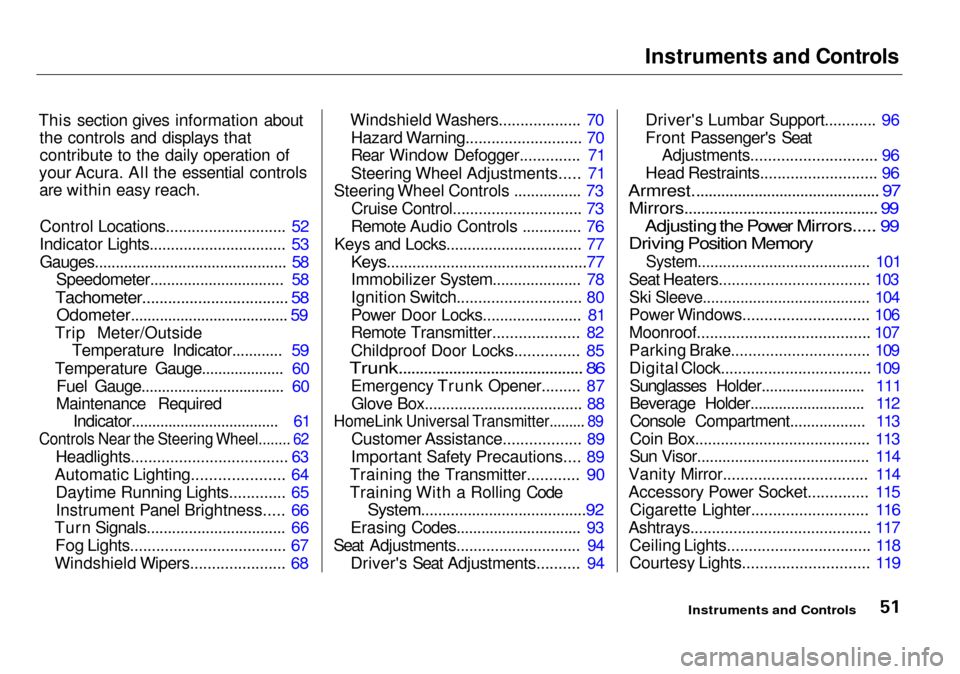
This section gives information about the controls and displays thatcontribute to the daily operation of
your Acura. All the essential controls are within easy reach.
Control Locations............................ 52
Indicator Lights................................ 53 Gauges.............................................. 58 Speedometer................................ 58
Tachometer.................................. 58
Odometer...................................... 59
Trip Meter/Outside Temperature Indicator............ 59
Temperature Gauge.................... 60 Fuel Gauge................................... 60
Maintenance Required Indicator.................................... 61
Controls Near the Steering Wheel........ 62
Headlights.................................... 63
Automatic Lighting..................... 64 Daytime Running Lights............. 65
Instrument Panel Brightness..... 66
Turn Signals................................. 66
Fog Lights.................................... 67
Windshield Wipers...................... 68 Windshield Washers................... 70
Hazard Warning........................... 70
Rear Window Defogger.............. 71
Steering Wheel Adjustments..... 71
Steering Wheel Controls ................ 73
Cruise Control.............................. 73
Remote Audio Controls .............. 76
Keys and Locks................................ 77
Keys...............................................77
Immobilizer System..................... 78
Ignition Switch............................. 80
Power Door Locks....................... 81
Remote Transmitter.................... 82
Childproof Door Locks............... 85
Trunk............................................ 86
Emergency Trunk Opener......... 87Glove Box..................................... 88
HomeLink Universal Transmitter......... 89
Customer Assistance.................. 89
Important Safety Precautions.... 89
Training the Transmitter............ 90
Training With a Rolling Code
System.......................................92
Erasing Codes.............................. 93
Seat Adjustments............................. 94 Driver's Seat Adjustments.......... 94
Driver's Lumbar Support............ 96
Front Passenger's SeatAdjustments............................. 96
Head Restraints........................... 96
Armrest............................................. 97
Mirrors.............................................. 99
Adjusting the Power Mirrors..... 99
Driving Position Memory
System......................................... 101
Seat Heaters................................... 103
Ski Sleeve........................................ 104
Power Windows............................. 106
Moonroof........................................ 107
Parking Brake................................ 109
Digital Clock................................... 109Sunglasses Holder......................... 111
Beverage Holder............................ 112Console Compartment.................. 113
Coin Box......................................... 113
Sun Visor......................................... 114
Vanity Mirror................................. 114
Accessory Power Socket.............. 115 Cigarette Lighter........................... 116
Ashtrays.......................................... 117 Ceiling Lights................................. 118
Courtesy Lights............................. 119
Instruments and Controls
Page 103 of 333

Mirrors
ADJUSTMENT BUTTON
3. Move the mirror right, left, up or
down by pushing the adjustment
button in that direction.
4. When you finish, move the
selector switch to the center (off)
position. This turns off the adjustment button so you can't
move a mirror out of position by accidentally bumping the button.
Outside mirror positions can be
stored in the driving position
memory system (see page 101).
HEATED MIRROR BUTTON
The outside mirrors are heated to re- move fog and frost. With the ignitionswitch ON (II), turn on the heaters
by pressing the button. The light in the button comes on as a reminder.
Press the button again to turn the
heaters off.
Instruments and Controls
Page 106 of 333

Driving Position Memory System, Seat Heaters
To stop the system's automatic ad- justment; Press any button on the control
panel: MEMO, 1 or 2.
Push any of the adjustment
switches for the seat or steering
wheel. Shift out of Park. Adjust the outside mirrors.
If you select a memorized position
without inserting the key in the ignition switch, only the seat andoutside mirrors will adjust. To get
the system to also adjust the steering
wheel, insert the key in the ignition switch. You will hear two beeps
when it is complete. If desired, you can use the adjust-
ment switches to change the posi-
tions of the seat, steering wheel or outside mirrors after they are in
their memorized position. To keep
this driving position for later use,
you must store it in the driving posi- tion memory. Seat Heaters
Both front seats are equipped withseat heaters. The ignition switch
must be ON (II) to use them. Push
the front of the switch, HI, to rapidly
heat up the seat. After the seat reaches a comfortable temperature,select LO by pushing the back of the
switch. This will keep the seat warm.
CONTINUED
Instruments and Controls
SEAT HEATERS
Page 107 of 333

Seat Heaters, Ski Sleeve
The HI or LO indicator lights and remains lit until you turn it off by
pushing the opposite side of theswitch lightly. The indicator will turn
off.
In HI, the heater turns off when the
seat gets warm, and turns back on
after the seat's temperature drops. It
continues to cycle as long as you
leave it set on HI. The HI indicator
remains lit as a reminder that you
have the heater on.
In LO, the heater runs continuously.It does not cycle with temperature
changes.
Because of the sensors for the side
airbag system, there is no heater in
the passenger's seat-back. Follow these precautions whenever
you use the seat heaters: Use the HI setting only to heat the
seats quickly. Select the LO
setting when the seats feel warm.
The HI setting draws large amounts of current from the
battery. Do not use the seat heaters, even
on the LO setting, if the engine is
left idling for an extended period.
They can weaken the battery, causing hard starting.
Ski Sleeve
The ski sleeve allows you to carry skis or other long objects safely
without soiling or damaging the
interior of your car. It attaches to the
trunk pass-through.
KNOB
To use the ski sleeve: 1. Pull down the rear seat armrest. Open the trunk pass-through
cover by sliding the knob down-
ward and pulling on the cover.
Instruments and Controls
LID
Page 127 of 333

Climate Control System
3.5 RL without Navigation System
Fully-automatic Operation
To put the Automatic Climate Control in fully-automatic mode,
press the AUTO button and set the
fan control dial to AUTO, then set
the desired temperature by turning the temperature control dial. You willsee FULL AUTO in the system's
display. The light above either the or button also goes
on to show you which is selected.
The system automatically selects the proper mix of conditioned and/or
heated air that will, as quickly as
possible, raise or lower the interior
temperature from its current level to
the set temperature.
When you set the temperature to its lower limit (60°F/18°C) or its upper
limit (90°F/32°C), the system runsat full cooling or heating only. It does
not regulate the interior temperature.
When the temperature is set between the lower and upper limits,
the system regulates the interior
temperature to the set value.
In cold weather, the fan will not
come on automatically until the car
has been driven for a short time and the heater starts to develop warm air. Pressing the OFF button shuts the
climate control system completely
off. Keep the system completely off
only for short periods. To keep stale
air and mustiness from collecting,
you should have the fan running at all times.
Comfort and Convenience Features
TEMPERATURE
CONTROL DIAL FULL AUTO
DISPLAY FAN CONTROL
DIAL
AUTO
BUTTON
OFF
BUTTON
Page 132 of 333

Climate Control System
3.5 RL with Navigation System
Fully-automatic Operation
To put the Automatic Climate Control in fully-automatic mode,
press the AUTO button and set the
fan control dial to AUTO, then set
the desired temperature by turning
the temperature control dial. You will see FULL AUTO in the system's
display. The light above the button also shows you which
mode, Recirculation or Fresh Air, is
selected.
The system automatically selects the proper mix of conditioned and/or
heated air that will, as quickly as
possible, raise or lower the interior
temperature from its current level to
the set temperature.
When you set the temperature to its lower limit (60°F/18°C) or its upper
limit (90°F/32°C), the system runs
at full cooling or heating only. It does
not regulate the interior temperature.
FAN CONTROL
DIAL
FULL AUTO
DISPLAY
TEMPERATURE
CONTROL DIAL
When the temperature is set between the lower and upper limits,
the system regulates the interior temperature to the set value.
In cold weather, the fan will not come on automatically until the car
has been driven for a short time and
the heater starts to develop warm air.
OFF
BUTTON
Pressing the OFF button shuts the
climate control system completely
off. Keep the system completely off only for short periods. To keep stale
air and mustiness from collecting,
you should have the fan running at all times.
Comfort and Convenience Features AUTO
BUTTON
Page 226 of 333

Cooling System
Replacing Engine Coolant
The cooling system should be completely drained and refilled with
new coolant according to the time
and distance recommendations in
the maintenance schedule. Only use Honda All Season Antifreeze/Coolant Type 2. Use of any non-
Honda coolant or plain water can
result in corrosion and deposits in
the cooling system.
Draining the coolant requires access
to the underside of the car. Unless
you have the tools and knowledge,
you should have this maintenance done by a skilled mechanic.
1. Turn the ignition ON (II). Turn
the heater temperature control
dial to maximum heat (climate
control to 90°F/32°C). Turn off
the ignition. Open the hood. Make
sure the engine and radiator are
cool to the touch.
2. Remove the radiator cap.
3. Loosen the drain plug on the
bottom of the radiator. The
coolant will come out through the
hole in the splash cover.
CONTINUED
Maintenance
DRAIN PLUG
Page 330 of 333

Index
Engine Coolant........................... 223
Engine Oil and Filter................. 219
Fuses........................................... 292 Light Bulbs................................. 252
Schedule..................................... 206
Spark Plugs................................. 233
Tires............................................ 247
Wiper Blades.............................. 239
Replacing Seat Belts After a
Crash............................................. 42
Reserve Tank, Engine Coolant.... 172
Reverse Gear Position................... 183
Rotation, Tire................................. 246
Safety Belts......................................... 8
Safety Defects, Reporting*.......... 317
Safety Features.................................. 7
Airbags............................................9
Door Locks................................... 10
Head Restraints........................... 10
Seat Belts........................................ 8
Seats & Seat-Backs...................... 10
Safety Labels, Location of.............. 50
Safety Messages................................ ii Seat Belts...................................... 8, 40
Additional Information................ 40
Advice for Pregnant Women...... 18
Automatic Seat BeltTensioner.. 41
Child Seat Anchor Plate.............. 39
Cleaning...................................... 267
Lap/Shoulder Belt....................... 40
Maintenance................................. 42 Reminder Light and Beeper................................. 40, 54
Replacement................................. 42
System Components.................... 40 Use During Pregnancy................ 18
Wearing a Lap/Shoulder Belt.... 15
Seat Heaters................................... 103
Seat Position Memory................... 101
Seats, Adjusting the......................... 94
Security Alarm System ................. 165
Serial Number................................ 300
Service Intervals............................ 208
Service Manual*............................ 319
Service Station Procedures.......... 169
Setting the Clock........................... 109
Shifting the Automatic
Transmission.............................. 182
Shift Lever Position Indicator...... 182 Shift Lock Release......................... 185
Side Airbags..................................... 45
How The Side Airbag Indicator
Light Works............................. 47
How Your Side Airbags Work.... 45
Side Marker Lights, Bulb
Replacement in.......................... 255
Signaling Turns................................ 66
Ski Sleeve........................................ 104
Snow Tires...................................... 249
Solvent-type Cleaners.................... 264
Sound System................................. 136
Spare Tire Inflating....................................... 272
Specifications............................. 303
Spark Plugs, Replacing................. 233
Specifications Charts..................... 302
Speed Control................................... 73
Speedometer.................................... 58
Spotlights........................................ 118
COAT/M/FA)