steering wheel adjustment Acura RL 2004 3.5 Owner's Manual
[x] Cancel search | Manufacturer: ACURA, Model Year: 2004, Model line: RL, Model: Acura RL 2004Pages: 370, PDF Size: 4.33 MB
Page 6 of 370
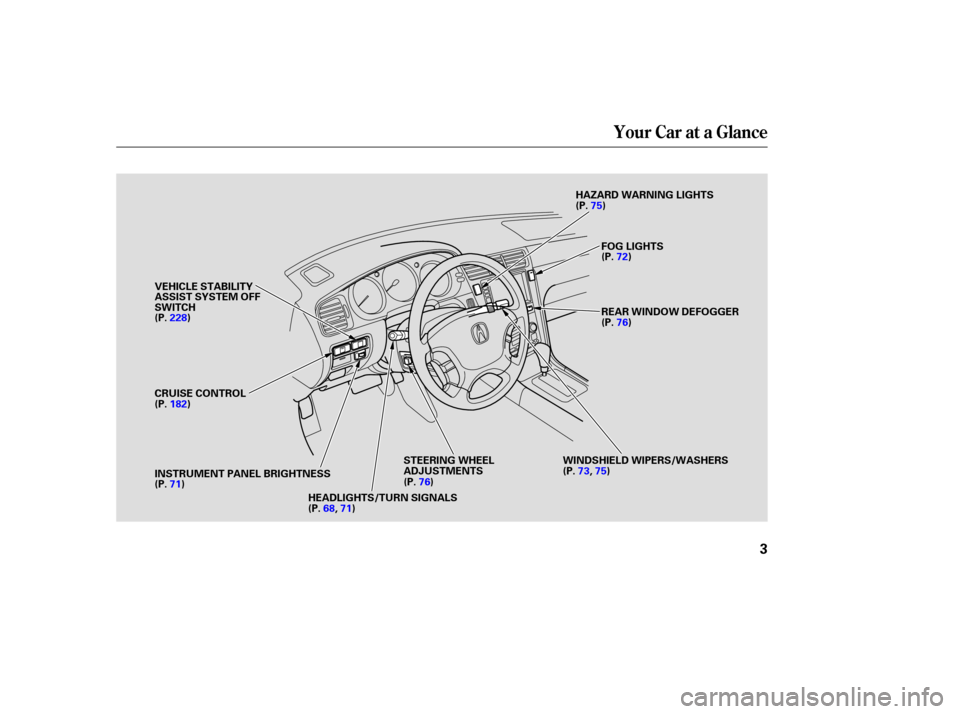
Your Car at a Glance
3
HAZARD WARNING LIGHTS
STEERING WHEEL
ADJUSTMENTS
CRUISE CONTROL VEHICLE STABILITY
ASSIST SYSTEM OFF
SWITCH
HEADLIGHTS/TURN SIGNALS FOG LIGHTS
REAR WINDOW DEFOGGER (P.
72)
(P. 76)
WINDSHIELD WIPERS/WASHERS
(P. 71) (P.
76) (P.
73, 75)
(P.
75)
INSTRUMENT PANEL BRIGHTNESS (P.68, 71)
(P.
228)
(P. 182)
Page 58 of 370

This section gives inf ormation about
the controls and displays that
contribute to the daily operation of
your Acura. All the essential controls
are within easy reach............................
Control Locations .56
...............................
Indicator Lights .57
.............................................
Gauges .63
...............................
Speedometer .63
.................................
Tachometer .63
.....................................
Odometer .64
...................................
Trip Meter .64
Outside Temperature ...................................
Indicator .65
...................
Temperature Gauge . 65
..................................
Fuel Gauge .65
Maintenance Required ...................................
Indicator .66 Controls Near the Steering
.......................................
Wheel .67
...................................
Headlights .68
....................
Automatic Lighting .69
............
Daytime Running Lights . 70
....
Instrument Panel Brightness . 71
................................
Turn Signals .71
...................................
Fog Lights .72
.....................
Windshield Wipers .73
..................
Windshield Washers . 75
..........................
Hazard Warning .75
.............
Rear Window Def ogger . 76
....
Steering Wheel Adjustments . 76
...............................
Keys and Locks .79
..............................................
Keys .79
....................
Immobilizer System . 80
............................
Ignition Switch .82
......................
Power Door Locks .83
...................
Remote Transmitter . 84
..............
Childproof Door Locks . 87
...........................................
Trunk .88
........
Emergency Trunk Opener . 89
....................................
Glove Box .90
............................
Seat Adjustments .91
.........
Driver’s Seat Adjustments . 91
...........
Driver’s Lumbar Support . 93Front Passenger’s Seat
............................
Adjustments .93
..........................
Head Restraints .94
......................
Rear Seat Armrest .95
.............................................
Mirrors .96
....
Adjusting the Power Mirrors . 96
Driving Position Memory ..........................................
System .98
..................................
Seat Heaters .100
.......................................
Ski Sleeve .101
............................
Power Windows .103
.......................................
Moonroof .105
...............................
Parking Brake .107
..................................
Digital Clock .108
........................
Sunglasses Holder .109
...........................
Beverage Holder .110
.................
Console Compartment . 111
........................................
Coin Box .111
........................................
Sun Visor .112
................................
Vanity Mirror .112
.............
Accessory Power Socket . 113
..........................
Cigarette Lighter .114
.........................................
Ashtrays .115
................................
Ceiling Lights .116
............................
Courtesy Lights .117
Instruments and Controls
Inst rument s and Cont rols55
Page 70 of 370
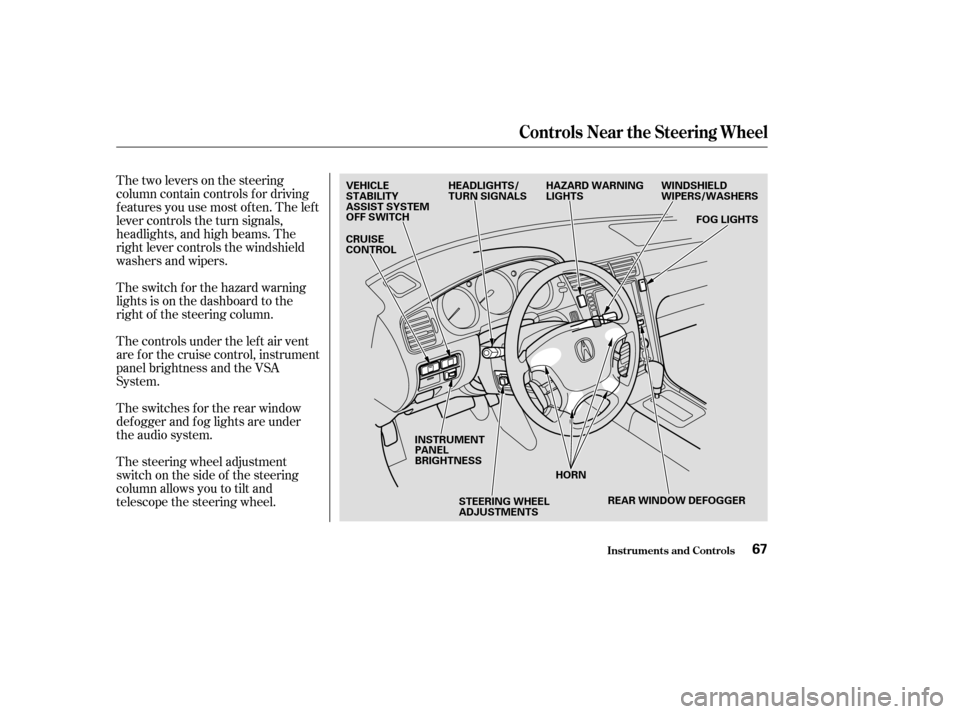
Thetwoleversonthesteering
column contain controls f or driving
f eatures you use most of ten. The lef t
lever controls the turn signals,
headlights, and high beams. The
right lever controls the windshield
washers and wipers.
The switch for the hazard warning
lights is on the dashboard to the
right of the steering column.
The controls under the lef t air vent
areforthecruisecontrol,instrument
panel brightness and the VSA
System.
The switches for the rear window
def ogger and f og lights are under
the audio system.
The steering wheel adjustment
switch on the side of the steering
column allows you to tilt and
telescope the steering wheel.
Controls Near the Steering Wheel
Inst rument s and Cont rols67
VEHICLE
STABILITY
ASSIST SYSTEM
OFF SWITCH
CRUISE
CONTROLSTEERING WHEEL
ADJUSTMENTS
HEADLIGHTS/
TURN SIGNALS
HAZARD WARNING
LIGHTS
INSTRUMENT
PANEL
BRIGHTNESS WINDSHIELD
WIPERS/WASHERS
HORN REAR WINDOW DEFOGGER FOG LIGHTS
Page 79 of 370
See page f or important saf etyinf ormation about how to properlyposition the steering wheel. 17
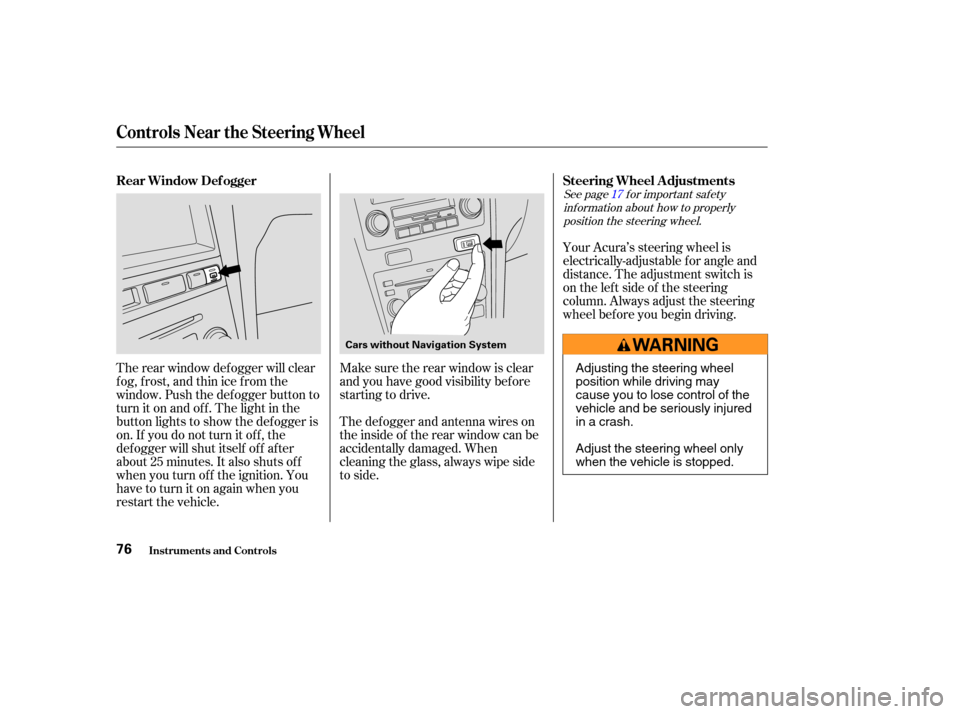
Your Acura’s steering wheel is
electrically-adjustable f or angle and
distance. The adjustment switch is
on the lef t side of the steering
column. Always adjust the steering
wheel bef ore you begin driving.
Make sure the rear window is clear
and you have good visibility bef ore
starting to drive.
The def ogger and antenna wires on
the inside of the rear window can be
accidentally damaged. When
cleaning the glass, always wipe side
to side.
The rear window def ogger will clear
fog,frost,andthinicefromthe
window. Push the def ogger button to
turn it on and of f . The light in the
button lights to show the def ogger is
on. If you do not turn it of f , the
def ogger will shut itself of f af ter
about25minutes.Italsoshutsoff
when you turn of f the ignition. You
have to turn it on again when you
restart the vehicle. Steering Wheel A djustments
Rear Window Def ogger
Controls Near the Steering Wheel
Inst rument s and Cont rols76
Cars without Navigation System
Adjusting the steering wheel
position while driving may
cause you to lose control of the
vehicle and be seriously injured
inacrash.
Adjust the steering wheel only
when the vehicle is stopped.
Page 80 of 370
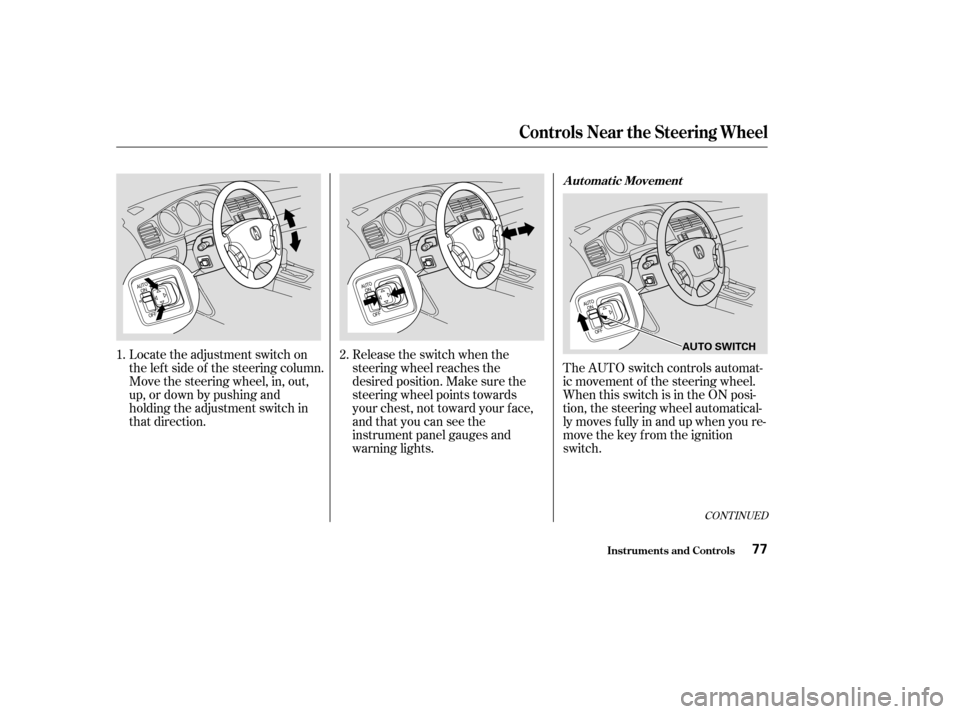
The AUTO switch controls automat-
ic movement of the steering wheel.
When this switch is in the ON posi-
tion, the steering wheel automatical-
ly moves f ully in and up when you re-
move the key from the ignition
switch.
Release the switch when the
steering wheel reaches the
desired position. Make sure the
steering wheel points towards
your chest, not toward your f ace,
andthatyoucanseethe
instrument panel gauges and
warning lights.
Locate the adjustment switch on
the lef t side of the steering column.
Move the steering wheel, in, out,
up, or down by pushing and
holding the adjustment switch in
that direction.
2.
1.
CONT INUED
Automatic Movement
Controls Near the Steering Wheel
Inst rument s and Cont rols77
AUTO SWITCH
Page 102 of 370
Doing any of the f ollowing af ter
pressing the MEMO button will
cancel the storing procedure.Not pressing a memory button
within 5 seconds.
Readjusting the seat or steering
position.
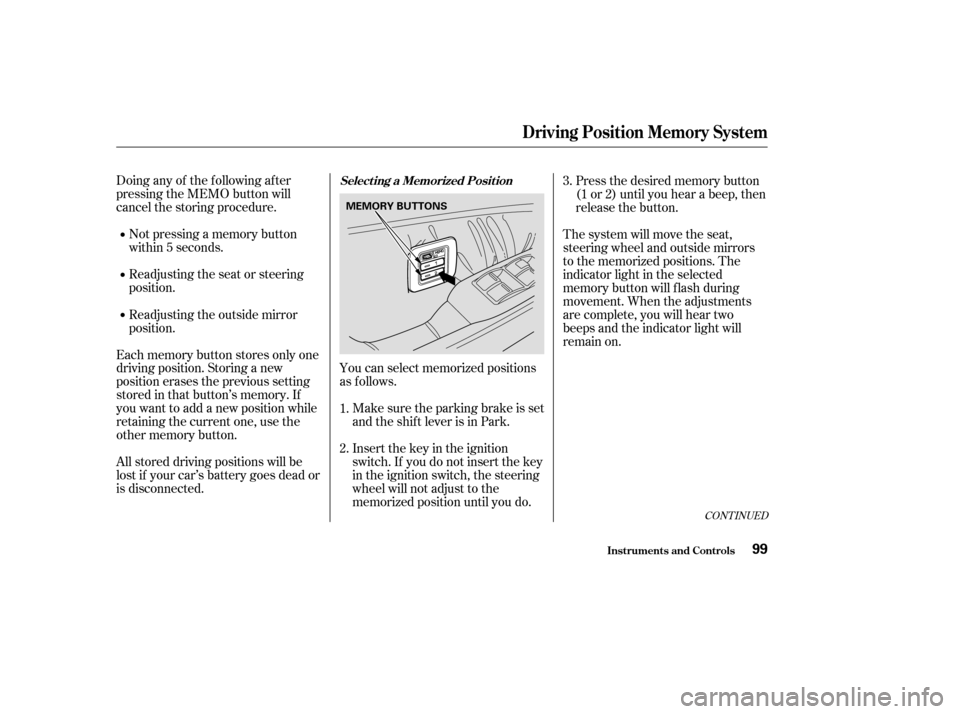
You can select memorized positions
as f ollows.Make sure the parking brake is set
and the shif t lever is in Park.
Insert the key in the ignition
switch. If you do not insert the key
in the ignition switch, the steering
wheel will not adjust to the
memorized position until you do. Press the desired memory button
(1 or 2) until you hear a beep, then
release the button.
The system will move the seat,
steering wheel and outside mirrors
to the memorized positions. The
indicator light in the selected
memory button will f lash during
movement. When the adjustments
are complete, you will hear two
beeps and the indicator light will
remain on.
Readjusting the outside mirror
position.
Each memory button stores only one
driving position. Storing a new
position erases the previous setting
stored in that button’s memory. If
you want to add a new position while
retaining the current one, use the
other memory button.
All stored driving positions will be
lost if your car’s battery goes dead or
is disconnected. 3.
1.
2.
CONT INUED
Select ing a Memorized Posit ion
Inst rument s and Cont rols
Driving Posit ion Memory Syst em
99
MEMORY BUTTONS
Page 103 of 370
Press any button on the control
panel: MEMO, 1 or 2.
Push any of the adjustment
switches f or the seat or steering
wheel.
Shif t out of Park.
To stop the system’s automatic ad-
justment;
Adjust the outside mirrors.
If you select a memorized position
without inserting the key in the
ignition switch, only the seat and
outside mirrors will adjust. To get
the system to also adjust the steering
wheel, insert the key in the ignition
switch. You will hear two beeps
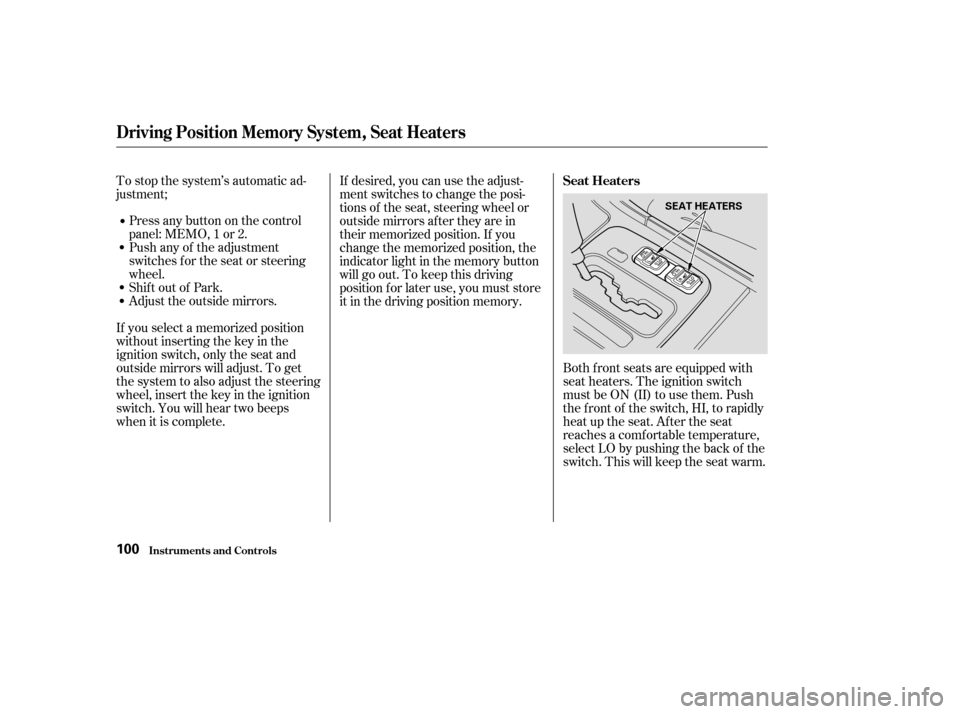
when it is complete. Both f ront seats are equipped with
seat heaters. The ignition switch
must be ON (II) to use them. Push
the front of the switch, HI, to rapidly
heat up the seat. After the seat
reaches a comf ortable temperature,
select LO by pushing the back of the
switch. This will keep the seat warm.
If desired, you can use the adjust-
ment switches to change the posi-
tions of the seat, steering wheel or
outside mirrors af ter they are in
their memorized position. If you
change the memorized position, the
indicator light in the memory button
will go out. To keep this driving
position f or later use, you must store
it in the driving position memory.
Seat Heaters
Driving Position Memory System, Seat Heaters
Inst rument s and Cont rols100
SEAT HEATERS
Page 219 of 370

Make sure all windows, mirrors,
and outside lights are clean and
unobstructed. Remove f rost, snow,
or ice.
Check that the hood and trunk are
f ully closed.Check the adjustment of the
inside and outside mirrors (see
page ).
Check the adjustment of the
steering wheel (see page ).
Make sure the doors are securely
closed and locked.
Fasten your seat belt. Check that
your passengers have f astened
their seat belts (see page ).Turn the ignition switch ON (II).
Check the indicator lights in the
instrument panel.
Start the engine (see page ).
Check the gauges and indicator
lights in the instrument panel (see
page ).
Visually check the tires. If a tire
looks low, use a gauge to check its
pressure.
Check that any items you may be
carrying with you inside are stored
properly or f astened down
securely.
Youshoulddothefollowingchecks
and adjustments every day bef ore
you drive your car.
Check the adjustment of the seat
(see page ).
1.
2.
3.
4. 5.
6.
7.
8.
9.
10.
11. 12.
15
91
96 7657 217
Preparing to Drive
Driving216
Page 367 of 370

.....................................
Tachometer .63
......
Taillights, Changing Bulbs in . 292
.
Taking Care of the Unexpected . 307
...........................
Tape Player .139, 159
Technical Descriptions ......
DOT Tire Quality Grading . 340
.....
Emissions Control Systems . 345
.....................
Oxygenated Fuels .343
Three Way Catalytic ...............................
Converter .347
.......................
Temperature Gauge .65
...................
Tensioners, Seat Belts . 45
..............
Tether Anchorage Points . 39
...............
Thef t Deterrent System . 181
............................
Thef t Protection .180
..
Three Way Catalytic Converter . 347
..................
Time, Setting the . 108,158
....................................
Timing Belt .279
....................................
Tire Chains .285
...........................
Tire Inf ormation .342
.........
Tire, How to Change a Flat . 309
...............................................
Tires .279
..............................
Air Pressure .280
...................................
Balancing .282
....................................
Side Airbags .49
How the Side Airbag Cutof f ...........
Indicator Light Works . 51
...
How Your Side Airbags Work . 49
Side Marker Lights, Bulb .........................
Replacement in .291
...............................
Signaling Turns .71
.......................................
Ski Sleeve .101
.....................................
Snow Tires .285
...................
Solvent-type Cleaners . 300
........................
Sound System .134, 151
Spare Tire ......................................
Inf lating .308
............................
Specif ications .339
................
Spark Plugs, Replacing . 269
....................
Specif ications Charts . 338
................................
Speed Control .182
...................................
Speedometer .63
.......................................
Spotlights .116
..........
SRS, Additional Inf ormation . 47
...
Additional Safety Precautions . 52
Automatic Seat Belt ...............................
Tensioners .45
How the SRS Indicator Light .......................................
Works .50
.....
How Your Airbags Work . 47,49 ........................
SRS Components .47
..................................
SRS Service .52
.............................
SRS Indicator .50 ,59
....
START (Ignition Key Position) . 82
.......................
Starting the Engine .217
In Cold Weather at High ..................................
Altitude .217
................
With a Dead Battery . 316
..........
State Emissions Testing . 348
........
Steam Coming f rom Engine . 319
Steering Wheel ................................
Adjustments .76
.............
Anti-theft Column Lock . 82
........................
Position Memory .98
...........
Stereo Sound System . 134,151
...........................
Storing Your Car .297
........................................
Sun Visor .112
........................
Sunglasses Holder .109
Supplemental Restraint ............................
System .9 ,47, 49
....................
Service Precautions .52
......................................
Servicing .52
.........................
SRS Indicator .50 ,59
...................
System Components . 47
...............
Tensioners, Seat Belts . 45
..................................
Synthetic Oil .252
Index
T
VIII