Acura RL 2008 Navigation Manual
Manufacturer: ACURA, Model Year: 2008, Model line: RL, Model: Acura RL 2008Pages: 162, PDF Size: 6.95 MB
Page 71 of 162
Navigation System71
Driving to Your Destination
Avoid Streets
From the Change route by screen, if
you say or select Avoid Streets, the
system displays a list of streets that will
get you to your destination. This feature
allows you to avoid a street or streets
along your route. This is helpful if you
know of road construction, closures, or
excessive traffic alon g the route. Simply
select the street or streets you wish to
avoid. You cannot avoid your current
street, or the streets of your waypoint(s)
or destination (system beeps if selected).
NOTE:
Although you can choose streets to
avoid, you cannot choose specific
streets you want to use.
Search Waypoint on Route
Waypoints allow you to add an interim
“pit stop” while traveling to a
destination. For instance, you may want
to stop for gas or food, and then
continue on to your destination.
Although you can enter up to five
waypoints at a time, typically you may
never use more than one at a time.
Waypoints are routed to in the order
they were entered (number 1 first, etc.),
with your final destination routed to last.
If you wish to create a custom route of
several destinations, and then control
the order of routing, the function
“Today’s Destinations” is probably a
better choice (see By Today’s
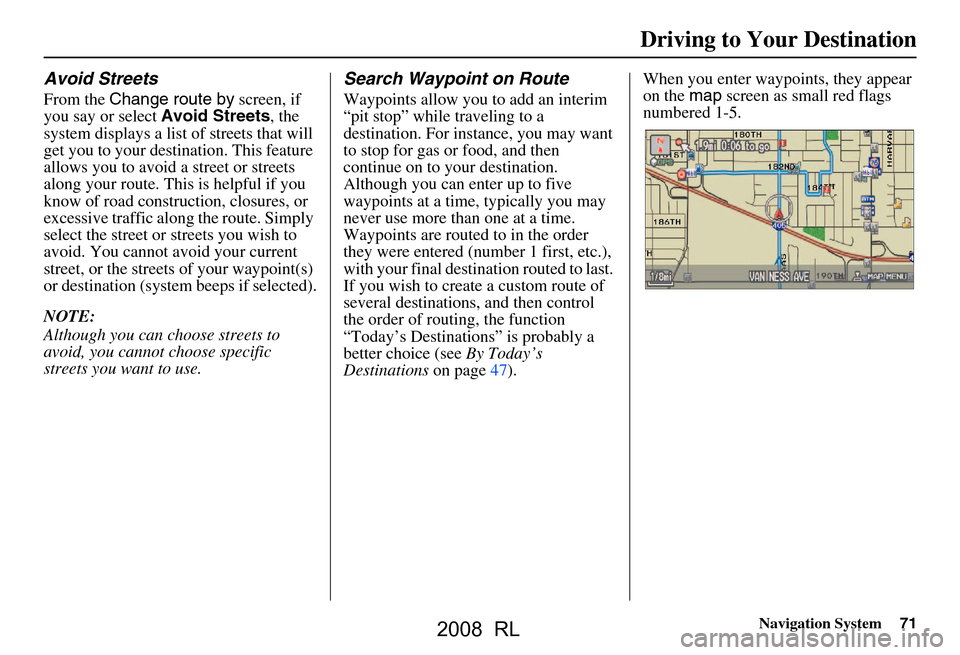
Destinations on page47). When you enter waypoints, they appear
on the
map screen as small red flags
numbered 1-5.
2008 RL
Page 72 of 162
72Navigation System
Adding Waypoints
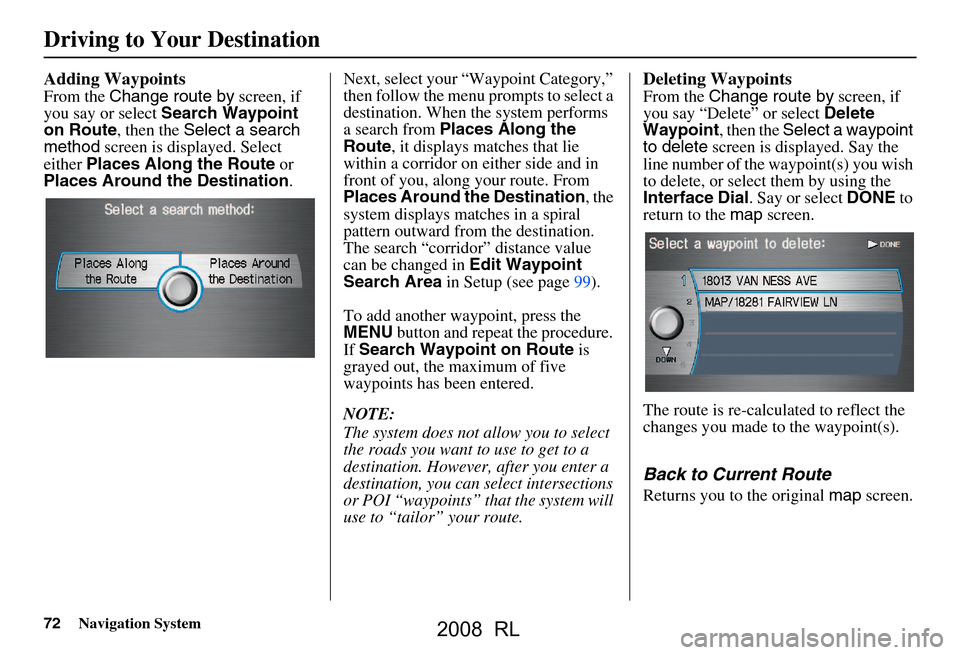
From the Change route by screen, if
you say or select Search Waypoint
on Route , then the Select a search
method screen is displayed. Select
either Places Along the Route or
Places Around the Destination .Next, select your “Waypoint Category,”
then follow the menu
prompts to select a
destination. When the system performs
a search from Places Along the
Route , it displays matches that lie
within a corridor on either side and in
front of you, along your route. From
Places Around the Destination , the
system displays matches in a spiral
pattern outward from the destination.
The search “corridor” distance value
can be changed in Edit Waypoint
Search Area in Setup (see page99).
To add another waypoint, press the
MENU button and repeat the procedure.
If Search Waypoint on Route is
grayed out, the maximum of five
waypoints has been entered.
NOTE:
The system does not allow you to select
the roads you want to use to get to a
destination. However, after you enter a
destination, you can select intersections
or POI “waypoints” that the system will
use to “tailor” your route.
Deleting Waypoints
From the Change route by screen, if
you say “Delete” or select Delete
Waypoint , then the Select a waypoint
to delete screen is displayed. Say the
line number of the waypoint(s) you wish
to delete, or select them by using the
Interface Dial . Say or select DONE to
return to the map screen.
The route is re-calculated to reflect the
changes you made to the waypoint(s).
Back to Current Route
Returns you to the original map screen.
Driving to Your Destination
2008 RL
Page 73 of 162
Navigation System73
Driving to Your Destination
Changing Your Destination
There are four methods by which you
can change or add a waypoint to your
route. These are:
Find Nearest (Voice command)
From the map screen, say one of the
“Find Nearest...” voice commands to
locate the nearest gas station, ATM,
restaurant or other point of interest. See
the “Find Nearest” voice commands
listing on page146.
Go Home (Voice command)
From the map screen, say, “Go home.”
If you have entered a “Go home”
address, then the system will display a
confirmation screen.
Using Interface Dial to Change
Destination
While following a calculated route, you
can select a new destination with the
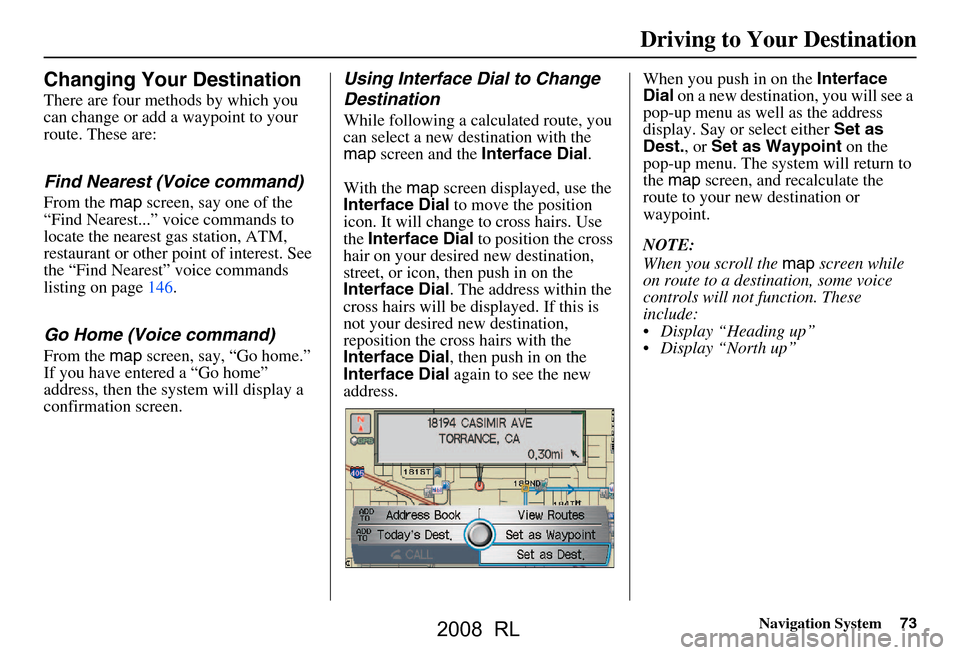
map screen and the Interface Dial .
With the map screen displayed, use the
Interface Dial to move the position
icon. It will change to cross hairs. Use
the Interface Dial to position the cross
hair on your desired new destination,
street, or icon, then push in on the
Interface Dial . The address within the
cross hairs will be displayed. If this is
not your desired new destination,
reposition the cross hairs with the
Interface Dial , then push in on the
Interface Dial again to see the new
address. When you push in on the
Interface
Dial on a new destination, you will see a
pop-up menu as well as the address
display. Say or select either Set as
Dest. , or Set as Waypoint on the
pop-up menu. The syst em will return to
the map screen, and recalculate the
route to your new destination or
waypoint.
NOTE:
When you scroll the map screen while
on route to a destination, some voice
controls will not function. These
include:
Display “Heading up”
Display “North up”
2008 RL
Page 74 of 162
74Navigation System
Entering a Destination from the
Menu Screen (while on route)
If you say “Menu” or press the MENU
button twice, the sy stem displays the
Enter destination by screen. Follow
the procedure described in Entering a
Destination , which begins on page27.
After selecting OK to the Calculate
route to screen, your new location can
be used either as a waypoint or as a
replacement destination.
Continue Trip Screen
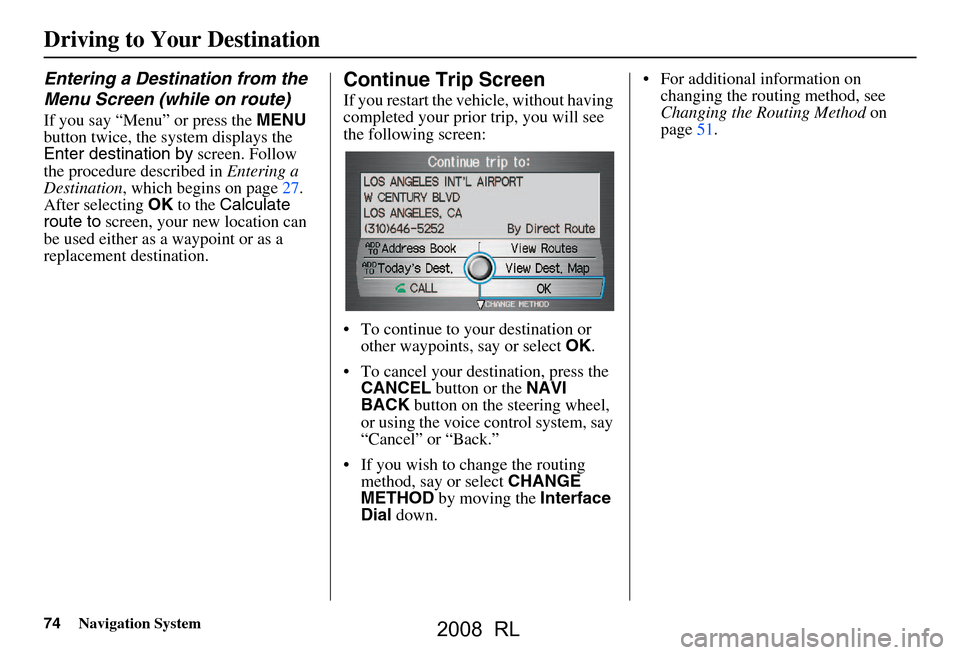
If you restart the vehicle, without having
completed your prior trip, you will see
the following screen:
To continue to your destination or other waypoints, say or select OK.
To cancel your destination, press the CANCEL button or the NAVI
BACK button on the steering wheel,
or using the voice control system, say
“Cancel” or “Back.”
If you wish to change the routing method, say or select CHANGE
METHOD by moving the Interface
Dial down. For additional information on
changing the routing method, see
Changing the Routing Method on
page51.
Driving to Your Destination
2008 RL
Page 75 of 162
Navigation System75
Driving to Your Destination
AcuraLink Messages
AcuraLink enhances your ownership
experience by providing a direct
communication link between you and
Acura. AcuraLink messages are
displayed on the Navigation screen.
Working through the XM Satellite
Radio, AcuraLink works in conjunction
with your vehicle’s Navigation,
Bluetooth® HandsFreeLink® (HFL),
and audio systems to send and receive
several kinds of message. These
include:
Operating tips and information on your vehicle’s features.
Important recall and safety information.
Maintenance information to keep your vehicle in top condition.
Diagnostic information to provide information about any problems with
your vehicle.
NOTE:
See your vehicle’s Owner’s manual for
more details on this feature. When service inform
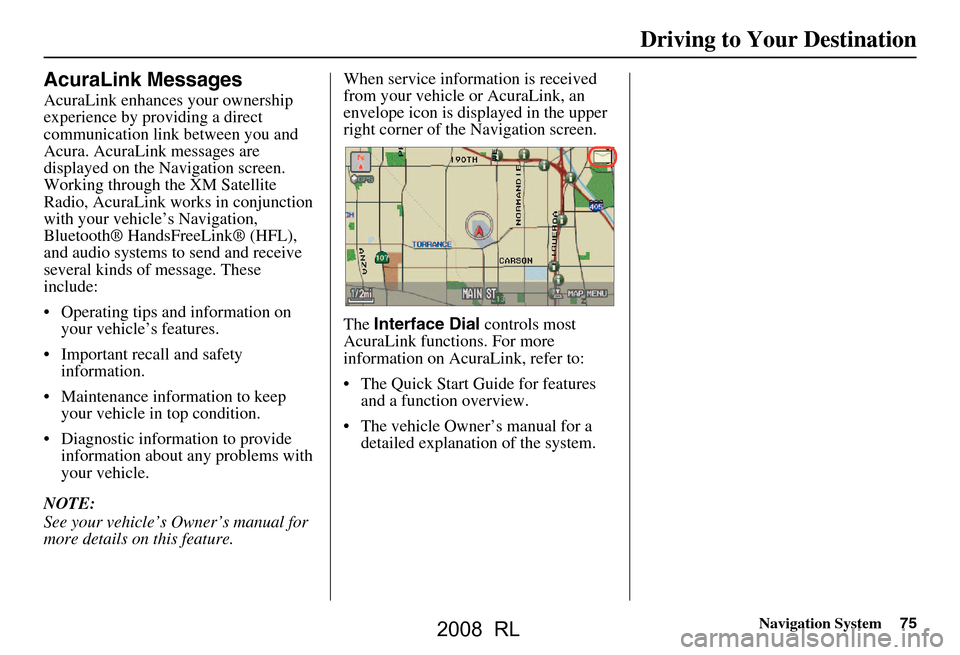
ation is received
from your vehicle or AcuraLink, an
envelope icon is displayed in the upper
right corner of the Navigation screen.
The Interface Dial controls most
AcuraLink functions. For more
information on AcuraLink, refer to:
The Quick Start Guide for features and a function overview.
The vehicle Owner’s manual for a detailed explanatio n of the system.
2008 RL
Page 76 of 162
76Navigation System
Information Features
Information Screen
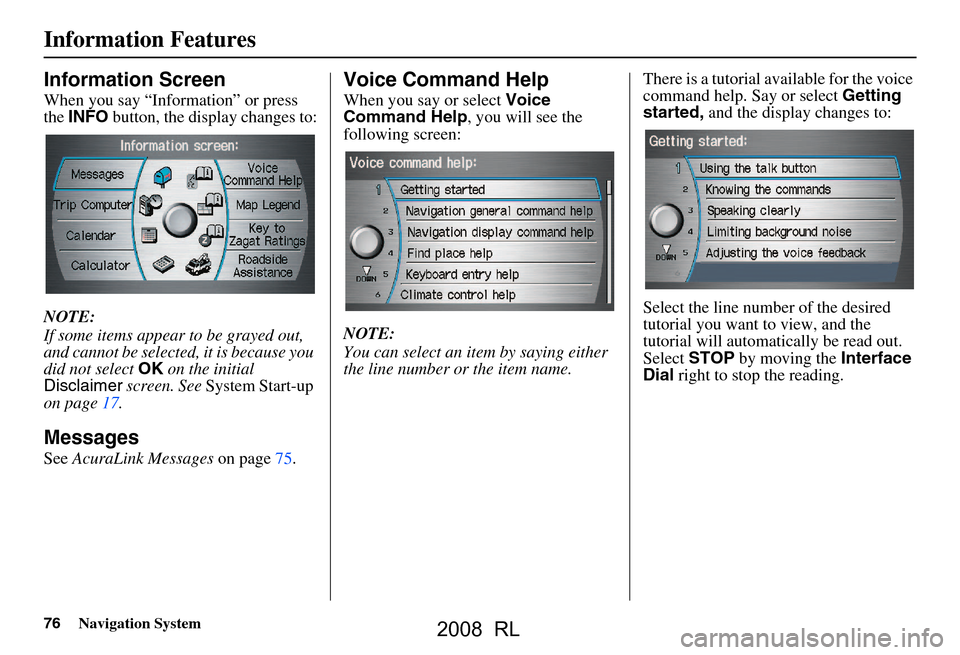
When you say “Information” or press
the INFO button, the display changes to:
NOTE:
If some items appear to be grayed out,
and cannot be selected, it is because you
did not select OK on the initial
Disclaimer screen. See System Start-up
on page17.
Messages
See AcuraLink Messages on page75.
Voice Command Help
When you say or select Voice
Command Help , you will see the
following screen:
NOTE:
You can select an item by saying either
the line number or the item name. There is a tutorial available for the voice
command help. Say or select
Getting
started, and the display changes to:
Select the line number of the desired
tutorial you want to view, and the
tutorial will automatically be read out.
Select STOP by moving the Interface
Dial right to stop the reading.
2008 RL
Page 77 of 162
Navigation System77
Information Features
When you make a selection, you will
see the help commands that can be used
with the voice control. You can say
“Read List” or select by moving the
Interface Dial right, and the system
will read the list to you.
For a listing of all voice commands, see
Voice Command Index on page144.Trip Computer
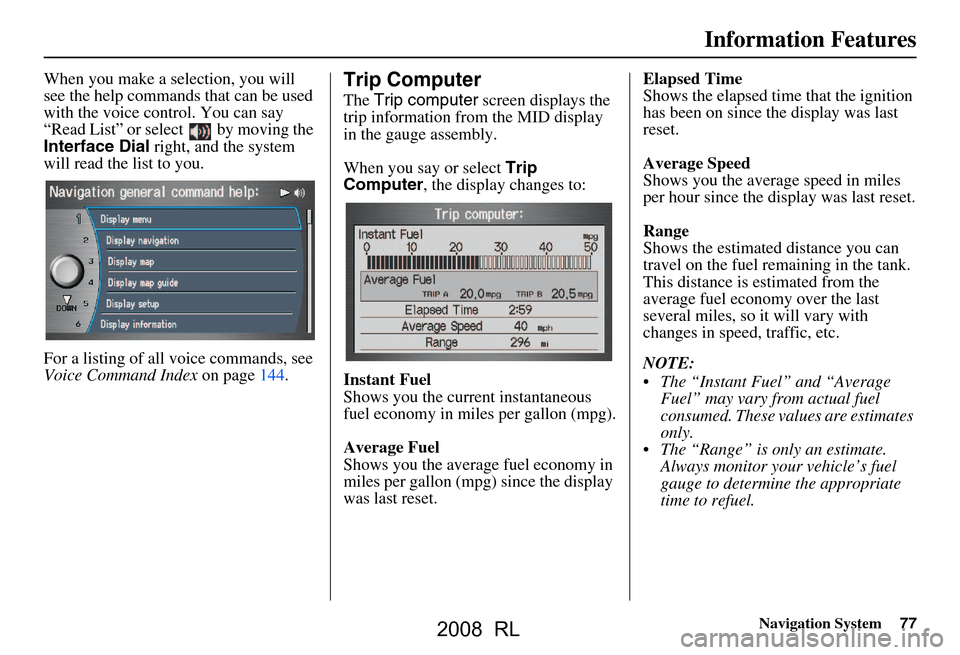
The Trip computer screen displays the
trip information from the MID display
in the gauge assembly.
When you say or select Trip
Computer , the display changes to:
Instant Fuel
Shows you the current instantaneous
fuel economy in miles per gallon (mpg).
Average Fuel
Shows you the averag e fuel economy in
miles per gallon (mpg) since the display
was last reset. Elapsed Time
Shows the elapsed tim
e that the ignition
has been on since the display was last
reset.
Average Speed
Shows you the averag e speed in miles
per hour since the display was last reset.
Range
Shows the estimated distance you can
travel on the fuel re maining in the tank.
This distance is estimated from the
average fuel economy over the last
several miles, so it will vary with
changes in speed, traffic, etc.
NOTE:
The “Instant Fuel” and “Average Fuel” may vary from actual fuel
consumed. These values are estimates
only.
The “Range” is only an estimate. Always monitor your vehicle’s fuel
gauge to determine the appropriate
time to refuel.
2008 RL
Page 78 of 162
78Navigation System
Information Features
Map Legend
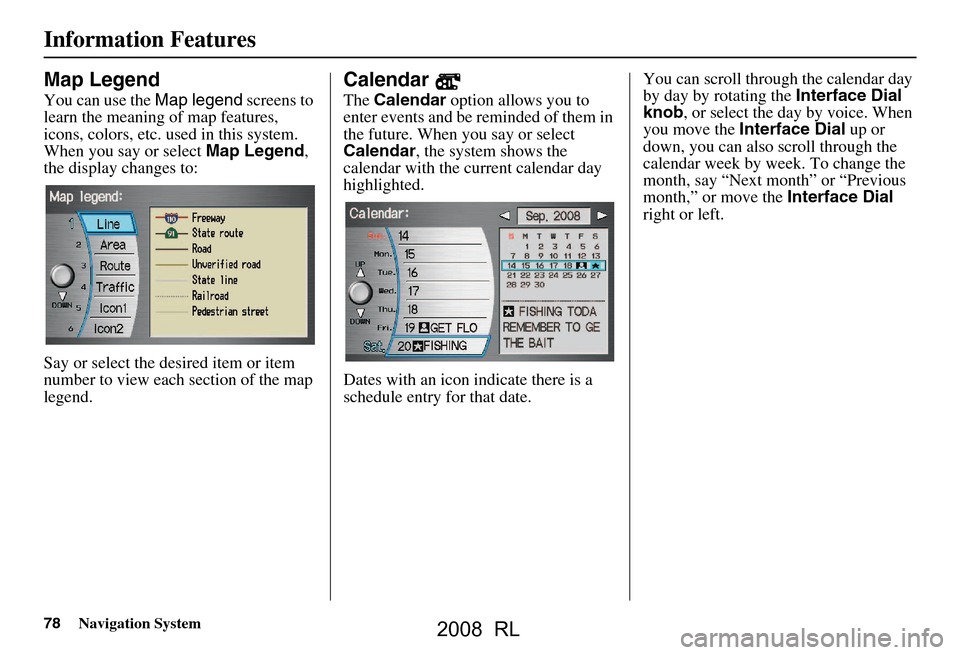
You can use the Map legend screens to
learn the meaning of map features,
icons, colors, etc. used in this system.
When you say or select Map Legend,
the display changes to:
Say or select the desired item or item
number to view each section of the map
legend.
Calendar
The Calendar option allows you to
enter events and be reminded of them in
the future. When yo u say or select
Calendar , the system shows the
calendar with the current calendar day
highlighted.
Dates with an icon indicate there is a
schedule entry for that date. You can scroll through the calendar day
by day by rotating the
Interface Dial
knob , or select the day by voice. When
you move the Interface Dial up or
down, you can also scroll through the
calendar week by week. To change the
month, say “Next month” or “Previous
month,” or move the Interface Dial
right or left.
2008 RL
Page 79 of 162
Navigation System79
Information Features
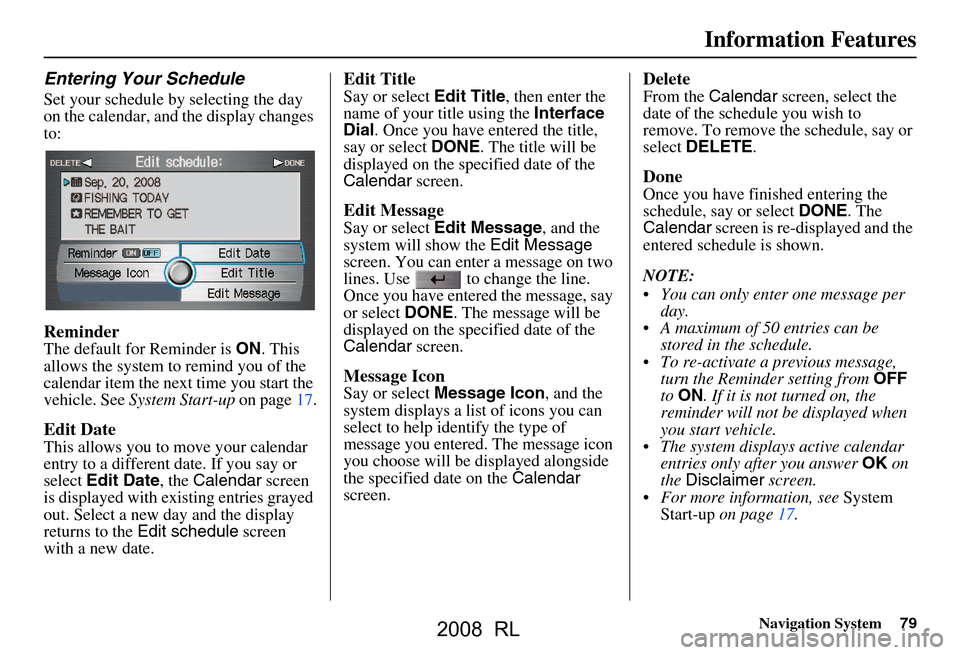
Entering Your Schedule
Set your schedule by selecting the day
on the calendar, and the display changes
to:
Reminder
The default for Reminder is ON. This
allows the system to remind you of the
calendar item the next time you start the
vehicle. See System Start-up on page17.
Edit Date
This allows you to move your calendar
entry to a different date. If you say or
select Edit Date , the Calendar screen
is displayed with existing entries grayed
out. Select a new day and the display
returns to the Edit schedule screen
with a new date.
Edit Title
Say or select Edit Title, then enter the
name of your title using the Interface
Dial . Once you have entered the title,
say or select DONE. The title will be
displayed on the specified date of the
Calendar screen.
Edit Message
Say or select Edit Message , and the
system will show the Edit Message
screen. You can enter a message on two
lines. Use to change the line.
Once you have entered the message, say
or select DONE. The message will be
displayed on the specified date of the
Calendar screen.
Message Icon
Say or select Message Icon , and the
system displays a list of icons you can
select to help identify the type of
message you entered. The message icon
you choose will be displayed alongside
the specified date on the Calendar
screen.
Delete
From the Calendar screen, select the
date of the schedule you wish to
remove. To remove the schedule, say or
select DELETE .
Done
Once you have finished entering the
schedule, say or select DONE. The
Calendar screen is re-displayed and the
entered schedule is shown.
NOTE:
You can only enter one message per day.
A maximum of 50 entries can be stored in the schedule.
To re-activate a previous message, turn the Reminder setting from OFF
to ON . If it is not turned on, the
reminder will not be displayed when
you start vehicle.
The system displays active calendar entries only after you answer OK on
the Disclaimer screen.
For more information, see System
Start-up on page17.
2008 RL
Page 80 of 162
80Navigation System
Information Features
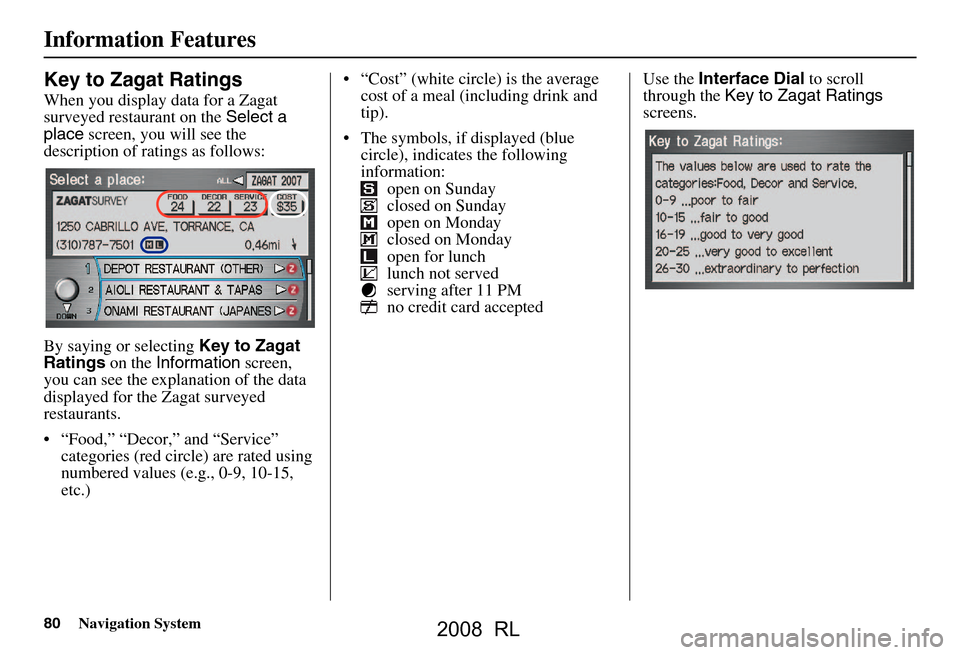
Key to Zagat Ratings
When you display data for a Zagat
surveyed restaurant on the Select a
place screen, you will see the
description of ratings as follows:
By saying or selecting Key to Zagat
Ratings on the Information screen,
you can see the explanation of the data
displayed for the Zagat surveyed
restaurants.
“Food,” “Decor,” and “Service” categories (red circle) are rated using
numbered values (e.g., 0-9, 10-15,
etc.) “Cost” (white circle) is the average
cost of a meal (including drink and
tip).
The symbols, if displayed (blue circle), indicates the following
information: open on Sunday
closed on Sunday
open on Monday
closed on Monday
open for lunch
lunch not served
serving after 11 PM
no credit card accepted Use the
Interface Dial to scroll
through the Key to Zagat Ratings
screens.
2008 RL