ECO mode Acura RLX 2014 Owner's Guide
[x] Cancel search | Manufacturer: ACURA, Model Year: 2014, Model line: RLX, Model: Acura RLX 2014Pages: 518, PDF Size: 15.83 MB
Page 121 of 518

uuLocking and Unlocking the DoorsuLocking/Unlocking the Doors from the Outside
120Controls
Fully insert the key and turn it.■Locking the front doors
Push the lock tab forward
a or push the
master door lock switch in the lock direction
b, and close the door.■Locking the rear doors
Push the lock tab forward and close the door.
■Lockout prevention system
The doors cannot be locked when the keyless access remote is inside the vehicle, and
any door is open.■
Locking/Unlocking the Doors Using a Key
1Locking/Unlocking the Doors Using a Key
When you lock the driver’s door with a key, all the
other doors lock at the same time. When unlocking,
the driver’s door unlocks first. Turn the key a second
time within a few seconds to unlock the remaining
doors.
You can customize the door unlock mode setting.
2Customized Features P. 102, 264
Lock
Unlock
■
Locking a Door Without Using a Key
1Locking a Door Without Using a Key
When you lock the driver’s door, all the other doors
lock at the same time.
Make sure you have the key in your hand before
locking the door to prevent it from being locked in
the vehicle.
Page 130 of 518
129
uuSecurity SystemuSecurity System Alarm
Controls
■Setting the security system alarm
The security system alarm automatically sets when the following conditions have
been met:
•The power mode is set to VEHICLE OFF (LOCK).
•The hood and trunk are closed.
•All doors are locked from outside with the key, remote transmitter or keyless
access system.■When the security system alarm sets
The security system indicator in the instrument panel blinks. When the blinking
interval changes after about 15 seconds, the security system is set.■To cancel the security system alarm
The security system is canceled when the vehicle is unlocked using the key or remote
transmitter, or you grab either front door
* or any door
* handle while carrying the
keyless access remote, or the power mode is set to ON. The security system indicator
goes off at the same time.
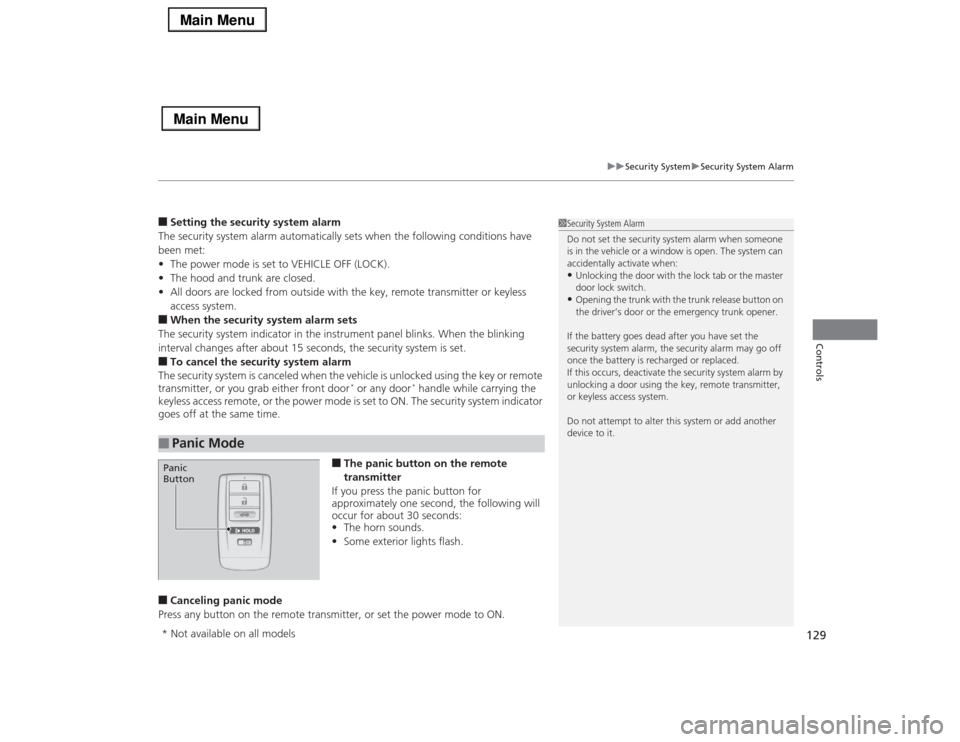
■The panic button on the remote
transmitter
If you press the panic button for
approximately one second, the following will
occur for about 30 seconds:
•The horn sounds.
•Some exterior lights flash.
■Canceling panic mode
Press any button on the remote transmitter, or set the power mode to ON.■
Panic Mode
1Security System Alarm
Do not set the security system alarm when someone
is in the vehicle or a window is open. The system can
accidentally activate when:•Unlocking the door with the lock tab or the master
door lock switch.•Opening the trunk with the trunk release button on
the driver’s door or the emergency trunk opener.
If the battery goes dead after you have set the
security system alarm, the security alarm may go off
once the battery is recharged or replaced.
If this occurs, deactivate the security system alarm by
unlocking a door using the key, remote transmitter,
or keyless access system.
Do not attempt to alter this system or add another
device to it.
Panic
Button* Not available on all models
Page 139 of 518

uuOperating the Switches Around the Steering WheeluLight Switches
138Controls
Automatic lighting control can be used when
the power mode is in ON.
When the light switch is in AUTO, the
headlights and other exterior lights will switch
on and off automatically depending on the
ambient brightness.
You can change the auto light sensitivity
setting.2Customized Features P. 102, 264
■
Automatic Lighting Control
1Automatic Lighting Control
We recommend that you turn on the lights manually
when driving at night, in a dense fog, or in dark areas
such as long tunnels or parking facilities.
The light sensor is in the location shown below.
Do not cover this light sensor with anything;
otherwise, the automatic lighting system may not
work properly.
Light Sensor
Models with automatic intermittent wipersLight SensorModels without automatic intermittent wipers
Page 140 of 518

139
uuOperating the Switches Around the Steering WheeluLight Switches
Controls
The headlights automatically come on when the wipers are used several times within
a certain intervals with the headlight switch in AUTO.
The headlights automatically go off a few minutes later if the wipers are stopped.
The headlights, all other exterior lights, and the instrument panel lights turn off 15
seconds after you set the power mode to VEHICLE OFF (LOCK), take the remote with
you, and close the driver's door.
If you set the power mode to VEHICLE OFF (LOCK) with the headlight switch on, but
do not open the door, the lights turn off after 10 minutes (three minutes, if the
switch is in the AUTO position).
The lights turn on again when you unlock or open the driver’s door. If you unlock
the door, but do not open it within 15 seconds, the lights go off. If you open the
driver’s door, you will hear a lights on reminder chime.■
Headlight Integration with Wipers
*
■
Automatic Lighting Off Feature
1Automatic Lighting Control
Adjust the auto light sensitivity as follows:
2Customized Features P. 102, 264
Setting
The exterior lights come on
when the ambient light is at
MAXHIGHMIDLOWMIN
Bright
Dark
1Headlight Integration with Wipers
*
This feature activates during the headlights are off in
AUTO.
The instrument panel brightness does not change
when the headlights come on.
When the ambient light is at dark, the automatic
lighting control feature overrides, and the headlights
come on with or without the wipers sweeping more
than several times.1Automatic Lighting Off Feature
You can change the headlight auto off timer setting.
2Customized Features P. 102, 264
* Not available on all models
Page 142 of 518
141
uuOperating the Switches Around the Steering WheeluWipers and Washers
Continued
Controls
Wipers and Washers
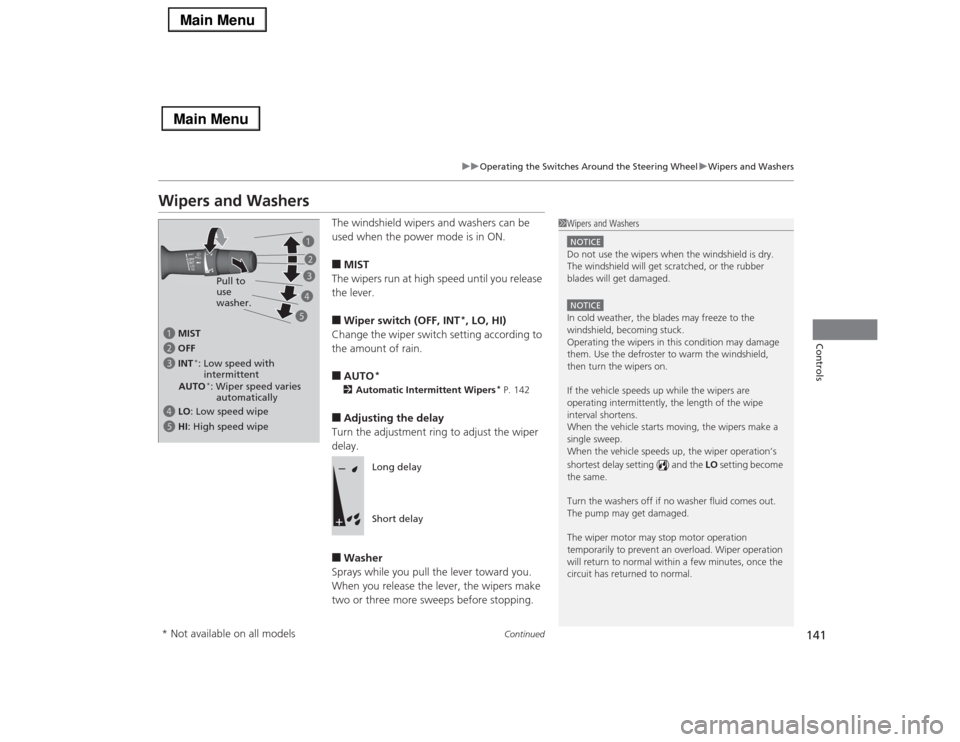
The windshield wipers and washers can be
used when the power mode is in ON.■MIST
The wipers run at high speed until you release
the lever.■Wiper switch (OFF, INT
*, LO, HI)
Change the wiper switch setting according to
the amount of rain.
■AUTO
*
2Automatic Intermittent Wipers
* P. 142
■Adjusting the delay
Turn the adjustment ring to adjust the wiper
delay.■Washer
Sprays while you pull the lever toward you.
When you release the lever, the wipers make
two or three more sweeps before stopping.
1Wipers and WashersNOTICEDo not use the wipers when the windshield is dry.
The windshield will get scratched, or the rubber
blades will get damaged.NOTICEIn cold weather, the blades may freeze to the
windshield, becoming stuck.
Operating the wipers in this condition may damage
them. Use the defroster to warm the windshield,
then turn the wipers on.
If the vehicle speeds up while the wipers are
operating intermittently, the length of the wipe
interval shortens.
When the vehicle starts moving, the wipers make a
single sweep.
When the vehicle speeds up, the wiper operation’s
shortest delay setting ( ) and the LO setting become
the same.
Turn the washers off if no washer fluid comes out.
The pump may get damaged.
The wiper motor may stop motor operation
temporarily to prevent an overload. Wiper operation
will return to normal within a few minutes, once the
circuit has returned to normal.
a MIST
c INT
*: Low speed with
intermittent b OFF
d LO: Low speed wipe
e HI: High speed wipePull to
use
washer.a
b
c
d
e
AUTO*: Wiper speed varies
automatically
Long delay
Short delay
* Not available on all models
Page 145 of 518
144
uuOperating the Switches Around the Steering WheeluBrightness Control
Controls
Brightness Control
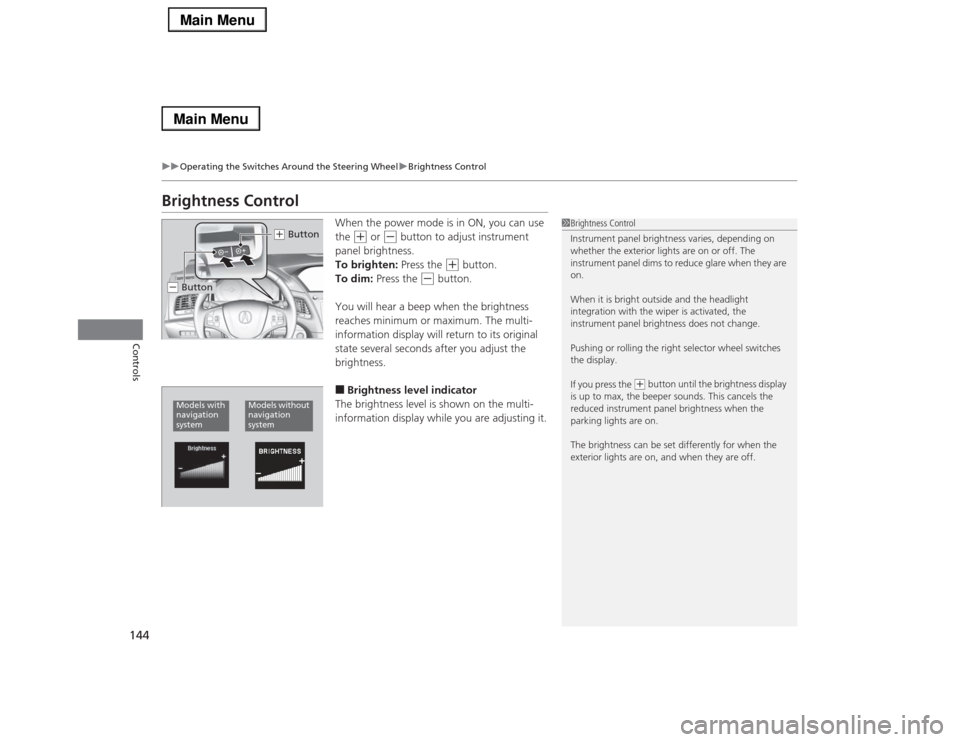
When the power mode is in ON, you can use
the
(+
or
(-
button to adjust instrument
panel brightness.
To brighten: Press the
(+
button.
To dim: Press the
(-
button.
You will hear a beep when the brightness
reaches minimum or maximum. The multi-
information display will return to its original
state several seconds after you adjust the
brightness.
■Brightness level indicator
The brightness level is shown on the multi-
information display while you are adjusting it.
1Brightness Control
Instrument panel brightness varies, depending on
whether the exterior lights are on or off. The
instrument panel dims to reduce glare when they are
on.
When it is bright outside and the headlight
integration with the wiper is activated, the
instrument panel brightness does not change.
Pushing or rolling the right selector wheel switches
the display.
If you press the
(+ button until the brightness display
is up to max, the beeper sounds. This cancels the
reduced instrument panel brightness when the
parking lights are on.
The brightness can be set differently for when the
exterior lights are on, and when they are off.
(+ Button
(- ButtonModels with
navigation
system
Models without
navigation
system
Page 148 of 518
147
uuOperating the Switches Around the Steering WheeluDriving Position Memory System
Controls
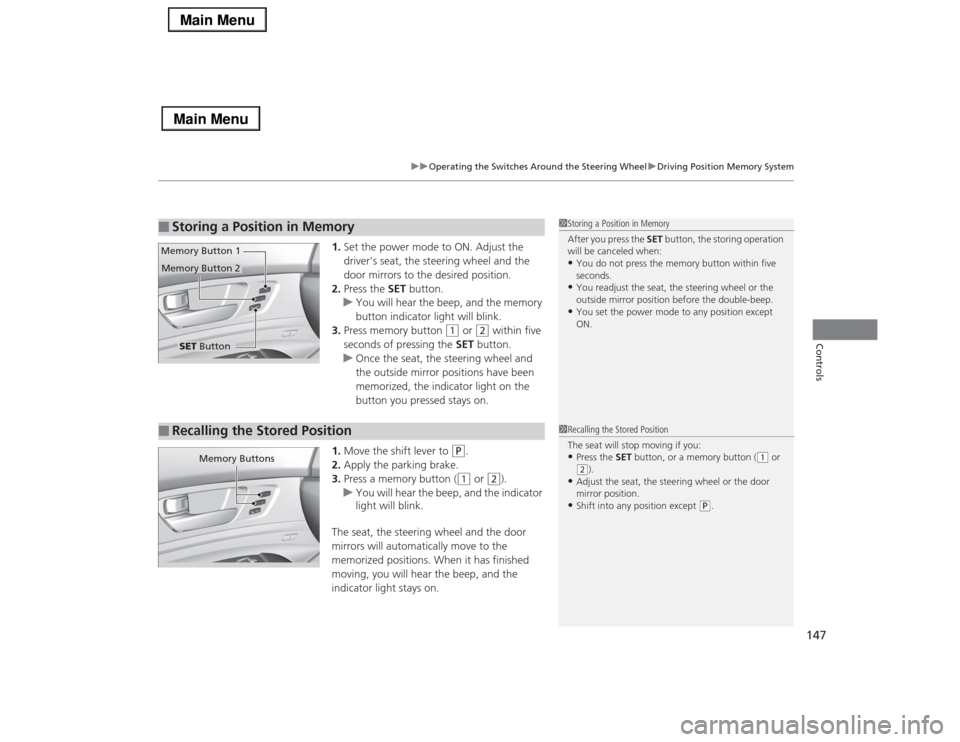
1.Set the power mode to ON. Adjust the
driver’s seat, the steering wheel and the
door mirrors to the desired position.
2.Press the SET button.
uYou will hear the beep, and the memory
button indicator light will blink.
3.Press memory button
(1
or
(2
within five
seconds of pressing the SET button.
uOnce the seat, the steering wheel and
the outside mirror positions have been
memorized, the indicator light on the
button you pressed stays on.
1.Move the shift lever to
(P
.
2.Apply the parking brake.
3.Press a memory button ((1
or
(2
).
uYou will hear the beep, and the indicator
light will blink.
The seat, the steering wheel and the door
mirrors will automatically move to the
memorized positions. When it has finished
moving, you will hear the beep, and the
indicator light stays on.
■
Storing a Position in Memory
1Storing a Position in Memory
After you press the SET button, the storing operation
will be canceled when:•You do not press the memory button within five
seconds.•You readjust the seat, the steering wheel or the
outside mirror position before the double-beep.•You set the power mode to any position except
ON.
SET Button Memory Button 1
Memory Button 2■
Recalling the Stored Position
1Recalling the Stored Position
The seat will stop moving if you:•Press the SET button, or a memory button (
(1 or
(2).
•Adjust the seat, the steering wheel or the door
mirror position.•Shift into any position except
(P.
Memory Buttons
Page 160 of 518
159
Continued
Controls
Interior Lights/Interior Convenience ItemsInterior Lights
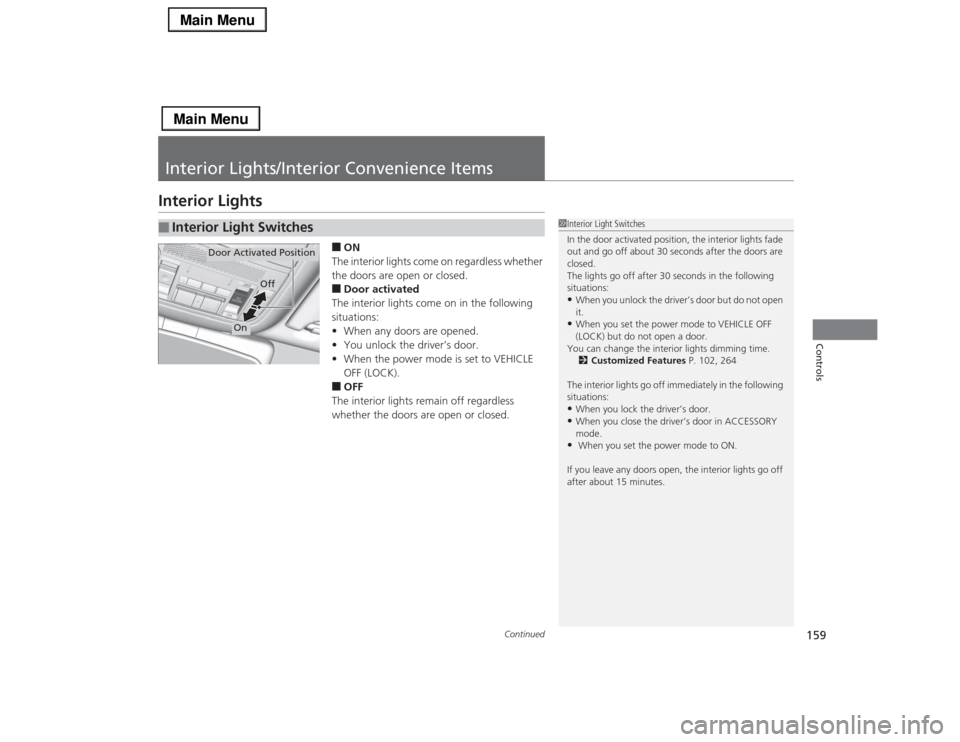
■ON
The interior lights come on regardless whether
the doors are open or closed.■Door activated
The interior lights come on in the following
situations:
•When any doors are opened.
•You unlock the driver’s door.
•When the power mode is set to VEHICLE
OFF (LOCK).■OFF
The interior lights remain off regardless
whether the doors are open or closed.
■
Interior Light Switches
1Interior Light Switches
In the door activated position, the interior lights fade
out and go off about 30 seconds after the doors are
closed.
The lights go off after 30 seconds in the following
situations:•When you unlock the driver’s door but do not open
it.•When you set the power mode to VEHICLE OFF
(LOCK) but do not open a door.
You can change the interior lights dimming time.
2Customized Features P. 102, 264
The interior lights go off immediately in the following
situations:•When you lock the driver’s door.•When you close the driver’s door in ACCESSORY
mode.• When you set the power mode to ON.
If you leave any doors open, the interior lights go off
after about 15 minutes.
Door Activated Position
Off
On
Page 182 of 518
Continued
181
uuClimate Control SystemuUsing Automatic Climate Control
Controls
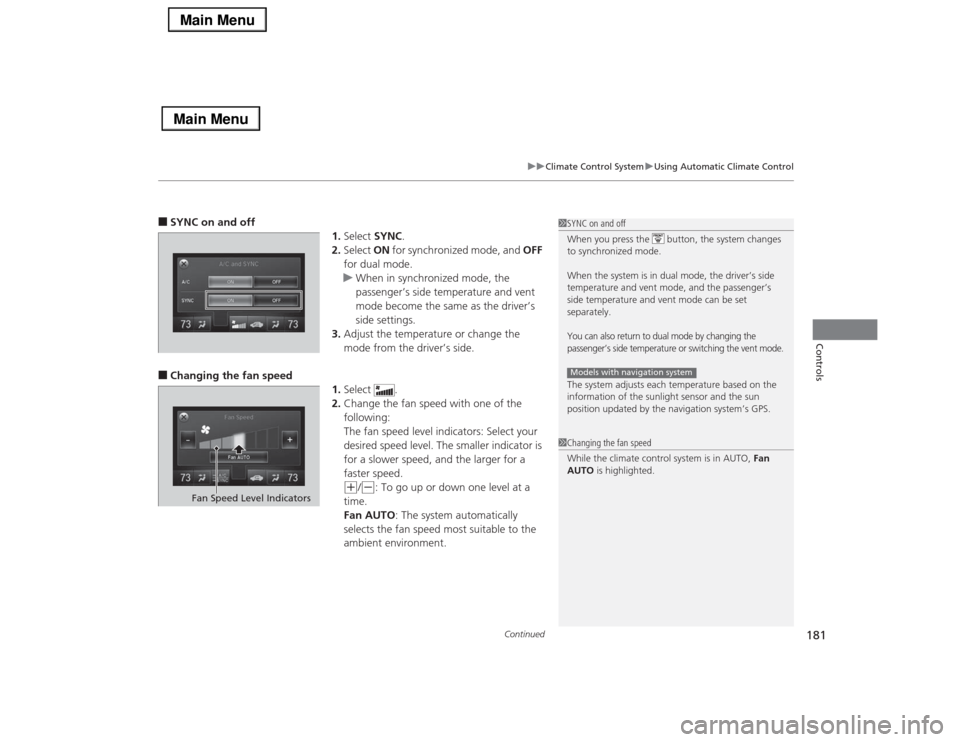
■SYNC on and off
1.Select SYNC.
2.Select ON for synchronized mode, and OFF
for dual mode.
uWhen in synchronized mode, the
passenger’s side temperature and vent
mode become the same as the driver’s
side settings.
3.Adjust the temperature or change the
mode from the driver’s side.■Changing the fan speed
1.Select .
2.Change the fan speed with one of the
following:
The fan speed level indicators: Select your
desired speed level. The smaller indicator is
for a slower speed, and the larger for a
faster speed.
(+
/(-
: To go up or down one level at a
time.
Fan AUTO: The system automatically
selects the fan speed most suitable to the
ambient environment.
1SYNC on and off
When you press the button, the system changes
to synchronized mode.
When the system is in dual mode, the driver’s side
temperature and vent mode, and the passenger’s
side temperature and vent mode can be set
separately.You can also return to dual mode by changing the
passenger’s side temperature or switching the vent mode.The system adjusts each temperature based on the
information of the sunlight sensor and the sun
position updated by the navigation system’s GPS.Models with navigation system1Changing the fan speed
While the climate control system is in AUTO, Fan
AUTO is highlighted.
Fan Speed Level Indicators
Page 188 of 518
187
Features
This chapter describes how to operate technology features.
Audio System
About Your Audio System ................ 188
USB Port .......................................... 189
Auxiliary Input Jack .......................... 190
Audio System Theft Protection ......... 191
Audio Remote Controls .................... 192
Audio System Basic Operation........ 193
On Demand Multi-Use Display
TM....... 194
Audio/Information Screen ................ 203
Adjusting the Sound ........................ 207
Display Setup ................................... 208
Voice Control Operation .................. 209
Playing AM/FM Radio ....................... 217Playing XM® Radio ........................... 222
Playing a CD .................................... 225
Playing Hard Disc Drive (HDD) Audio .... 228Playing an iPod®............................... 238
Song By Voice
TM (SBV) ...................... 242
Playing Internet Radio ...................... 246
Playing a USB Flash Drive ................. 249
Playing Bluetooth® Audio................. 252
Audio Error Messages
CD Player ......................................... 254
Hard Disc Drive (HDD) Audio ............ 255
iPod®/USB Flash Drive....................... 256
Pandora®......................................... 257
Aha
TM Radio ..................................... 259
General Information on the Audio SystemXM® Radio Service ........................... 260
Recommended CDs ......................... 261Compatible iPod
®, iPhone
®, and USB Flash
Drives .................................................... 263
Customized Features
............................264
Defaulting All the Settings........................ 283
Deleting all HDD Data .............................. 284HomeLink
® Universal Transceiver
.......285
Bluetooth® HandsFreeLink®
Using HFL ........................................ 287
HFL Menus ...................................... 289AcuraLink
®*...........................................327
* Not available on all models