display Acura RLX 2017 Workshop Manual
[x] Cancel search | Manufacturer: ACURA, Model Year: 2017, Model line: RLX, Model: Acura RLX 2017Pages: 557, PDF Size: 37.97 MB
Page 184 of 557
Continued183
uuClimate Control System uUsing Automatic Climate Control
Controls
■Changing the interior temperature setting
1.Select the driver’s or passenger’s side
temperature control.
2. Change the temperature setting from the
following:
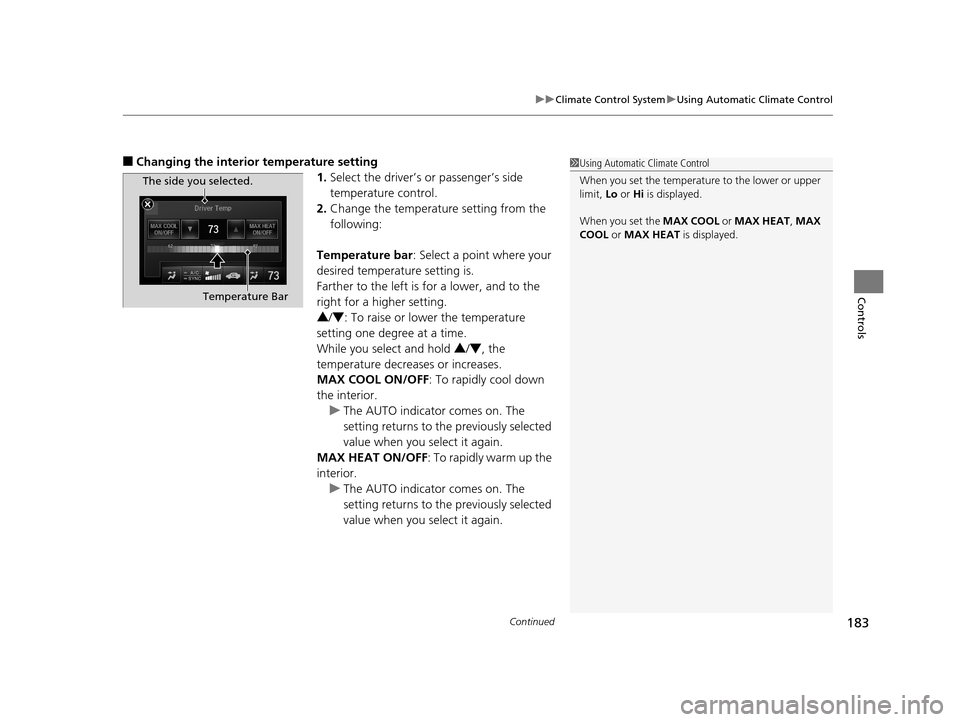
Temperature bar : Select a point where your
desired temperature setting is.
Farther to the left is for a lower, and to the
right for a higher setting.
3 /4 : To raise or lower the temperature
setting one degree at a time.
While you select and hold 3 /4 , the
temperature decreases or increases.
MAX COOL ON/OFF : To rapidly cool down
the interior. u The AUTO indicator comes on. The
setting returns to the previously selected
value when you select it again.
MAX HEAT ON/OFF : To rapidly warm up the
interior.
u The AUTO indicator comes on. The
setting returns to the previously selected
value when you select it again.1Using Automatic Climate Control
When you set the temperature to the lower or upper
limit, Lo or Hi is displayed.
When you set the MAX COOL or MAX HEAT , MAX
COOL or MAX HEAT is displayed.
The side you selected.
Temperature Bar
17 ACURA RLX-31TY26300.book 183 ページ 2016年6月17日 金曜日 午前8時12分
Page 192 of 557
191
Features
This chapter describes how to operate technology features.
Audio SystemAbout Your Audio System ................ 192
USB Port .......................................... 193
Auxiliary Input Jack .......................... 193
Audio System Theft Protection ......... 194
Audio Remote Controls .................... 195
Audio System Basic Operation ........ 196
On Demand Multi-Use Display
TM....... 197
Audio/Information Screen ................ 205
Adjusting the Sound ........................ 209
Display Setup ................................... 210
Voice Control Operation .................. 211
Playing AM/FM Radio ....................... 216 Playing SiriusXM
® Radio ................... 221
Playing a CD .................................... 224
Playing Hard Disk Drive (HDD) Audio .... 227Playing an iPod ................................ 237
Song By VoiceTM (SBV) ...................... 241
Playing Internet Radio ...................... 245
Playing a USB Flash Drive ................. 248
Playing Bluetooth ® Audio................. 251
Audio Error Messages CD Player ......................................... 253
Hard Disk Drive (HDD) Audio............ 254
iPod/USB Flash Drive ........................ 255
Pandora ®......................................... 256
Aha
TM Radio ..................................... 257
General Information on the Audio SystemSiriusXM ® Radio Service ................... 258
Recommended CDs ......................... 259
Compatible iPod, iPhone, and USB Flash Drives ................................................261
Customized Features............................262Defaulting All th e Settings........................ 286
Deleting all HDD Data .............................. 287
HomeLink® Universal Transceiver.......288Bluetooth® HandsFreeLink®
Using HFL ........................................ 290
HFL Menus ...................................... 292
AcuraLink®............................................330
17 ACURA RLX-31TY26300.book 191 ページ 2016年6月17日 金曜日 午前8時12分
Page 194 of 557
193
uuAudio System uUSB Port
Features
USB Port
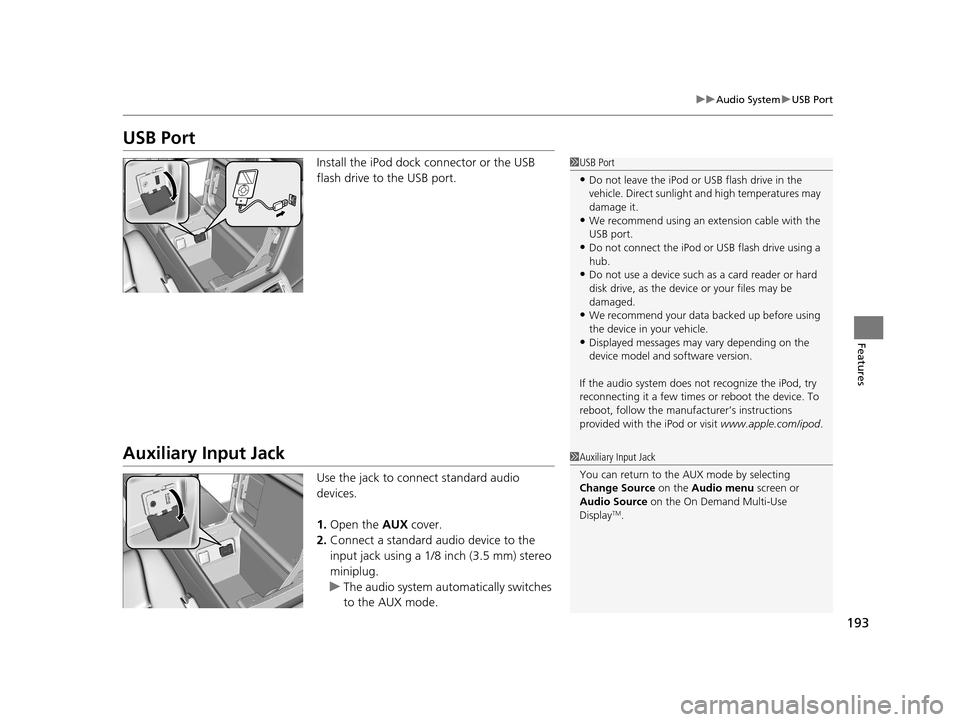
Install the iPod dock connector or the USB
flash drive to the USB port.
Auxiliary Input Jack
Use the jack to connect standard audio
devices.
1. Open the AUX cover.
2. Connect a standard audio device to the
input jack using a 1/8 inch (3.5 mm) stereo
miniplug.
u The audio system auto matically switches
to the AUX mode.
1 USB Port
•Do not leave the iPod or USB flash drive in the
vehicle. Direct sunlight and high temperatures may
damage it.
•We recommend using an extension cable with the
USB port.
•Do not connect the iPod or USB flash drive using a
hub.
•Do not use a device such as a card reader or hard
disk drive, as the device or your files may be
damaged.
•We recommend your data backed up before using
the device in your vehicle.
•Displayed messages may vary depending on the
device model and software version.
If the audio system does not recognize the iPod, try
reconnecting it a few times or reboot the device. To
reboot, follow the manufac turer’s instructions
provided with the iPod or visit www.apple.com/ipod.
1Auxiliary Input Jack
You can return to the AUX mode by selecting
Change Source on the Audio menu screen or
Audio Source on the On Demand Multi-Use
Display
TM.
17 ACURA RLX-31TY26300.book 193 ページ 2016年6月17日 金曜日 午前8時12分
Page 195 of 557
194
uuAudio System uAudio System Theft Protection
Features
Audio System Theft Protection
The audio system is disabled when it is di sconnected from the power source, such as
when the battery is disconnected or goes dead. In certain conditions, the system
may display Enter code. If this occurs, reactivate the audio system.
■Reactivating the audio system
1. Set the power mode to ON.
2. Turn on the audio system.
3. Press and hold the audio system power button for more than two seconds.
u The audio system is reac tivated when the audio co ntrol unit establishes a
connection with the vehicle control unit. If the control unit fails to recognize
the audio unit, you must go to a dealer and have the audio unit checked.
17 ACURA RLX-31TY26300.book 194 ページ 2016年6月17日 金曜日 午前8時12分
Page 197 of 557
196
Features
Audio System Basic Operation
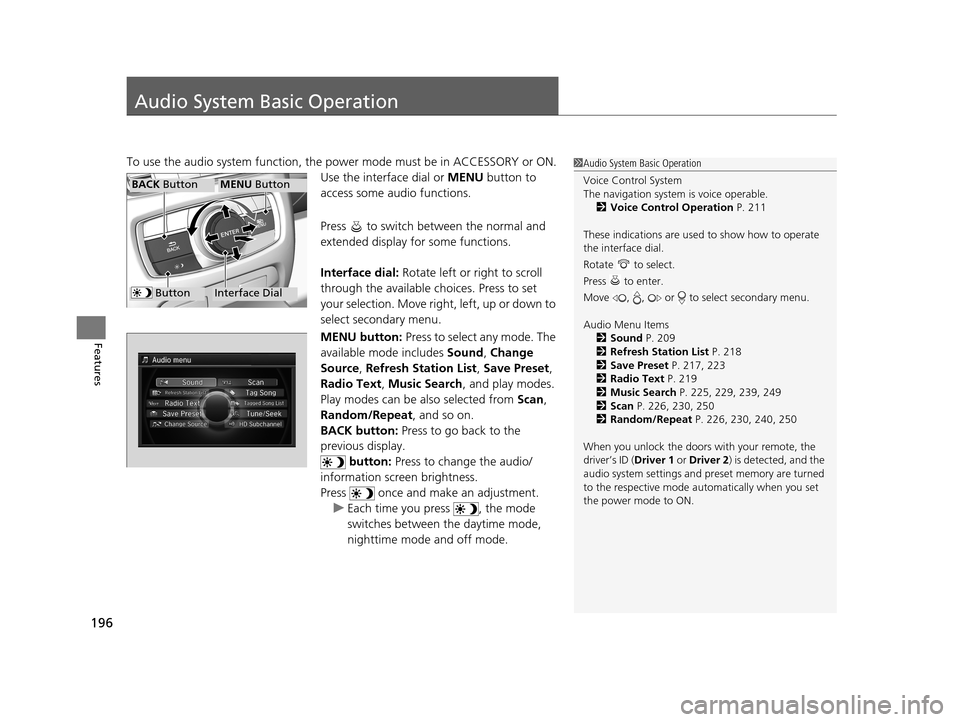
To use the audio system function, the power mode must be in ACCESSORY or ON.
Use the interface dial or MENU button to
access some audio functions.
Press to switch between the normal and
extended display fo r some functions.
Interface dial: Rotate left or right to scroll
through the available choices. Press to set
your selection. Move right, left, up or down to
select secondary menu.
MENU button: Press to select any mode. The
available mode includes Sound, Change
Source , Refresh Station List , Save Preset ,
Radio Text, Music Search , and play modes.
Play modes can be also selected from Scan,
Random/Repeat , and so on.
BACK button: Press to go back to the
previous display.
button: Press to change the audio/
information screen brightness.
Press once and make an adjustment. u Each time you press , the mode
switches between the daytime mode,
nighttime mode and off mode.1Audio System Basic Operation
Voice Control System
The navigation system is voice operable.
2 Voice Control Operation P. 211
These indications are used to show how to operate
the interface dial.
Rotate to select.
Press to enter.
Move , , or to select secondary menu.
Audio Menu Items 2 Sound P. 209
2 Refresh Station List P. 218
2 Save Preset P. 217, 223
2 Radio Text P. 219
2 Music Search P. 225, 229, 239, 249
2 Scan P. 226, 230, 250
2 Random/Repeat P. 226, 230, 240, 250
When you unlock the doors with your remote, the
driver’s ID ( Driver 1 or Driver 2) is detected, and the
audio system settings and pr eset memory are turned
to the respective mode automatically when you set
the power mode to ON.
Interface Dial
MENU ButtonBACK Button
Button
17 ACURA RLX-31TY26300.book 196 ページ 2016年6月17日 金曜日 午前8時12分
Page 198 of 557
197
uuAudio System Basic Operation uOn Demand Multi-Use DisplayTM
Continued
Features
On Demand Multi-Use DisplayTM
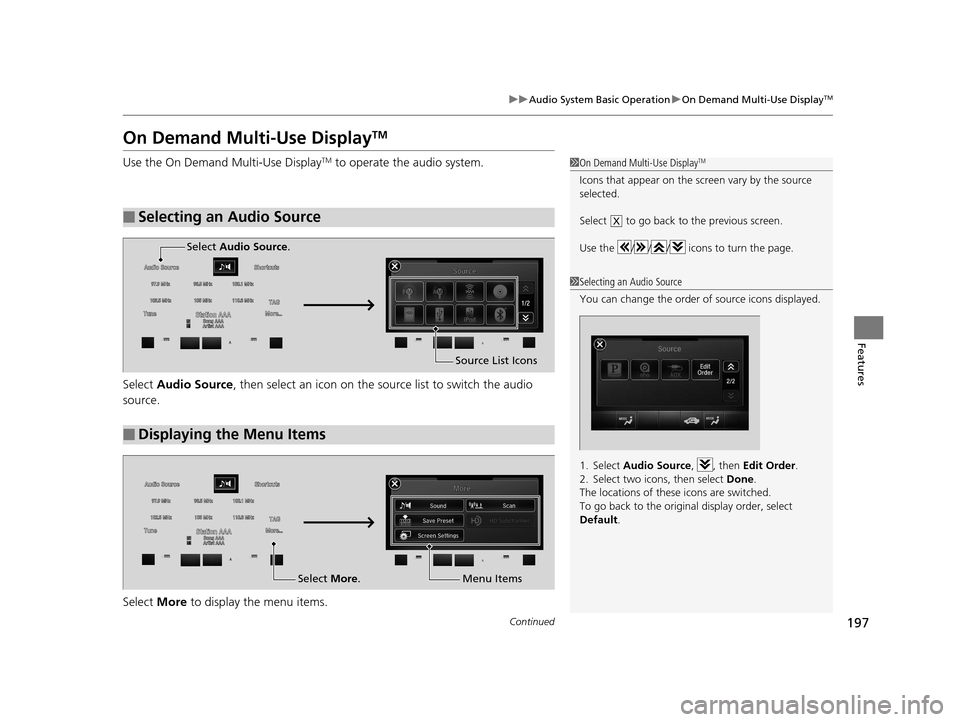
Use the On Demand Multi-Use DisplayTM to operate the audio system.
Select Audio Source , then select an icon on the s ource list to switch the audio
source.
Select More to display the menu items.
■Selecting an Audio Source
1On Demand Multi-Use DisplayTM
Icons that appear on the sc reen vary by the source
selected.
Select to go back to the previous screen.
Use the / / / icons to turn the page.
X
1 Selecting an Audio Source
You can change the order of source icons displayed.
1. Select Audio Source , , then Edit Order .
2. Select two icons, then select Done.
The locations of these icons are switched.
To go back to the original display order, select
Default .
■Displaying the Menu Items
Select Audio Source .
Source List Icons
Select More. Menu Items
17 ACURA RLX-31TY26300.book 197 ページ 2016年6月17日 金曜日 午前8時12分
Page 199 of 557
uuAudio System Basic Operation uOn Demand Multi-Use DisplayTM
198
Features
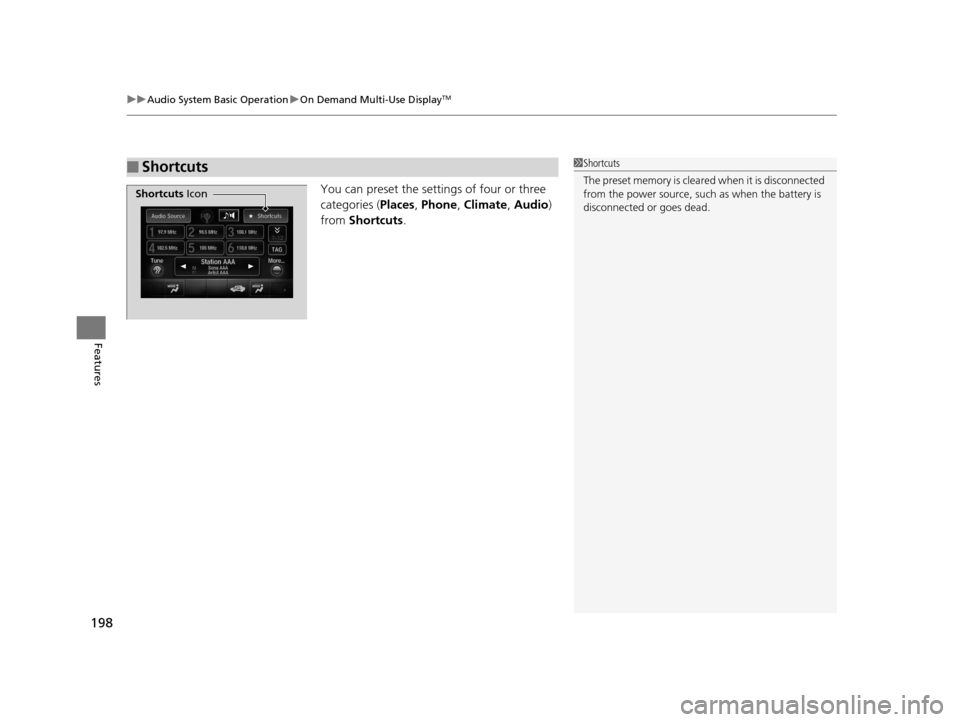
You can preset the settings of four or three
categories ( Places, Phone , Climate , Audio)
from Shortcuts.
■Shortcuts1Shortcuts
The preset memory is cleare d when it is disconnected
from the power source, such as when the battery is
disconnected or goes dead.
Shortcuts Icon
17 ACURA RLX-31TY26300.book 198 ページ 2016年6月17日 金曜日 午前8時12分
Page 200 of 557
Continued199
uuAudio System Basic Operation uOn Demand Multi-Use DisplayTM
Features
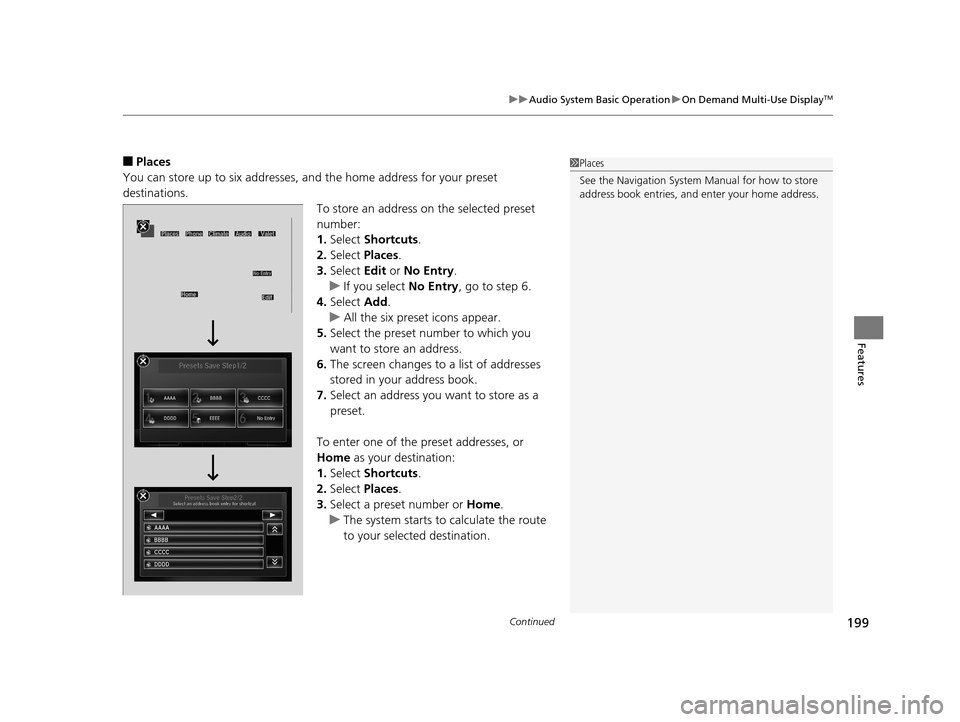
■Places
You can store up to six addresses, an d the home address for your preset
destinations.
To store an address on the selected preset
number:
1.Select Shortcuts .
2. Select Places .
3. Select Edit or No Entry .
u If you select No Entry, go to step 6.
4. Select Add.
u All the six preset icons appear.
5. Select the preset number to which you
want to store an address.
6. The screen changes to a list of addresses
stored in your address book.
7. Select an address you want to store as a
preset.
To enter one of the preset addresses, or
Home as your destination:
1. Select Shortcuts .
2. Select Places .
3. Select a preset number or Home.
u The system starts to calculate the route
to your selected destination.1Places
See the Navigation System Manual for how to store
address book entries, and enter your home address.
17 ACURA RLX-31TY26300.book 199 ページ 2016年6月17日 金曜日 午前8時12分
Page 201 of 557
200
uuAudio System Basic Operation uOn Demand Multi-Use DisplayTM
Features
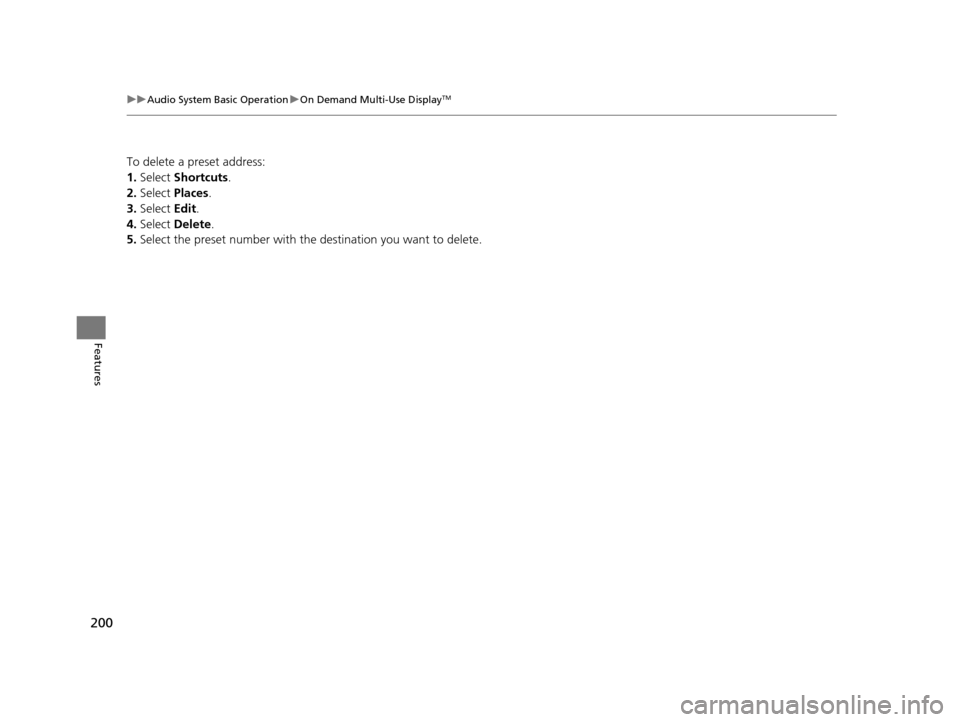
To delete a preset address:
1. Select Shortcuts .
2. Select Places .
3. Select Edit.
4. Select Delete.
5. Select the preset number with the destination you want to delete.
17 ACURA RLX-31TY26300.book 200 ページ 2016年6月17日 金曜日 午前8時12分
Page 202 of 557
Continued201
uuAudio System Basic Operation uOn Demand Multi-Use DisplayTM
Features
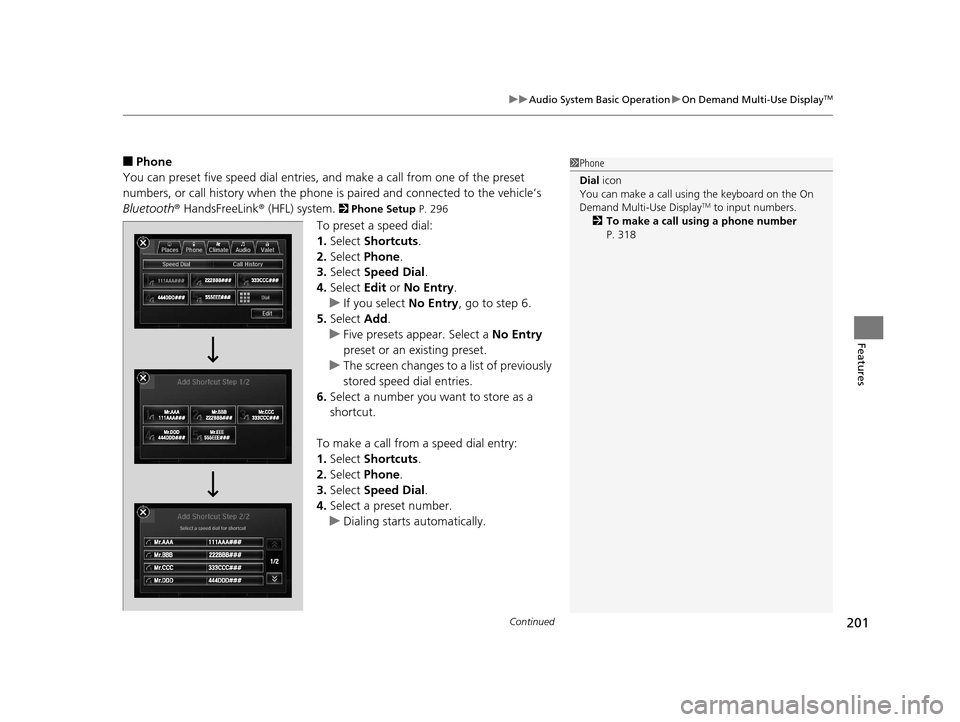
■Phone
You can preset five speed dial entries, and make a call from one of the preset
numbers, or call history when the phone is paired and connected to the vehicle‘s
Bluetooth ® HandsFreeLink ® (HFL) system.
2 Phone Setup P. 296
To preset a speed dial:
1.Select Shortcuts .
2. Select Phone.
3. Select Speed Dial .
4. Select Edit or No Entry .
u If you select No Entry, go to step 6.
5. Select Add.
u Five presets appear. Select a No Entry
preset or an existing preset.
u The screen changes to a list of previously
stored speed dial entries.
6. Select a number you want to store as a
shortcut.
To make a call from a speed dial entry:
1. Select Shortcuts .
2. Select Phone.
3. Select Speed Dial .
4. Select a preset number.
u Dialing starts automatically.
1Phone
Dial icon
You can make a call using the keyboard on the On
Demand Multi-Use Display
TM to input numbers.
2 To make a call using a phone number
P. 318
17 ACURA RLX-31TY26300.book 201 ページ 2016年6月17日 金曜日 午前8時12分