navigation Acura RLX 2017 Owner's Manual
[x] Cancel search | Manufacturer: ACURA, Model Year: 2017, Model line: RLX, Model: Acura RLX 2017Pages: 557, PDF Size: 37.97 MB
Page 5 of 557
4
Quick Reference Guide
Quick Reference Guide
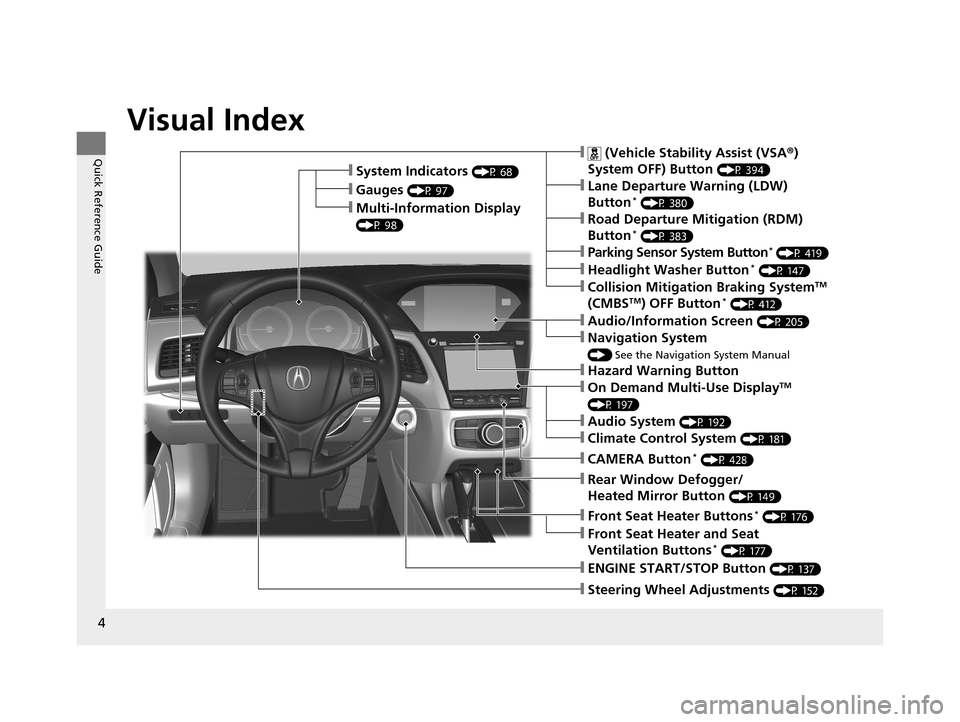
Visual Index
❙Steering Wheel Adjustments (P 152)
❙ENGINE START/STOP Button (P 137)
❙ (Vehicle Stability Assist (VSA®)
System OFF) Button
(P 394)
❙Lane Departure Warning (LDW)
Button* (P 380)
❙Parking Sensor System Button* (P 419)
❙Collision Mitigation Braking SystemTM
(CMBSTM) OFF Button* (P 412)
❙Navigation System
() See the Navigation System Manual
❙Audio/Information Screen (P 205)
❙Hazard Warning Button
❙On Demand Multi-Use DisplayTM
(P 197)
❙Audio System (P 192)
❙System Indicators (P 68)
❙Gauges (P 97)
❙Multi-Information Display
(P 98)
❙Climate Control System (P 181)
❙Rear Window Defogger/
Heated Mirror Button
(P 149)
❙Headlight Washer Button* (P 147)
❙Front Seat Heater and Seat
Ventilation Buttons* (P 177)
❙Road Departure Mitigation (RDM)
Button* (P 383)
❙CAMERA Button* (P 428)
❙Front Seat Heater Buttons* (P 176)
17 ACURA RLX-31TY26300.book 4 ページ 2016年6月17日 金曜日 午前8時12分
Page 12 of 557
11
Quick Reference Guide
Controls (P 113)
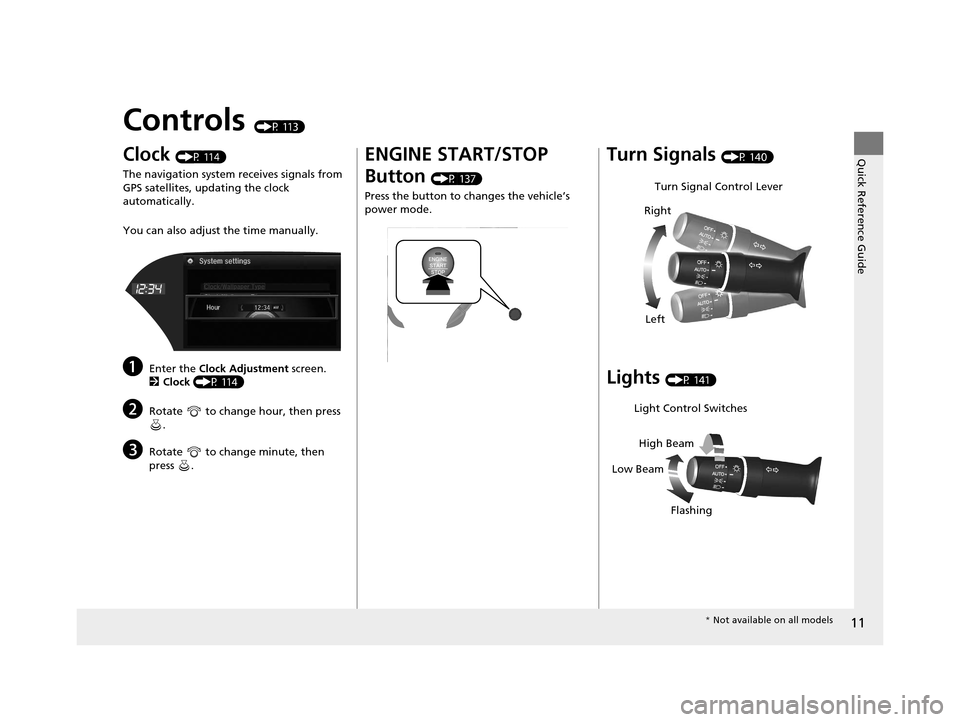
Clock (P 114)
The navigation system receives signals from
GPS satellites, updating the clock
automatically.
You can also adjust the time manually.
aEnter the Clock Adjustment screen.
2 Clock (P 114)
bRotate to change hour, then press
.
cRotate to change minute, then
press .
ENGINE START/STOP
Button
(P 137)
Press the button to ch anges the vehicle’s
power mode.
Turn Signals (P 140)
Lights (P 141)
Turn Signal Control Lever
Right
Left
Light Control Switches
Low Beam High Beam
Flashing
* Not available on all models
17 ACURA RLX-31TY26300.book 11 ページ 2016年6月17日 金曜日 午前8時12分
Page 102 of 557
Continued101
uuGauges and Multi-Information Display uMulti-Information Display
Instrument Panel
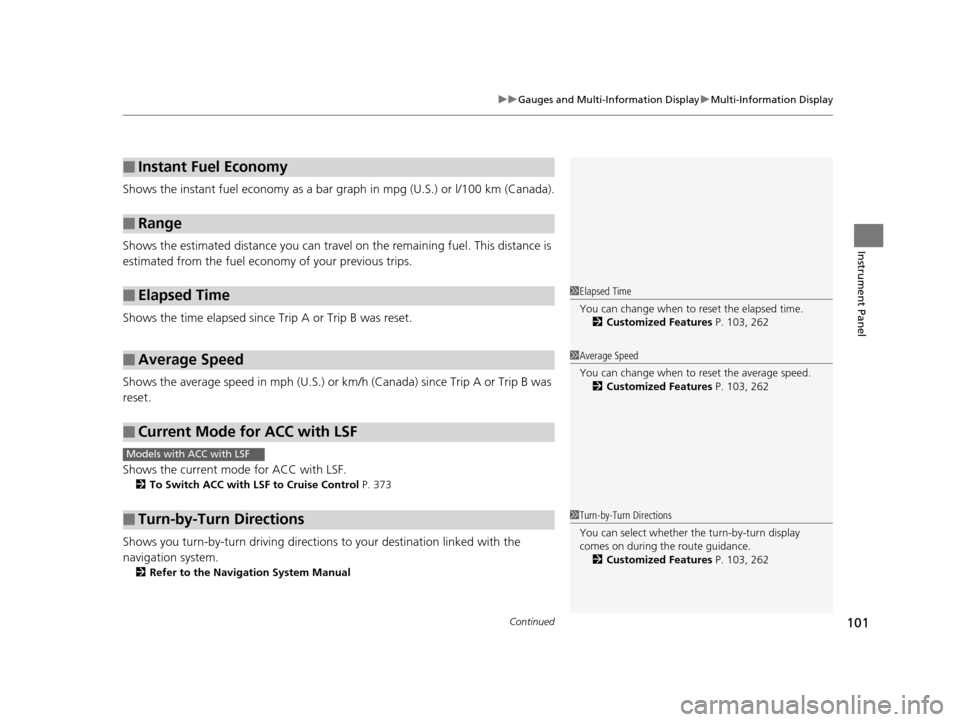
Shows the instant fuel economy as a bar gr aph in mpg (U.S.) or l/100 km (Canada).
Shows the estimated distance you can travel on the remaining fuel. This distance is
estimated from the fuel economy of your previous trips.
Shows the time elapsed since Trip A or Trip B was reset.
Shows the average speed in mph (U.S.) or km/h (Canada) since Trip A or Trip B was
reset.
Shows the current mode for ACC with LSF.
2 To Switch ACC with LSF to Cruise Control P. 373
Shows you turn-by-turn driv ing directions to your destination linked with the
navigation system.
2 Refer to the Navigation System Manual
■Instant Fuel Economy
■Range
■Elapsed Time
■Average Speed
■Current Mode for ACC with LSF
■Turn-by-Turn Directions
1Elapsed Time
You can change when to reset the elapsed time.
2 Customized Features P. 103, 262
1Average Speed
You can change when to reset the average speed.
2 Customized Features P. 103, 262
Models with ACC with LSF
1Turn-by-Turn Directions
You can select whether the turn-by-turn display
comes on during the route guidance.
2 Customized Features P. 103, 262
17 ACURA RLX-31TY26300.book 101 ページ 2016年6月17日 金曜日 午前8時12分
Page 115 of 557
114
Controls
Clock
Adjusting the Clock
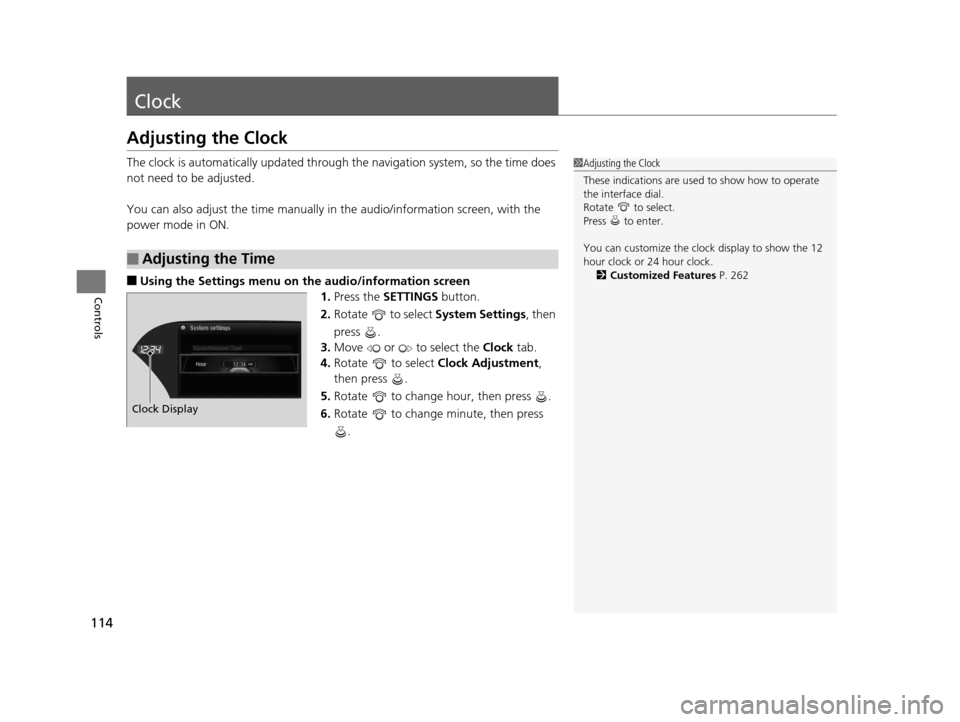
The clock is automatically updated through the navigation system, so the time does
not need to be adjusted.
You can also adjust the time manually in the audio/information screen, with the
power mode in ON.
■Using the Settings menu on th e audio/information screen
1. Press the SETTINGS button.
2. Rotate to select System Settings, then
press .
3. Move or to select the Clock tab.
4. Rotate to select Clock Adjustment,
then press .
5. Rotate to change hour, then press .
6. Rotate to change minute, then press
.
■Adjusting the Time
1Adjusting the Clock
These indications are used to show how to operate
the interface dial.
Rotate to select.
Press to enter.
You can customize the clock display to show the 12
hour clock or 24 hour clock. 2 Customized Features P. 262
Hour
Clock/Wallpaper Type
System settings
Clock Display
17 ACURA RLX-31TY26300.book 114 ページ 2016年6月17日 金曜日 午前8時12分
Page 167 of 557
uuInterior Lights/Interior Convenience Items uInterior Convenience Items
166
Controls
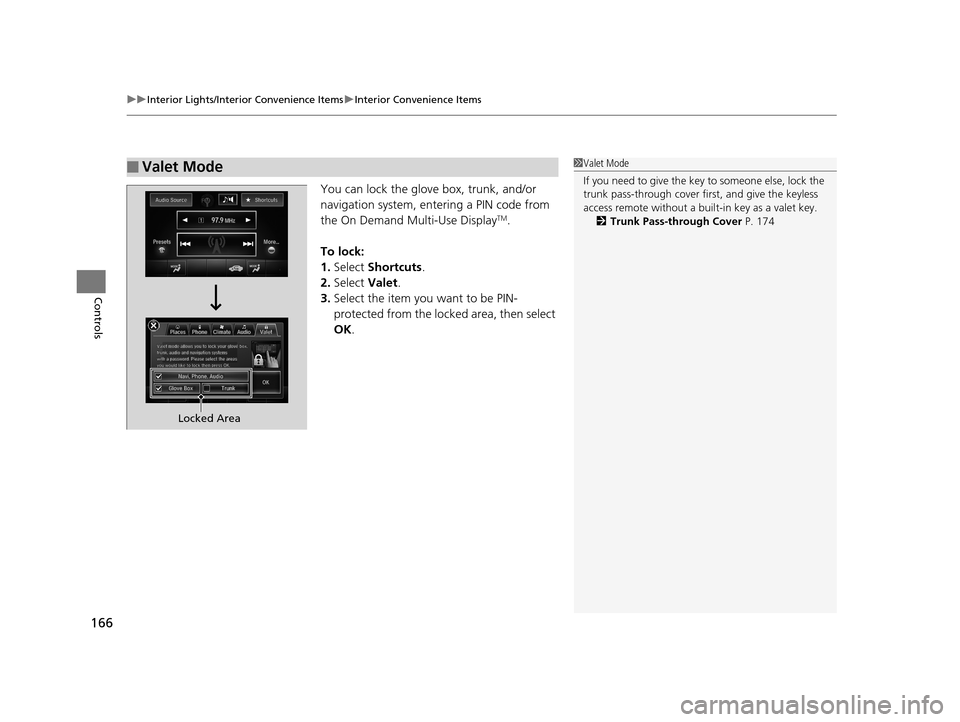
You can lock the glove box, trunk, and/or
navigation system, entering a PIN code from
the On Demand Multi-Use Display
TM.
To lock:
1. Select Shortcuts .
2. Select Valet.
3. Select the item you want to be PIN-
protected from the locked area, then select
OK .
■Valet Mode1Valet Mode
If you need to give the key to someone else, lock the
trunk pass-through cover first, and give the keyless
access remote without a buil t-in key as a valet key.
2 Trunk Pass-through Cover P. 174
Locked Area
17 ACURA RLX-31TY26300.book 166 ページ 2016年6月17日 金曜日 午前8時12分
Page 193 of 557
192
Features
Audio System
About Your Audio System
See the Navigation System Manual for information on the navigation system.
The audio system features AM/FM radio and the SiriusXM ® Radio service. It can also
play audio CDs, WMA/MP3/AAC files, Hard Di sk Drive (HDD) audio, USB flash drives,
and iPod, iPhone and Bluetooth® devices.
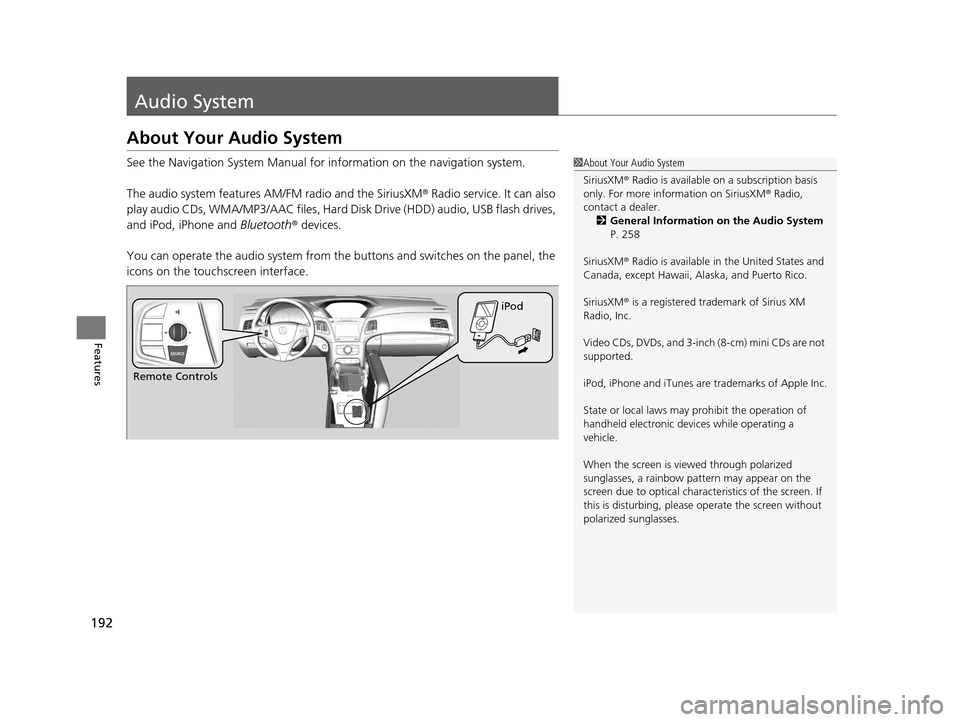
You can operate the audio system from the buttons and switches on the panel, the
icons on the touc hscreen interface.1About Your Audio System
SiriusXM ® Radio is available on a subscription basis
only. For more information on SiriusXM ® Radio,
contact a dealer.
2 General Information on the Audio System
P. 258
SiriusXM ® Radio is available in the United States and
Canada, except Ha waii, Alaska, and Puerto Rico.
SiriusXM ® is a registered trademark of Sirius XM
Radio, Inc.
Video CDs, DVDs, and 3-inch (8-cm) mini CDs are not
supported.
iPod, iPhone and iTunes are trademarks of Apple Inc.
State or local laws may pr ohibit the operation of
handheld electronic devi ces while operating a
vehicle.
When the screen is vi ewed through polarized
sunglasses, a rainbow pa ttern may appear on the
screen due to optical characteristics of the screen. If
this is disturbing, please operate the screen without
polarized sunglasses.
Remote Controls iPod
17 ACURA RLX-31TY26300.book 192 ページ 2016年6月17日 金曜日 午前8時12分
Page 197 of 557
196
Features
Audio System Basic Operation
To use the audio system function, the power mode must be in ACCESSORY or ON.
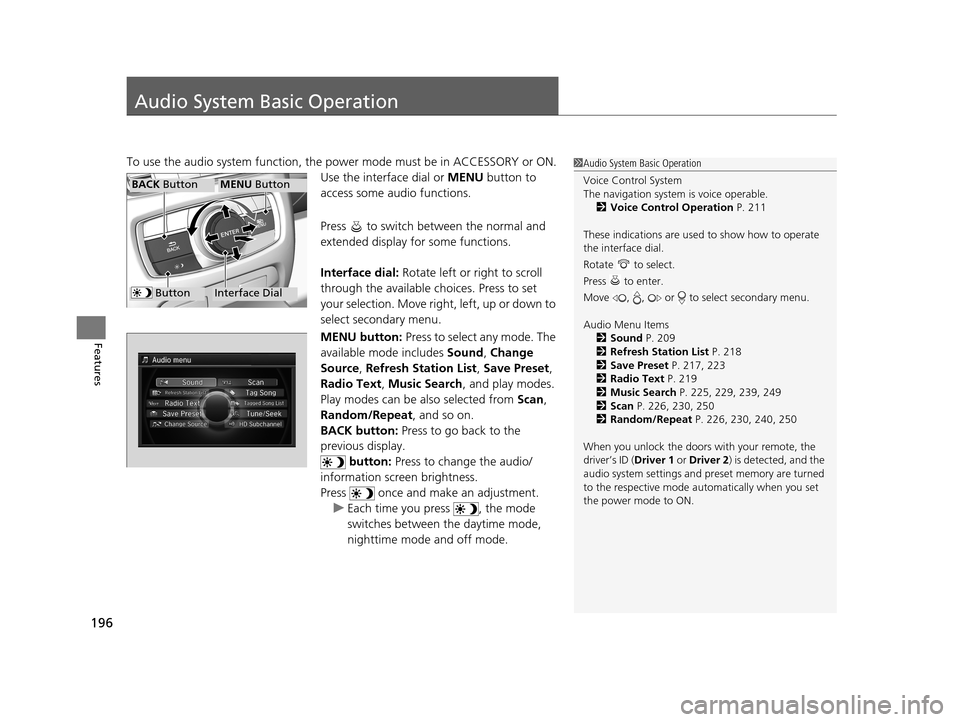
Use the interface dial or MENU button to
access some audio functions.
Press to switch between the normal and
extended display fo r some functions.
Interface dial: Rotate left or right to scroll
through the available choices. Press to set
your selection. Move right, left, up or down to
select secondary menu.
MENU button: Press to select any mode. The
available mode includes Sound, Change
Source , Refresh Station List , Save Preset ,
Radio Text, Music Search , and play modes.
Play modes can be also selected from Scan,
Random/Repeat , and so on.
BACK button: Press to go back to the
previous display.
button: Press to change the audio/
information screen brightness.
Press once and make an adjustment. u Each time you press , the mode
switches between the daytime mode,
nighttime mode and off mode.1Audio System Basic Operation
Voice Control System
The navigation system is voice operable.
2 Voice Control Operation P. 211
These indications are used to show how to operate
the interface dial.
Rotate to select.
Press to enter.
Move , , or to select secondary menu.
Audio Menu Items 2 Sound P. 209
2 Refresh Station List P. 218
2 Save Preset P. 217, 223
2 Radio Text P. 219
2 Music Search P. 225, 229, 239, 249
2 Scan P. 226, 230, 250
2 Random/Repeat P. 226, 230, 240, 250
When you unlock the doors with your remote, the
driver’s ID ( Driver 1 or Driver 2) is detected, and the
audio system settings and pr eset memory are turned
to the respective mode automatically when you set
the power mode to ON.
Interface Dial
MENU ButtonBACK Button
Button
17 ACURA RLX-31TY26300.book 196 ページ 2016年6月17日 金曜日 午前8時12分
Page 200 of 557
Continued199
uuAudio System Basic Operation uOn Demand Multi-Use DisplayTM
Features
■Places
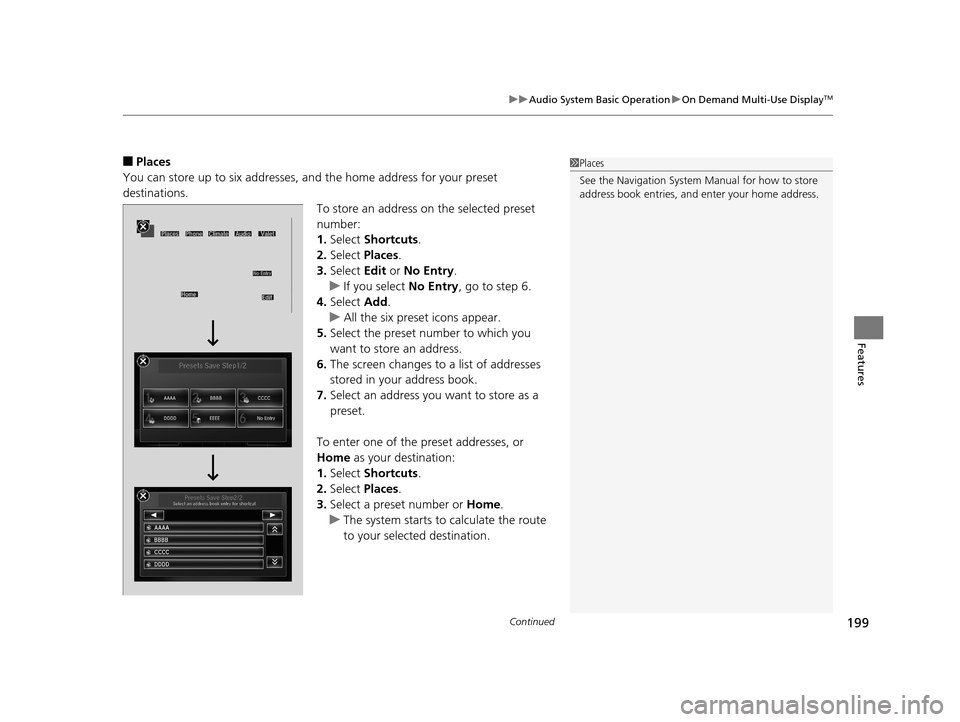
You can store up to six addresses, an d the home address for your preset
destinations.
To store an address on the selected preset
number:
1.Select Shortcuts .
2. Select Places .
3. Select Edit or No Entry .
u If you select No Entry, go to step 6.
4. Select Add.
u All the six preset icons appear.
5. Select the preset number to which you
want to store an address.
6. The screen changes to a list of addresses
stored in your address book.
7. Select an address you want to store as a
preset.
To enter one of the preset addresses, or
Home as your destination:
1. Select Shortcuts .
2. Select Places .
3. Select a preset number or Home.
u The system starts to calculate the route
to your selected destination.1Places
See the Navigation System Manual for how to store
address book entries, and enter your home address.
17 ACURA RLX-31TY26300.book 199 ページ 2016年6月17日 金曜日 午前8時12分
Page 206 of 557
205
uuAudio System Basic Operation uAudio/Information Screen
Continued
Features
Audio/Information Screen
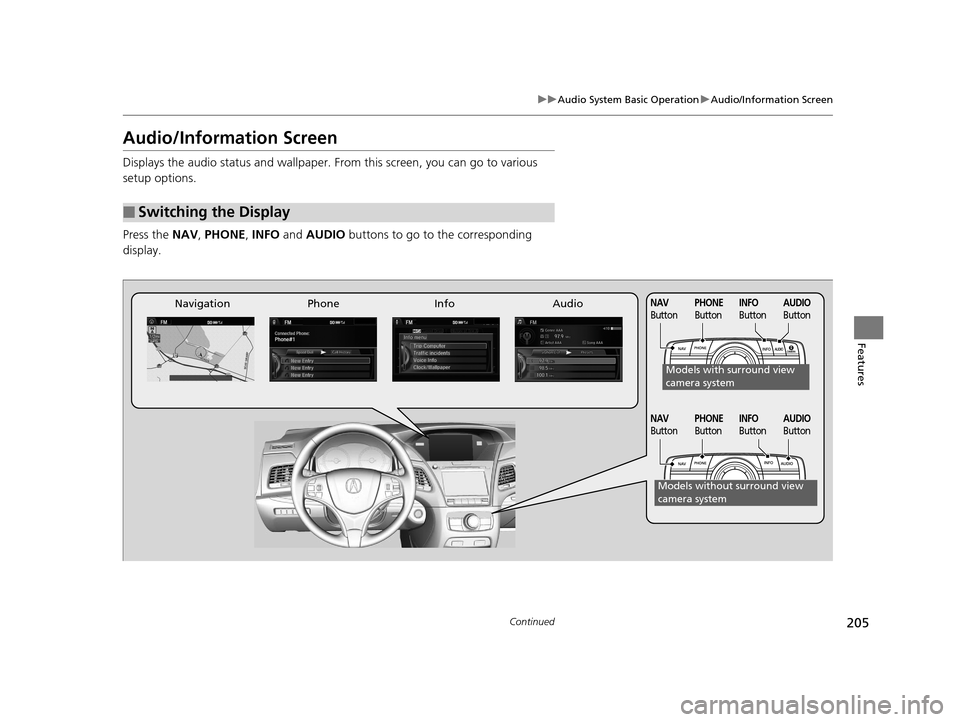
Displays the audio status and wallpaper. From this screen, you can go to various
setup options.
Press the NAV, PHONE , INFO and AUDIO buttons to go to the corresponding
display.
■Switching the Display
Audio
Info
Navigation PhoneAUDIO
ButtonNAV
ButtonPHONE
ButtonINFO
Button
Models with surround view
camera system
Models without surround view
camera system
AUDIO
ButtonNAV
ButtonPHONE
ButtonINFO
Button
17 ACURA RLX-31TY26300.book 205 ページ 2016年6月17日 金曜日 午前8時12分
Page 207 of 557
206
uuAudio System Basic Operation uAudio/Information Screen
Features
■Audio
Shows the current audio information.
■Navigation
Shows the navigation screen.
2 Refer to the Navigation System Manual
■Phone
Shows the HFL information.
2 Bluetooth ® HandsFreeLink® P. 290
■Info
Shows the Trip Computer or Clock/Wallpaper and other information. Rotate
to select an item, then press .
■Trip computer (Current Drive)
Shows the range, and instant and average fu el economy of the current trip, as well
as the average fuel economy from your last trip.
■Trip computer (History of Trip A)
Shows the range, average fuel economy and distances traveled for the current trip, as well
as the average fuel economy and distances tr aveled during the last three driving cycles.
Each time you reset the trip meter A, the information on the display updates. The
history of the previous th ree driving cycles is kept.
■Deleting the history manually
1. Move on the History of Trip A screen to select Delete History, then press .
2. You will receive a confirmation message on the screen. Rotate to select Yes,
then press .
■Clock/Wallpaper
Shows a clock screen or an image you import.
17 ACURA RLX-31TY26300.book 206 ページ 2016年6月17日 金曜日 午前8時12分