light Acura RSX 2002 Service Manual
[x] Cancel search | Manufacturer: ACURA, Model Year: 2002, Model line: RSX, Model: Acura RSX 2002Pages: 320, PDF Size: 4.38 MB
Page 148 of 320

Never try to insert f oreign objects in
the CD player or the magazine. AnewCDmayberoughonthe
inner and outer edges. The small
plastic pieces causing this roughness
can f lake of f and f all on the re-
cording surf ace of the disc, causing
skipping or other problems. Remove
these pieces by rubbing the inner
and outer edges with the side of a
pencil or pen.
To clean a disc, use a clean sof t cloth.
Wipe across the disc f rom the center
to the outside edge. When a CD is not being played, store
it in its case to protect it f rom dust
and other contamination. To prevent
warpage, keep CDs out of direct
sunlight and extreme heat.
Handle a CD by its edges; never
touch either surf ace. Do not place
stabilizer rings or labels on the CD.
These, along with contamination
f rom f ingerprints liquids, and f elt-tip
pens, can cause the CD to not play
properly, or possibly jam in the drive. Protecting Compact Discs
Audio System
Comf ort and Convenience Feat ures145
Page 151 of 320
Once the security system is set,
opening either door (without using
the key or the remote transmitter),
or the hood, will cause it to alarm. It
also alarms if the radio is removed
f rom the dashboard or the wiring is
cut.Do not attempt to alter this system
or add other devices to it.
The security system sets auto-
matically fifteen seconds after you
lock the doors, hood, and hatch. The
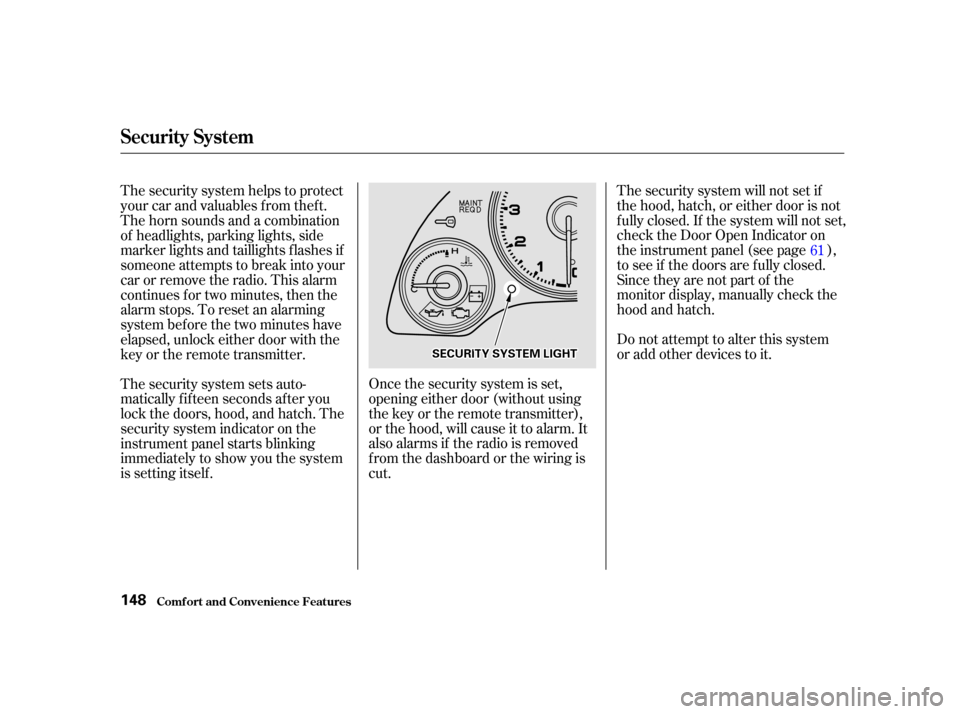
security system indicator on the
instrument panel starts blinking
immediately to show you the system
is setting itself . The security system will not set if
the hood, hatch, or either door is not
f ully closed. If the system will not set,
check the Door Open Indicator on
the instrument panel (see page ),
toseeif thedoorsarefullyclosed.
Since they are not part of the
monitor display, manually check the
hood and hatch.
The security system helps to protect
your car and valuables f rom thef t.
The horn sounds and a combination
of headlights, parking lights, side
marker lights and taillights f lashes if
someone attempts to break into your
carorremovetheradio.Thisalarm
continues f or two minutes, then the
alarm stops. To reset an alarming
system bef ore the two minutes have
elapsed, unlock either door with the
key or the remote transmitter.
61
Security System
Comf ort and Convenience Feat ures148
S SE
EC
CU UR RIITT Y
Y S
SYYSSTTE
EM
M L
LIIGGH HT
T
Page 152 of 320
CONT INUED
Accelerate to the desired cruising
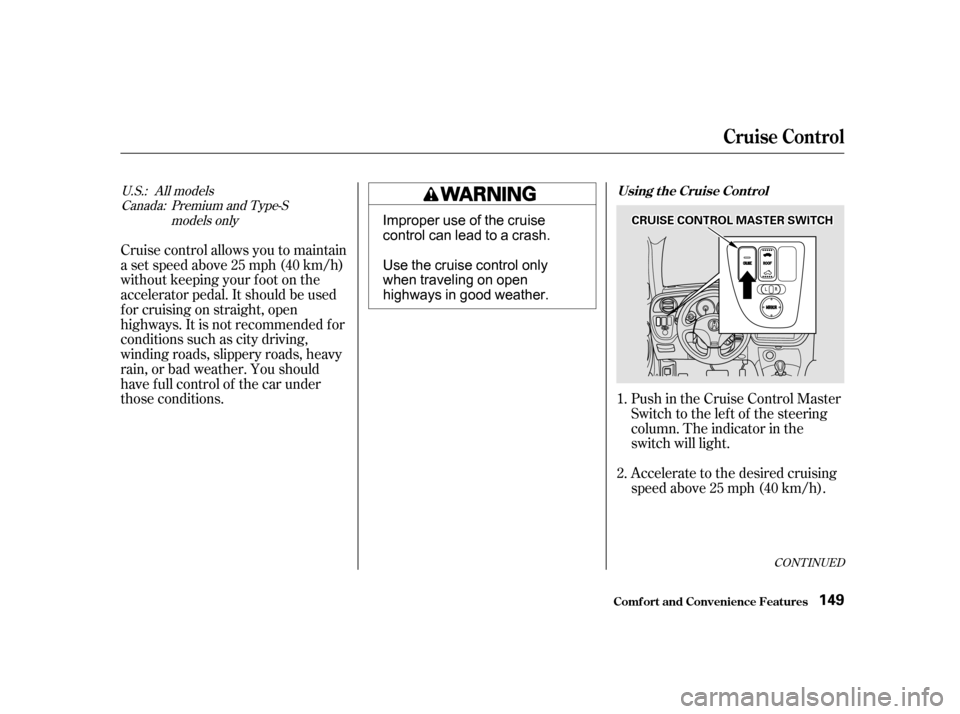
speedabove25mph(40km/h). Push in the Cruise Control Master
Switch to the lef t of the steering
column. The indicator in the
switch will light.
Cruise control allows you to maintain
asetspeedabove25mph(40km/h)
without keeping your f oot on the
accelerator pedal. It should be used
f or cruising on straight, open
highways. It is not recommended f or
conditions such as city driving,
winding roads, slippery roads, heavy
rain, or bad weather. You should
have f ull control of the car under
those conditions.
1.
2.
U.S.: Canada: All models
Premium and Type-Smodels only
Cruise Control
Comf ort and Convenience Feat ures
Using t he Cruise Cont rol
149
C CR RUUI ISSE E C
COON NTTR
RO OL L M
M A
AS
STTE
ER
R S
SWWI ITT C
CH HImproper use of the cruise
control can lead to a crash.
Use the cruise control only
when traveling on open
highways in good weather.
Page 153 of 320
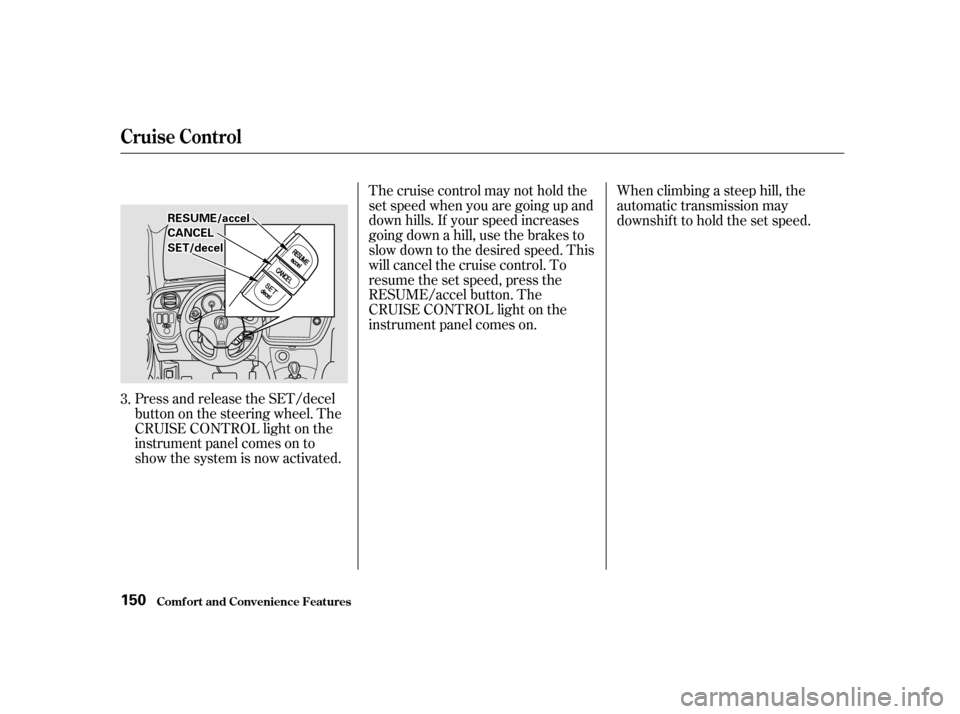
Press and release the SET/decel
buttononthesteeringwheel.The
CRUISE CONTROL light on the
instrument panel comes on to
show the system is now activated.Thecruisecontrolmaynotholdthe
set speed when you are going up and
down hills. If your speed increases
going down a hill, use the brakes to
slow down to the desired speed. This
will cancel the cruise control. To
resume the set speed, press the
RESUME/accel button. The
CRUISE CONTROL light on the
instrument panel comes on.
When climbing a steep hill, the
automatic transmission may
downshifttoholdthesetspeed.
3.
Cruise Control
Comf ort and Convenience Feat ures150
S SE ET
T/
/d
d e
ecceel l
R
RE
ES
SU UM M E
E/
/a
ac ccceel l
C
CA A N
NC CEEL
L
Page 154 of 320

CONT INUED
You can increase the set cruising
speed in either of two ways:Press and hold the RESUME/
accel button. The car will acceler-
ate. When you reach the desired
cruising speed, release the button.
Push on the accelerator pedal. Ac-
celerate to the desired cruising
speed and press the SET/decel
button. You can decrease the set cruising
speed in either of two ways:
Press and hold the SET/decel
button. The car will decelerate.
Release the button when you
reach the desired speed. Even with the cruise control turned
on, you can still use the accelerator
pedal to speed up f or passing. Af ter
completing the pass, take your foot
of f the accelerator pedal. The car
will return to the set cruising speed.
Resting your f oot on the brake or
clutch pedal will cause the cruise
control to cancel.
To increase your speed in very
small amounts, tap the RESUME/
accel button repeatedly. Each time
you do this, your car will speed up
about 1 mph (1.6 km/h). Tap the brake or clutch pedal
lightly with your f oot. The
CRUISE CONTROL light on the
instrument panel will go out.
When the car slows to the desired
speed, press the SET/decel button.
The car will then maintain the
desired speed. To slow down in very small
amounts, tap the SET/decel
button repeatedly. Each time you
do this, your car will slow down
about 1 mph (1.6 km/h).
Changing t he Set Speed
Cruise Control
Comf ort and Convenience Feat ures151
Page 155 of 320

Youcancancelthecruisecontrolin
any of these ways:Tap the brake or clutch pedal. Pressing the Cruise Control Master
Switch turns the system completely
of f and erases the previous cruising
speed f rom memory. To use the
system again, ref er to
.
Push the CANCEL button on the
steering wheel. The system remembers the
previously-set cruising speed. To
return to that speed, accelerate to
above25mph(40km/h),thenpress
the RESUME/accel button. The
CRUISE CONTROL light comes on,
and the car will accelerate to the
same cruising speed as bef ore.
Press the Cruise Control Master
Switch.
When you push the CANCEL button,
or tap the brake or clutch pedal, the
CRUISE CONTROL light on the
instrument panel will go out and the
car will begin to slow down. You can
use the accelerator pedal in the
normal way.
Cancelling t he Cruise Cont rol
Using t he
Cruise Cont rol
Cruise Control
Comf ort and Convenience Feat ures152
Page 160 of 320
CONT INUED
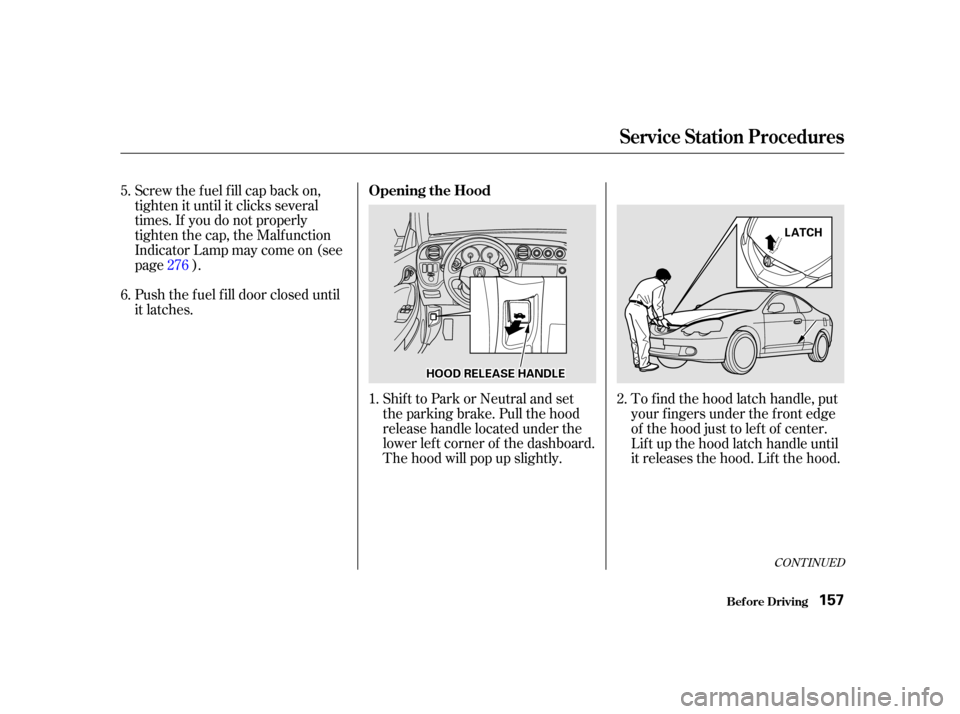
Shift to Park or Neutral and set
the parking brake. Pull the hood
release handle located under the
lower lef t corner of the dashboard.
The hood will pop up slightly.
Screw the f uel f ill cap back on,
tighten it until it clicks several
times. If you do not properly
tighten the cap, the Malfunction
Indicator Lamp may come on (see
page ).
Push the f uel f ill door closed until
it latches.
To f ind the hood latch handle, put
your f ingers under the f ront edge
of the hood just to lef t of center.
Lif t up the hood latch handle until
it releases the hood. Lif t the hood.
1.
2.
5.
6.
276
Service Station Procedures
Bef ore Driving
Opening the Hood
157
H H
O
OO ODD R
REEL
LEE A
A S
SEE H
HA
AN
ND DL
LEE L
LA
A T
TC
CH H
Page 161 of 320
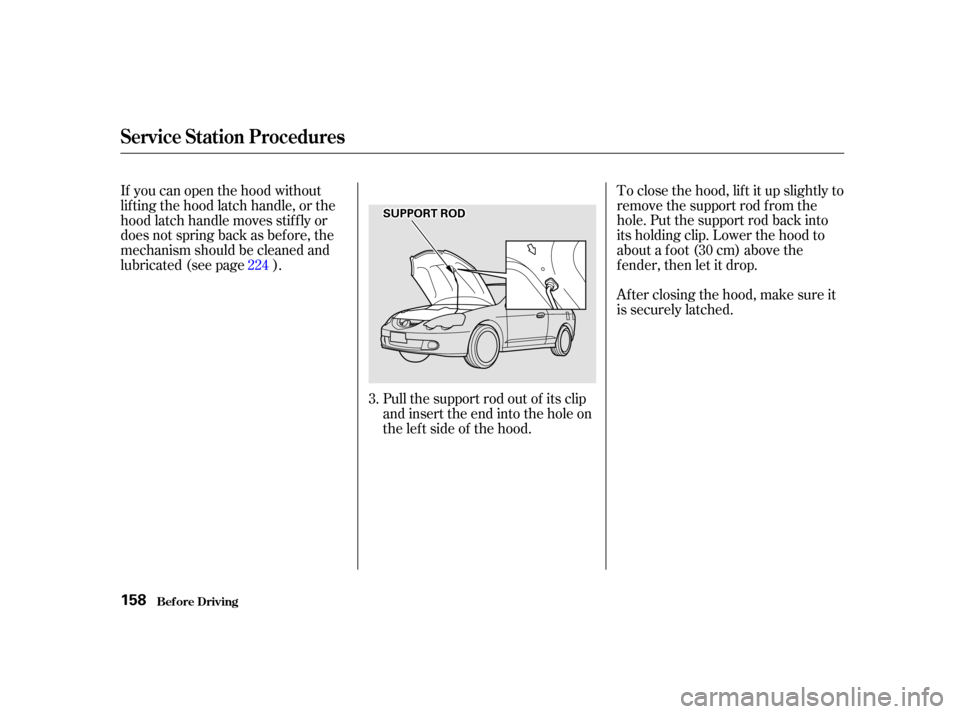
To close the hood, lif t it up slightly to
remove the support rod f rom the
hole. Put the support rod back into
its holding clip. Lower the hood to
about a f oot (30 cm) above the
fender,thenletitdrop.
Afterclosingthehood,makesureit
is securely latched.
Pull the support rod out of its clip
and insert the end into the hole on
theleftsideof thehood.
If you can open the hood without
lifting the hood latch handle, or the
hood latch handle moves stif f ly or
does not spring back as bef ore, the
mechanism should be cleaned and
lubricated (see page ).
3.
224
Service Station Procedures
Bef ore Driving158
S SU
UP PP
PO
OR RTT R
ROOD D
Page 165 of 320

Be sure electronic accessories do
not overload electrical circuits
(see page ).
If possible, have your dealer inspect
the f inal installation. Bef ore installing any accessory:
Have the installer contact your
Acura dealer f or assistance bef ore
installing any electronic accessory.
Modif ying your car, or installing
some non-Acura accessories, can
make your car unsaf e. Bef ore you
make any modif ications or add any
accessories,besuretoreadthe
f ollowing inf ormation.
Your dealer has Genuine Acura
accessories that allow you to
personalize your car. These
accessories have been designed and
approved f or your car, and are
covered by warranty.
Non-Acura accessories are usually
designed f or universal applications.
Although aftermarket accessories
may f it on your car, they may not
meet f actory specif ications, and
could adversely af f ect your car’s
handling and stability. (See
‘‘Modif ications’’ on the page f or
additional information.)
When properly installed, cellular
phones, alarms, two-way radios, and
low-powered audio systems should
not interf ere with your car’s
computer-controlled systems, such
as the SRS and anti-lock brake
system.
However, if electronic accessories
are improperly installed, or exceed
your car’s electrical system capacity,
they can interfere with the operationof your car, or even cause the
airbags to deploy.
Make sure the accessory does not
obscure any lights, or interf ere
with proper car operation or
perf ormance.
131 280
A ccessories
A ccessories and Modif ications
Bef ore Driving162
Improper accessories or
modifications can affect your
car’s handling, stability and
performance, and cause a
crash in which you can be hurt
or killed.
Follow all instructions in this
owner’s manual regarding
accessories and modifications.
Page 167 of 320
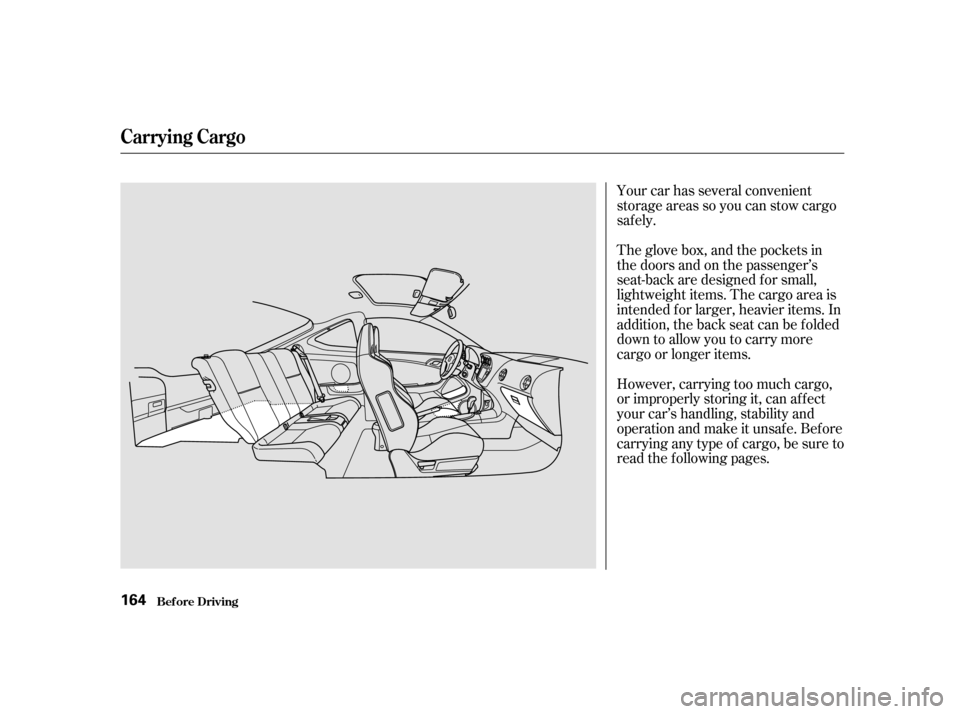
Your car has several convenient
storage areas so you can stow cargo
saf ely.
The glove box, and the pockets in
the doors and on the passenger’s
seat-back are designed f or small,
lightweight items. The cargo area is
intended f or larger, heavier items. In
addition, the back seat can be f olded
down to allow you to carry more
cargoorlongeritems.
However, carrying too much cargo,
or improperly storing it, can af f ect
your car’s handling, stability and
operation and make it unsafe. Before
carrying any type of cargo, be sure to
read the f ollowing pages.
Carrying Cargo
Bef ore Driving164