light Acura RSX 2002 Repair Manual
[x] Cancel search | Manufacturer: ACURA, Model Year: 2002, Model line: RSX, Model: Acura RSX 2002Pages: 320, PDF Size: 4.38 MB
Page 214 of 320

Turn of f the engine, let it sit f or
several minutes, then check the oil
level. If necessary, add oil to bring
the level to the upper mark on the
dipstick. Let the engine run f or several
minutes and check the drain bolt
and oil f ilter f or leaks.
Put a new washer on the drain bolt,
then reinstall the drain bolt.
Tighten it to:
Replace the engine oil f ill cap.
Start the engine. The oil pressure
indicator light should go out within
f ive seconds. If it does not, turn of f
the engine and reinspect your
work.
Refill the engine with the recom-
mended oil.
Engine oil change capacity
(including f ilter): 7.
8.
9.
5.
6.
(RSX and Premium models)
(Type-S)
(RSX and Premium models)
(Type-S)
Engine Oil
Maint enance211
33 lbf·ft (44 N·m , 4.5 kgf·m)
29 lbf·ft (39 N·m , 4.0 kgf·m)
4.4 US qt (4.2
, 3.7 Imp qt)
5.0 US qt (4.7
, 4.1 Imp qt) Improper disposal of engine oil can be
harmf ul to the environment. If you
change your own oil, please dispose of
the used oil properly. Put it in a sealed
container and take it to a recycling
center. Do not discard it in a trash bin
or dump it on the ground.
Page 220 of 320
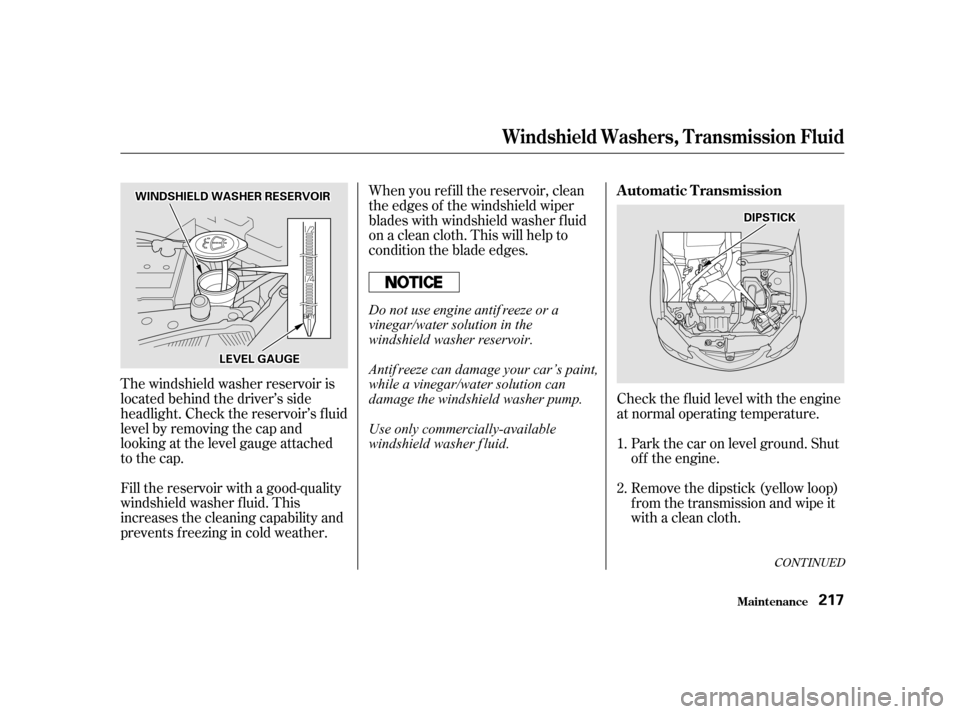
The windshield washer reservoir is
located behind the driver’s side
headlight. Check the reservoir’s f luid
level by removing the cap and
looking at the level gauge attached
to the cap.
Fill the reservoir with a good-quality
windshield washer f luid. This
increases the cleaning capability and
prevents f reezing in cold weather.When you ref ill the reservoir, clean
the edges of the windshield wiper
blades with windshield washer f luid
on a clean cloth. This will help to
condition the blade edges.
Remove the dipstick (yellow loop)
f rom the transmission and wipe it
with a clean cloth. Park the car on level ground. Shut
of f the engine.
Check the f luid level with the engine
at normal operating temperature.
1.
2.
CONT INUED
Maint enance
Windshield Washers, T ransmission Fluid
Automatic Transmission
217
W WI
INND DS
SHH I
IEE L
LDD W
WA AS
SHH E
ER
R R
REES
SE ER
RV V O
OI IRR
L
LE E V
V E
EL
L G
GAAU
UG GEE D
D
I
IPP S
ST TI
ICCK K
Do not use engine antif reeze or a
vinegar/water solution in the
windshield washer reservoir.
Antif reeze can damage your car’s paint,
while a vinegar/water solution can
damage the windshield washer pump.
Use only commercially-available
windshield washer f luid.
Page 226 of 320

Lif t up the cover slightly, then
move it sideways to separate it
f rom the breather tube.Reinstall the air cleaner housing
cover, tighten the five bolts.
Place the new air cleaner element
in the air cleaner housing. Remove the old air cleaner
element.
Caref ully clean the inside of the
air cleaner housing with a damp
rag.
Push the air cleaner housing cover
into the breather tube. Install the breather tube clamp.
Install the intake air duct and
clamp.
4. 5.
6.
7.
8.9.
10.
11.
A ir Cleaner Element
Maint enance223
C CO OV VE
ER
R
A
AI
IRR C
CLLEE A
A N
NE ER
R E
EL
LEE M
M E
EN
NT T
B
BR REEA
A T
TH
H E
ER
R T
TU
UB BEE
Page 228 of 320

Torque the spark plug. (If you do
not have a torque wrench, tighten
the spark plug two-thirds of a turn
af ter it contacts the cylinder head.)
Tightening torque:
Use a wrench to remove the bolt
holding the ignition coil. Pull the
ignition coil up slightly.
Disconnect the wire connector
f rom the ignition coil by pushing
on the lock tab and pulling on the
connector. Pull on the plastic
connector, not the wires.
Put the new spark plug into the
socket; then screw it into the hole.
Screw it in by hand so you do not
crossthread it. Remove the spark plug with
a f ive-eighths inch (16 mm) spark
plug socket. Remove the ignition coil.
6. 5.
4. 3.
7.8.
CONT INUED
Spark Plugs
Maint enance225
C CO
ON NNNEEC
CT TO
OR R
I
IG GN NIITT I
IOON N
C
CO OI ILL
L
LOOC CKK T
TA
A B
B
13 lbf·ft (18 N·m , 1.8 kgf·m)
Page 234 of 320
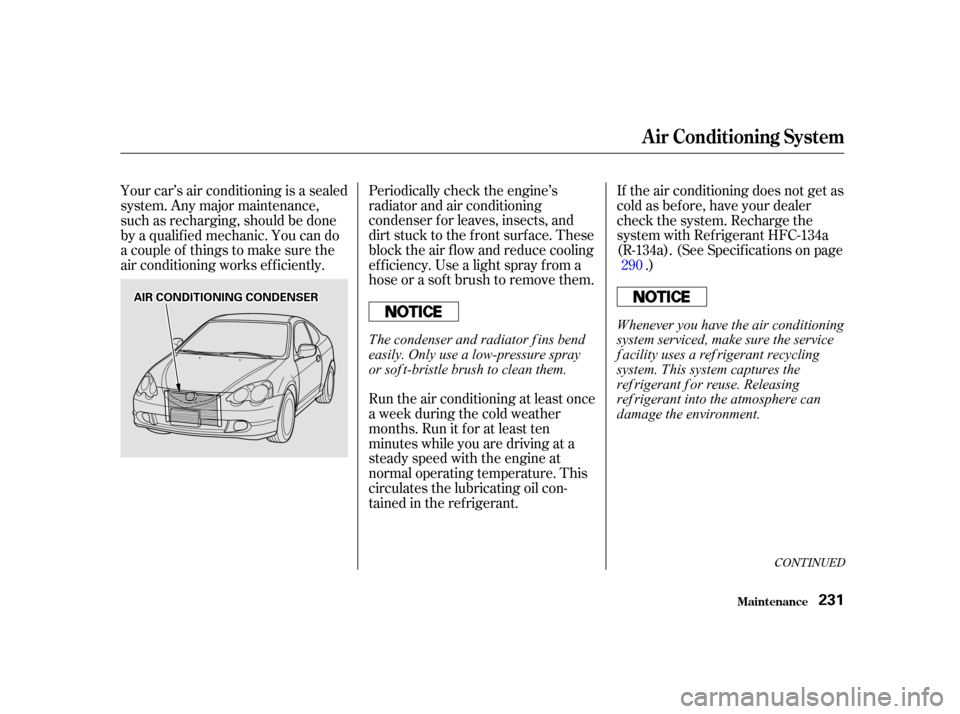
Periodically check the engine’s
radiator and air conditioning
condenser f or leaves, insects, and
dirt stuck to the f ront surf ace. These
block the air f low and reduce cooling
ef f iciency. Use a light spray f rom a
hose or a sof t brush to remove them.
Run the air conditioning at least once
a week during the cold weather
months. Run it f or at least ten
minutes while you are driving at a
steady speed with the engine at
normal operating temperature. This
circulates the lubricating oil con-
tained in the ref rigerant.If the air conditioning does not get as
cold as before, have your dealer
check the system. Recharge the
system with Ref rigerant HFC-134a
(R-134a). (See Specif ications on page
.)
Your car’s air conditioning is a sealed
system. Any major maintenance,
such as recharging, should be done
by a qualif ied mechanic. You can do
a couple of things to make sure the
air conditioning works ef f iciently.
290
CONT INUED
A ir Condit ioning Syst em
Maint enance231
A AI
IRR C
COON NDDI
ITT I
IOON NIINNG G C
COON NDDE
EN
NS SEER
R
The condenser and radiator f ins bend
easily. Only use a low-pressure spray
or sof t-bristle brush to clean them. Whenever you have the air conditioning
system serviced, make sure the service
f acility uses a ref rigerant recycling
system. This system captures the
ref rigerant f or reuse. Releasing
ref rigerant into the atmosphere can
damage the environment.
Page 245 of 320

Check the operation of your car’s
exterior lights at least once a month.
A burned out bulb can create an
unsaf e condition by reducing your
car’s visibility and the ability to
signal your intentions to other
drivers.
Lights
Maint enance242
H HE
EA
A D
DL
LIIGGH HT
T L
LOOW W B
BEEA
A M
M
H
H E
EA
A D
DL
LIIGGH HT
T H
HI
IGGH H
B
BE EA
A M
M
P
PA
A R
RKKIINNG G L
LIIGGH HT
T
T
T U
UR RNN S
SIIGGN NAAL
L L
LIIGGH HT
T
Page 246 of 320
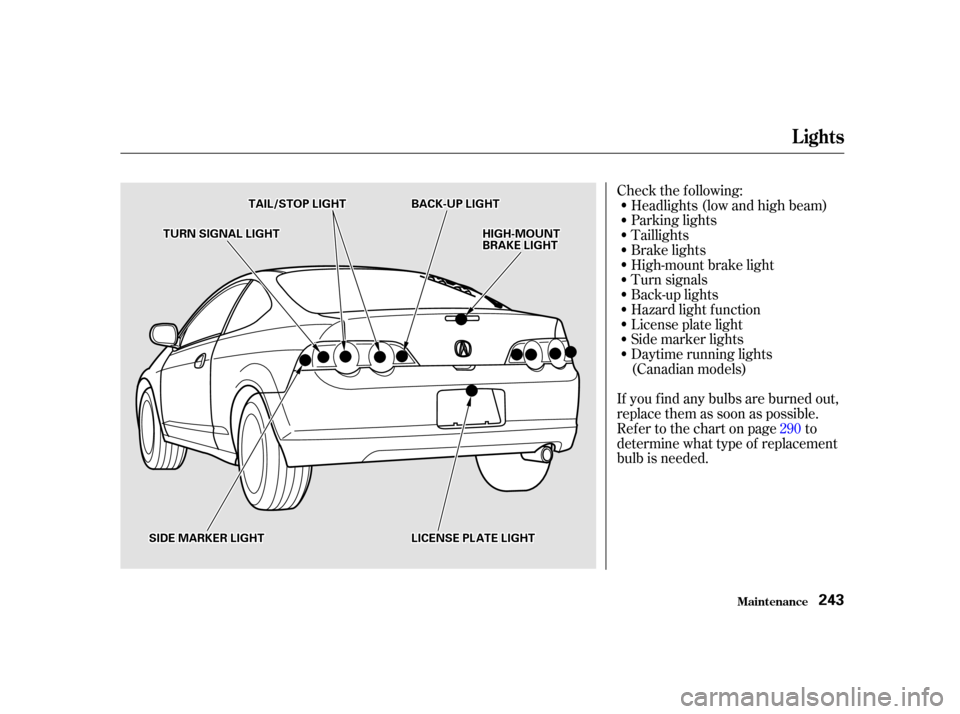
Check the f ollowing:Headlights (low and high beam)
Parking lights
Taillights
Brake lights
High-mount brake light
Turn signals
Back-up lights
Hazard light f unction
License plate light
Side marker lights
Daytime running lights
(Canadian models)
If youfindanybulbsareburnedout,
replace them as soon as possible.
Refer to the chart on page to
determinewhattypeof replacement
bulb is needed. 290
Lights
Maint enance243
T T
U
UR RNN S
SIIGGN NAAL
L L
LIIGGH HT
T
S
SI IDD E
E M
M A
AR
RKKEER
R L
LIIGGH HT
T H
H
I
IGGH H-
-M
M O
OUUNNTT
B
BR RAA K
KEE L
LIIGGH HT
T
B
BA
A C
CKK--U
UP P L
LIIGGH HT
T
T
T A
A I
ILL/ /S
ST TO
OP P L
LIIGGH HT
T
L
LIICCE EN
NS SEE P
PL
LAA T
TE
E L
LIIGGH HT
T
Page 247 of 320
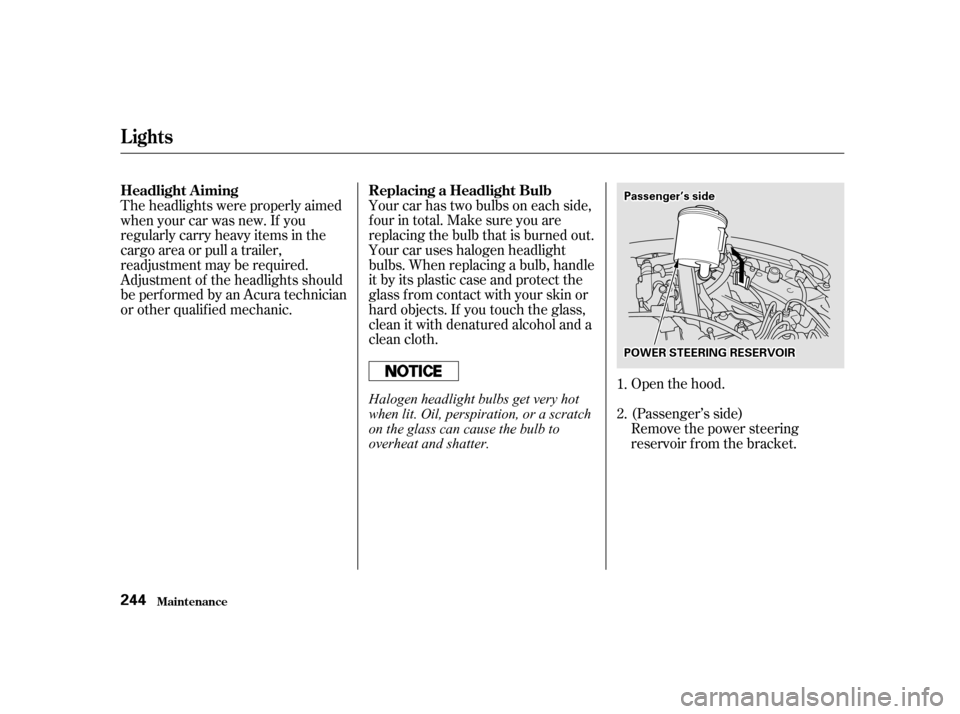
Open the hood.
Your car has two bulbs on each side,
four in total. Make sure you are
replacing the bulb that is burned out.
Your car uses halogen headlight
bulbs. When replacing a bulb, handle
it by its plastic case and protect the
glass from contact with your skin or
hard objects. If you touch the glass,
clean it with denatured alcohol and a
clean cloth.
(Passenger’s side)
Theheadlightswereproperlyaimed
when your car was new. If you
regularly carry heavy items in the
cargo area or pull a trailer,
readjustment may be required.
Adjustment of the headlights should
be perf ormed by an Acura technician
or other qualif ied mechanic.
Remove the power steering
reservoir f rom the bracket.
1.
2.
Replacing a Headlight Bulb
Headlight A iming
Lights
Maint enance244
P P O
OW WE ER
R S
STTE
EE
ER
RI INNG G R
REES
SE ER
RV V O
OI IRR
P
P
a
asssseen n g
ge
err’’ss s
siidd e
e
Halogen headlight bulbs get very hot
when lit. Oil, perspiration, or a scratch
on the glass can cause the bulb to
overheat and shatter.
Page 248 of 320
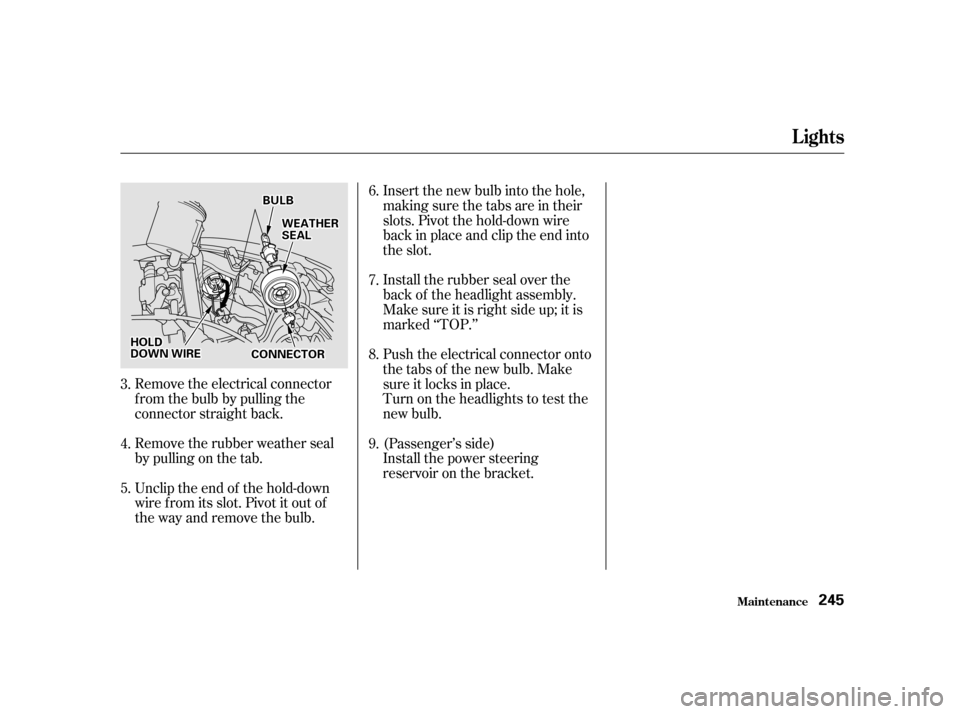
Remove the electrical connector
f rom the bulb by pulling the
connector straight back.
Remove the rubber weather seal
by pulling on the tab.
Unclip the end of the hold-down
wire f rom its slot. Pivot it out of
the way and remove the bulb.Insert the new bulb into the hole,
making sure the tabs are in their
slots. Pivot the hold-down wire
back in place and clip the end into
the slot.
Install the rubber seal over the
back of the headlight assembly.
Make sure it is right side up; it is
marked ‘‘TOP.’’
Push the electrical connector onto
the tabs of the new bulb. Make
sure it locks in place.
Turn on the headlights to test the
new bulb.
(Passenger’s side)
Install the power steering
reservoir on the bracket.
3.
4.
5. 6.
7.
8.
9.
Lights
Maint enance245
H H
O
OL LDD
D
D O
OW WN N W
WIIRRE E B
BU
UL LBB
W
WE EA
A T
TH
H E
ER
R
S
SE EA
A L
L
C
CO ON NNNEEC
CT TO
OR R
Page 249 of 320
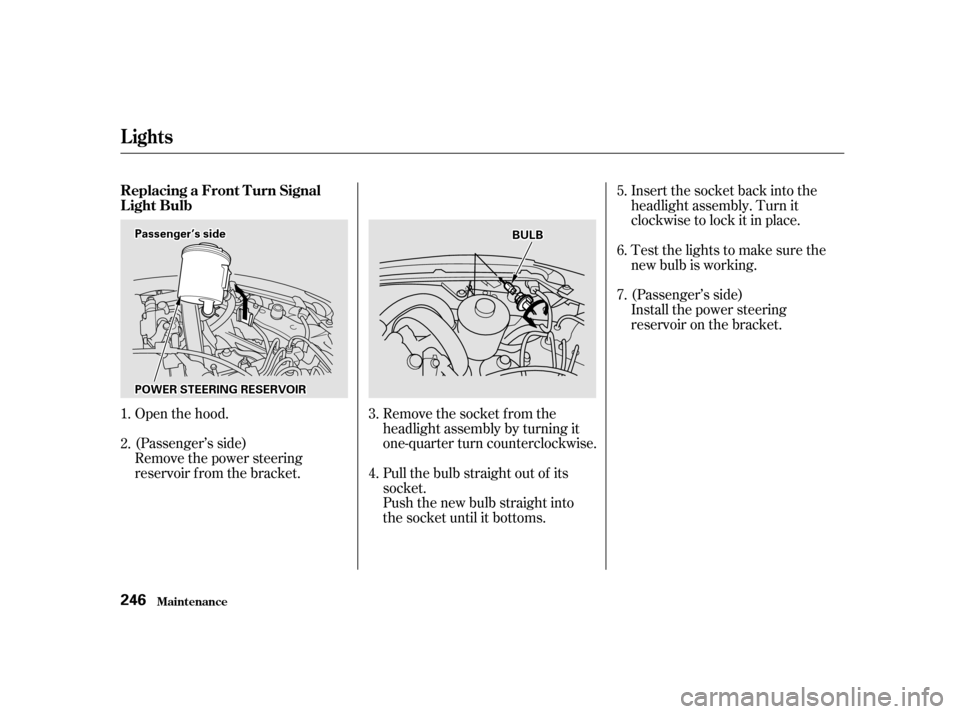
Insert the socket back into the
headlight assembly. Turn it
clockwise to lock it in place.
Testthelightstomakesurethe
new bulb is working.
Install the power steering
reservoir on the bracket.
Open the hood.
(Passenger’s side)
Remove the power steering
reservoir f rom the bracket. Remove the socket from the
headlight assembly by turning it
one-quarter turn counterclockwise.
Pull the bulb straight out of its
socket.
Push the new bulb straight into
the socket until it bottoms.
1.
2.
3.
4.5.
6.
7. (Passenger’s side)
Lights
Maint enance
Replacing a Front T urn Signal
Light Bulb
246
P P
O
OW WE ER
R S
STTE
EE
ER
RI INNG G R
REES
SE ER
RV V O
OI IRR
P
P
a
asssseen n g
ge
err’’ss s
siidd e
e
B
BUUL LBB