Head rest Acura TL 2010 User Guide
[x] Cancel search | Manufacturer: ACURA, Model Year: 2010, Model line: TL, Model: Acura TL 2010Pages: 612, PDF Size: 15.02 MB
Page 51 of 612

Push the button located next to
each rear head restraint to pivot
the head restraint down.Place the child seat on the vehicle
seat, then attach the seat to the
lower anchors according to the
child seat maker’s instructions.
Some LATCH-compatible seats
have a rigid-type connector as
shown above.Other LATCH-compatible seats
have a f lexible-type connector as
shown above.
Whatever type you have, f ollow
the child seat maker’s instructions
f or adjusting or tightening the f it.
4.
5.
6.
Installing a Child Seat
48
BUTTONHEAD RESTRAINT
Outer seating position Rigid typeFlexible type
09/07/29 16:50:32 31TK4610_053
2010 TL
Page 52 of 612
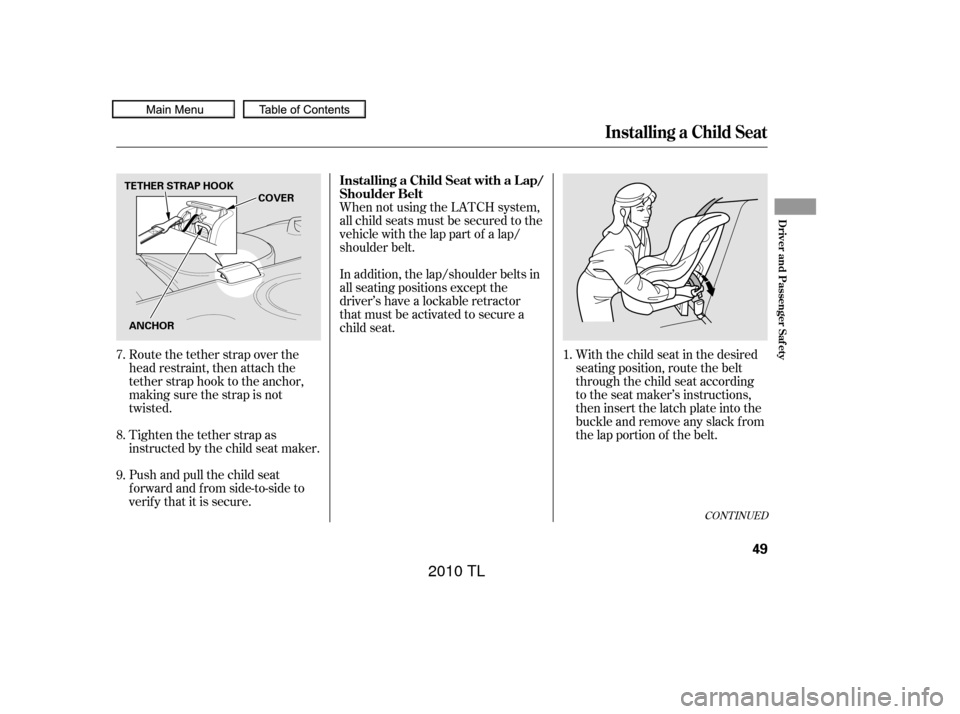
Tighten the tether strap as
instructed by the child seat maker.
Push and pull the child seat
f orward and f rom side-to-side to
verify that it is secure.When not using the LATCH system,
all child seats must be secured to the
vehicle with the lap part of a lap/
shoulder belt.
In addition, the lap/shoulder belts in
all seating positions except the
driver’s have a lockable retractor
that must be activated to secure a
child seat.
Route the tether strap over the
head restraint, then attach the
tether strap hook to the anchor,
making sure the strap is not
twisted. With the child seat in the desired
seating position, route the belt
through the child seat according
to the seat maker’s instructions,
then insert the latch plate into the
buckle and remove any slack f rom
the lap portion of the belt.
7.
8.
9. 1.
CONT INUED
Installing a Child Seat
Installing a Child Seat with a L ap/
Shoulder Belt
Driver and Passenger Saf ety
49
TETHER STRAP HOOK
ANCHOR COVER
09/07/29 16:50:43 31TK4610_054
2010 TL
Page 54 of 612

To deactivate the lockable retractor
and remove a child seat, unlatch the
buckle, unroute the seat belt, and let
the belt fully retract.A child seat with a tether can be
installed in any seating position in
the back seat, using one of the
anchorage points shown above.
Since a tether can provide additional
security to the lap/shoulder belt
installation, we recommend using a
tether whenever one is required or
available. Af ter properly securing the child
seat with the lap/shoulder belt
(see page ), pivot the head
restraint down (see page ) and
route the tether strap over the
head restraint.
1.
49 157
CONT INUED
Installing a Child Seat with a
Tether
Installing a Child Seat
Using an Out er A nchor
Driver and Passenger Saf ety
51
COVER
ANCHOR TETHER ANCHORAGE P
OINTSTETHER STRAP HOOK
ANCHOR COVER
09/07/29 16:51:03 31TK4610_056
2010 TL
Page 55 of 612

Lift the anchor cover, then attach
the tether strap hook to the
anchor, making sure the strap is
not twisted.
Tighten the strap according to the
seat maker’s instructions.Followsteps2and3inthe
previous column. Af ter properly securing the child
seat (see page ), adjust the
head restraint to its lowest
position, then route the tether
strap over the head restraint.
1.
2.
3. 2.
49Using t he Cent er A nchor
Installing a Child Seat
52
TETHER STRAP
HOOKCOVER
ANCHOR
09/07/29 16:51:12 31TK4610_057
2010 TL
Page 159 of 612

The driver’s seat includes a memory
f eature. Two seat positions can be
stored in separate memories. You
canthenselectamemorizedposition
by pushing the appropriate memory
button. Ref er to page f or how to
memorize and select the seat
positions.Your vehicle is equipped with head
restraints in all seating positions to
help protect you and your
passengers f rom the likelihood of
whiplash and other injuries.
They are most ef f ective when you
adjust them so the center of the back
of the occupant’s head rests against
the center of the restraint.
164
See page f or important saf ety inf ormation and a warning aboutimproperly positioning head restraints. 15
Seats
Head Restraints
156
Passenger’s seat
09/07/29 17:08:38 31TK4610_161
2010 TL
Page 160 of 612

CONT INUED
The head restraints adjust f or height.
You need both hands to adjust the
restraint. Do not attempt to adjust it
while driving. To raise a f ront or rear
center head restraint, pull upward.
To lower the restraint, push the
release button sideways, and push
the restraint down.Tolowereitherrearouterhead
restraint f or better visibility, press
the tilt button on the side of the head
restraint. It f olds down backward. To
raise the rear outer head restraint,
pull it up f rom behind by hand. Make
sure the head restraint locks in
position when you lower or raise it.
Seats
A djust ing t he Head Rest raint
Inst rument s and Cont rols
157
Front
LEGS
SEAT-
BACK
CUSHION
RELEASE BUTTON Rear Center
CUSHION
SEAT-BACK RELEASE
BUTTON
LEGS TILT BUTTON
Rear Outer
09/07/29 17:08:48 31TK4610_162
2010 TL
Page 161 of 612
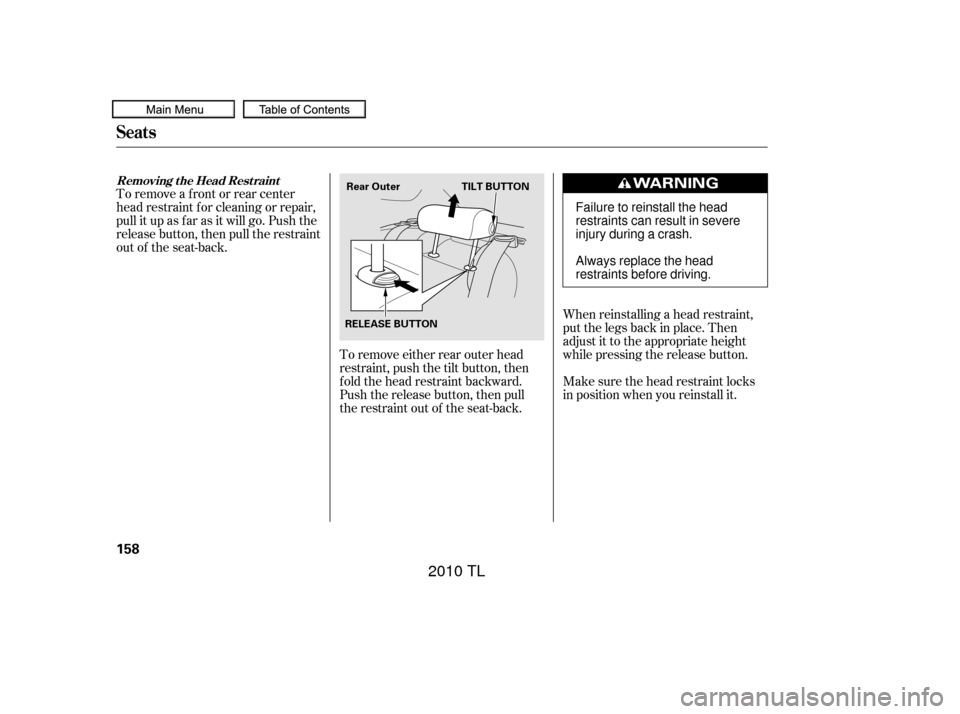
When reinstalling a head restraint,
put the legs back in place. Then
adjust it to the appropriate height
while pressing the release button.
Make sure the head restraint locks
in position when you reinstall it.
To remove a f ront or rear center
head restraint f or cleaning or repair,
pull it up as f ar as it will go. Push the
release button, then pull the restraint
out of the seat-back.
To remove either rear outer head
restraint, push the tilt button, then
f old the head restraint backward.
Push the release button, then pull
the restraint out of the seat-back.
Seats
Removing t he Head Rest raint
158
Rear OuterTILT BUTTON
RELEASE BUTTON
Failure to reinstall the head
restraints can result in severe
injury during a crash.
Always replace the head
restraints before driving.
09/07/29 17:08:56 31TK4610_163
2010 TL
Page 162 of 612
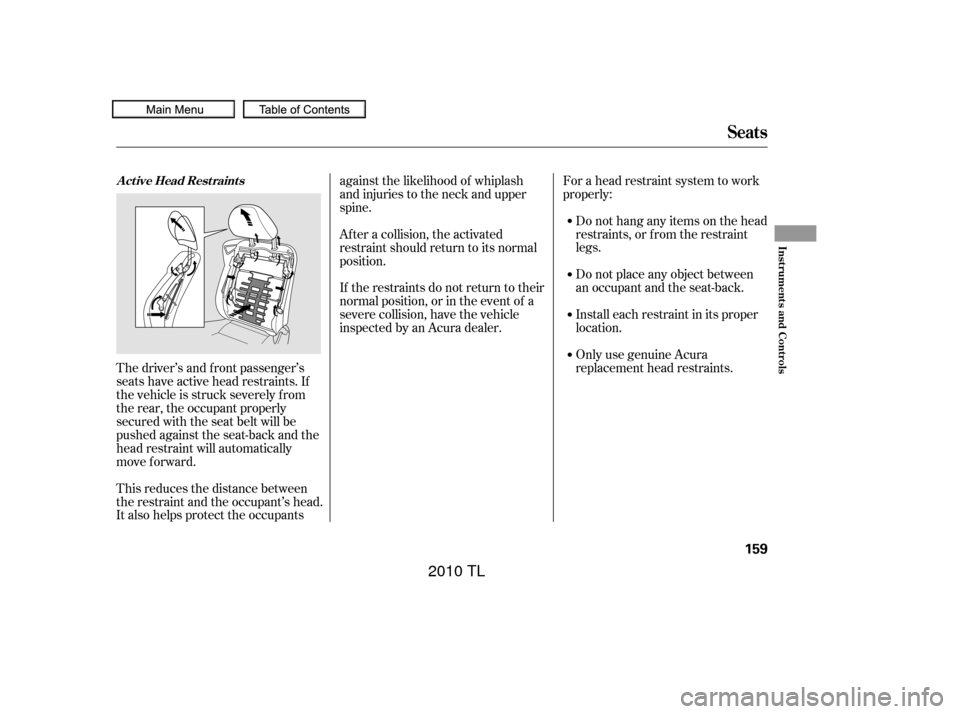
The driver’s and f ront passenger’s
seats have active head restraints. If
the vehicle is struck severely f rom
the rear, the occupant properly
secured with the seat belt will be
pushed against the seat-back and the
head restraint will automatically
move forward.
This reduces the distance between
the restraint and the occupant’s head.
It also helps protect the occupantsagainst the likelihood of whiplash
and injuries to the neck and upper
spine.
For a head restraint system to work
properly:
Do not hang any items on the head
restraints, or f rom the restraint
legs.
Do not place any object between
an occupant and the seat-back.
Install each restraint in its proper
location.
Only use genuine Acura
replacement head restraints.
If the restraints do not return to their
normal position, or in the event of a
severe collision, have the vehicle
inspected by an Acura dealer. Af ter a collision, the activated
restraint should return to its normal
position.
A ct ive Head Rest raint s
Seats
Inst rument s and Cont rols
159
09/07/29 17:09:06 31TK4610_164
2010 TL
Page 601 of 612
CONT INUED
................................
AAC .262, 302,349
....................................
Accessories .453
ACCESSORY (Ignition Key .....................................
Position) .145
ACCESSORY Mode ...........................
(Power Mode) .178
............
Accessory Power Sockets . 207
................
Active Head Restraints . 159
....................................
AcuraLink
. 425
....................
Additives, Engine Oil . 510
...........................
Advanced Airbags .28
...............................
Airbag (SRS) .9, 24
..........
Airbag System Components . 24
......
Air Conditioning System . 216,217
.........................................
Usage .218
...............
Air Pressure, Tires . 535,536
......................................
Antif reeze .512
Anti-lock Brakes (ABS) ...............................
Indicator .66, 482
...................................
Operation .482
..............
Anti-thef t, Audio System . 372
Anti-thef t Steering Column ....................................
Lock .145, 183
................................
Audio System .225 .
Automatic Lighting Off Feature . 135
...
Automatic Seat Belt Tensioners . 22
.............
Automatic Speed Control . 382
..............
Automatic Transmission . 468
..........................
Capacity, Fluid .578
...............
Checking Fluid Level . 515
..........................
Paddle Shif ters .473
.......................................
Shif ting .469
Shif t Lever Position ...............................
Indicators .468
....................
Shif t Lock Release . 471
......................
Auxiliary Input Jack .371
Battery Charging System ...........................
Indicator .65, 559
............................
Jump Starting .555
..............................
Maintenance .543
............................
Specif ications .579
..............................
Bef ore Driving .443
....................................
Belts,Seat .8,20
.........................
Beverage Holders .206
...................
Audio . 269,359
...............
HandsFreeLink. 388, 406
..................................
Booster Seats .54
Brakes ...........
Anti-lock System (ABS) . 482
.............
Break-in, New Linings . 444
...........................................
Fluid .519
.......................................
Parking .204
.................
System Indicator . 65,561
........................
Wear Indicators .481
.............................
Braking System .481
.................
Break-in, New Vehicle . 444
Brightness Control, ...............................
Instruments .137
....................................
Built-In Key .195
Bulb Replacement ..........................
Back-up Lights .528
.........
Daytime Running Lights . 521
.................................
Fog Lights .526
.................................
Headlights .521
............................
Specif ications .579
............
Turn Signal Lights . 524,528
..............................
Bulbs, Halogen .526
Bluetooth Bluetooth
Index
A
B
INDEX
I
09/07/29 18:43:37 31TK4610_604
2010 TL
Page 604 of 612
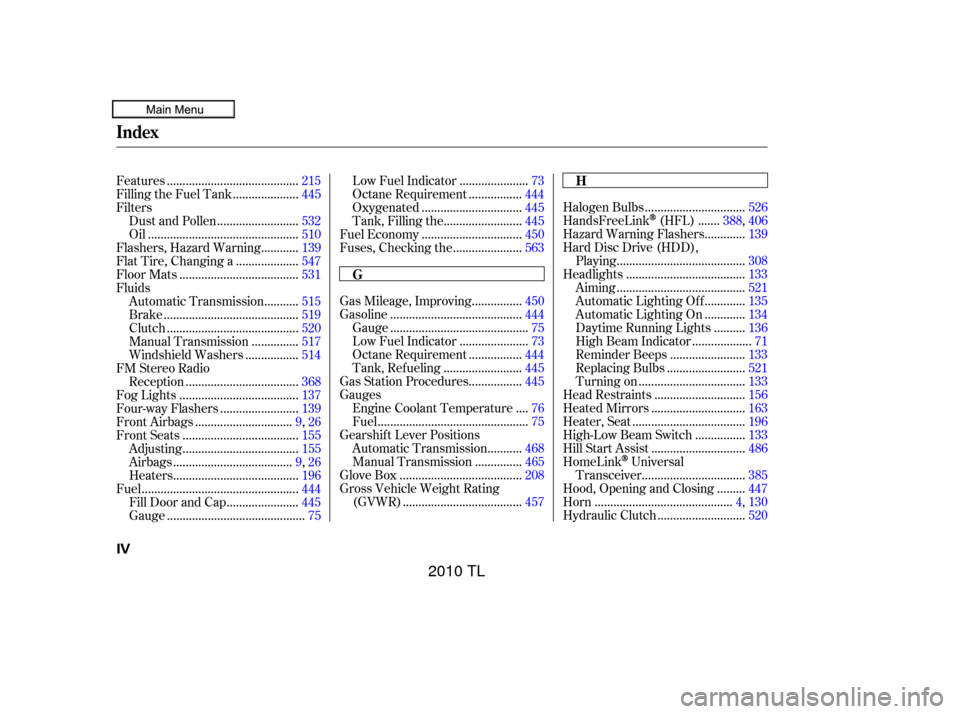
...............................
Halogen Bulbs .526
......
HandsFreeLink
(HFL) . 388,406
............
Hazard Warning Flashers . 139
Hard Disc Drive (HDD), ........................................
Playing .308
.....................................
Headlights .133
........................................
Aiming .521
............
Automatic Lighting Off . 135
............
Automatic Lighting On . 134
.........
Daytime Running Lights . 136
..................
High Beam Indicator . 71
.......................
Reminder Beeps .133
........................
Replacing Bulbs .521
.................................
Turning on .133
............................
Head Restraints .156
.............................
Heated Mirrors .163
...................................
Heater, Seat .196
...............
High-Low Beam Switch . 133
.............................
Hill Start Assist .486
HomeLink
Universal ................................
Transceiver .385
........
Hood, Opening and Closing . 447
...........................................
Horn .4,130
...........................
Hydraulic Clutch .520
...............
Gas Mileage, Improving . 450
.........................................
Gasoline .444
...........................................
Gauge .75
.....................
Low Fuel Indicator .73
................
Octane Requirement . 444
........................
Tank, Ref ueling .445
................
Gas Station Procedures . 445
Gauges ...
Engine Coolant Temperature . 76
...............................................
Fuel .75
Gearshif t Lever Positions ..........
Automatic Transmission . 468
..............
Manual Transmission . 465
......................................
Glove Box .208
Gross Vehicle Weight Rating .....................................
(GVWR) .457
.........................................
Features .215
....................
Filling the Fuel Tank . 445
Filters .........................
Dust and Pollen .532
...............................................
Oil .510
...........
Flashers, Hazard Warning . 139
...................
Flat Tire, Changing a . 547
.....................................
Floor Mats .531
Fluids ..........
Automatic Transmission . 515
..........................................
Brake .519
.........................................
Clutch .520
..............
Manual Transmission . 517
................
Windshield Washers . 514
FM Stereo Radio ...................................
Reception .368
.....................................
Fog Lights .137
........................
Four-way Flashers .139
..............................
Front Airbags .9 ,26
....................................
Front Seats .155
....................................
Adjusting .155
.....................................
Airbags .9, 26
.......................................
Heaters .196
.................................................
Fuel .444
......................
Fill Door and Cap .445
...........................................
Gauge .75 .....................
Low Fuel Indicator .73
................
Octane Requirement . 444
...............................
Oxygenated .445
........................
Tank, Filling the .445
...............................
Fuel Economy .450
.....................
Fuses, Checking the .563
Index
H
G
IV
09/07/29 18:43:56 31TK4610_607
2010 TL