change time Acura TL 2012 Navigation Manual
[x] Cancel search | Manufacturer: ACURA, Model Year: 2012, Model line: TL, Model: Acura TL 2012Pages: 184, PDF Size: 20.24 MB
Page 8 of 184
Introduction
Navigation System
7
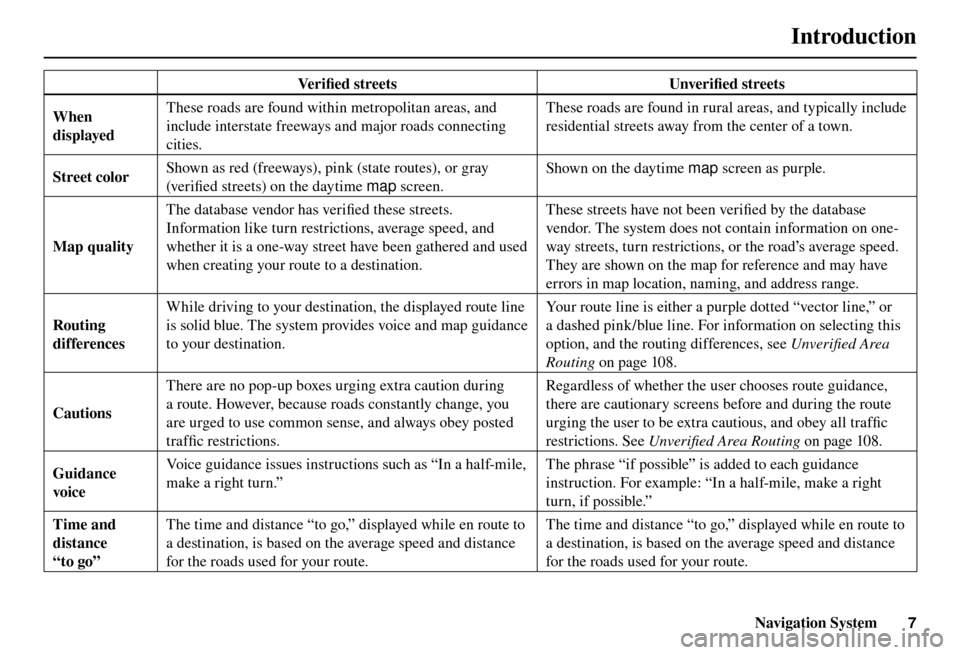
V e r i fi ed streets Unverifi ed streets
When
displayed These roads are found within metropolitan areas, and
include interstate freeways and major roads connecting
cities. These roads are found in rural areas, and typically include
residential streets away from the center of a town.
Street color Shown as red (freeways), pink (state routes), or gray
(ver i fi
ed streets) on the daytime map screen. Shown on the daytime map
screen as purple.
Map quality The database vendor has verifi
ed these streets.
Information like turn restrictions, average speed, and
whether it is a one-way street have been gathered and used
when creating your route to a destination. These streets have not been verifi
ed by the database
vendor. The system does not contain information on one-
way streets, turn restrictions, or the road’s average speed.
They are shown on the map for reference and may have
errors in map location, naming, and address range.
Routing
differences While driving to your destination, the displayed route line
is solid blue. The system provides voice and map guidance
to your destination.
Your route line is either a purple dotted “vector line,” or
a dashed pink/blue line. For information on selecting this
option, and the routing differences, see
Unverifi ed Area
Routing on page 108 .
Cautions There are no pop-up boxes urging extra caution during
a route. However, because roads constantly change, you
are urged to use common sense, and always obey posted
traffi
c restrictions. Regardless of whether the user chooses route guidance,
there are cautionary screens before and during the route
urging the user to be extra cautious, and obey all traffi
c
restrictions. See Unverifi ed Area Routing on page 108 .
Guidance
voice Voice guidance issues instructions such as “In a half-mile,
make a right turn.”
The phrase “if possible” is added to each guidance
instruction. For example: “In a half-mile, make a right
turn, if possible.”
Time and
distance
“to go” The time and distance “to go,” displayed while en route to
a destination, is based on the average speed and distance
for the roads used for your route.
The time and distance “to go,” displayed while en route to
a destination, is based on the average speed and distance
for the roads used for your route.
Page 22 of 184
Getting Started
Navigation System21
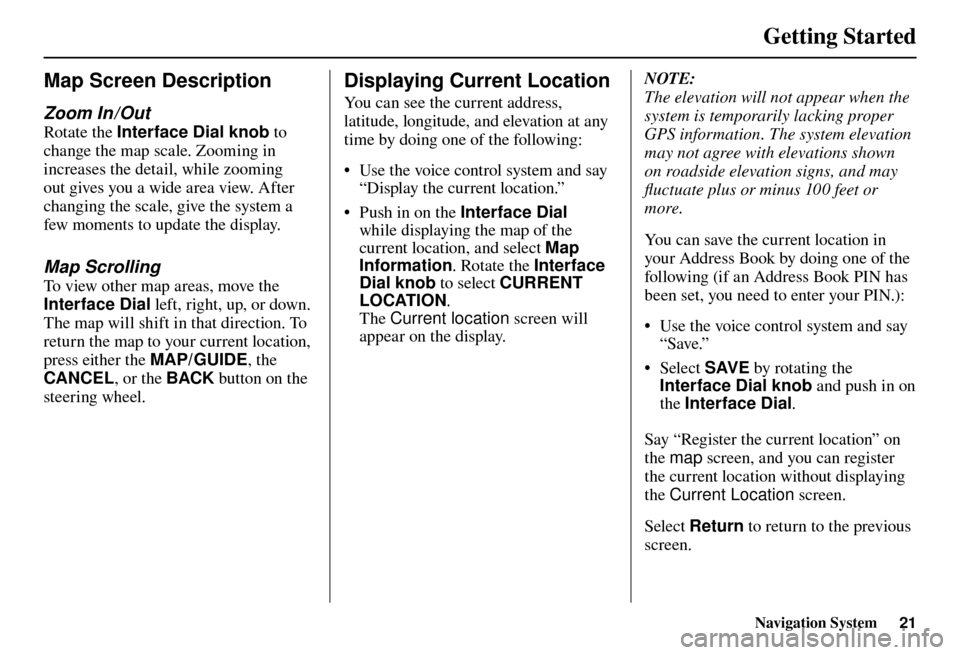
Map Screen Description
Zoom In / Out
Rotate the Interface Dial knob to
change the map scale. Zooming in
increases the detail, while zooming
out gives you a wide area view. After
changing the scale, give the system a
few moments to update the display.
Map Scrolling
To view other map areas, move the
Interface Dial left, right, up, or down.
The map will shift in that direction. To
return the map to your current location,
press either the MAP/GUIDE , the
CANCEL , or the BACK button on the
steering wheel.
Displaying Current Location
You can see the current address,
latitude, longitude, and elevation at any
time by doing one of the following:
• Use the voice control system and say
“Display the current location.”
• Push in on the Interface Dial
while displaying the map of the
current location, and select Map
Information . Rotate the Interface
Dial knob to select CURRENT
LOCATION .
The Current location screen will
appear on the display.
NOTE:
The elevation will not appear when the
system is temporarily lacking proper
GPS information. The system elevation
may not agree with elevations shown
on roadside elevation signs, and may
fl uctuate plus or minus 100 feet or
more.
You can save the current location in
your Address Book by doing one of the
following (if an Address Book PIN has
been set, you need to enter your PIN.):
• Use the voice control system and say “Save.”
• Select SAVE by rotating the
Interface Dial knob and push in on
the Interface Dial .
Say “Register the current location” on
the map screen, and you can register
the current location without displaying
the Current Location screen.
Select Return to return to the previous
screen.
Page 31 of 184
Entering a Destination
30 Navigation System
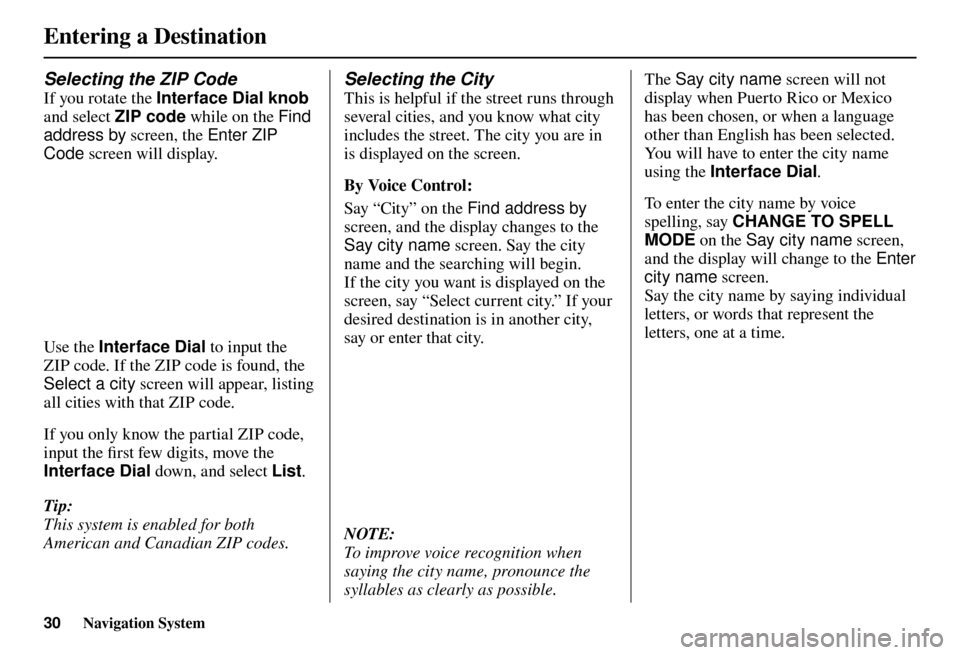
Selecting the ZIP Code
If you rotate the Interface Dial knob
and select ZIP code while on the Find
address by screen, the Enter ZIP
Code screen will display.
Use the Interface Dial to input the
ZIP code. If the ZIP code is found, the
Select a city screen will appear, listing
all cities with that ZIP code.
If you only know the partial ZIP code,
input the fi rst few digits, move the
Interface Dial down, and select List .
Tip:
This system is enabled for both
American and Canadian ZIP codes.
Selecting the City
This is helpful if the street runs through
several cities, and you know what city
includes the street. The city you are in
is displayed on the screen.
By Voice Control:
Say “City” on the Find address by
screen, and the display changes to the
Say city name screen. Say the city
name and the searching will begin.
If the city you want is displayed on the
screen, say “Select current city.” If your
desired destination is in another city,
say or enter that city.
NOTE:
To improve voice recognition when
saying the city name, pronounce the
syllables as clearly as possible. The
Say city name screen will not
display when Puerto Rico or Mexico
has been chosen, or when a language
other than English has been selected.
You will have to enter the city name
using the Interface Dial .
To enter the city name by voice
spelling, say CHANGE TO SPELL
MODE on the Say city name screen,
and the display will change to the Enter
city name screen.
Say the city name by saying individual
letters, or words that represent the
letters, one at a time.
Page 33 of 184
Entering a Destination
32 Navigation System
Select DESTINATION MAP and use
the Interface Dial to select an icon,
approximate area, or street you wish to
choose as your destination. Otherwise,
a central location of the city will be
selected. If you select a point of interest
(POI) or road in an unverifi ed area, you
may or may not have routing in these
areas. See Map Overview on page 6 . Selecting the Street
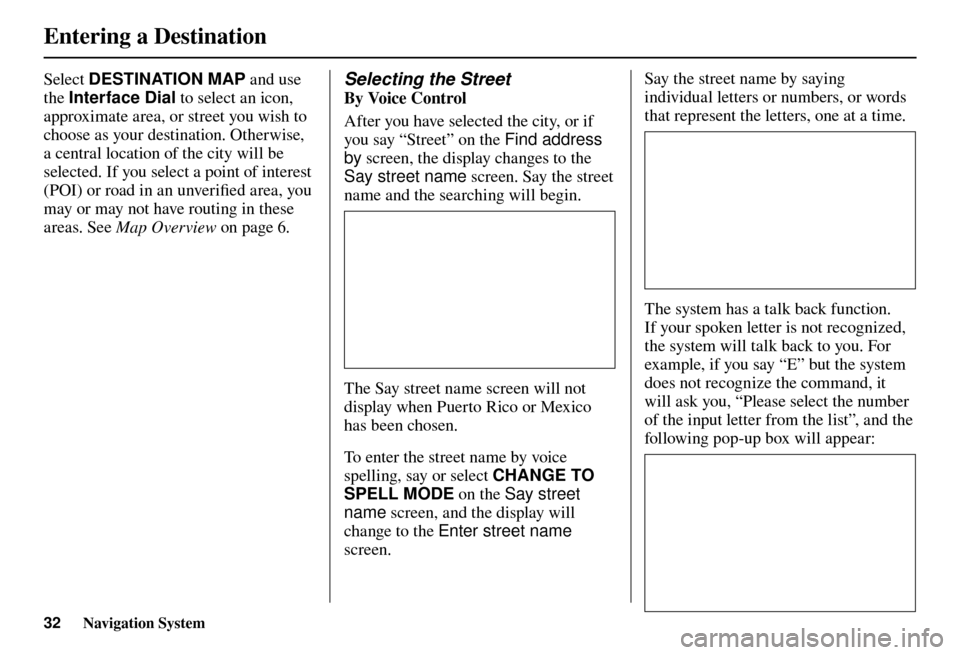
By Voice Control
After you have selected the city, or if
you say “Street” on the Find address
by screen, the display changes to the
Say street name screen. Say the street
name and the searching will begin.
The Say street name screen will not
display when Puerto Rico or Mexico
has been chosen.
To enter the street name by voice
spelling, say or select CHANGE TO
SPELL MODE on the Say street
name screen, and the display will
change to the Enter street name
screen. Say the street name by saying
individual letters or numbers, or words
that represent the letters, one at a time.
The system has a talk back function.
If your spoken letter is not recognized,
the system will talk back to you. For
example, if you say “E” but the system
does not recognize the command, it
will ask you, “Please select the number
of the input letter from the list”, and the
following pop-up box will appear:
Page 47 of 184
Entering a Destination
46 Navigation System
By Map Input
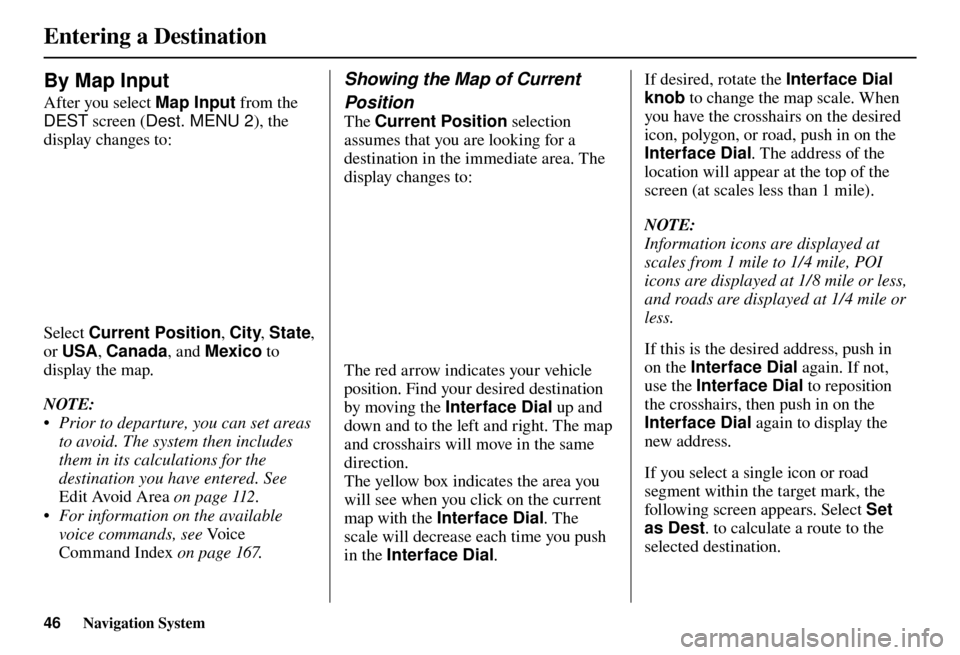
After you select Map Input from the
DEST screen ( Dest. MENU 2 ), the
display changes to:
Select Current Position , City, State ,
or USA , Canada , and Mexico to
display the map.
NOTE:
• Prior to departure, you can set areas to avoid. The system then includes
them in its calculations for the
destination you have entered. See
Edit Avoid Area on page 112 .
• For information on the available voice commands, see Vo i c e
Command Index on page 167 .
Showing the Map of Current
Position
The Current Position selection
assumes that you are looking for a
destination in the immediate area. The
display changes to:
The red arrow indicates your vehicle
position. Find your desired destination
by moving the Interface Dial up and
down and to the left and right. The map
and crosshairs will move in the same
direction.
The yellow box indicates the area you
will see when you click on the current
map with the Interface Dial . The
scale will decrease each time you push
in the Interface Dial . If desired, rotate the Interface Dial
knob to change the map scale. When
you have the crosshairs on the desired
icon, polygon, or road, push in on the
Interface Dial . The address of the
location will appear at the top of the
screen (at scales less than 1 mile).
NOTE:
Information icons are displayed at
scales from 1 mile to 1/4 mile, POI
icons are displayed at 1/ 8 mile or less,
and roads are displayed at 1/4 mile or
less.
If this is the desired address, push in
on the Interface Dial again. If not,
use the Interface Dial to reposition
the crosshairs, then push in on the
Interface Dial again to display the
new address.
If you select a single icon or road
segment within the target mark, the
following screen appears. Select Set
as Dest . to calculate a route to the
selected destination.
Page 49 of 184
Entering a Destination
48 Navigation System
The Say city name screen will not
display when Puerto Rico or Mexico
has been chosen, or when a language
other than English has been selected.
To enter the city name by voice
spelling, say CHANGE TO SPELL
MODE on the Say city name screen,
and the display will change to the Enter
city name screen.
Say the city name by saying individual
letters, or words that represent the
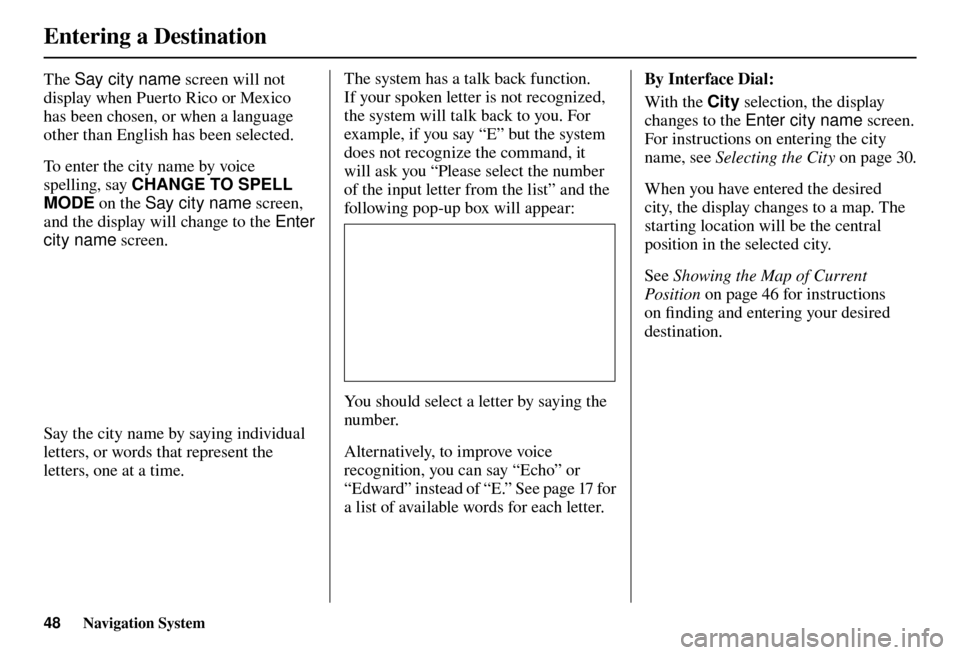
letters, one at a time. The system has a talk back function.
If your spoken letter is not recognized,
the system will talk back to you. For
example, if you say “E” but the system
does not recognize the command, it
will ask you “Please select the number
of the input letter from the list” and the
following pop-up box will appear:
You should select a letter by saying the
number.
Alternatively, to improve voice
recognition, you can say “Echo” or
“Edward” instead of “E.” See page
17 for
a list of available words for each letter. By Interface Dial:
With the City selection, the display
changes to the Enter city name
screen.
For instructions on entering the city
name, see Selecting the City on page 30 .
When you have entered the desired
city, the display changes to a map. The
starting location will be the central
position in the selected city.
See Showing the Map of Current
Position on page 46 for instructions
on fi nding and entering your desired
destination.
Page 50 of 184
Entering a Destination
Navigation System49
Show Map of State
By Voice Control:
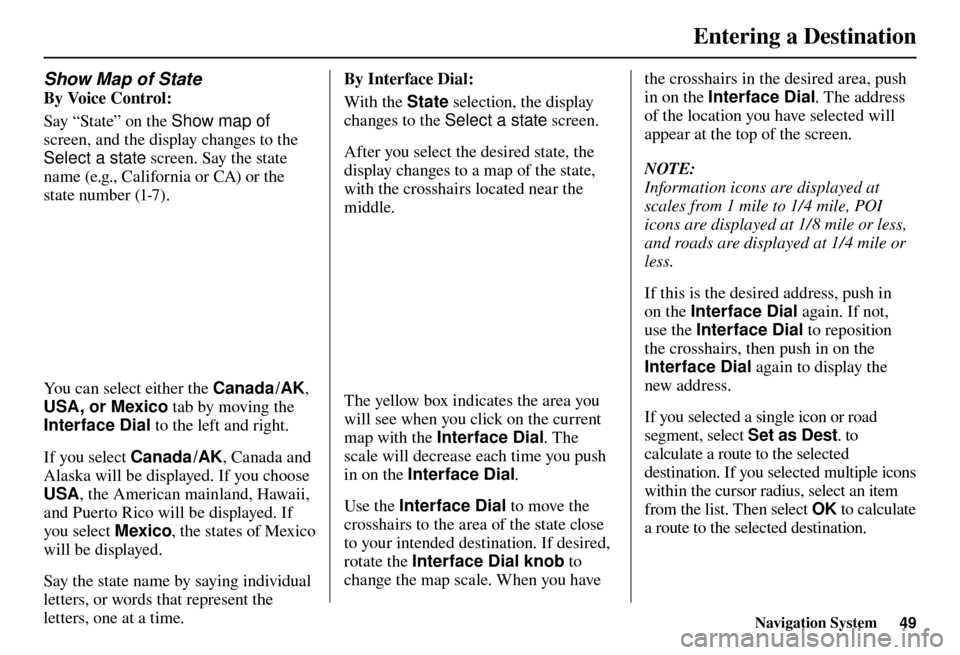
Say “State” on the Show map of
screen, and the display changes to the
Select a state screen. Say the state
name (e.g., California or CA) or the
state number (1-7).
You can select either the Canada /AK,
USA, or Mexico tab by moving the
Interface Dial to the left and right.
If you select Canada /AK , Canada and
Alaska will be displayed. If you choose
USA , the American mainland, Hawaii,
and Puerto Rico will be displayed. If
you select Mexico , the states of Mexico
will be displayed.
Say the state name by saying individual
letters, or words that represent the
letters, one at a time. By Interface Dial:
With the State
selection, the display
changes to the Select a state screen.
After you select the desired state, the
display changes to a map of the state,
with the crosshairs located near the
middle.The yellow box indicates the area you
will see when you click on the current
map with the Interface Dial . The
scale will decrease each time you push
in on the Interface Dial .
Use the Interface Dial to move the
crosshairs to the area of the state close
to your intended destination. If desired,
rotate the Interface Dial knob to
change the map scale. When you have the crosshairs in the desired area, push
in on the Interface Dial
. The address
of the location you have selected will
appear at the top of the screen.
NOTE:
Information icons are displayed at
scales from 1 mile to 1/4 mile, POI
icons are displayed at 1/ 8 mile or less,
and roads are displayed at 1/4 mile or
less.
If this is the desired address, push in
on the Interface Dial again. If not,
use the Interface Dial to reposition
the crosshairs, then push in on the
Interface Dial again to display the
new address.
If you selected a single icon or road
segment, select Set as Dest. to
calculate a route to the selected
destination. If you selected multiple icons
within the cursor radius, select an item
from the list. Then select OK to calculate
a route to the selected destination.
Page 51 of 184
Entering a Destination
50 Navigation System
Show Map of Continental USA,
Canada and Mexico
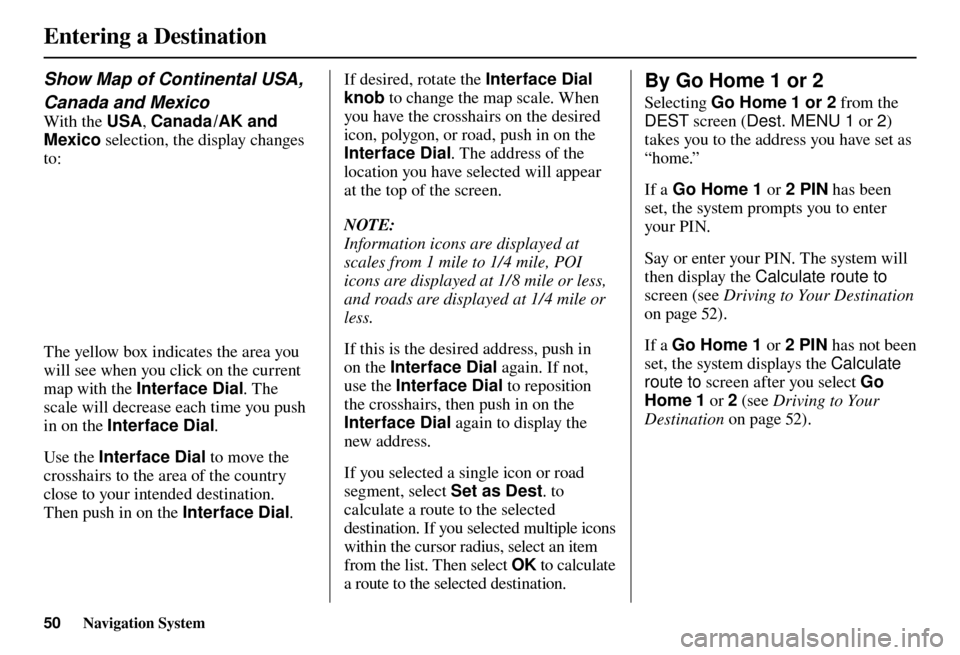
With the USA , Canada /AK and
Mexico selection, the display changes
to:
The yellow box indicates the area you
will see when you click on the current
map with the Interface Dial . The
scale will decrease each time you push
in on the Interface Dial .
Use the Interface Dial to move the
crosshairs to the area of the country
close to your intended destination.
Then push in on the Interface Dial .If desired, rotate the Interface Dial
knob to change the map scale. When
you have the crosshairs on the desired
icon, polygon, or road, push in on the
Interface Dial . The address of the
location you have selected will appear
at the top of the screen.
NOTE:
Information icons are displayed at
scales from 1 mile to 1/4 mile, POI
icons are displayed at 1/ 8 mile or less,
and roads are displayed at 1/4 mile or
less.
If this is the desired address, push in
on the Interface Dial again. If not,
use the Interface Dial to reposition
the crosshairs, then push in on the
Interface Dial again to display the
new address.
If you selected a single icon or road
segment, select Set as Dest. to
calculate a route to the selected
destination. If you selected multiple icons
within the cursor radius, select an item
from the list. Then select OK to calculate
a route to the selected destination.
By Go Home 1 or 2
Selecting Go Home 1 or 2 from the
DEST screen ( Dest. MENU 1 or 2 )
takes you to the address you have set as
“home.”
If a Go Home 1 or 2 PIN has been
set, the system prompts you to enter
your PI N.
Say or enter your PIN. The system will
then display the Calculate route to
screen (see Driving to Your Destination
on page 52 ).
If a Go Home 1 or 2 PIN has not been
set, the system displays the Calculate
route to screen after you select Go
Home 1 or 2 (see Driving to Your
Destination on page 52 ).
Page 54 of 184
Driving to Your Destination
Navigation System53
Changing the Routing Method
The system lets you select the way you
want to drive to your destination. Select
Route Pref. on the Calculate route
to screen by rotating the Interface
Dial knob .
• You can choose MAX or MIN for
three settings: Use Freeways , Use
To l l R o a d s , and Use Ferries . The
route calculations for the current
selection will be displayed in the
upper right-hand corner of the screen. The generated route may not be the
route you would choose. For safety
reasons, the system generally applies
the following rules to your route:
• Shortcuts through residential areas
are avoided.
• Right turns are favored over left turns or U-turns.
• Restricted turns (turns that cannot be made during or at certain times of the
day) are not used.
Viewing the Routes
If you select View Routes on the
Calculate route to screen, you can
view three possible routes to your
destination. You can also use the
Interface Dial to verify the areas
peripheral to the map. If you select
View Routes , the display changes to:
These different routes are shown and
calculated based on the setup options in
Route Preference .
You can select one of the three routes
(1-3) by rotating the Interface Dial
knob . The system will calculate the
selected route and display the map
screen.
Page 55 of 184
Driving to Your Destination
54 Navigation System
NOTE:
• The driving distance and time
estimated for the various routes is
displayed.
• It is not unusual for the different methods to pick the same route.
Voice commands cannot be used
while the system is calculating.
• Zoom IN/OUT to view route details or traffi c conditions is not available
on the View Routes screen. After
moving the Interface Dial and
scrolling through the map, you can
then zoom in or out on the map
screen to view your route in details. Based on the route data, you can change
the routing method by rotating the
Interface Dial knob
.
Once you confi rm your selection, say
the number of the desired routing
method or push in on the Interface
Dial .
The calculated route will be highlighted
as a blue line, and a voice prompt
will tell you how to proceed along the
highlighted route.
Push in on the Interface Dial and
select Voic e to have the guidance
repeated. Viewing the Destination Map
If you move the Interface Dial down
and select DESTINATION MAP while
on the Calculate route to screen,
a map of the destination vicinity is
displayed. Press the CANCEL or
BACK button, or select Return to
return to the previous screen. You can
view the destination map anytime while
en route by saying “Display destination
map.”