park assist Acura TLX 2019 Owner's Manual
[x] Cancel search | Manufacturer: ACURA, Model Year: 2019, Model line: TLX, Model: Acura TLX 2019Pages: 591, PDF Size: 34.5 MB
Page 6 of 591
4
Quick Reference Guide
Quick Reference Guide
Visual Index
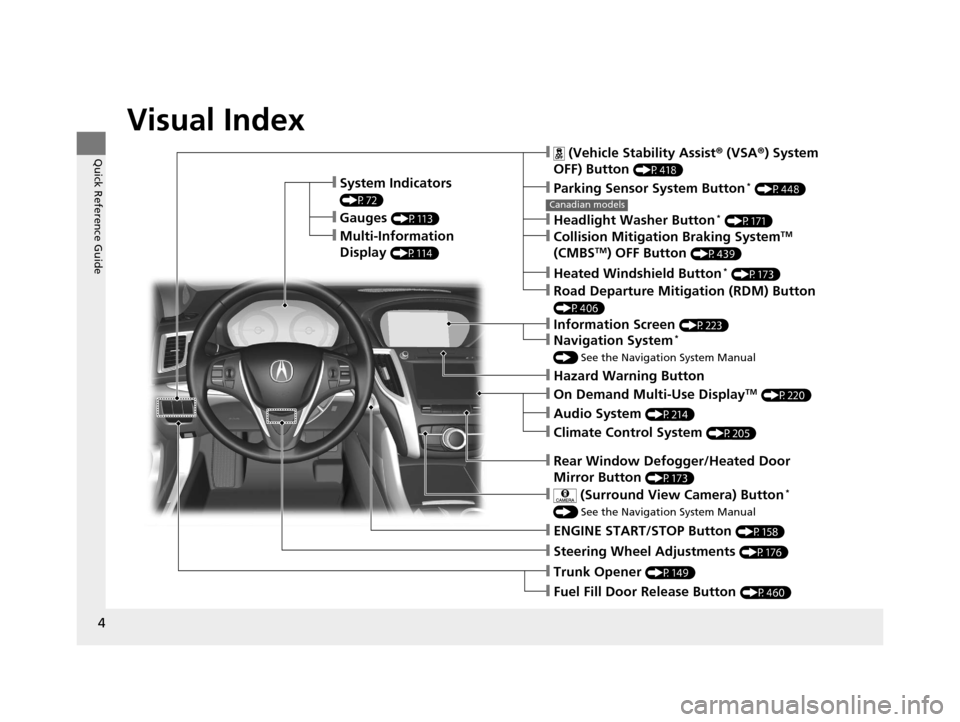
❙System Indicators
(P72)
❙Gauges (P113)
❙Multi-Information
Display
(P114)
❙Steering Wheel Adjustments (P176)
❙ENGINE START/STOP Button (P158)
❙Hazard Warning Button
❙Rear Window Defogger/Heated Door
Mirror Button
(P173)
Canadian models
❙ (Vehicle Stability Assist® (VSA ®) System
OFF) Button
(P418)
❙Parking Sensor System Button* (P448)
❙Collision Mitigation Braking SystemTM
(CMBSTM) OFF Button (P439)
❙Headlight Washer Button* (P171)
❙Heated Windshield Button* (P173)
❙Road Departure Mitigation (RDM) Button
(P406)
❙On Demand Multi-Use DisplayTM (P220)
❙Audio System (P214)
❙Climate Control System (P205)
❙Trunk Opener (P149)
❙Fuel Fill Door Release Button (P460)
❙Navigation System*
() See the Navigation System Manual
❙Information Screen (P223)
❙ (Surround View Camera) Button*
() See the Navigation System Manual
19 ACURA TLX-31TZ36400.book 4 ページ 2018年2月16日 金曜日 午後12時22分
Page 13 of 591
11
Quick Reference Guide
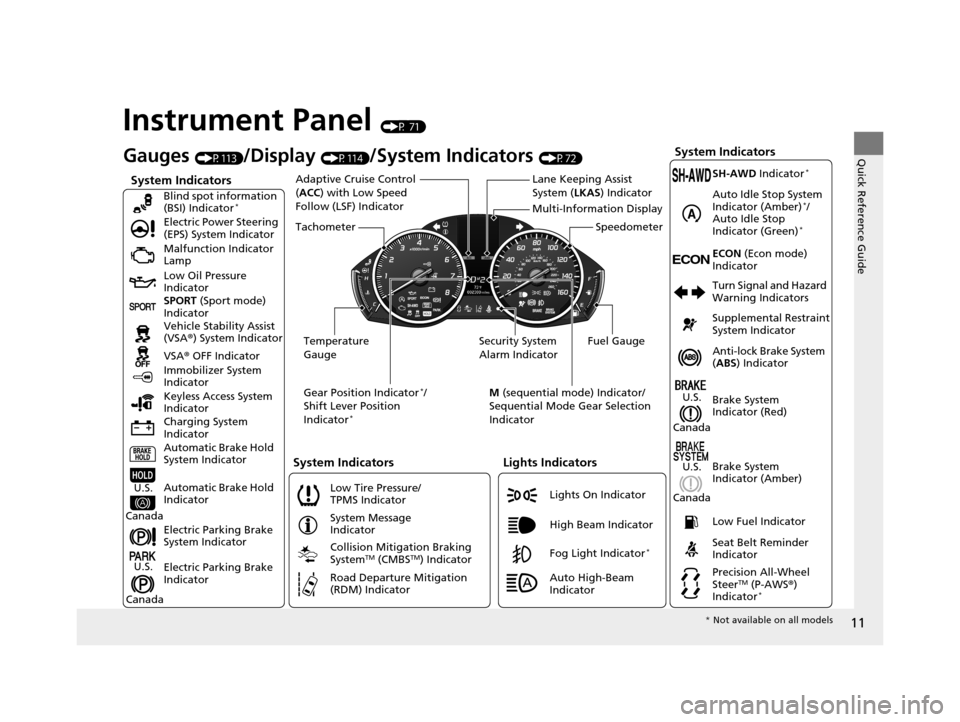
Instrument Panel (P 71)
System Indicators
Malfunction Indicator
Lamp
Low Oil Pressure
Indicator
Charging System
Indicator Vehicle Stability Assist
(VSA®) System Indicator
VSA ® OFF Indicator
Electric Power Steering
(EPS) System Indicator
Lights Indicators
Lights On Indicator
High Beam Indicator
Immobilizer System
Indicator
System Indicators
System Message
Indicator
Gauges (P113)/Display (P114)/System Indicators (P72)
Low Tire Pressure/
TPMS Indicator
Keyless Access System
Indicator
Electric Parking Brake
System Indicator
Electric Parking Brake
Indicator Automatic Brake Hold
System Indicator SPORT
(Sport mode)
Indicator Blind spot information
(BSI) Indicator
*
Collision Mitigation Braking
SystemTM (CMBSTM) Indicator
Road Departure Mitigation
(RDM) Indicator
Automatic Brake Hold
IndicatorU.S.
Canada
U.S.
CanadaFog Light Indicator*
Temperature
Gauge Security System
Alarm IndicatorFuel Gauge
Tachometer
Multi-Information Display
Speedometer
Gear Position Indicator
*/
Shift Lever Position
Indicator
*
M (sequential mode) Indicator/
Sequential Mode Gear Selection
Indicator
System Indicators
Lane Keeping Assist
System ( LKAS) Indicator
Adaptive Cruise Control
(
ACC ) with Low Speed
Follow (LSF) Indicator
Anti-lock Brake System
( ABS ) Indicator
Seat Belt Reminder
Indicator Brake System
Indicator (Red) Supplemental Restraint
System Indicator
Low Fuel Indicator Turn Signal and Hazard
Warning Indicators
Brake System
Indicator (Amber)
U.S.
Canada
U.S.
Canada
Precision All-Wheel
SteerTM (P-AWS ®)
Indicator*
ECON (Econ mode)
Indicator SH-AWD Indicator
*
Auto Idle Stop System
Indicator (Amber)*/
Auto Idle Stop
Indicator (Green)
*
Auto High-Beam
Indicator
* Not available on all models
19 ACURA TLX-31TZ36400.book 11 ページ 2018年2月16日 金曜日 午後12時22分
Page 169 of 591
Continued167
uuOperating the Switches Around the Steering Wheel uAuto High-Beam
Controls
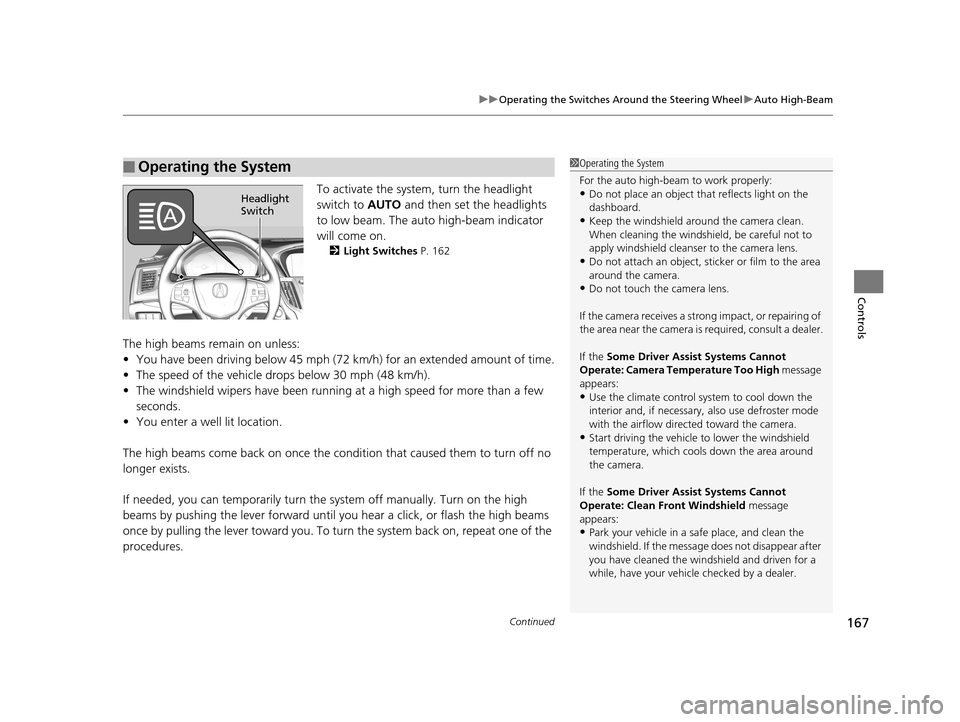
To activate the system , turn the headlight
switch to AUTO and then set the headlights
to low beam. The auto high-beam indicator
will come on.
2 Light Switches P. 162
The high beams remain on unless:
•You have been driving below 45 mph (72 km/h) for an extended amount of time.
• The speed of the vehicle drops below 30 mph (48 km/h).
• The windshield wipers have been runnin g at a high speed for more than a few
seconds.
• You enter a well lit location.
The high beams come back on once the condi tion that caused them to turn off no
longer exists.
If needed, you can temporarily turn the system off manually. Turn on the high
beams by pushing the lever forward until you hear a click, or flash the high beams
once by pulling the lever toward you. To turn the system back on, repeat one of the
procedures.
■Operating the System1 Operating the System
For the auto high-beam to work properly:
•Do not place an object that reflects light on the
dashboard.
•Keep the windshield around the camera clean.
When cleaning the windshield, be careful not to
apply windshield cleanser to the camera lens.
•Do not attach an object, sticker or film to the area
around the camera.
•Do not touch the camera lens.
If the camera receives a st rong impact, or repairing of
the area near the camera is required, consult a dealer.
If the Some Driver Assist Systems Cannot
Operate: Camera Temperature Too High message
appears:
•Use the climate control system to cool down the
interior and, if necessary, also use defroster mode
with the airflow directed toward the camera.
•Start driving the vehicle to lower the windshield
temperature, which cool s down the area around
the camera.
If the Some Driver Assist Systems Cannot
Operate: Clean Front Windshield message
appears:
•Park your vehicle in a sa fe place, and clean the
windshield. If the message does not disappear after
you have cleaned the windshield and driven for a
while, have your vehicle checked by a dealer.
Headlight
Switch
19 ACURA TLX-31TZ36400.book 167 ページ 2018年2月16日 金曜日 午後12時22分
Page 357 of 591
355
Driving
This chapter discusses driving and refueling.
Before Driving................................... 356
Towing a Trailer ................................ 361
When Driving
Starting the Engine .......................... 362
Precautions While Driving................. 369
Automatic Transmission
*................. 370
Dual Clutch Transmission*............... 370
Shifting ............................................ 371
Shifting ............................................ 378
Auto Idle Stop
*................................ 382
Integrated Dynamics System............. 387
Models with electronic gear selector
Models with shift lever
Front Sensor Camera ....................... 388
Adaptive Cruise Control (ACC) with Low Speed Follow (LSF) ......................... 390
Road Departure Mitigation (RDM) System ... 404Lane Keeping Assist System (LKAS) .. 409Vehicle Stability Assist® (VSA®), aka Electronic
Stability Control (ESC), System ............... 417
Agile Handling Assist ....................... 419
Precision All-Wheel SteerTM (P-AWS ®)
System*......................................... 419
Blind spot inform ation (BSI) System*.... 420
Super Handling-All Wheel DriveTM (SH-
AWD® )*......................................... 423 Tire Pressure Monitoring System (TPMS)
with Tire Fill Assist.......................... 424
Tire Pressure Monitoring System (TPMS) -
Required Federal Expl anation ........... 426
Braking .............................................. 428
Parking Your Vehicle ........................ 445
Multi-View Rear Camera
*................ 456
Surround View Camera System*..... 458
Refueling ........................................... 459
Fuel Economy and CO
2 Emissions .... 462
* Not available on all models
19 ACURA TLX-31TZ36400.book 355 ページ 2018年2月16日 金曜日 午後12時22分
Page 370 of 591
uuWhen Driving uStarting the Engine
368
Driving
■Hill Start Assist System
Hill start assist keeps the brake engaged br iefly to help prevent the vehicle from
rolling on inclines as you move your fo ot from the brake pedal to the accelerator.
Change the gear position to
(D when facing uphill, or (R when facing downhill,
then release the brake pedal.
1 Hill Start Assist System
Hill start assist may not prevent the vehicle from
rolling downhill on a very st eep or slippery slope, and
will not operate on small inclines.
Hill start assist is not a replacement for the parking
brake.
Hill start assist will operate even when VSA ® is
switched off.
19 ACURA TLX-31TZ36400.book 368 ページ 2018年2月16日 金曜日 午後12時22分
Page 391 of 591

389
uuWhen Driving uFront Sensor Camera
Driving
1Front Sensor Camera
If the Some Driver Assist Systems Cannot
Operate: Camera Temperature Too High message
appears:
•Use the climate control system to cool down the
interior and, if necessary, also use defroster mode
with the airflow directed towards the camera.
•Start driving the vehicle to lower the windshield
temperature, which cool s down the area around
the camera.
If the Some Driver Assist Systems Cannot
Operate: Clean Front Windshield message
appears:
•Park your vehicle in a sa fe place, and clean the
windshield. If the message does not disappear after
you have cleaned the windshield and driven for a
while, have your vehicle checked by a dealer.
19 ACURA TLX-31TZ36400.book 389 ページ 2018年2月16日 金曜日 午後12時22分
Page 393 of 591
Continued391
uuWhen Driving uAdaptive Cruise Control (ACC) with Low Speed Follow (LSF)
Driving
■How to activate the system1Adaptive Cruise Control (ACC) with Low Speed Follow (LSF)
When the MAIN button is pressed, both ACC with
LSF and the Lane Keeping A ssist System (LKAS) are
either turned on or off.
ACC with LSF may not work properly under certain
conditions. 2 ACC with LSF Conditions and Limitations
P. 395
When not using ACC with LSF: Turn off adaptive
cruise by pressing the MAIN button. This also will
turn off the Lane Keeping Assist System (LKAS).
Do not use ACC with LSF under the following
conditions.
•On roads with heavy traf fic or while driving in
continuous stop and go traffic.
•On roads with sharp turns.
•On roads with steep downhill sections, as the set
vehicle speed can be exceeded by coasting. In such
cases, ACC with LSF will not apply the brakes to
maintain the set speed.
•On roads with toll collection facilities or other
objects between lanes of traffic, or in parking
areas, or faci lities with driv e through access.
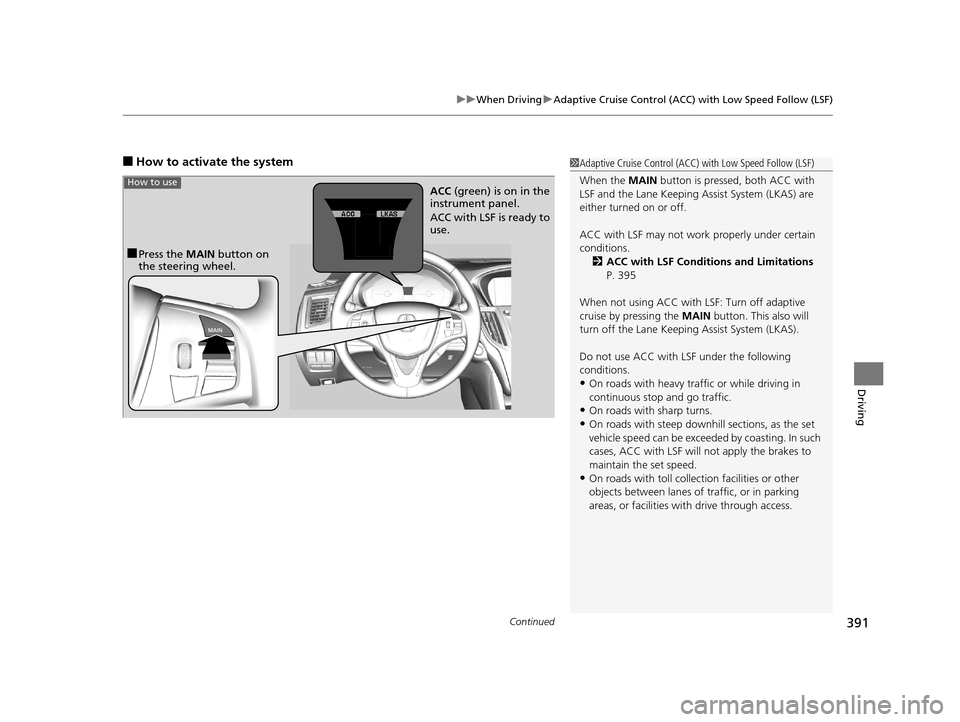
■Press the MAIN button on
the steering wheel. ACC
(green) is on in the
instrument panel.
ACC with LSF is ready to
use.
How to use
19 ACURA TLX-31TZ36400.book 391 ページ 2018年2月16日 金曜日 午後12時22分
Page 422 of 591

420
uuWhen Driving uBlind spot information (BSI) System*
Driving
Blind spot information (BSI) System*
Is designed to detect vehicles in specified alert zones adjacent to your vehicle,
particularly in harder to see areas commonly known as “blind spots.”
When the system detects vehi cles approaching from behind in adjacent lanes, the
appropriate indicator comes on for a few se conds, providing assistance when you
change lanes.
■How the system works
1 Blind spot inform ation (BSI) System*
Important Safety Reminder
Like all assistance systems, BSI has limitations. Over
reliance on BSI may result in a collision.
The BSI alert indicator may not come on under the
following conditions:
•A vehicle does not stay in the alert zone for more
than two seconds.
•A vehicle is parked in a side lane.•The speed difference betw een your vehicle and the
vehicle you are passing is greater than 6 mph (10
km/h).
•An object not detected by the radar sensors
approaches or passes your vehicle.
•A vehicle running in the adjacent lane is a
motorcycle or other small vehicle.
3WARNING
Failure to visually confirm that it is safe to
change lanes before doing so may result in
a crash and serious injury or death.
Do not rely only on the blind spot
information system wh en changing lanes.
Always look in your mi rrors, to either side
of your vehicle, and behind you for other
vehicles before changing lanes.
●The transmission is in ( D or
(S.●Your vehicle speed is
between 20 mph (32 km/h)
and 100 mph (160 km/h)
Alert zone range
A: Approx. 1.6 ft. (0.5 m)
B: Approx. 10 ft. (3 m)
C: Approx. 10 ft. (3 m) Radar Sensors:
underneath the
rear bumper
corners
Alert Zone
A
B
C
* Not available on all models
19 ACURA TLX-31TZ36400.book 420 ページ 2018年2月16日 金曜日 午後12時22分
Page 495 of 591
493
Maintenance
Checking and Maintaining Tires
Checking Tires
To safely operate your vehicle, your tires must be of the proper type and size, in
good condition with adequate tread, and properly inflated.
■Inflation guidelines
Properly inflated tires provid e the best combination of hand ling, tread life, and comfort.
Refer to the driver’s doorjamb label or spec ifications page for the specified pressure.
Underinflated tires wear unev enly, adversely affect handling and fuel economy, and
are more likely to fail from overheating.
Overinflated tires make your vehicle ride ha rshly, are more prone to road hazards,
and wear unevenly.
Every day before you drive, look at each of the tires. If one looks lower than the
others, check the pressure with a tire gauge.
At least once a month or before long trips , use a gauge to measure the pressure in
all tires, including the spare
*. Even tires in good condition can lose 1–2 psi (10–20
kPa, 0.1–0.2 kgf/cm2) per month.
■Inspection guidelines
Every time you check inflation, also examine the tires and valve stems.
Look for:
• Bumps or bulges on the side or in the tread. Replace the tire if you find any cuts,
splits, or cracks in the side of the tire . Replace it if you see fabric or cord.
• Remove any foreign objects and inspect for air leaks.
• Uneven tread wear. Have a deal er check the wheel alignment.
• Excessive tread wear.
2 Wear Indicators P. 498
•Cracks or other damage around valve stem.
1Checking Tires
Measure the air pressure when tires are cold. This
means the vehicle has been parked for at least three
hours, or driven less than 1 mile (1.6 km). If
necessary, add or releas e air until the specified
pressure is reached.
If checked when hot, tire pressure can be as much as
4–6 psi (30–40 kPa, 0.3–0.4 kgf/cm
2) higher than if
checked when cold. 2 Tire Fill Assist P. 424
Have a dealer check the tires if you feel a consistent
vibration while driving. Ne w tires and any that have
been removed and reinst alled should be properly
balanced.
Check the spare tire pressu re once a month or before
long trips.
3WARNING
Using tires that are excessively worn or
improperly inflated can cause a crash in
which you can be seriously hurt or killed.
Follow all instruction s in this owner’s
manual regarding ti re inflation and
maintenance.
Vehicles with optional spare tire
* Not available on all models
19 ACURA TLX-31TZ36400.book 493 ページ 2018年2月16日 金曜日 午後12時22分
Page 519 of 591
517Continued
Handling the Unexpected
If a Tire Goes Flat
Temporarily Repairing a Flat Tire
If the tire has a large cut or is otherwise severely damaged, you will need to have the
vehicle towed. If the tire only has a small puncture, from a nail for instance, you can
use the temporary tire repair kit so that you can drive to the nearest service station
for a more permanent repair.
If a tire goes flat while driving, grasp the steering wheel firmly, and brake gradually
to reduce speed. Then stop in a safe place.
1. Park the vehicle on a firm, level, and n on-slippery surface and apply the parking
brake.
2. Change the gear position to
(P.
3. Turn on the hazard warning lights an d set the power mode to VEHICLE OFF
(LOCK).
1 Temporarily Repairing a Flat Tire
The kit should not be used in the following situations.
Instead, contact a dealer or roadside assistance to
have the vehicle towed.
•The tire sealant has expired.
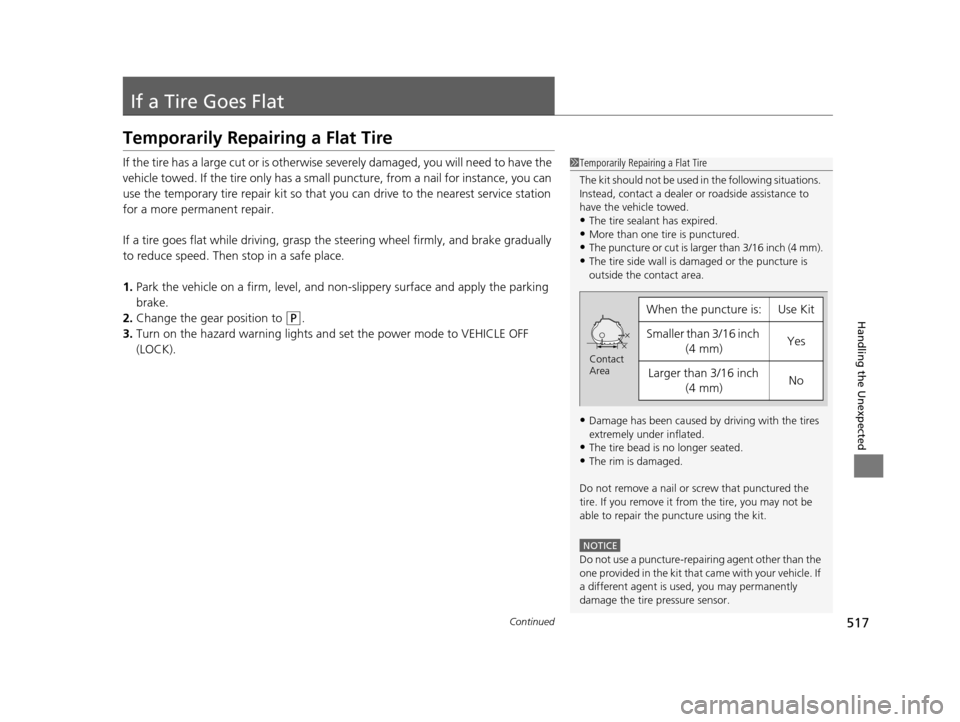
•More than one tire is punctured.•The puncture or cut is larger than 3/16 inch (4 mm).
•The tire side wall is da maged or the puncture is
outside the contact area.
•Damage has been caused by driving with the tires
extremely under inflated.
•The tire bead is no longer seated.
•The rim is damaged.
Do not remove a nail or screw that punctured the
tire. If you remove it from the tire, you may not be
able to repair the puncture using the kit.
NOTICE
Do not use a puncture-repairing agent other than the
one provided in the kit that came with your vehicle. If
a different agent is used, you may permanently
damage the tire pressure sensor.
When the puncture is:Use Kit
Smaller than 3/16 inch (4 mm)Yes
Larger than 3/16 inch (4 mm)No
Contact
Area
19 ACURA TLX-31TZ36400.book 517 ページ 2018年2月16日 金曜日 午後12時22分