spare wheel Acura TSX 2007 Owner's Manual
[x] Cancel search | Manufacturer: ACURA, Model Year: 2007, Model line: TSX, Model: Acura TSX 2007Pages: 379, PDF Size: 5.45 MB
Page 263 of 379
Never use a puncture-repairing agent
in a flat tire. If used, you will have to
replace the tire pressure sensor.
Havetheflattirerepairedbyyour
dealer as soon as possible.
Each wheel is equipped with a tire
pressure sensor mounted inside the
tire behind the valve stem. You must
use TPMS specific wheels. It is
recommended that you always have
your tires serviced by your dealer or
a qualified technician.
After
you replace the flat tire with
the spare, the low tire pressure
indicator stays on. This is normal;
the system is not monitoring the
spare tire pressure. Manually check
the spare tire pressure to be sure it
is correct.
If
you have a flat tire, the low tire
indicator and tire pressure monitor
will come on. Replace the indicated
flat tire with the compact spare tire
(see page ).
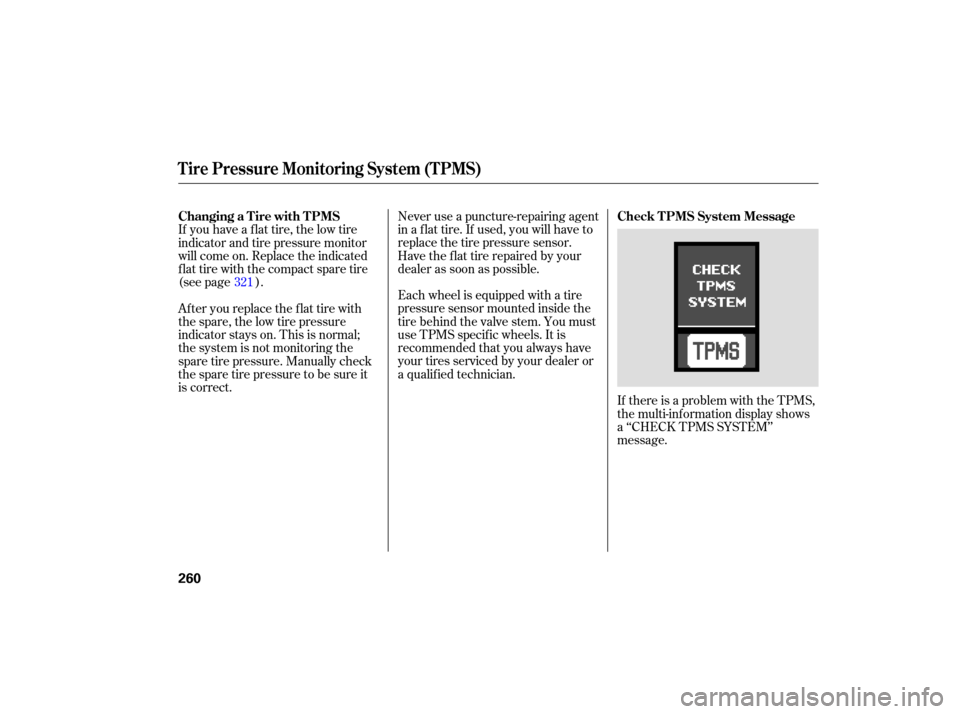
If there is a problem with the TPMS,
the multi-information display shows
a ‘‘CHECK TPMS SYSTEM’’
message.
321
Tire Pressure Monitoring System (TPMS)
Check T PMS System Message
Changing a T ire with T PMS
260
Page 266 of 379
Driving with varying tire or wheel
sizes may cause the VSA to
malfunction. When replacing tires,
make sure they are of the same size
and type as your original tires (see
page ).
Deactivate the VSA system if you
need to drive with the compact spare
tire installed (see page ).
If you install winter tires, make sure
they are the same size as those that
were originally supplied with your
vehicle. Exercise the same caution
during winter driving as you would if
your vehicle was not equipped with
VSA.
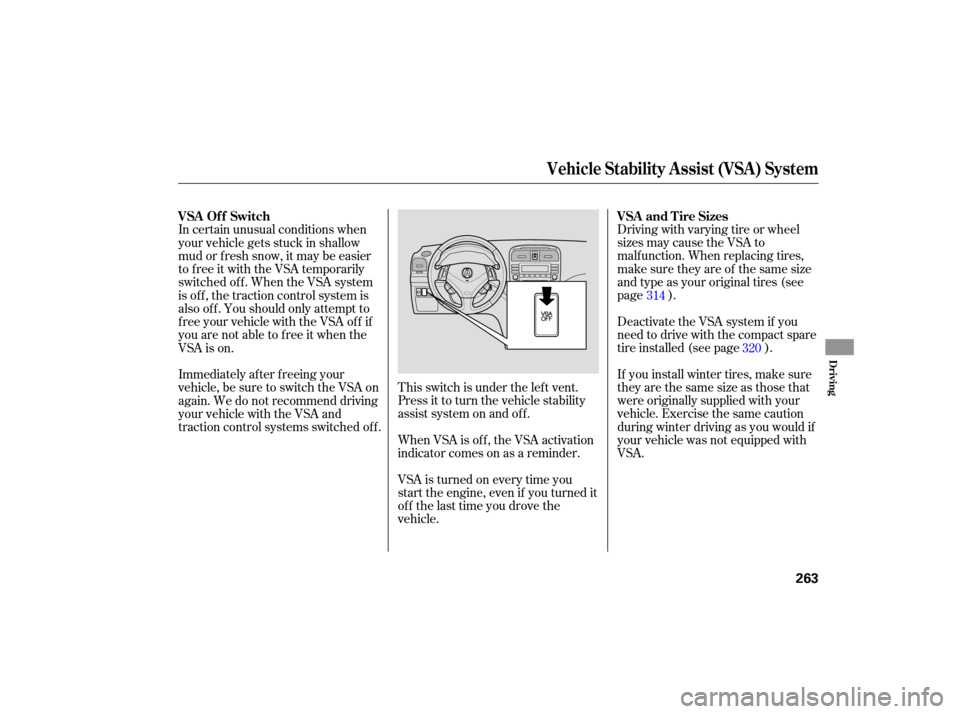
This switch is under the lef t vent.
Press it to turn the vehicle stability
assist system on and of f .
When VSA is off, the VSA activation
indicator comes on as a reminder.
VSA is turned on every time you
start the engine, even if you turned it
off the last time you drove the
vehicle.
In certain unusual conditions when
your vehicle gets stuck in shallow
mud or f resh snow, it may be easier
to free it with the VSA temporarily
switched of f . When the VSA system
is of f , the traction control system is
alsooff.Youshouldonlyattemptto
f ree your vehicle with the VSA of f if
you are not able to f ree it when the
VSA is on.
Immediately af ter f reeing your
vehicle, be sure to switch the VSA on
again. We do not recommend driving
your vehicle with the VSA and
traction control systems switched off.
314
320
VSA Of f Switch
VSA and Tire Sizes
Vehicle Stability Assist (VSA) System
Driving
263
Page 271 of 379

When preparing to tow, and before
driving away, be sure to check the
following: Al
ways drive slowly and have
someone guide you when backing up.
Grip the of the steering
wheel; then turn the wheel to the left
to get the trailer to move to the left,
andturnthewheelrighttomovethe
trailer to the right.
Follow all normal precautions when
parking, including firmly setting the
parking brake and putting the
transmission in Park (automatic) or
in first or reverse (manual). Also,
place wheel chocks at each of the
trailer’s tires.
Your
vehicle tires and spare are
properly inflated (see page ),
and the trailer tires and spare are
inflated as recommended by the
trailer maker.
Crosswinds and air turbulence
caused by passing trucks can disrupt
your steering and cause the trailer to
sway. When being passed by a large
vehicle, keep a constant speed, and
steer straight ahead. Do not try to
make quick steering or braking
corrections.
The
vehicle has been properly
serviced, and the suspension,
cooling system, and lights are in
good operating condition.
All weights and loads are within
limits (see pages and ).
Thehitch,safetychains,andany
other attachments are secure.
All items in or on the trailer are
properly secured and cannot shif t
while you drive.
The lights and brakes on your
vehicle and the trailer are working
properly. 264 265
311
bottom
Pre-T ow ChecklistBacking Up
Parking
Handling Crosswinds and Buf f et ing
Towing a Trailer
268
Page 323 of 379
Check the inflation pressure of the
compact spare tire every time you
check the other tires. It should be
inflated to:
Follow these precautions:
Never exceed 50 mph (80 km/h).
This tire gives a harsher ride and
less traction on some road
surfaces. Use greater caution
while driving. Do
not mount snow chains on the
compact spare tire.
Do not use the compact spare tire
if you are towing a trailer.
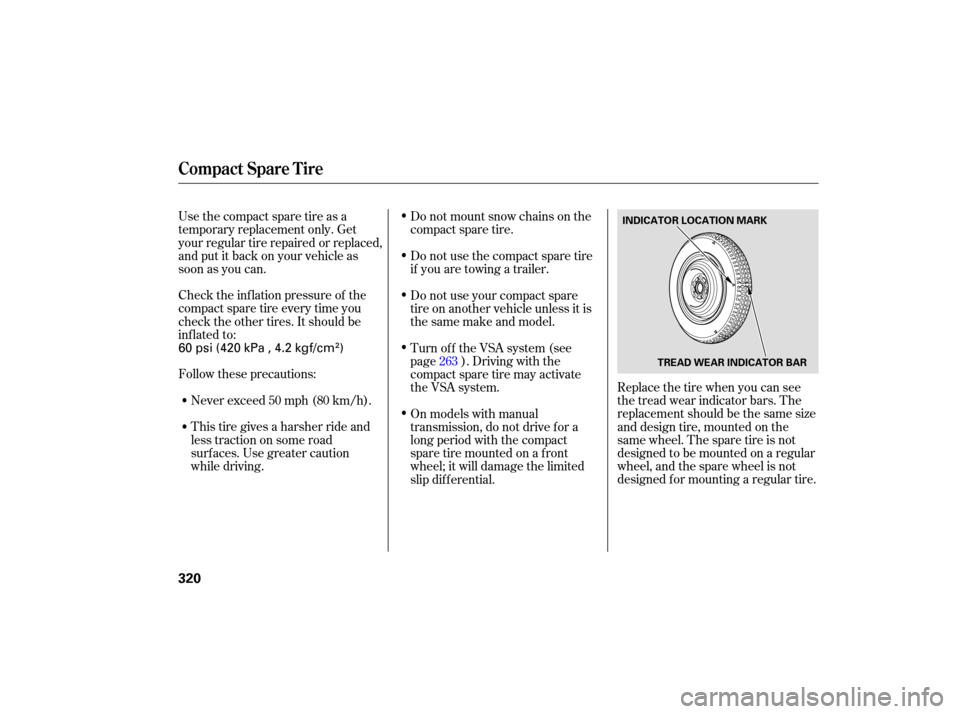
Replace the tire when you can see
the tread wear indica tor bars. The
replacement should be the same size
and design tire, mounted on the
samewheel.Thesparetireisnot
designed to be mounted on a regular
wheel, and the spare wheel is not
designed for mounting a regular tire.
Use
the compact spare tire as a
temporary replacement only. Get
your regular tire repaired or replaced,
and put it back on your vehicle as
soon as you can.
Do not use your compact spare
tire on another vehicle unless it is
thesamemakeandmodel.
On models with manual
tran smission, do not drive for a
long period with the compact
spare tire mounted on a f ront
wheel; it will damage the limited
slip dif f erential. Turn of f the VSA system (see
page ). Driving with the
compact spare tire may activate
the VSA system. 263
Compact Spare Tire
320
INDICATOR LOCATION MARK
TREAD WEAR INDICATOR BAR
60 psi (420 kPa , 4.2 kgf/cm)
Page 325 of 379
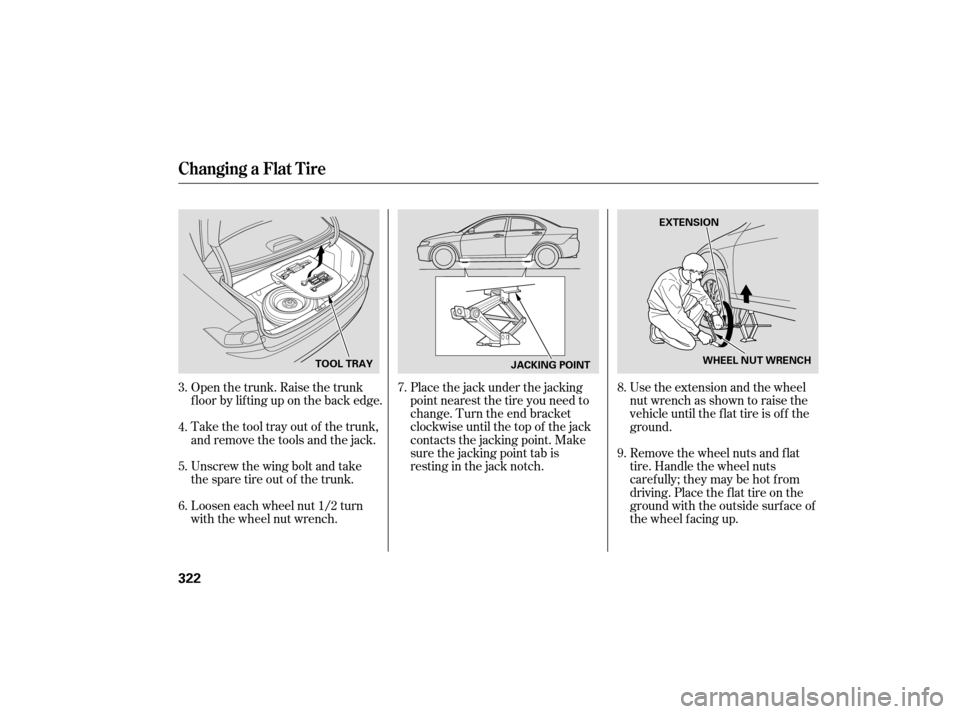
Open the trunk. Raise the trunk
f loor by lif ting up on the back edge.
Take the tool tray out of the trunk,
and remove the tools and the jack.
Unscrew the wing bolt and take
the spare tire out of the trunk.
Loosen each wheel nut 1/2 turn
with the wheel nut wrench.Place the jack under the jacking
point nearest the tire you need to
change. Turn the end bracket
clockwise until the top of the jack
contacts the jacking point. Make
sure the jacking point tab is
restinginthejacknotch.
Use the extension and the wheel
nut wrench as shown to raise the
vehicle until the f lat tire is of f the
ground.
Remove the wheel nuts and f lat
tire. Handle the wheel nuts
caref ully; they may be hot f rom
driving. Place the f lat tire on the
ground with the outside surf ace of
the wheel f acing up.
7.
3.
4.
5.
6. 8.
9.
Changing a Flat Tire
322
JACKING POINT
TOOL TRAY WHEEL NUT WRENCH
EXTENSION
Page 326 of 379
CONT INUED
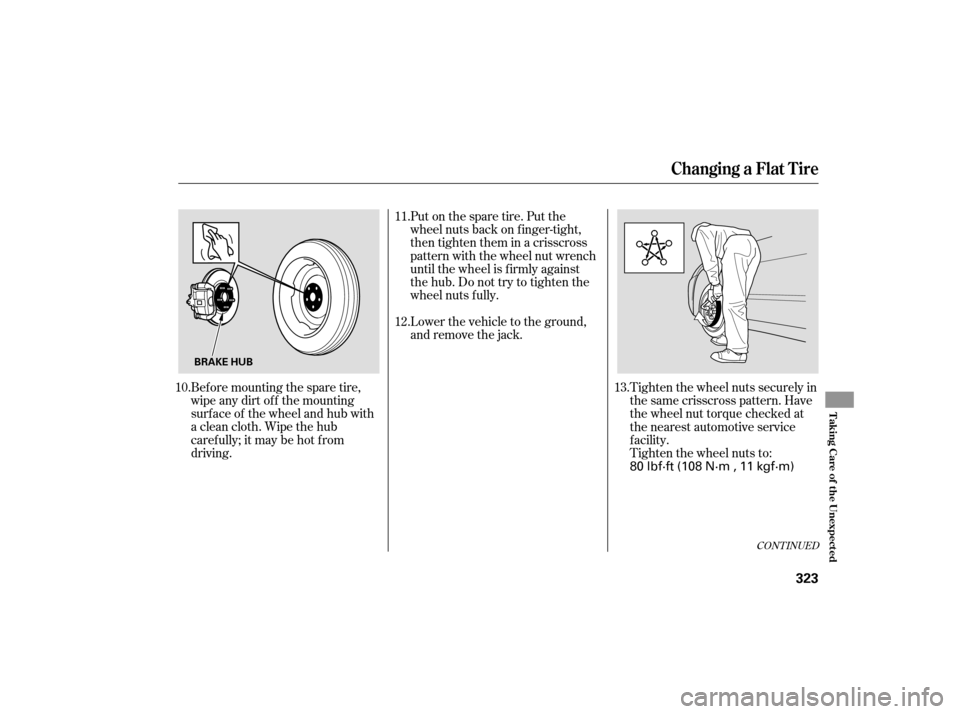
Bef ore mounting the spare tire,
wipeanydirtoff themounting
surface of the wheel and hub with
a clean cloth. Wipe the hub
carefully;itmaybehotfrom
driving.Put on the spare tire. Put the
wheel nuts back on f inger-tight,
then tighten them in a crisscross
pattern with the wheel nut wrench
until the wheel is f irmly against
the hub. Do not try to tighten the
wheel nuts f ully.
Lower the vehicle to the ground,
and remove the jack.
Tighten the wheel nuts securely in
the same crisscross pattern. Have
the wheel nut torque checked at
the nearest automotive service
f acility.
Tighten the wheel nuts to:
10.
13.
12. 11.
Changing a Flat Tire
T aking Care of t he Unexpect ed
323
BRAKE HUB
80 lbf·ft (108 N·m , 11 kgf·m)
Page 327 of 379
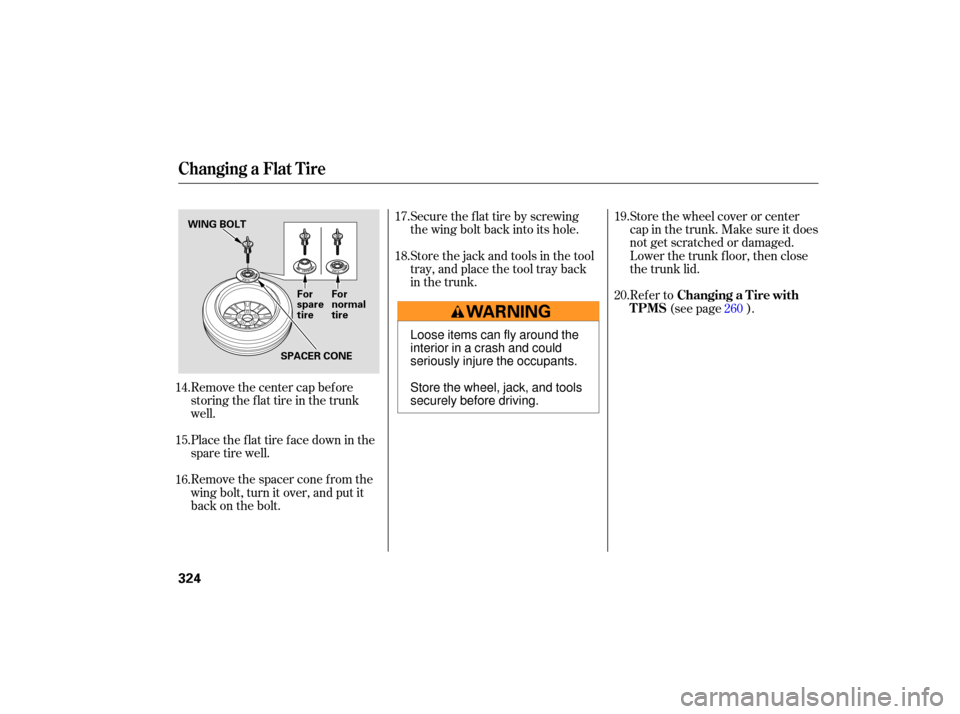
Securetheflattirebyscrewing
the wing bolt back into its hole.
Store the jack and tools in the tool
tray, and place the tool tray back
in the trunk. Store
the wheel cover or center
cap in the trunk. Make sure it does
not get scratched or damaged.
Lower the trunk floor, then close
the trunk lid.
Remove the center cap before
storing the flat tire in the trunk
well.
Place the flat tire face down in the
spare tire well.
Remove the spacer cone from the
wing bolt, turn it over, and put it
back on the bolt. Refer to
(see page ).
19.
20.
17.
18.
14.
15.
16. 260
Changing a Flat Tire
Changing a T ire with
TPMS
324
WING BOLT
For
spare
tireFor
normal
tire
SPACER CONE
Loose items can fly around the
interior in a crash and could
seriously injure the occupants.
Store the wheel, jack, and tools
securely before driving.
Page 376 of 379
CONT INUED
Seat Belts................................
Maintenance .22
Reminder Indicator and ................................
Beeper . 19, 62
...................
System Components . 19
...............
Use During Pregnancy . 17
...
Wearing a Lap/Shoulder Belt . 20
..................................
Seat Heaters .137
..................
Seat Position Memory . 142
......................
Seats, Adjusting the .138
............................
Security System .203
.......................................
Indicator .67
.................
Security Relock Timer . 115
.....................
Selecting a Child Seat .44
.......................
Select/Reset Button .72
...............................
Serial Number .344
.............................
Service Manual .363
...........
Service Station Procedure . 231
..........................
Setting the Clock .202
........
Sequential SportShif t Mode . 248
.....
Shif t Lever Position Indicator . 246
........................
Shif t Lock Release .251
................................
Side Airbags . 9, 30
...
How Your Side Airbags Work . 30
How the Side Airbag Of f ......................
Indicator Works .32 ..................
Side Curtain Airbags . 9, 31
How Your Side Curtain ..........................
Airbags Work .31
Side Marker Lights, Bulb .................
Replacement in . 301, 302
.............................
Signaling Turns .121
.....................................
Snow Tires .314
................................
Sound System .175
Spare Tire ......................................
Inf lating .320
............................
Specif ications .348
....................
Specif ications Charts . 346
........................
Speed Limiter . 245, 251
...................................
Speedometer .68
.......................................
Spotlights .153
..........
SRS, Additional Inf ormation . 23
...
Additional Safety Precautions . 35
.............................
Airbag Service .34
How the Passenger Airbag Of f ......................
Indicator Works .33
..
How the SRS Indicator Works . 32
How Your Front Airbags .........................................
Work .26
...
How Your Side Airbags Work . 30
How Your Side Curtain Airbags .........................................
Work .31 ........................
SRS Components .23
..................................
SRS Service .34
.............................
SRS Indicator . 32, 63
.......................................
Message .83
..
START (Ignition Key Position) . 128
.......................
Starting the Engine .243
In Cold Weather at High ..................................
Altitude .243
................
With a Dead Battery . 327
..............
State Emissions Testing . 357
........
Steam Coming f rom Engine . 329
Steering Wheel ................................
Adjustment .125
...........
Anti-thef t Column Lock . 128
....................
Storing Your Vehicle .317
........................................
Sun Visor .152
........................
Sunglasses Holder .158
Supplemental Restraint ..................................
System .9,23
......................................
Servicing .34
.........................
SRS Indicator . 32, 63
...................
System Components . 23
..................................
Synthetic Oil .288
............
System Message Indicator . 66
Index
INDEX
IX
Page 377 of 379
.....................................
Tachometer .68
......
Taillights, Changing Bulbs in . 303
.
Taking Care of the Unexpected . 319
Technical Descriptions ......
DOT Tire Quality Grading . 349
.....
Emissions Control Systems . 354
Three Way Catalytic ...............................
Converter .356
.......................
Temperature Gauge .68
........
Temperature, Inside Sensor . 169
....................
Temperature, Outside . 73
..............
Tether Anchorage Points . 49
..
Three Way Catalytic Converter . 356
...........
Tighten Fuel Cap Message . 79
.
Tilt/Telescopic Steering Wheel . 125
..........................
Time, Setting the .202
....................................
Tire Chains .315
.........
Tire, How to Change a Flat . 321
.................................
Tire Labeling .351
Tire Pressure Monitoring System ..................................
(TPMS) .257
...
Changing a Tire with TPMS . 260
Check TPMS System .................................
Message .260 Low Tire Pressure
...........................
Indicator . 67, 257
Required Federal ............................
Explanation .352
.............
Tire Pressure Monitor . 258
...........
Tire Pressure Readings . 259
...............................................
Tires .310
..............................
Air Pressure .311
........................................
Chains .315
.........................
Checking Wear .312
..........................
Compact Spare .320
......
DOT Tire Quality Grading . 349
......................................
Inf lation .310
..................................
Inspection .312
...................................
Replacing .313
......................................
Rotating .313
...........................................
Snow .314
....................
Specifications . 314, 348
...................
Tools, Tire Changing . 321
Towing .....................................
A Trailer .264
................
Emergency Wrecker . 341
....
Equipment and Accessories . 266
.............................
Weight Limit .264
Transmission ..........................
Check Message .83 Checking Fluid Level,
..............................
Automatic .293
Checking Fluid Level, ...................................
Manual .295
..................
Fluid Selection . 294, 295
..............
Identif ication Number . 344
.............
Shif ting the Automatic . 246
..................
Shif ting the Manual . 244
.....................................
Treadwear .349
Trip A & AVG. Fuel Reset with ...........................................
Ref uel .98
.......................................
Trip Meter .72
..............................................
Trunk .135
..................
Emergency Opener . 136
...............................
Main Switch .136
...............................
Opening the .135
..............................
Open Monitor .78
............................
Turn Signals . 65, 121
Unexpected, Taking Care of ...............................................
the .319
....
Unif orm Tire Quality Grading . 349
........................
Unleaded Gasoline .230
.....................
Upholstery Cleaning .306
Index
T
U
X
Page 378 of 379
.......
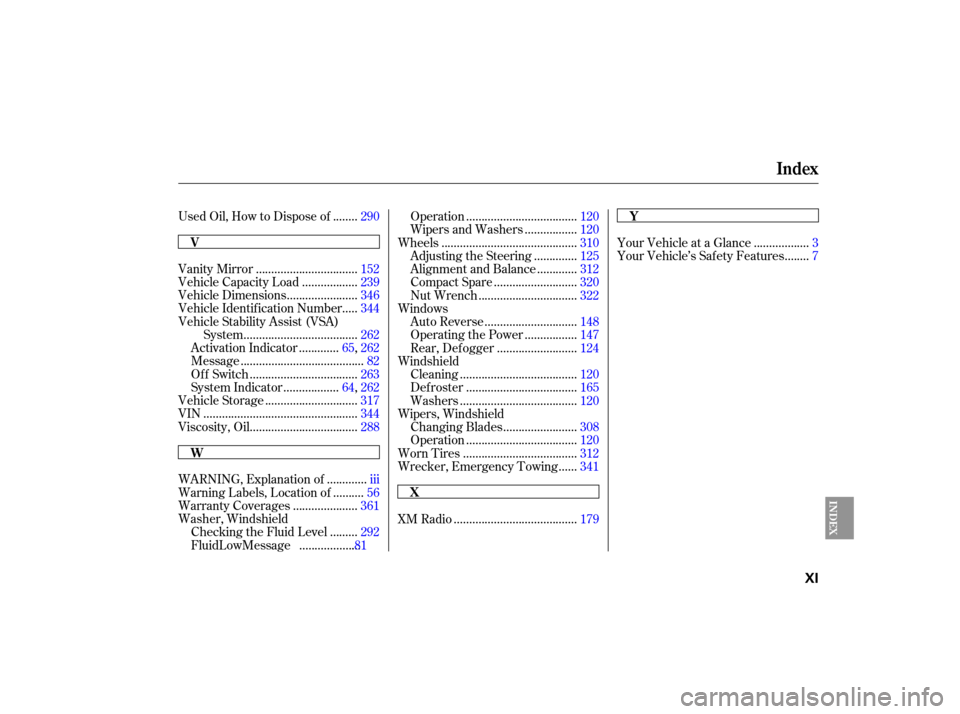
Used Oil, How to Dispose of . 290
................................
Vanity Mirror .152
.................
Vehicle Capacity Load . 239
......................
Vehicle Dimensions .346
....
Vehicle Identification Number . 344
Vehicle Stability Assist (VSA) ....................................
System .262
............
Ac tivation Indicator . 65, 262
.......................................
Message .82
..................................
Of f Switch .263
.................
System Indicator . 64, 262
.............................
Vehicle Storage .317
.................................................
VIN .344
..................................
Viscosity, Oil .288
............
WARNING, Explanation of . iii
.........
Warning Labels, Location of . 56
....................
Warranty Coverages .361
Washer, Windshield ........
Checking the Fluid Level . 292
....................
Fluid Low Message . 81 ...................................
Operation .120
................
Wipers and Washers . 120
...........................................
Wheels .310
.............
Adjusting the Steering . 125
............
Alignment and Balance . 312
..........................
Compact Spare .320
...............................
Nut Wrench .322
Windows .............................
Auto Reverse .148
................
Operating the Power . 147
.........................
Rear, Def ogger .124
Windshield .....................................
Cleaning .120
...................................
Def roster .165
.....................................
Washers .120
Wipers, Windshield .......................
Changing Blades .308
...................................
Operation .120
....................................
Worn Tires .312
.....
Wrecker, Emergency Towing . 341
.......................................
XM Radio .179 .................
Your Vehicle at a Glance . 3
.......
Your Vehicle’s Saf ety Features . 7
Index
INDEX
V
XY
W
XI