display Acura TSX 2012 Owner's Guide
[x] Cancel search | Manufacturer: ACURA, Model Year: 2012, Model line: TSX, Model: Acura TSX 2012Pages: 324, PDF Size: 9.45 MB
Page 85 of 324
84
uuGauges and Multi-Information DisplayuMulti-Information Display
Instrument Panel
■
Example for customization settings
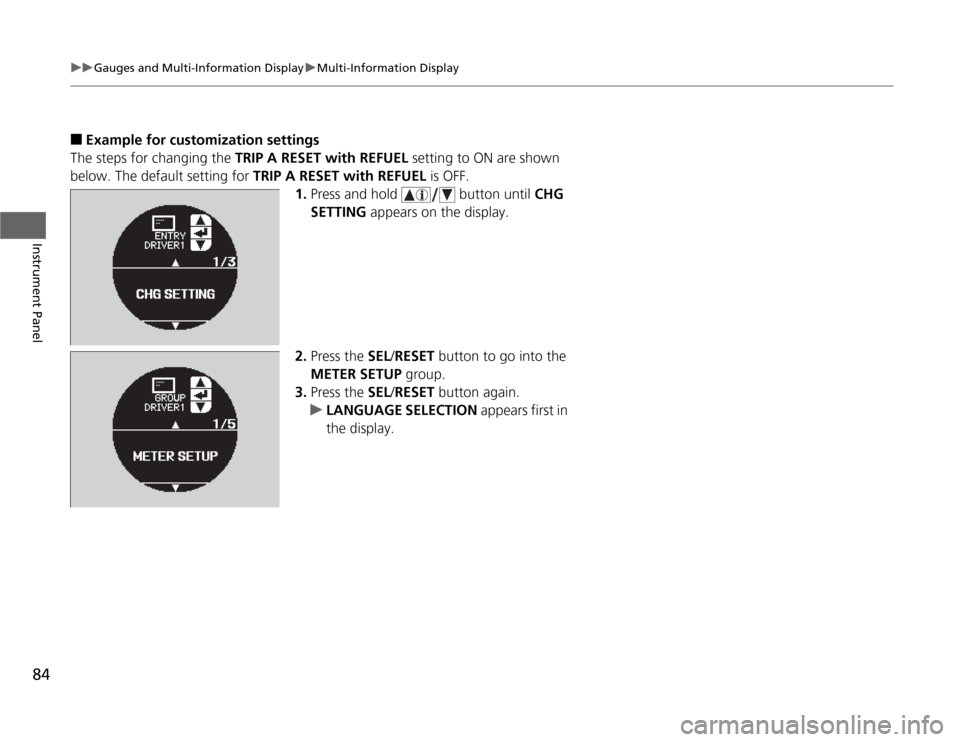
The steps for changing the TRIP A RESET with REFUEL setting to ON are shown
below. The default setting for TRIP A RESET with REFUEL is OFF.
1.Press and hold button until CHG
SETTING appears on the display.
2.Press the SEL/RESET button to go into the
METER SETUP group.
3.Press the SEL/RESET button again.
uLANGUAGE SELECTION appears first in
the display.
Page 86 of 324
85
uuGauges and Multi-Information DisplayuMulti-Information Display
Instrument Panel
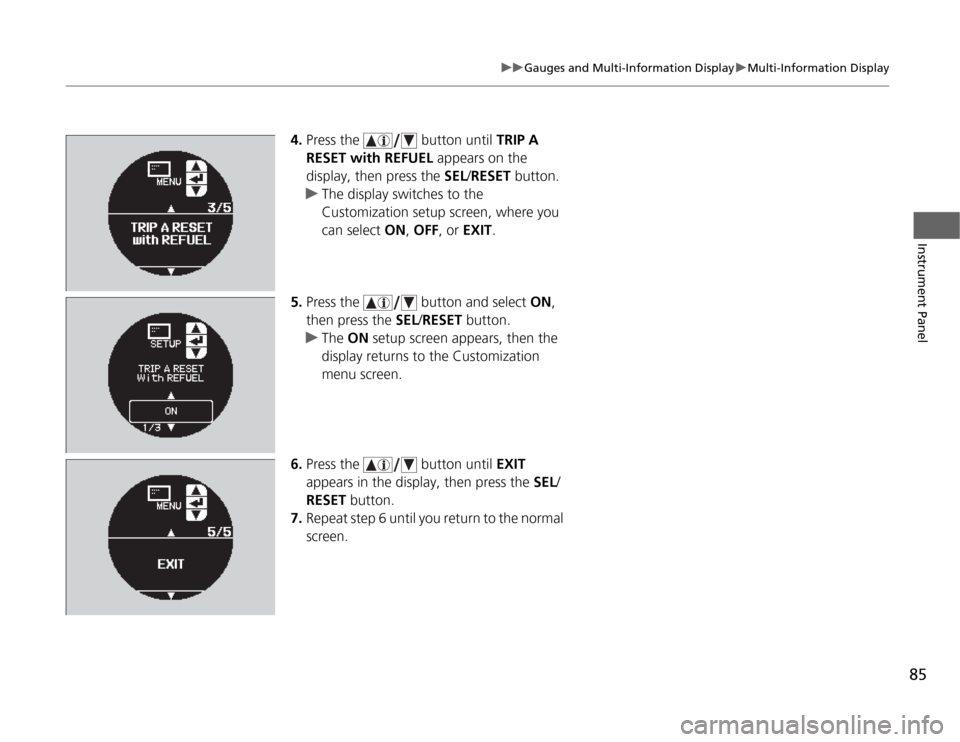
4.Press the button until TRIP A
RESET with REFUEL appears on the
display, then press the SEL/RESET button.
uThe display switches to the
Customization setup screen, where you
can select ON, OFF, or EXIT.
5.Press the button and select ON,
then press the SEL/RESET button.
uThe ON setup screen appears, then the
display returns to the Customization
menu screen.
6.Press the button until EXIT
appears in the display, then press the SEL/
RESET button.
7.Repeat step 6 until you return to the normal
screen.
Page 89 of 324
88Controls
Setting the ClockClockYou can adjust the time in the clock display, using the CLOCK button.
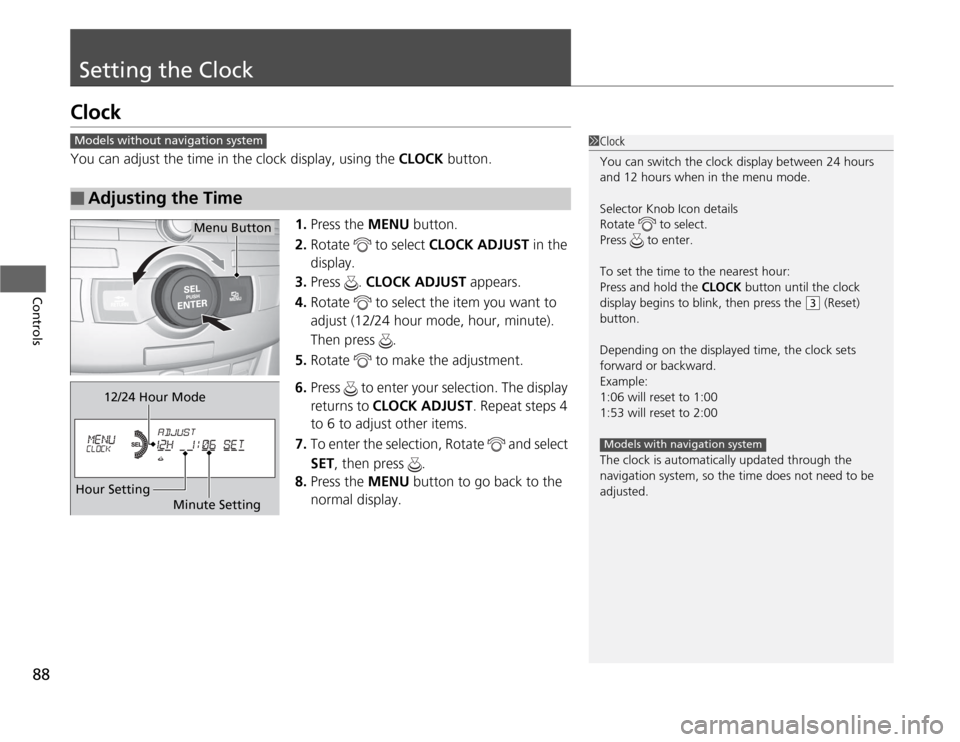
1.Press the MENU button.
2.Rotate to select CLOCK ADJUST in the
display.
3.Press . CLOCK ADJUST appears.
4.Rotate to select the item you want to
adjust (12/24 hour mode, hour, minute).
Then press .
5.Rotate to make the adjustment.
6.Press to enter your selection. The display
returns to CLOCK ADJUST. Repeat steps 4
to 6 to adjust other items.
7.To enter the selection, Rotate and select
SET, then press .
8.Press the MENU button to go back to the
normal display.■
Adjusting the Time
1Clock
You can switch the clock display between 24 hours
and 12 hours when in the menu mode.
Selector Knob Icon details
Rotate to select.
Press to enter.
To set the time to the nearest hour:
Press and hold the CLOCK button until the clock
display begins to blink, then press the
(3
(Reset)
button.
Depending on the displayed time, the clock sets
forward or backward.
Example:
1:06 will reset to 1:00
1:53 will reset to 2:00
The clock is automatically updated through the
navigation system, so the time does not need to be
adjusted.
Models with navigation system
Models without navigation system
Menu Button
12/24 Hour Mode
Hour Setting
Minute Setting
Page 95 of 324
94
uuLocking and Unlocking the DoorsuChildproof Door Locks
Controls
Childproof Door LocksThe childproof door locks prevent the rear doors from being opened from the inside
regardless of the position of the lock tab.
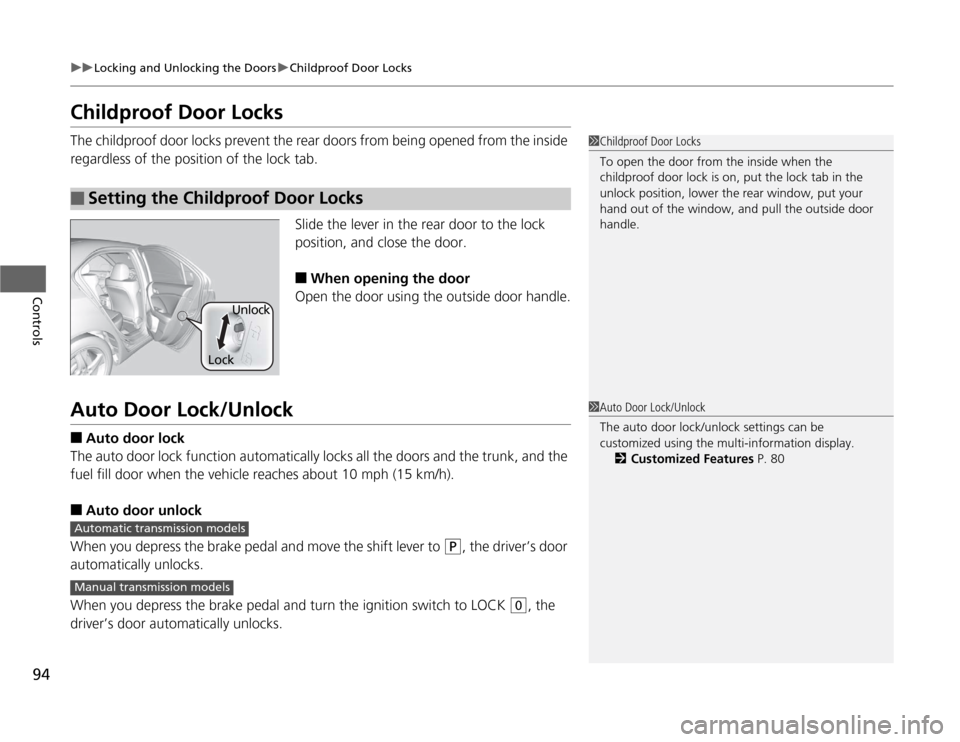
Slide the lever in the rear door to the lock
position, and close the door.
■
When opening the door
Open the door using the outside door handle.
Auto Door Lock/Unlock■
Auto door lock
The auto door lock function automatically locks all the doors and the trunk, and the
fuel fill door when the vehicle reaches about 10 mph (15 km/h).
■
Auto door unlock
When you depress the brake pedal and move the shift lever to
(P
, the driver’s door
automatically unlocks.
When you depress the brake pedal and turn the ignition switch to LOCK
(0
, the
driver’s door automatically unlocks.
■
Setting the Childproof Door Locks
1Childproof Door Locks
To open the door from the inside when the
childproof door lock is on, put the lock tab in the
unlock position, lower the rear window, put your
hand out of the window, and pull the outside door
handle.
LockUnlock
1Auto Door Lock/Unlock
The auto door lock/unlock settings can be
customized using the multi-information display.
2Customized Features P. 80
Automatic transmission modelsManual transmission models
Page 105 of 324
104Controls
Operating the Switches Around the Steering WheelIgnition Switch
1Ignition Switch
You cannot take the key out unless the shift lever is
in
(P
.
If you open the driver’s door when the key is in LOCK
(0
or ACCESSORY
(q
, a warning buzzer will sound
to remind you to take the key out.
When this happens, the following messages appear
on the multi-information display:
•In LOCK
(0
: REMOVE KEY.
•In ACCESSORY
(q
: REMOVE KEY. The buzzer will
stop when you take the key out.
If the key won’t turn from LOCK
(0
to ACCESSORY
(q
, turn the key while moving the steering wheel left
and right. The steering wheel will unlock, allowing
the key to turn.
3
WARNING
Removing the key from the ignition switch
while driving locks the steering. This can
cause you to lose control of the vehicle.
Remove the key from the ignition switch
only when parked.Manual transmission modelsAutomatic transmission modelsAll models
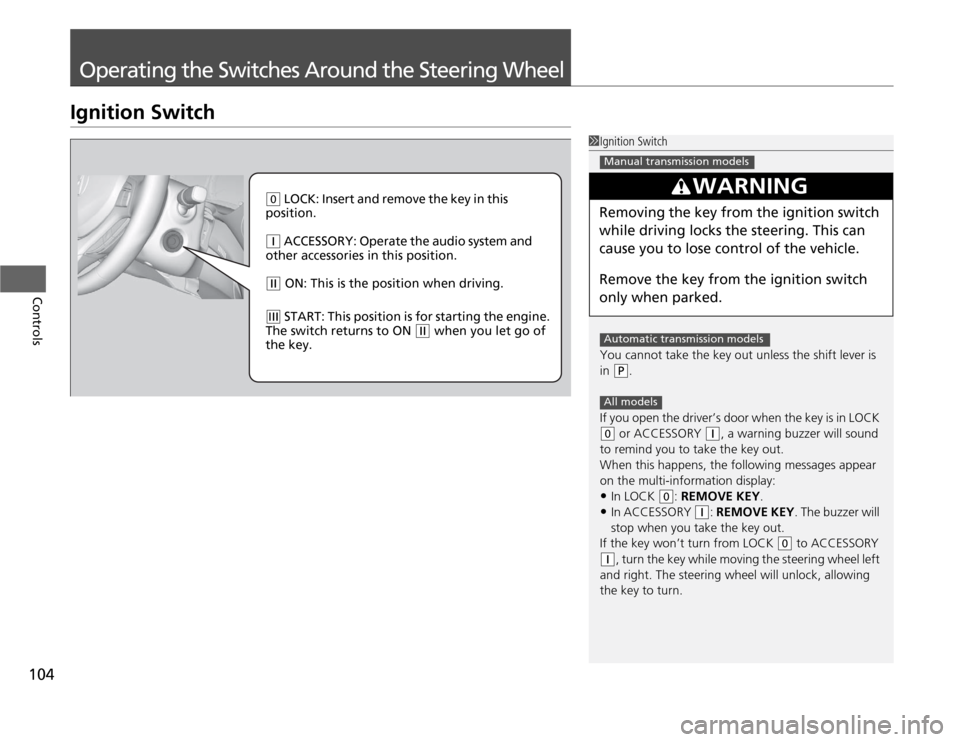
(0
LOCK: Insert and remove the key in this
position.
(q
ACCESSORY: Operate the audio system and
other accessories in this position.
(w
ON: This is the position when driving.
(e
START: This position is for starting the engine.
The switch returns to ON
(w
when you let go of
the key.
Page 110 of 324
109
uuOperating the Switches Around the Steering WheeluBrightness Control
Controls
Brightness Control
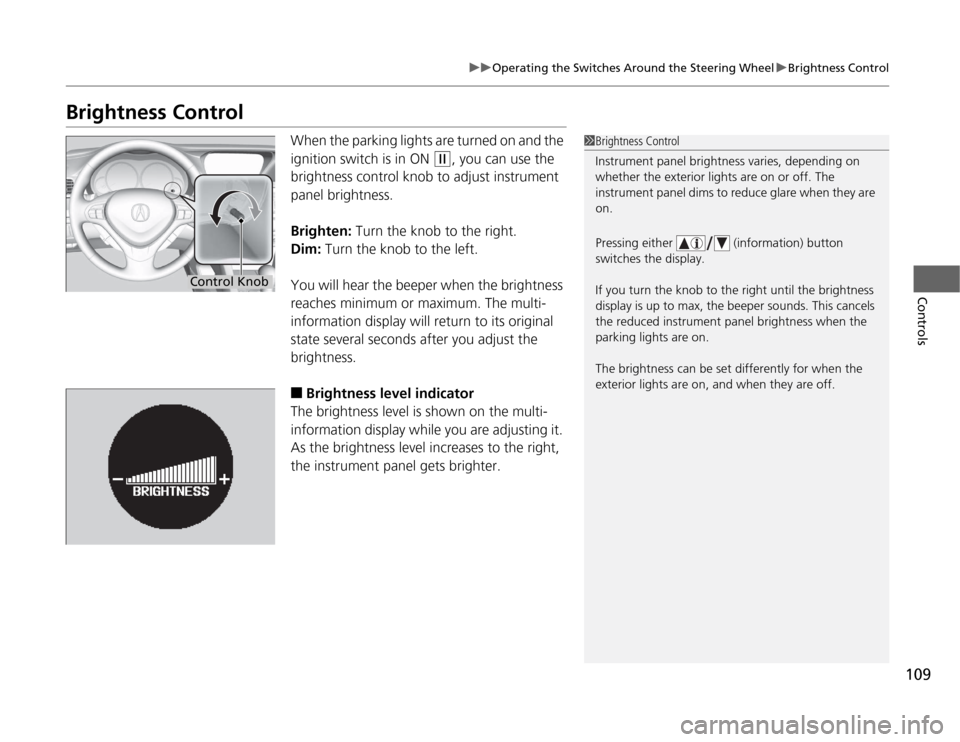
When the parking lights are turned on and the
ignition switch is in ON
(w
, you can use the
brightness control knob to adjust instrument
panel brightness.
Brighten: Turn the knob to the right.
Dim: Turn the knob to the left.
You will hear the beeper when the brightness
reaches minimum or maximum. The multi-
information display will return to its original
state several seconds after you adjust the
brightness.
■
Brightness level indicator
The brightness level is shown on the multi-
information display while you are adjusting it.
As the brightness level increases to the right,
the instrument panel gets brighter.
1Brightness Control
Instrument panel brightness varies, depending on
whether the exterior lights are on or off. The
instrument panel dims to reduce glare when they are
on.
Pressing either (information) button
switches the display.
If you turn the knob to the right until the brightness
display is up to max, the beeper sounds. This cancels
the reduced instrument panel brightness when the
parking lights are on.
The brightness can be set differently for when the
exterior lights are on, and when they are off.
Control Knob
Page 112 of 324
111
uuOperating the Switches Around the Steering WheeluDriving Position Memory System
*
Continued
Controls
Driving Position Memory System
*
You can store two driver’s seat positions with the driving position memory system.
When you unlock and open the driver’s door with a remote transmitter, the seat
adjusts automatically to one of the two preset positions.
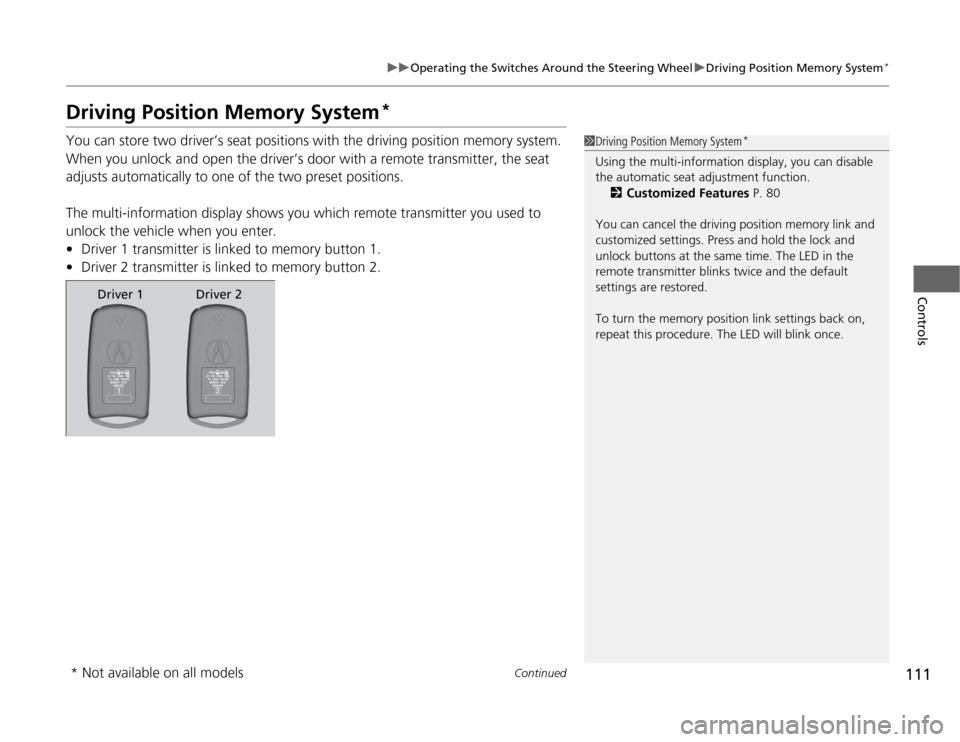
The multi-information display shows you which remote transmitter you used to
unlock the vehicle when you enter.
•Driver 1 transmitter is linked to memory button 1.
•Driver 2 transmitter is linked to memory button 2.
1Driving Position Memory System
*
Using the multi-information display, you can disable
the automatic seat adjustment function.
2Customized Features P. 80
You can cancel the driving position memory link and
customized settings. Press and hold the lock and
unlock buttons at the same time. The LED in the
remote transmitter blinks twice and the default
settings are restored.
To turn the memory position link settings back on,
repeat this procedure. The LED will blink once.
Driver 1 Driver 2
* Not available on all models
Page 134 of 324
133
Continued
Controls
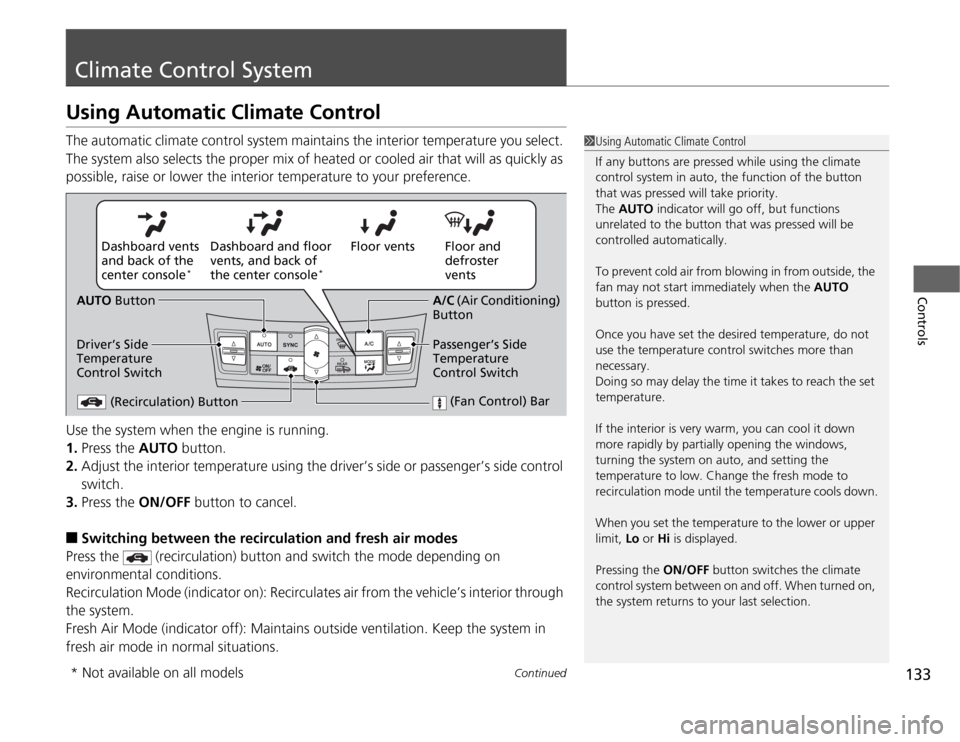
Climate Control SystemUsing Automatic Climate ControlThe automatic climate control system maintains the interior temperature you select.
The system also selects the proper mix of heated or cooled air that will as quickly as
possible, raise or lower the interior temperature to your preference.
Use the system when the engine is running.
1.Press the AUTO button.
2.Adjust the interior temperature using the driver’s side or passenger’s side control
switch.
3.Press the ON/OFF button to cancel.■
Switching between the recirculation and fresh air modes
Press the (recirculation) button and switch the mode depending on
environmental conditions.
Recirculation Mode (indicator on): Recirculates air from the vehicle’s interior through
the system.
Fresh Air Mode (indicator off): Maintains outside ventilation. Keep the system in
fresh air mode in normal situations.
1Using Automatic Climate Control
If any buttons are pressed while using the climate
control system in auto, the function of the button
that was pressed will take priority.
The AUTO indicator will go off, but functions
unrelated to the button that was pressed will be
controlled automatically.
To prevent cold air from blowing in from outside, the
fan may not start immediately when the AUTO
button is pressed.
Once you have set the desired temperature, do not
use the temperature control switches more than
necessary.
Doing so may delay the time it takes to reach the set
temperature.
If the interior is very warm, you can cool it down
more rapidly by partially opening the windows,
turning the system on auto, and setting the
temperature to low. Change the fresh mode to
recirculation mode until the temperature cools down.
When you set the temperature to the lower or upper
limit, Lo or Hi is displayed.
Pressing the ON/OFF button switches the climate
control system between on and off. When turned on,
the system returns to your last selection.
Floor and
defroster
vents Floor vents Dashboard and floor
vents, and back of
the center console
*
Dashboard vents
and back of the
center console
*
AUTO Button
Driver’s Side
Temperature
Control Switch
(Recirculation) Button
(Fan Control) Bar
A/C (Air Conditioning)
Button
Passenger’s Side
Temperature
Control Switch
* Not available on all models
Page 140 of 324
139
uuAudio SystemuUSB Adapter Cable
Features
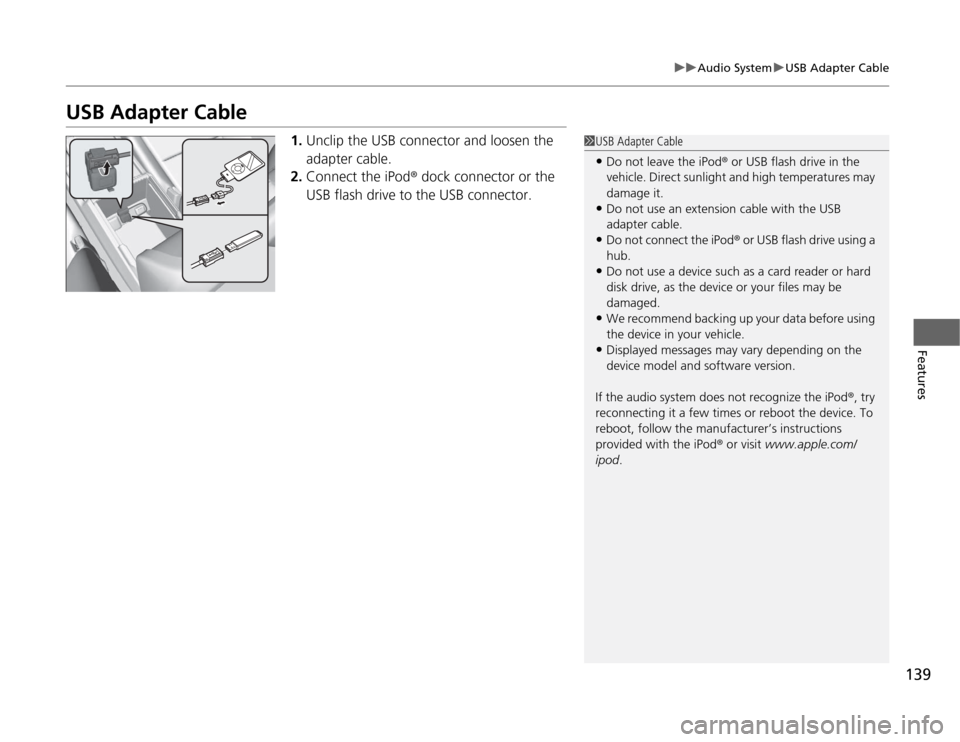
USB Adapter Cable
1.Unclip the USB connector and loosen the
adapter cable.
2.Connect the iPod® dock connector or the
USB flash drive to the USB connector.
1USB Adapter Cable•Do not leave the iPod® or USB flash drive in the
vehicle. Direct sunlight and high temperatures may
damage it.•Do not use an extension cable with the USB
adapter cable.•Do not connect the iPod® or USB flash drive using a
hub.•Do not use a device such as a card reader or hard
disk drive, as the device or your files may be
damaged.•We recommend backing up your data before using
the device in your vehicle.•Displayed messages may vary depending on the
device model and software version.
If the audio system does not recognize the iPod®, try
reconnecting it a few times or reboot the device. To
reboot, follow the manufacturer’s instructions
provided with the iPod® or visit www.apple.com/
ipod.
Page 141 of 324
140
uuAudio SystemuAuxiliary Input Jack
Features
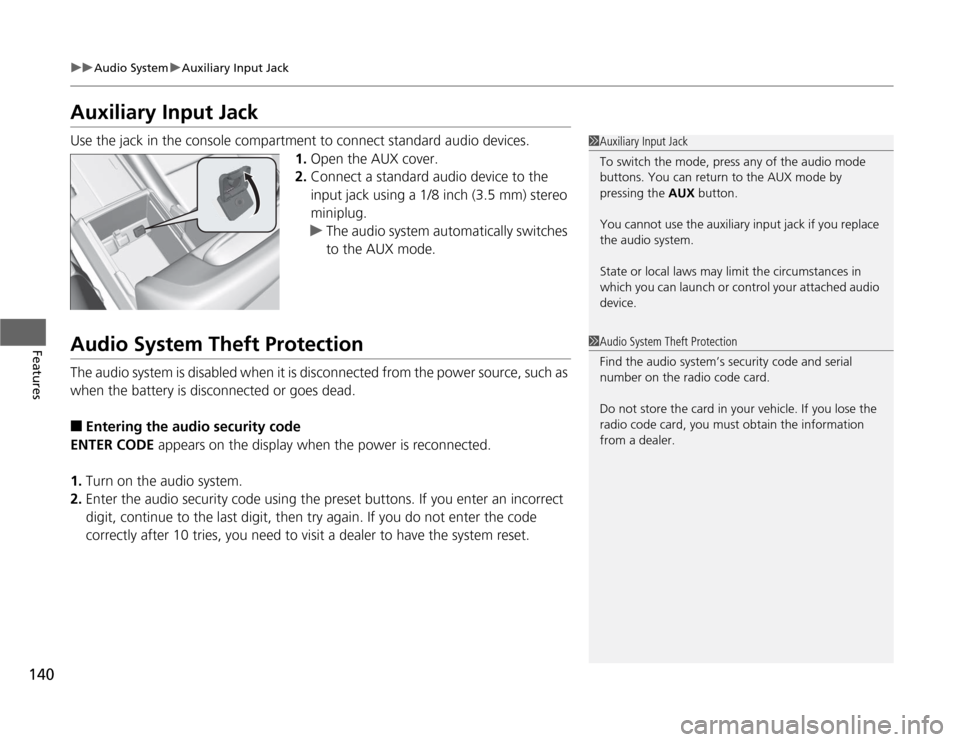
Auxiliary Input JackUse the jack in the console compartment to connect standard audio devices.
1.Open the AUX cover.
2.Connect a standard audio device to the
input jack using a 1/8 inch (3.5 mm) stereo
miniplug.
uThe audio system automatically switches
to the AUX mode.Audio System Theft ProtectionThe audio system is disabled when it is disconnected from the power source, such as
when the battery is disconnected or goes dead.■
Entering the audio security code
ENTER CODE appears on the display when the power is reconnected.
1.Turn on the audio system.
2.Enter the audio security code using the preset buttons. If you enter an incorrect
digit, continue to the last digit, then try again. If you do not enter the code
correctly after 10 tries, you need to visit a dealer to have the system reset.
1Auxiliary Input Jack
To switch the mode, press any of the audio mode
buttons. You can return to the AUX mode by
pressing the AUX button.
You cannot use the auxiliary input jack if you replace
the audio system.
State or local laws may limit the circumstances in
which you can launch or control your attached audio
device.1Audio System Theft Protection
Find the audio system’s security code and serial
number on the radio code card.
Do not store the card in your vehicle. If you lose the
radio code card, you must obtain the information
from a dealer.