light Acura TSX 2012 Owner's Guide
[x] Cancel search | Manufacturer: ACURA, Model Year: 2012, Model line: TSX, Model: Acura TSX 2012Pages: 324, PDF Size: 9.45 MB
Page 127 of 324
126
uuInterior Lights/Interior Convenience ItemsuInterior Convenience Items
Controls
Interior Convenience Items
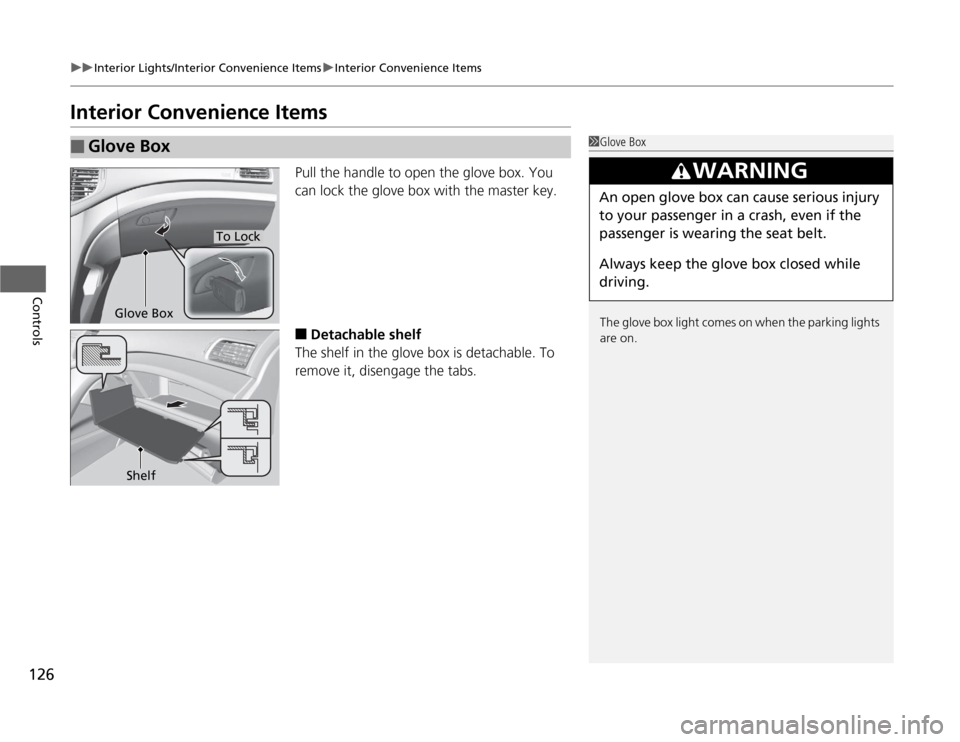
Pull the handle to open the glove box. You
can lock the glove box with the master key.â–
Detachable shelf
The shelf in the glove box is detachable. To
remove it, disengage the tabs.
â–
Glove Box
1Glove Box
The glove box light comes on when the parking lights
are on.
3
WARNING
An open glove box can cause serious injury
to your passenger in a crash, even if the
passenger is wearing the seat belt.
Always keep the glove box closed while
driving.
Glove Box
To Lock
Shelf
Page 128 of 324
Continued
127
uuInterior Lights/Interior Convenience ItemsuInterior Convenience Items
Controls
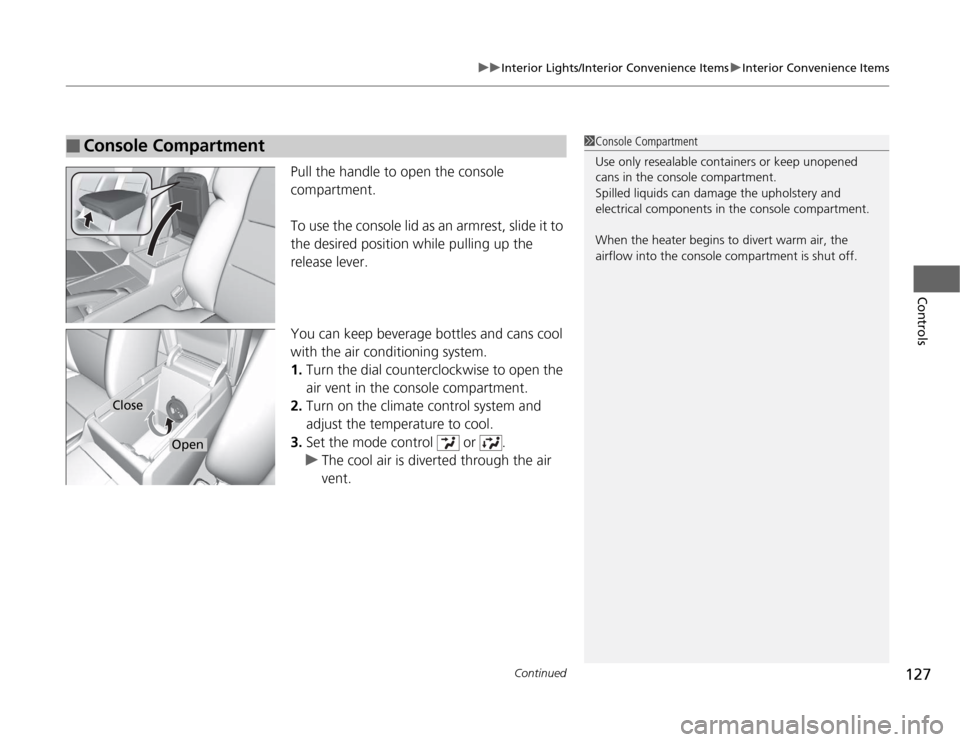
Pull the handle to open the console
compartment.
To use the console lid as an armrest, slide it to
the desired position while pulling up the
release lever.
You can keep beverage bottles and cans cool
with the air conditioning system.
1.Turn the dial counterclockwise to open the
air vent in the console compartment.
2.Turn on the climate control system and
adjust the temperature to cool.
3.Set the mode control or .
uThe cool air is diverted through the air
vent.
â–
Console Compartment
1Console Compartment
Use only resealable containers or keep unopened
cans in the console compartment.
Spilled liquids can damage the upholstery and
electrical components in the console compartment.
When the heater begins to divert warm air, the
airflow into the console compartment is shut off.
Close
Open
Page 129 of 324

uuInterior Lights/Interior Convenience ItemsuInterior Convenience Items
128Controls
â–
Front seat beverage holders
Press the raised detent to open the lid. To
close the lid, push it down until it latches.
â–
Rear seat beverage holders
Fold the armrest down to use the rear seat
beverage holders.
â–
Beverage Holders
1Beverage Holders
NOTICESpilled liquids can damage the upholstery, carpeting,
and electrical components in the interior.
Be careful when you are using the beverage holders.
Hot liquid can scald you.
Push
Page 130 of 324
Continued
129
uuInterior Lights/Interior Convenience ItemsuInterior Convenience Items
Controls
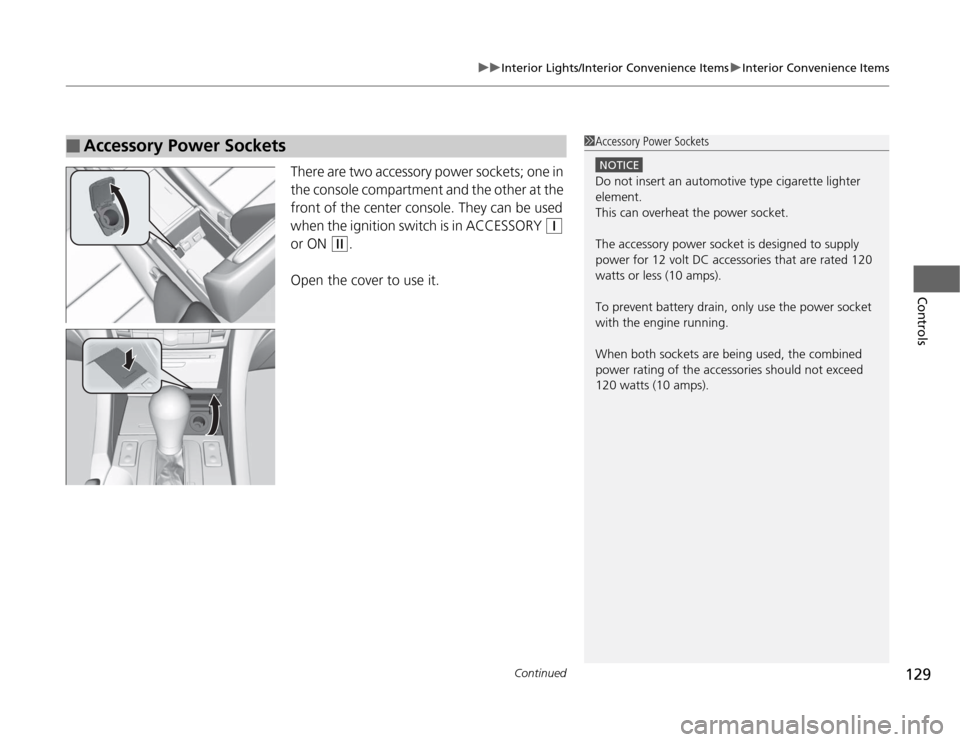
There are two accessory power sockets; one in
the console compartment and the other at the
front of the center console. They can be used
when the ignition switch is in ACCESSORY
(q
or ON
(w
.
Open the cover to use it.
â–
Accessory Power Sockets
1Accessory Power Sockets
NOTICEDo not insert an automotive type cigarette lighter
element.
This can overheat the power socket.
The accessory power socket is designed to supply
power for 12 volt DC accessories that are rated 120
watts or less (10 amps).
To prevent battery drain, only use the power socket
with the engine running.
When both sockets are being used, the combined
power rating of the accessories should not exceed
120 watts (10 amps).
Page 131 of 324

uuInterior Lights/Interior Convenience ItemsuInterior Convenience Items
130Controls
There are coat hooks on the rear left and right
grab handles. Pull them down to use them.
The cargo hooks in the trunk can be used to
install a net for securing items.
â–
Coat Hooks
1Coat Hooks
The coat hooks are not designed for large or heavy
items.
â–
Cargo Hooks
1Cargo Hooks
Distribute cargo evenly on the floor of the trunk,
placing the heaviest items on the bottom and as far
forward as possible.
2Maximum Load Limit P. 185
Hooks
Page 132 of 324
Continued
131
uuInterior Lights/Interior Convenience ItemsuInterior Convenience Items
Controls
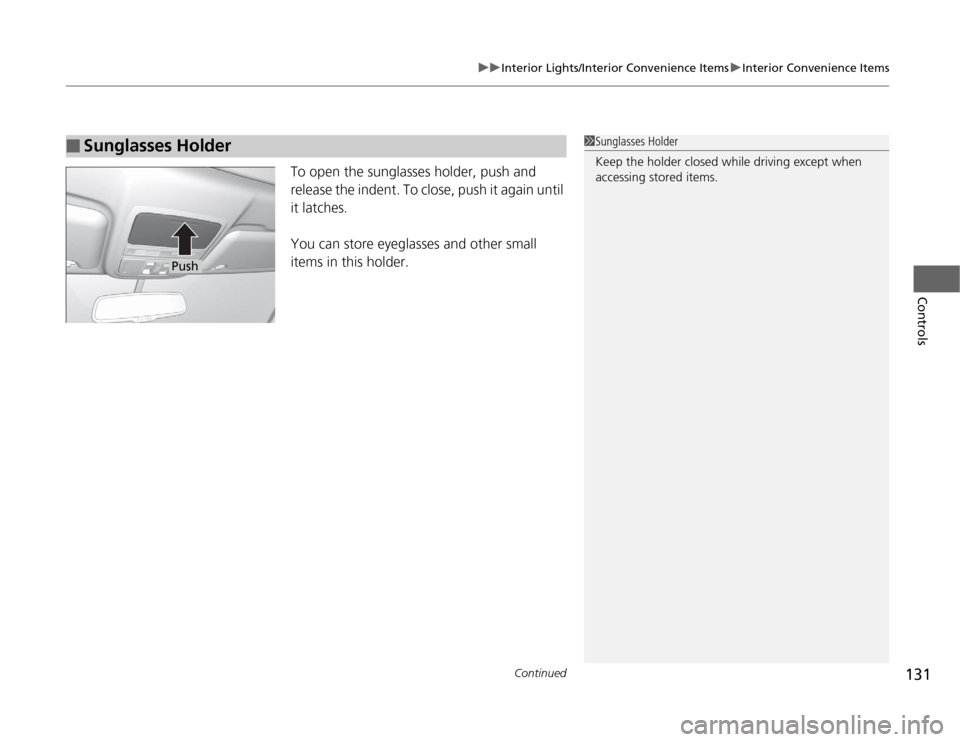
To open the sunglasses holder, push and
release the indent. To close, push it again until
it latches.
You can store eyeglasses and other small
items in this holder.
â–
Sunglasses Holder
1Sunglasses Holder
Keep the holder closed while driving except when
accessing stored items.
Push
Page 133 of 324
uuInterior Lights/Interior Convenience ItemsuInterior Convenience Items
132Controls
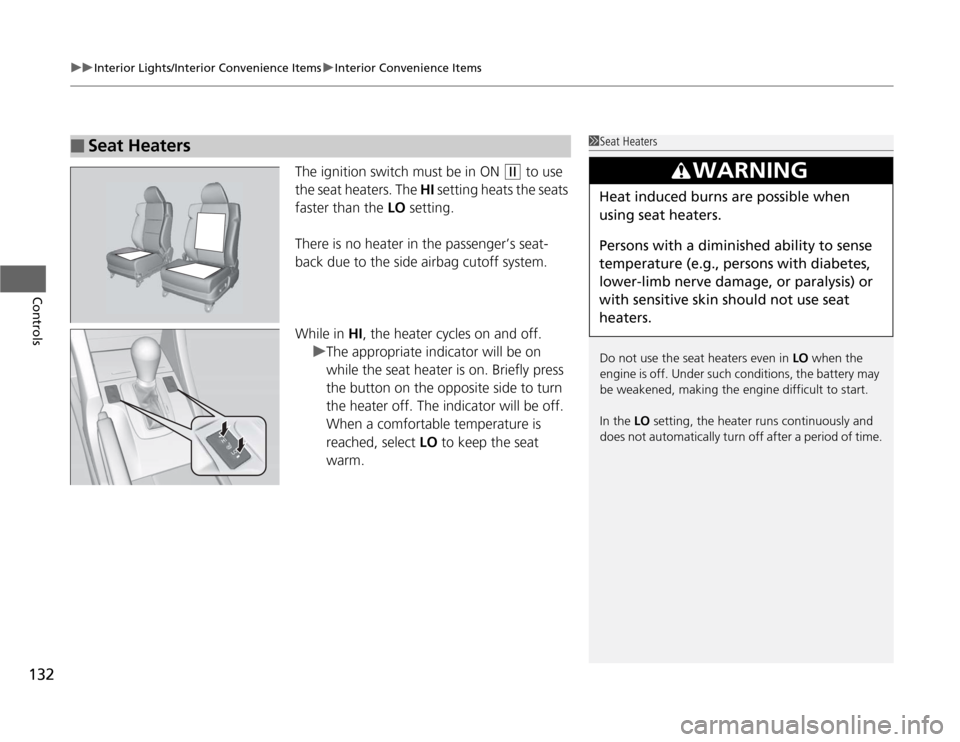
The ignition switch must be in ON
(w
to use
the seat heaters. The HI setting heats the seats
faster than the LO setting.
There is no heater in the passenger’s seat-
back due to the side airbag cutoff system.
While in HI, the heater cycles on and off.
uThe appropriate indicator will be on
while the seat heater is on. Briefly press
the button on the opposite side to turn
the heater off. The indicator will be off.
When a comfortable temperature is
reached, select LO to keep the seat
warm.
â–
Seat Heaters
1Seat Heaters
Do not use the seat heaters even in LO when the
engine is off. Under such conditions, the battery may
be weakened, making the engine difficult to start.
In the LO setting, the heater runs continuously and
does not automatically turn off after a period of time.
3
WARNING
Heat induced burns are possible when
using seat heaters.
Persons with a diminished ability to sense
temperature (e.g., persons with diabetes,
lower-limb nerve damage, or paralysis) or
with sensitive skin should not use seat
heaters.
Page 137 of 324

136
uuClimate Control SystemuAutomatic Climate Control Sensors
Controls
Automatic Climate Control Sensors
The automatic climate control system is
equipped with a sunlight sensor and an
interior temperature sensor. Do not cover or
spill any liquid on them.
Sunlight Sensor
Temperature Sensor
Page 140 of 324
139
uuAudio SystemuUSB Adapter Cable
Features
USB Adapter Cable
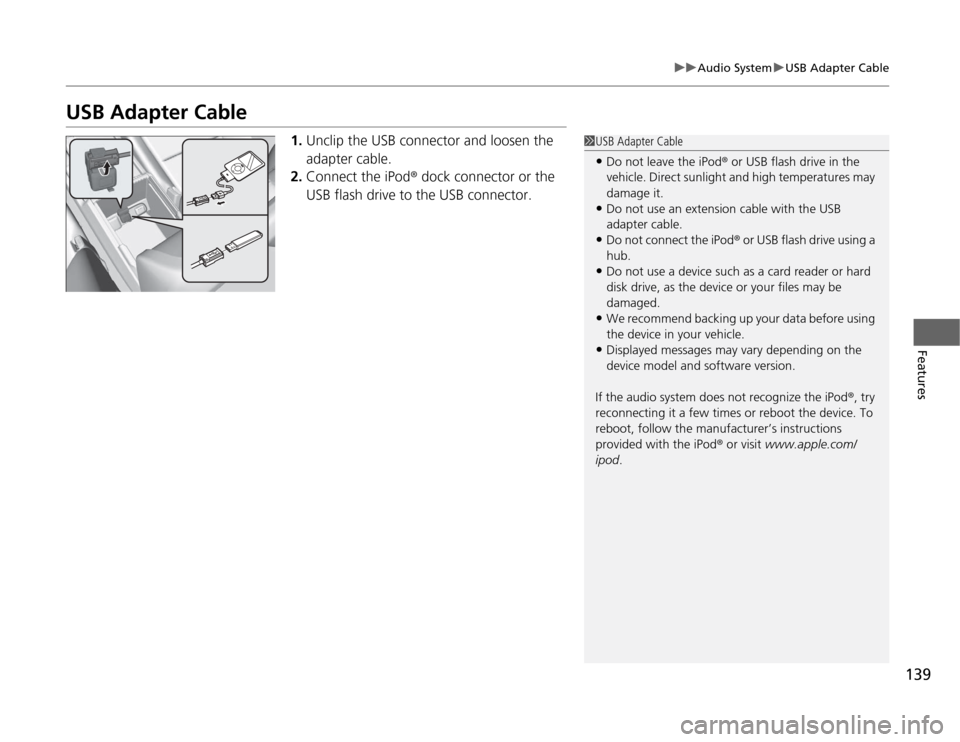
1.Unclip the USB connector and loosen the
adapter cable.
2.Connect the iPod® dock connector or the
USB flash drive to the USB connector.
1USB Adapter Cable•Do not leave the iPod® or USB flash drive in the
vehicle. Direct sunlight and high temperatures may
damage it.•Do not use an extension cable with the USB
adapter cable.•Do not connect the iPod® or USB flash drive using a
hub.•Do not use a device such as a card reader or hard
disk drive, as the device or your files may be
damaged.•We recommend backing up your data before using
the device in your vehicle.•Displayed messages may vary depending on the
device model and software version.
If the audio system does not recognize the iPod®, try
reconnecting it a few times or reboot the device. To
reboot, follow the manufacturer’s instructions
provided with the iPod® or visit www.apple.com/
ipod.
Page 164 of 324
163
uuGeneral Information on the Audio SystemuRecommended CDs
Features
â–
Protecting CDs
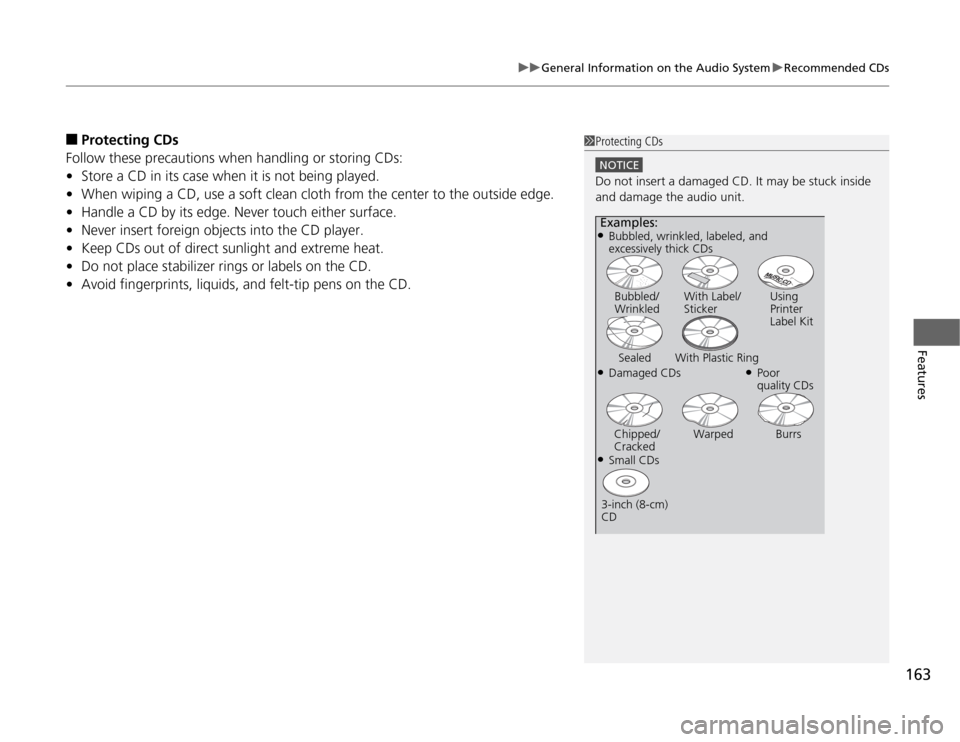
Follow these precautions when handling or storing CDs:
•Store a CD in its case when it is not being played.
•When wiping a CD, use a soft clean cloth from the center to the outside edge.
•Handle a CD by its edge. Never touch either surface.
•Never insert foreign objects into the CD player.
•Keep CDs out of direct sunlight and extreme heat.
•Do not place stabilizer rings or labels on the CD.
•Avoid fingerprints, liquids, and felt-tip pens on the CD.
1Protecting CDs
NOTICEDo not insert a damaged CD. It may be stuck inside
and damage the audio unit.Examples:â—ŹDamaged CDsBubbled/
WrinkledWith Label/
StickerUsing
Printer
Label Kit
Sealed With Plastic Ring
â—ŹPoor
quality CDs
Chipped/
CrackedWarped Burrs
â—ŹSmall CDs
3-inch (8-cm)
CDâ—ŹBubbled, wrinkled, labeled, and
excessively thick CDs