ECO mode Acura TSX 2013 Owner's Guide
[x] Cancel search | Manufacturer: ACURA, Model Year: 2013, Model line: TSX, Model: Acura TSX 2013Pages: 325, PDF Size: 8.61 MB
Page 158 of 325

157
uuAudio System Basic Operation uPlaying Bluetooth ® Audio
Features
1. Make sure that your phone is linked to HFL.
2. Press the AUX button.
Check the following if the phone is not recognized:
Another HFL-compatible phone, which is not compatible for Bluetooth® Audio, is
already linked.■
To pause or resume a file
1. Press the MENU button.
2. Rotate to select RESUME/PAUSE, then press .
Each time you press , the setting switches between PAUSE and RESUME.
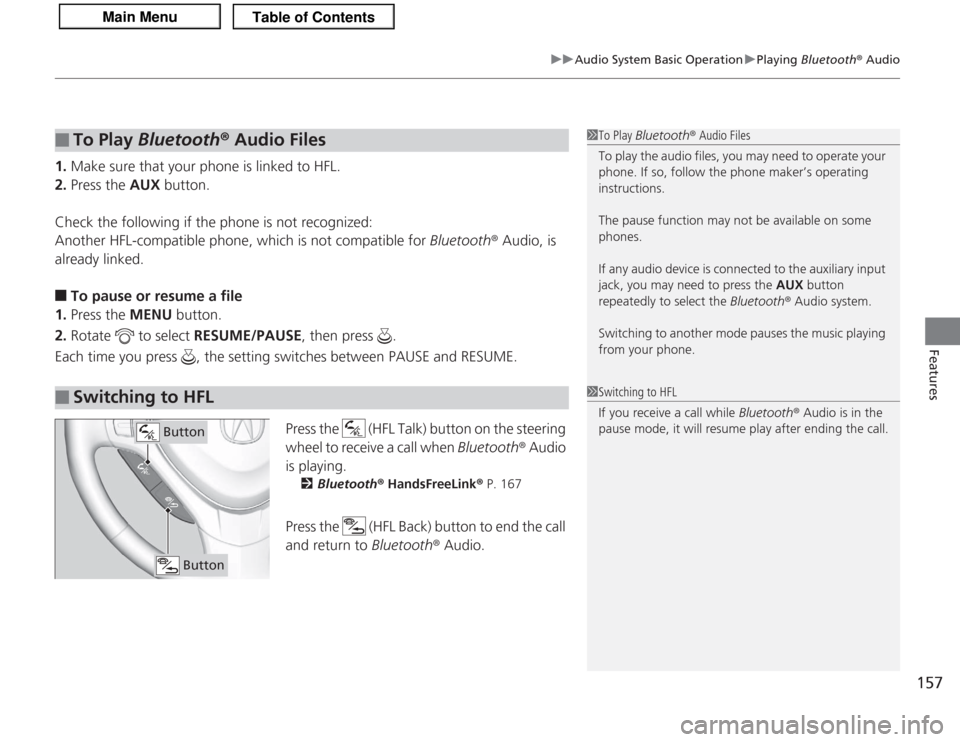
Press the (HFL Talk) button on the steering
wheel to receive a call when Bluetooth® Audio
is playing.
2 Bluetooth ® HandsFreeLink ® P. 167
Press the (HFL Back) button to end the call
and return to Bluetooth ® Audio.
■
To Play Bluetooth ® Audio Files
■
Switching to HFL
1 To Play Bluetooth ® Audio Files
To play the audio files, you may need to operate your
phone. If so, follow the phone maker’s operating
instructions.
The pause function may not be available on some
phones.
If any audio device is connected to the auxiliary input
jack, you may need to press the AUX button
repeatedly to select the Bluetooth® Audio system.
Switching to another mode pauses the music playing
from your phone.1 Switching to HFL
If you receive a call while Bluetooth® Audio is in the
pause mode, it will resume play after ending the call.
Button
Button
Page 165 of 325

164
uuGeneral Information on the Audio System uCompatible iPod ® and USB Flash Drives
Features
Compatible iPod ® and USB Flash Drives• Use a recommended USB flash drive of 256 MB or higher.
• Some digital audio players may not be compatible.
• Some USB flash drives (e.g., a device with security lockout) may not work.
• Some software files may not allow for audio play or text data display.
• Some versions of MP3, WMA, or AAC formats may be unsupported.■
iPod ® Model Compatibility
Model
iPod ® (5th generation)iPod classic ® 80/160GB (launched in 2007)iPod classic® 120GB (launched in 2008)iPod classic® 160GB (launched in 2009)iPod touch® (launched in 2011)iPod nano® (launched in 2011)■
USB Flash Drives
1iPod ® Model Compatibility
This system may not work with all software versions
of these devices.1 USB Flash Drives
Files on the USB flash drive are played in their stored
order. This order may be different from the order
displayed on your PC or device.
Page 168 of 325

167
Continued
Features
Bluetooth® HandsFreeLink ®For models with the navigation system, see the Navigation System Manual for how
to operate Bluetooth® HandsFreeLink ®.
Bluetooth ® HandsFreeLink ® (HFL) allows you to place and receive phone calls using
your vehicle’s audio system, without handling your cell phone.Using HFL
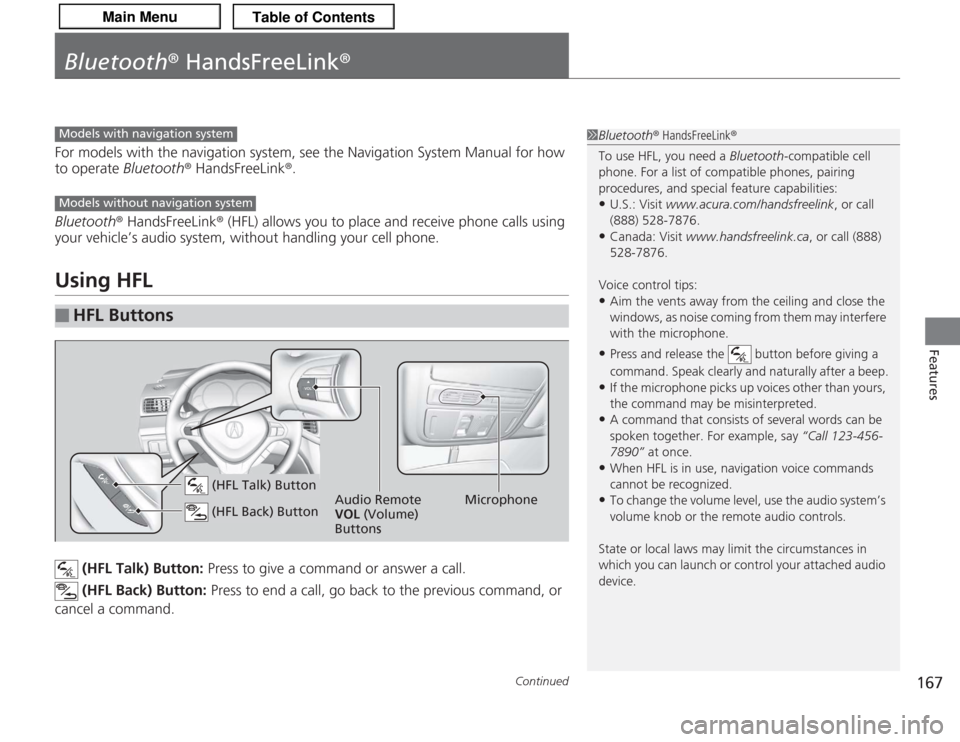
(HFL Talk) Button: Press to give a command or answer a call.
(HFL Back) Button: Press to end a call, go back to the previous command, or
cancel a command.
■
HFL Buttons
1 Bluetooth ® HandsFreeLink ®
To use HFL, you need a Bluetooth-compatible cell
phone. For a list of compatible phones, pairing
procedures, and special feature capabilities:•U.S.: Visit www.acura.com/handsfreelink , or call
(888) 528-7876.•Canada: Visit www.handsfreelink.ca , or call (888)
528-7876.
Voice control tips:•Aim the vents away from the ceiling and close the
windows, as noise coming from them may interfere
with the microphone.•Press and release the button before giving a
command. Speak clearly and naturally after a beep.•If the microphone picks up voices other than yours,
the command may be misinterpreted.•A command that consists of several words can be
spoken together. For example, say “Call 123-456-
7890” at once.•When HFL is in use, navigation voice commands
cannot be recognized.•To change the volume level, use the audio system’s
volume knob or the remote audio controls.
State or local laws may limit the circumstances in
which you can launch or control your attached audio
device.
Models with navigation systemModels without navigation system
Microphone
Audio Remote
VOL (Volume)
Buttons
(HFL Talk) Button (HFL Back) Button
Page 191 of 325

uuTowing a Trailer uTowing Your Vehicle
190Driving
• Monitor your temperature gauge. If it nears the red (Hot) mark, turn off the air
conditioning and reduce speed. Pull to the side of the road safely to cool down
the engine if necessary.
• Shift to the
(S
position if the transmission shifts frequently.
Towing Your VehicleYour vehicle is not designed to be towed behind a motor home. If your vehicle needs
to be towed in an emergency, refer to the emergency towing information.
2 Emergency Towing P. 299
■
Driving in Hilly Terrain
1Driving in Hilly Terrain
If you use the paddle shifters when driving uphill and
downhill, select 3rd, 2nd, or 1st gear, depending on
the vehicle speed and road conditions. Do not use
4th and 5th gears.
If the automatic transmission fluid temperature
exceeds the specified limit, the transmission will also
automatically downshift to the 1st gear, even in the
sequential shift mode. The gear position indicator
blinks for a few seconds, then stays on. Gear Position Speed Range
1st
0 - 42 mph (0 - 67 km/h)
2nd,3rd 19 - 62 mph (30 - 100 km/h)
Automatic transmission models
Automatic transmission models
Page 193 of 325

uuWhen Driving uStarting the Engine
192Driving
3. Turn the ignition switch to START
(e
without depressing the accelerator pedal.
1. Keeping your right foot on the brake pedal, release the parking brake. Check that
the parking brake indicator has gone off.
2 Parking Brake P. 210
2.Put the shift lever in
(D
. Select
(R
when reversing.
3. Gradually release the brake pedal and gently depress the accelerator pedal to pull
away.
1Starting the Engine
Do not hold the key in START
(e
for more than 15
seconds.
•If the engine does not start right away, wait for at
least 10 seconds before trying again.•If the engine starts, but then immediately stops,
wait at least 10 seconds before repeating step 3
while gently depressing the acce lerator pedal.
Release the accelerator pedal once the engine
starts.
The immobilizer system protects your vehicle from
theft. If an improperly coded key (or other device) is
used, the engine’s fuel system is disabled. 2 Immobilizer System P. 98
■
Starting to Drive
Automatic transmission models
Page 198 of 325

197
uuWhen Driving uShifting
Continued
Driving
Use the paddle shifters to change between 1st and 5th gears without removing your
hands from the steering wheel. The transmission will switch to the sequential shift
mode.■
When the shift lever is in
(D
:
The vehicle will go into the sequential shift mode momentarily, and the gear position
indicator will come on.
Once you start traveling at a constant speed, the sequential shift mode will
automatically switch off, and the gear position indicator will go off.
Hold the
(+
paddle shifter for two seconds to return to normal drive.
■
When the shift lever is in
(S
:
The vehicle will go into the sequential shift mode, and the M (sequential shift)
indicator and gear position indicator will come on. At speeds of 6 mph (10 km/h) or
less, the vehicle automatically shifts down into 1st gear. It will not automatically shift
up, even if vehicle speed increases.
You can only pull away in 1st or 2nd gear.
When switching out of the sequential shift mode, move the shift lever from
(S
to
(D
. When the sequential shift mode is canceled, the sequential shift mode indicator
and shift indicator go off.
■
Sequential Shift Mode
Page 199 of 325

uuWhen Driving uShifting
198Driving
■
Second gear lock mode
If you pull the
(+
paddle shifter while stopped or driving at 6 mph (10 km/h) or less,
the gear position will be locked in 2nd gear. This makes it easier to pull away on
slippery surfaces such as snow covered roads.
To cancel the 2nd gear lock mode, pull the
(-
paddle shifter, or move the shift lever
from
(S
to
(D
.
■
Sequential Shift Mode Operation
1 Sequential Shift Mode Operation
Each paddle shift operation makes a single gear
change.
To change gears continuously, release the paddle
shifter before pulling it again for the next gear.
Recommended Shift Points
Use this table as a guideline for efficient fuel
economy and effective emission control.
If the gear posit ion indicator blinks when you try to
shift up or down, this means your vehicle speed is not
in its allowa ble gear shifting range.
Slightly accelerate to shift up and decelerate to shift
down while the indicator is blinking. Shift Up Normal Acceleration
1st to 2nd
15 mph (24 km/h)
2nd to 3rd 25 mph (40 km/h)
3rd to 4th
40 mph (64 km/h)
4th to 5th 45 mph (72 km/h)
( -
Paddle Shifter
(Shift down)
( +
Paddle Shifter
(Shift up)
Downshifting when pulling
the
( -
paddle shifter.
(Changes to a lower gear) Upshifting when pulling
the
(
+
paddle shifter
(Changes to a higher gear)
Page 200 of 325

199
uuWhen Driving uShifting
Continued
Driving
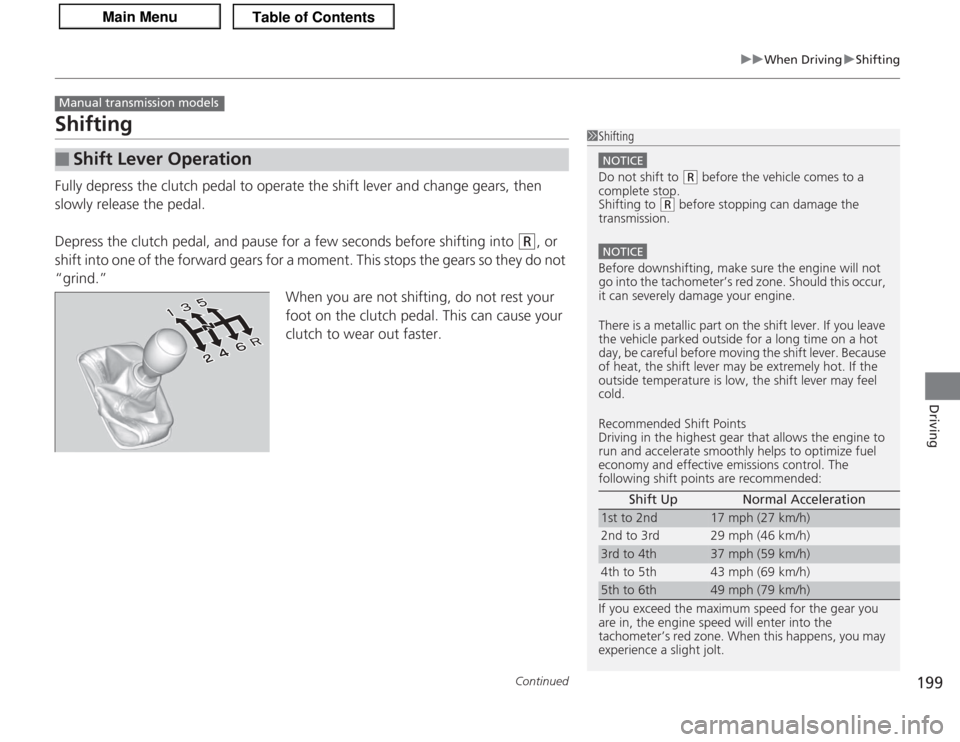
ShiftingFully depress the clutch pedal to operate the shift lever and change gears, then
slowly release the pedal.
Depress the clutch pedal, and pause for a few seconds before shifting into
(R
, or
shift into one of the forward gears for a moment. This stops the gears so they do not
“grind.” When you are not shifting, do not rest your
foot on the clutch pedal. This can cause your
clutch to wear out faster.
■
Shift Lever Operation
Manual transmission models
1Shifting
NOTICEDo not shift to
(R
before the vehicle comes to a
complete stop.
Shifting to
( R
before stopping can damage the
transmission.
NOTICEBefore downshifting, make sure the engine will not
go into the tachometer’s red zone. Should this occur,
it can severely damage your engine.
There is a metallic part on the shift lever. If you leave
the vehicle park ed outside for a long time on a hot
day, be careful before moving the shift lever. Because
of heat, the shift lever ma y be extremely hot. If the
outside temperature is low, the shift lever may feel
cold.
Recommended Shift Points
Driving in the highest gear that allows the engine to
run and accelerate smoothly helps to optimize fuel
economy and effective emissions control. The
following shift points are recommended:
If you exceed the maximum speed for the gear you
are in, the engine speed will enter into the
tachometer’s red zone. When this happens, you may
experience a slight jolt. Shift Up Normal Acceleration1st to 2nd
17 mph (27 km/h)
2nd to 3rd 29 mph (46 km/h)
3rd to 4th
37 mph (59 km/h)
4th to 5th 43 mph (69 km/h)
5th to 6th
49 mph (79 km/h)
Page 216 of 325

215
Continued
Driving
RefuelingFuel Information■
Fuel recommendation
Use of lower octane gasoline can cause occasional metallic knocking noise in the
engine and will result in decreased engine performance.
Use of gasoline with a pump octane less than 87 can lead to engine damage.
Your vehicle is designed to operate on premium unleaded gasoline with a pump
octane of 91 or higher.
If this octane grade is unavailable, regular unleaded gasoline with a pump octane of
87 or higher may be used temporally.
The use of regular unleaded gasoline can cause metallic knocking noises in the
engine and will result in decreased engine performance. The long-term use of
regular-grade gasoline can lead to engine damage.
■
Top tier detergent gasoline
Because the level of detergency and additives in gasoline vary in the market, Acura
endorses the use of “TOP TIER Detergent Gasoline” where available to help
maintain the performance and reliability of your vehicle. TOP TIER Detergent
Gasoline meets a new gasoline standard jointly established by leading automotive
manufacturers to meet the needs of today’s advanced engines.
Qualifying gasoline retailers will, in most cases, identify their gasoline as having met
“TOP TIER Detergent Gasoline” standards at the retail location. This fuel is
guaranteed to contain the proper level of detergent additives and be free of metallic
additives. The proper level of detergent additives, and absence of harmful metallic
additives in gasoline, help avoid build-up of deposits in your engine and emission
control system.Unleaded premium gasoline, pump octane number 91 or higher
1Fuel Information
NOTICEWe recommend quality gasoline containing
detergent additives that help prevent fuel system and
engine deposits. In addition, in order to maintain
good performance, fuel economy, and emissions
control, we strongly recommend, the use of gasoline
that does NOT contain harmful manganese-based
fuel additives such as MMT, if such gasoline is
available.
Use of gasoline with these additives may adversely
affect performance, and cause the malfunction
indicator lamp on your instrument panel to come on.
If this happens, contact a dealer for service.
4-cylinder models6-cylinder models
Page 223 of 325

222Maintenance
Before Performing MaintenanceInspection and MaintenanceFor your safety, perform all listed inspections and maintenance to keep your vehicle
in good condition. If you become aware of any abnormality (noise, smell, insufficient
brake fluid, oil residue on the ground, etc.), have your vehicle inspected by a dealer.
(Note, however, that service at a dealer is not mandatory to keep your \
warranties in
effect.) Refer to the separate maintenance booklet for detailed maintenance and
inspection information.■
Daily inspections
Perform inspections before long distance trips, when washing the vehicle, or when
refueling.
■
Periodic inspections
• Check the automatic transmission fluid level monthly.
2 Automatic Transmission Fluid P. 242
•Check the brake fluid level monthly.
2 Brake/Clutch Fluid P. 244
•Check the tire pressure monthly. Examine the tread for wear and foreign objects.
2 Checking and Maintaining Tires P. 259
•Check the operation of the exterior lights monthly.
2 Replacing Light Bulbs P. 247
•Check the condition of the wiper blades at least every six months.
2Checking and Maintaining Wiper Blades P. 257
■
Types of Inspection and Maintenance
1Inspection and Maintenance
Maintenance, replacement, or repair of
emissions control devices and systems may be
done by any automotive repair establishment or
individuals using parts that are “certified” to
EPA standards.
According to state and federal regulations, failure to
perform maintenance on the maintenance main
items marked with # will not void your emissions
warranties. However, all maintenance services should
be performed in accordance with the intervals
indicated by the multi-information display.
2 Maintenance Service Items P. 227
If you want to perform complex maintenance tasks
that require more skills and tools, purchase the
service manual. 2 Authorized Manuals P. 315
If you want to perform maintenance yourself, make
sure that you have the necessary tools and skills first.
After performing maintenance, update the records in
the separate maintenance booklet.
U.S. models