light ACURA ZDX 2010 Repair Manual
[x] Cancel search | Manufacturer: ACURA, Model Year: 2010, Model line: ZDX, Model: ACURA ZDX 2010Pages: 645, PDF Size: 17.13 MB
Page 307 of 645
It is possible to select up to 999 files
for inclusion in CD-Rs and CD-RWs,
and up to 3,500 files for inclusion in
DVD-Rs and DVD-RWs.Do not use discs with adhesive labels.
The label can curl up and cause the
disc to jam in the unit.
Manufactured under license under
U.S. Patentꭨ’s: 5,451,942; 5,956,674;
5,974,380; 5,978,762; 6,487,535 &
other U.S. and worldwide patents
issued & pending. DTS and DTS
Digital Surround are registered
trademarks and the DTS logos and
Symbol are trademarks of DTS, Inc.
© 1996-2008 DTS, Inc. All Rights
Reserved. To Load a Disc
Insert a disc about halfway into the
disc slot. The drive will pull the disc
in the rest of the way to play it. You
operate the disc player with the same
controls used for the radio. The
number of the current track is shown
in the display. When playing a disc in
MP3, WMA or AAC, the numbers of
the current folder and file are shown.
The system will continuously play a
disc until you change modes.
For information on how to handle
and protect compact discs, see page
365.
To Play a Disc
Select the disc player by pressing the
DISC button. The system will begin
playing the last selected track on the
disc. You will see the current track
position highlighted.
Title information will be displayed by
a list when the information is found
in the Gracenote
ꭂAlbum Info
(Gracenote
ꭂMedia Database) on the
built-in hard disk drive. When you
play a CD recorded with text data,
you will see the genre, artist name,
album and track name on the screen.
When you play MP3/WMA/AAC
discs, you will see the genre, artist
name, album name and track name
on the screen. If the disc was not
recorded with this information, it will
not be displayed.
Playing a Disc (Models with navigation system)30209/10/28 17:15:37 10 ACURA ZDX KA KC New North America Own 50 31SZN600 enu
ProCarManuals.com
Page 318 of 645
The Hard Disc Drive (HDD) Audio
function can record tracks from
music CDs to the navigation system’s
hard disc. This function also allows
for various playing methods, such as
playing recorded tracks on an artist-
by-artist or genre-by-genre basis. For
example, you can play the tracks that
you want to listen to in any order that
you like for each playlist. NOTE:
●Only recordings from a standard
CD-DA (44.1 kHz, 16 bit stereo
PCM digital sound data) to HDD
are supported.●Digital music files, such as MP3,
WMA, AAC etc., in CD-R, DVD-R
and USB flash memory devices
cannot be copied to HDD.
Likewise, digital music files
recorded to HDD cannot be copied
to CD-R, DVD-R and USB devices.●Music data recorded on HDD can
only be used for personal
enjoyment.●Data is recorded using ultra-
efficient compression technology,
therefore, sound quality may vary
slightly from the original.
●Title information will be displayed
when the information is found in
the Gracenote
ꭂAlbum Info
(Gracenote
ꭂMedia Database) on
the built-in hard disk drive. See
page 337.
●Recording function from following
media is not supported.
– CD-DA which prohibits the copy
by SCMS
– CD-DA with copy control
– SACD (Super Audio CD)
– DTS-CD
– DVD-A
– CD-R/RW
– DVD-R/RW
– Copy controlled CDs (Playback
cannot be guaranteed)
– DTS-CDs (Only enabled for
playback)
CONTINUED
Playing Hard Disc Drive (HDD) Audio (Models with navigation system)
313
Features
09/10/28 17:15:37 10 ACURA ZDX KA KC New North America Own 50 31SZN600 enu
ProCarManuals.com
Page 347 of 645
Use only compatible iPods with the
latest software. iPods that are not
compatible will not work in this audio
unit.
NOTE:●Do not connect your iPod using a
hub.●Do not keep the iPod and dock
connector cable in the vehicle.
Direct sunlight and high heat will
damage it.●Do not use an extension cable
between the USB adapter cable
equipped with your vehicle and
your dock connector.●We recommend backing up your
data before playing it.●Some devices cannot be powered
or charged via the USB adapter. If
this is the case, use the accessory
adapter to supply power to your
device.In AAC format, DRM (digital rights
management) files cannot be played.
If the system finds a DRM file, the
audio unit displays UNPLAYABLE,
and then skips to the next file.
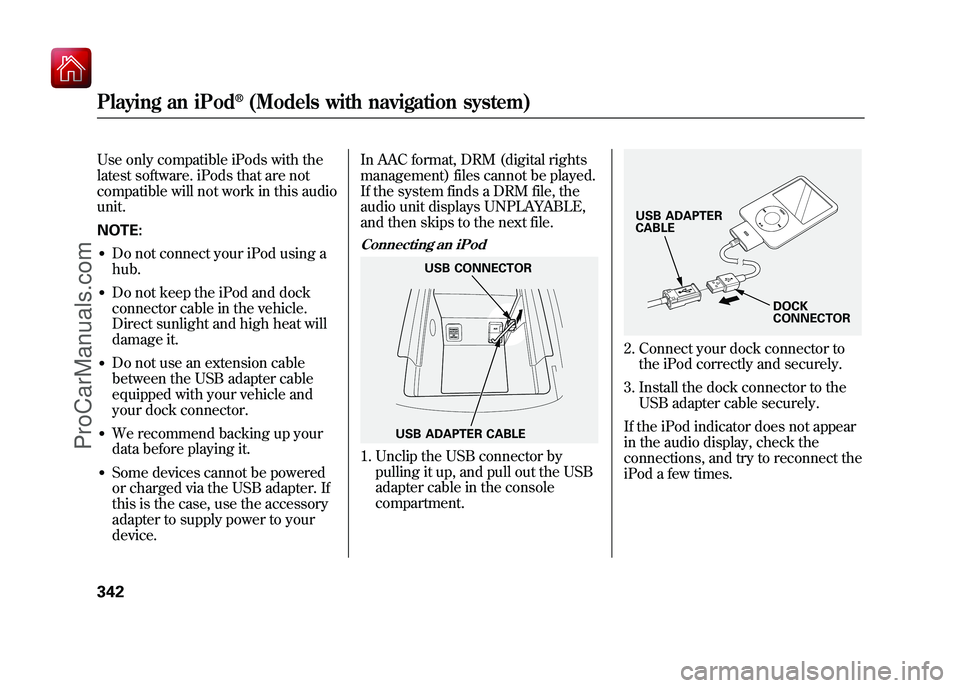
Connecting an iPod1. Unclip the USB connector by
pulling it up, and pull out the USB
adapter cable in the console
compartment.
2. Connect your dock connector tothe iPod correctly and securely.
3. Install the dock connector to the USB adapter cable securely.
If the iPod indicator does not appear
in the audio display, check the
connections, and try to reconnect the
iPod a few times.
USB ADAPTER CABLE USB CONNECTOR
USB ADAPTER
CABLE
DOCK
CONNECTOR
Playing an iPod
®(Models with navigation system)
34209/10/28 17:15:37 10 ACURA ZDX KA KC New North America Own 50 31SZN600 enu
ProCarManuals.com
Page 355 of 645
To Play a USB Flash Memory
Device
This audio system can select and
play the audio files on a USB flash
memory device with the same
controls used for the disc player. To
play a USB flash memory device,
connect it to the USB adapter cable
in the console compartment, then
press the USB/AUX button until you
see‘‘USB’’ in the display. The power
mode must be ACCESSORY or ON.
Your vehicle has the engine start/
stop button instead of an ignition
switch. For more information to
select the power mode, see page 194. The audio system reads and plays
the audio files on the USB flash
memory device in MP3, WMA or
AAC
ꭧformats. The USB flash
memory device limit is up to 500
folders or up to 15000 files.
ꭧ : Only AAC format files recorded
with iTunes are playable on this
audio unit.
The recommended USB flash
memory devices are 256 MB or
higher, and formatted with the FAT
file system. Some digital audio
players may be compatible as well.
Some USB flash memory devices
(such as devices with security
lockout features, etc.) will not work
in this audio unit. NOTE:
●Do not use a device such as a card
reader or hard drive as it or your
files may be damaged.●Do not connect your USB flash
memory device using a hub.●Do not use an extension cable to
the USB adapter cable equipped
with your vehicle.●Do not keep a USB flash memory
device in the vehicle. Direct
sunlight and high heat will damage
it.●We recommend backing up your
data before playing a USB flash
memory device.●Some devices cannot be powered
or charged via the USB adapter, if
this is the case use the accessory
adapter to supply power to your
device.
Playing a USB Flash Memory Device (Models with navigation system)35009/10/28 17:15:37 10 ACURA ZDX KA KC New North America Own 50 31SZN600 enu
ProCarManuals.com
Page 358 of 645
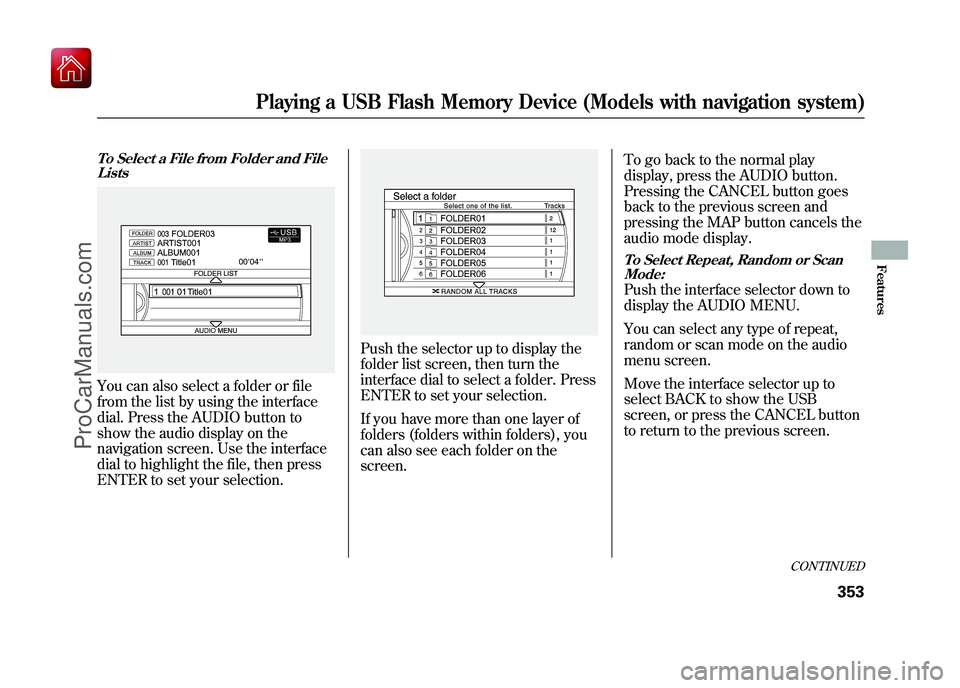
To Select a File from Folder and FileListsYou can also select a folder or file
from the list by using the interface
dial. Press the AUDIO button to
show the audio display on the
navigation screen. Use the interface
dial to highlight the file, then press
ENTER to set your selection.
Push the selector up to display the
folder list screen, then turn the
interface dial to select a folder. Press
ENTER to set your selection.
If you have more than one layer of
folders (folders within folders), you
can also see each folder on the
screen. To go back to the normal play
display, press the AUDIO button.
Pressing the CANCEL button goes
back to the previous screen and
pressing the MAP button cancels the
audio mode display.
To Select Repeat, Random or Scan
Mode:Push the interface selector down to
display the AUDIO MENU.
You can select any type of repeat,
random or scan mode on the audio
menu screen.
Move the interface selector up to
select BACK to show the USB
screen, or press the CANCEL button
to return to the previous screen.
CONTINUED
Playing a USB Flash Memory Device (Models with navigation system)
353
Features
09/10/28 17:15:37 10 ACURA ZDX KA KC New North America Own 50 31SZN600 enu
ProCarManuals.com
Page 371 of 645
Protecting Discs
When a disc is not being played,
store it in its case to protect it from
dust and other contamination. To
prevent warpage, keep discs out of
direct sunlight and extreme heat.
To clean a disc, use a clean soft cloth.
Wipe across the disc from the center
to the outside edge.
A new disc may be rough on the
inner and outer edges. The small
plastic pieces causing this roughness
can flake off and fall on the recording
surface of the disc, causing skipping
or other problems. Remove these
pieces by rubbing the inner and
outer edges with the side of a pencil
or pen.
Never try to insert foreign objects in
the disc changer.
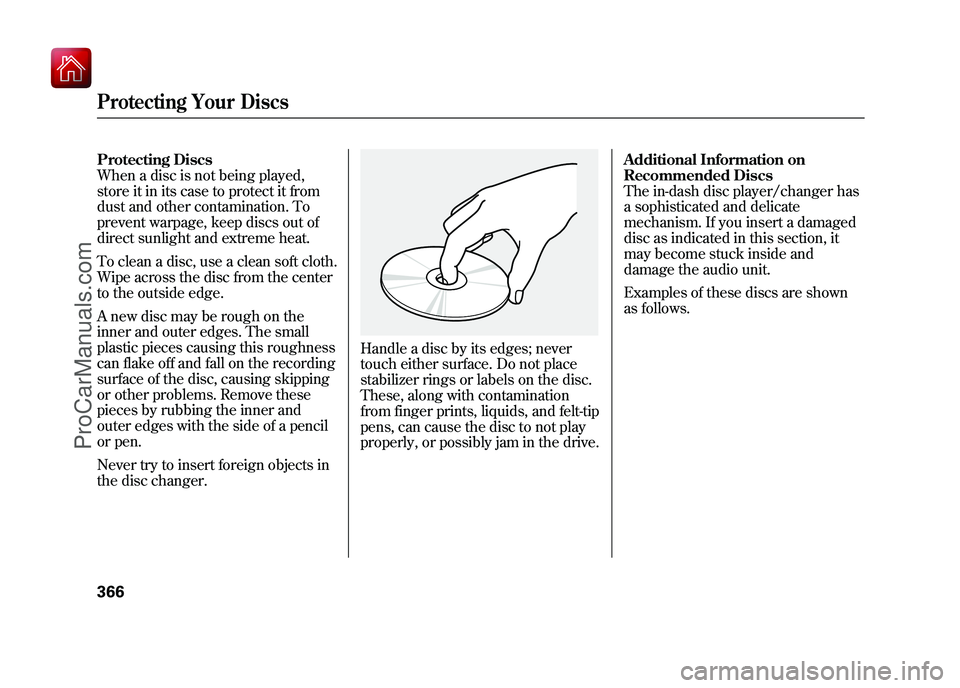
Handle a disc by its edges; never
touch either surface. Do not place
stabilizer rings or labels on the disc.
These, along with contamination
from finger prints, liquids, and felt-tip
pens, can cause the disc to not play
properly, or possibly jam in the drive.Additional Information on
Recommended Discs
The in-dash disc player/changer has
a sophisticated and delicate
mechanism. If you insert a damaged
disc as indicated in this section, it
may become stuck inside and
damage the audio unit.
Examples of these discs are shown
as follows.
Protecting Your Discs36609/10/28 17:15:37 10 ACURA ZDX KA KC New North America Own 50 31SZN600 enu
ProCarManuals.com
Page 383 of 645
The security system helps to protect
your vehicle and valuables from
theft. The horn sounds and a
combination of headlights, position
lights, side marker lights and
taillights flashes if someone attempts
to break into your vehicle or remove
the audio unit. This alarm continues
for 2 minutes, then the system
resets. To reset an activated system
before the 2 minutes have elapsed,
unlock the driver's door with the key
or the remote transmitter/keyless
access remote.
The security system automatically
sets 15 seconds after you lock the
doors, hood, and the tailgate. For the
system to activate, you must lock the
doors and the tailgate from the
outside with the key, driver's lock
tab, door lock master switch, or
remote transmitter/keyless access
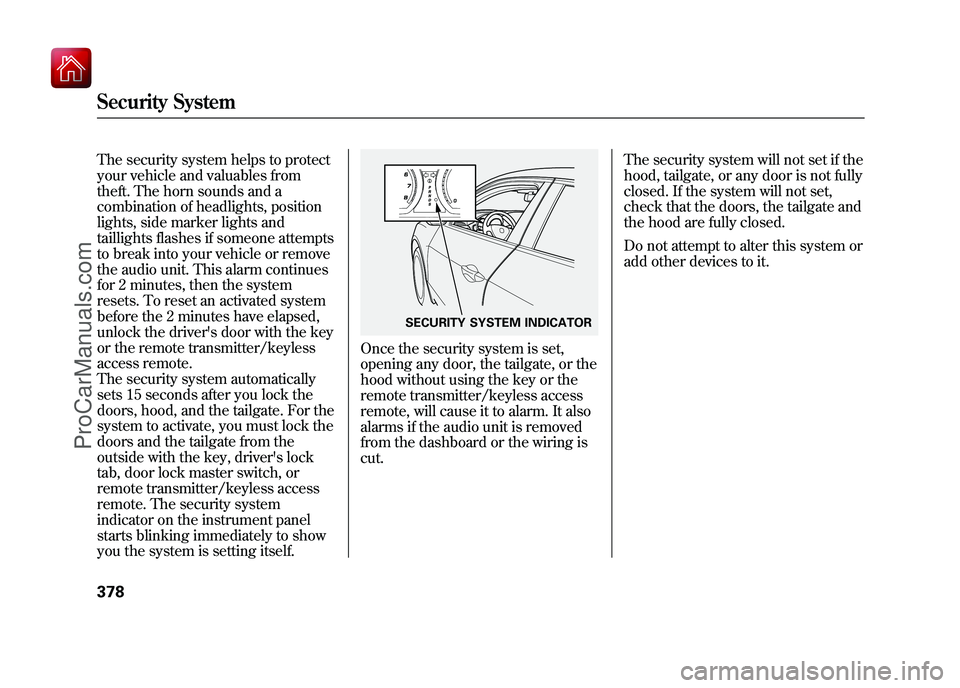
remote. The security system
indicator on the instrument panel
starts blinking immediately to show
you the system is setting itself.
Once the security system is set,
opening any door, the tailgate, or the
hood without using the key or the
remote transmitter/keyless access
remote, will cause it to alarm. It also
alarms if the audio unit is removed
from the dashboard or the wiring is
cut.The security system will not set if the
hood, tailgate, or any door is not fully
closed. If the system will not set,
check that the doors, the tailgate and
the hood are fully closed.
Do not attempt to alter this system or
add other devices to it.
SECURITY SYSTEM INDICATOR
Security System37809/10/28 17:15:37 10 ACURA ZDX KA KC New North America Own 50 31SZN600 enu
ProCarManuals.com
Page 385 of 645
Cruise control may not hold the set
speed when you are going up and
down hills. If your vehicle speed
increases going down a hill, use the
brakes to slow down. This will cancel
the cruise control. To resume the set
speed, press the RES/ACCEL
button. The CRUISE CONTROL
indicator on the instrument panel will
come back on.Changing the Set Speed
You can increase the set cruising
speed in any of these ways:
●Press and hold the RES/ACCEL
button. When you reach the
desired cruising speed, release the
button.●Push on the accelerator pedal.
Accelerate to the desired cruising
speed, then press the SET/
DECEL button.●To increase the speed in very
small amounts, tap the RES/
ACCEL button. Each time you do
this, your vehicle will speed up
about 1 mph (1.6 km/h).You can decrease the set cruising
speed in any of these ways:
●Press and hold the SET/DECEL
button. Release the button when
you reach the desired speed.●To slow down in very small
amounts, tap the SET/DECEL
button. Each time you do this,
your vehicle will slow down about
1 mph (1.6 km/h).●Tap the brake pedal lightly with
your foot. The CRUISE CONTROL
indicator on the instrument panel
will go out. When the vehicle
slows to the desired speed, press
the SET/DECEL button.
Cruise Control38009/10/28 17:15:37 10 ACURA ZDX KA KC New North America Own 50 31SZN600 enu
ProCarManuals.com
Page 401 of 645
The HomeLink
®Universal
Transceiver built into your vehicle can
be programmed to operate up to three
remote controlled devices around
your home, such as garage doors,
lighting, or home security systems.
General Safety InformationBefore programming your HomeLink
to operate a garage door opener,
confirm that the opener has an
external entrapment protection
system, such as an ‘‘electronic eye, ’’or
other safety and reverse stop features.
If your garage door was manufactured
before April 1, 1982, you may not be
able to program HomeLink to operate
it. These units do not have safety
features that cause the motor to stop
and reverse it if an obstacle is
detected during closing, increasing
the risk of injury. Do not use
HomeLink with any garage door
opener that lacks safety stop and
reverse features. Units manufactured between April 1,
1982 and January 1, 1993 may be
equipped with safety stop and reverse
features. If your unit does not have an
external entrapment protection
system, an easy test to confirm the
function and performance of the safety
stop and reverse feature is to lay a 2
╳
4 under the closing door. The door
should stop and reverse upon
contacting the piece of wood.
As an additional safety feature, garage
door openers manufactured after
January 1, 1993 are required to have
external entrapment protection
systems, such as an electronic eye,
which detect an object obstructing the
door.
Important Safety PrecautionsRefer to the safety information that came
with your garage door opener to test that
the safety features are functioning
properly. If you do not have this
information, contact the manufacturer of
the equipment.
Before programming HomeLink to a
garage door or gate opener, make sure
that people and objects are out of the way
of the device to prevent potential injury or
damage.
When programming a garage door opener,
park just outside the garage.Training HomeLinkBefore you begin
- If you just
received your vehicle and have not
trained any of the buttons in
HomeLink before, you should erase
any previously learned codes before
training the first button.
To do this, press and hold the two
outside buttons on the HomeLink
transceiver for about 20 seconds,
until the red indicator flashes.
Release the buttons, then proceed to
step 1.
HomeLink
®Universal Transceiver
39609/10/28 17:15:37 10 ACURA ZDX KA KC New North America Own 50 31SZN600 enu
ProCarManuals.com
Page 421 of 645
Bluetooth
®HandsFreeLink
®(HFL)
allows you to place and receive
phone calls using either the
navigation system controls or voice
commands without the distraction of
handling your cell phone.
To use HFL, you need a Bluetooth-
compatible cell phone. For a list of
compatible phones, pairing
procedures, and special feature
capabilities:
In the U.S., visit
www.acura.com/
handsfreelink
, or call (888) 528-7826.
In Canada, visit
www.acura.ca
, or call
(888) 9-ACURA-9. Using HFL
Interface DialUse the Interface Dial to make menu
or list selections.
To select an item on the screen, turn
the selector knob left or right to
highlight it, and then press ENTER.
To select an item that comes with,
,or
icons, push the knob up,
down, left, or right.
Press the INFO/PHONE button to
go to the main information screen.
Select Cellular Phone from the menu
and press ENTER.
Press the CANCEL button to go back
to the previous screen.
To quickly access the Cellular Phone
screen, press the Pick-Up button on
the steering wheel.
INFO/PHONE
BUTTON
CANCEL
BUTTON
DIAL SELECTOR ENTER
Bluetooth
®HandsFreeLink
®(Models with navigation system)
41609/10/28 17:15:37 10 ACURA ZDX KA KC New North America Own 50 31SZN600 enu
ProCarManuals.com