navigation system Acura ZDX 2013 Owner's Manual
[x] Cancel search | Manufacturer: ACURA, Model Year: 2013, Model line: ZDX, Model: Acura ZDX 2013Pages: 324, PDF Size: 8.58 MB
Page 3 of 324
2Quick Reference Guide
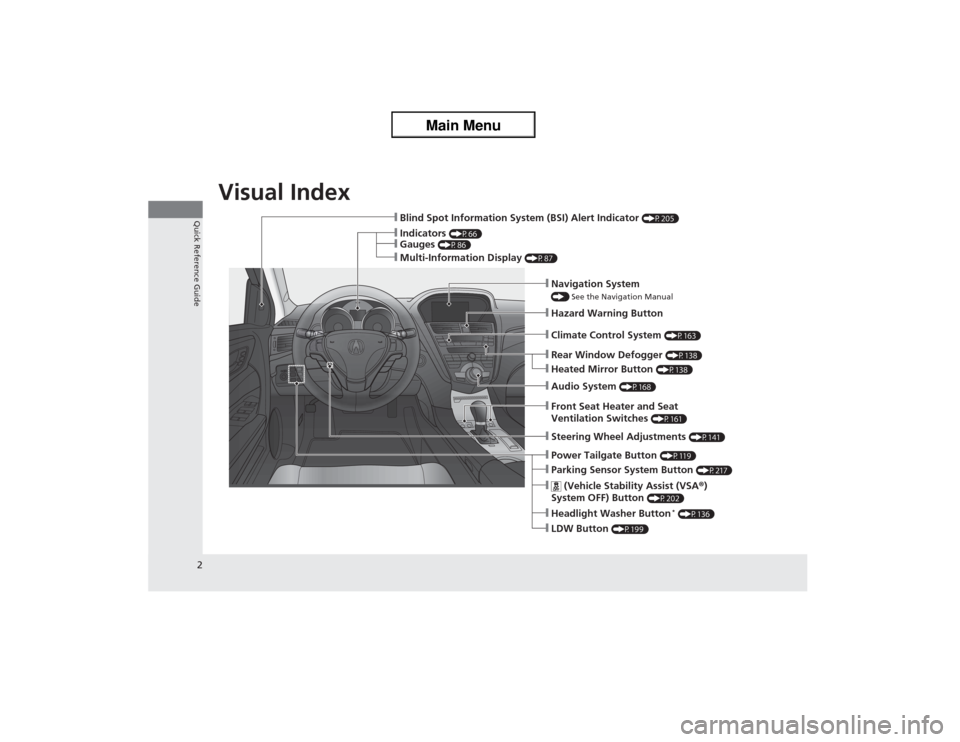
Quick Reference GuideVisual Index
❙Indicators
(P66)
❙Gauges
(P86)
❙Multi-Information Display
(P87)
❙Blind Spot Information System (BSI) Alert Indicator
(P205)
❙Navigation System() See the Navigation Manual❙Audio System
(P168)
❙Hazard Warning Button❙Climate Control System
(P163)
❙Rear Window Defogger
(P138)
❙Steering Wheel Adjustments
(P141)
❙Front Seat Heater and Seat
Ventilation Switches
(P161)
❙Power Tailgate Button
(P119)
❙Heated Mirror Button
(P138)
❙Parking Sensor System Button
(P217)
❙
(Vehicle Stability Assist (VSA®)
System OFF) Button
(P202)
❙Headlight Washer Button
* (P136)
❙LDW Button
(P199)
Page 4 of 324
3Quick Reference Guide
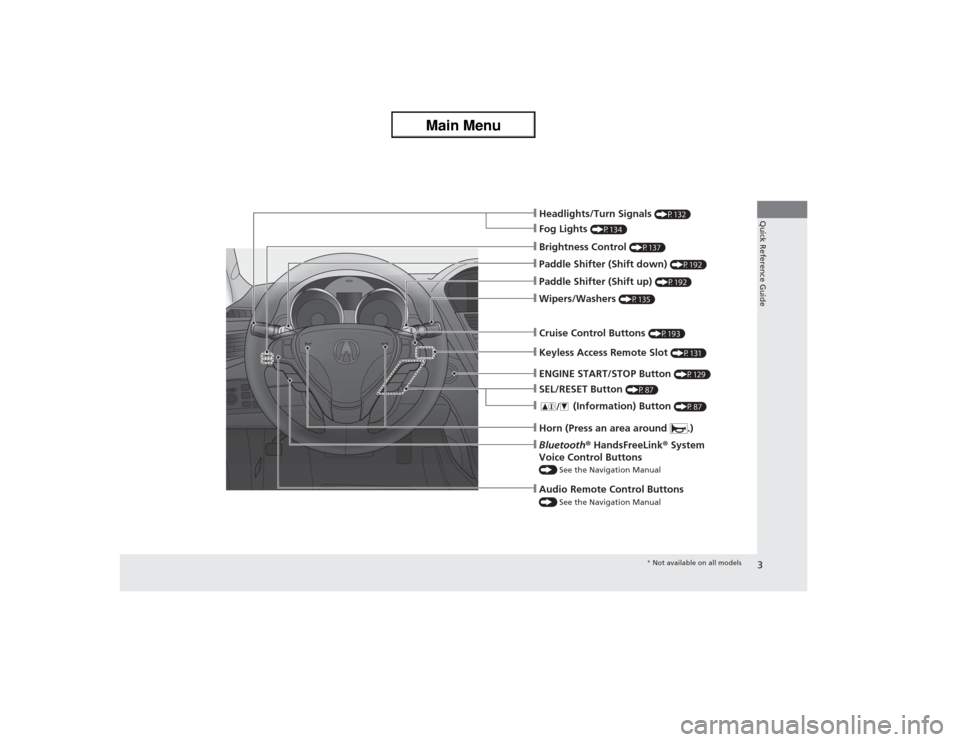
❙Headlights/Turn Signals
(P132)
❙Fog Lights
(P134)
❙Paddle Shifter (Shift down)
(P192)
❙Audio Remote Control Buttons() See the Navigation Manual❙Bluetooth® HandsFreeLink® System
Voice Control Buttons() See the Navigation Manual❙Horn (Press an area around .)❙Brightness Control
(P137)
❙Paddle Shifter (Shift up)
(P192)
❙Wipers/Washers
(P135)
❙Cruise Control Buttons
(P193)
❙Keyless Access Remote Slot
(P131)
❙ENGINE START/STOP Button
(P129)
❙SEL/RESET Button
(P87)
❙
(Information) Button
(P87)
* Not available on all models
Page 10 of 324
9Quick Reference Guide
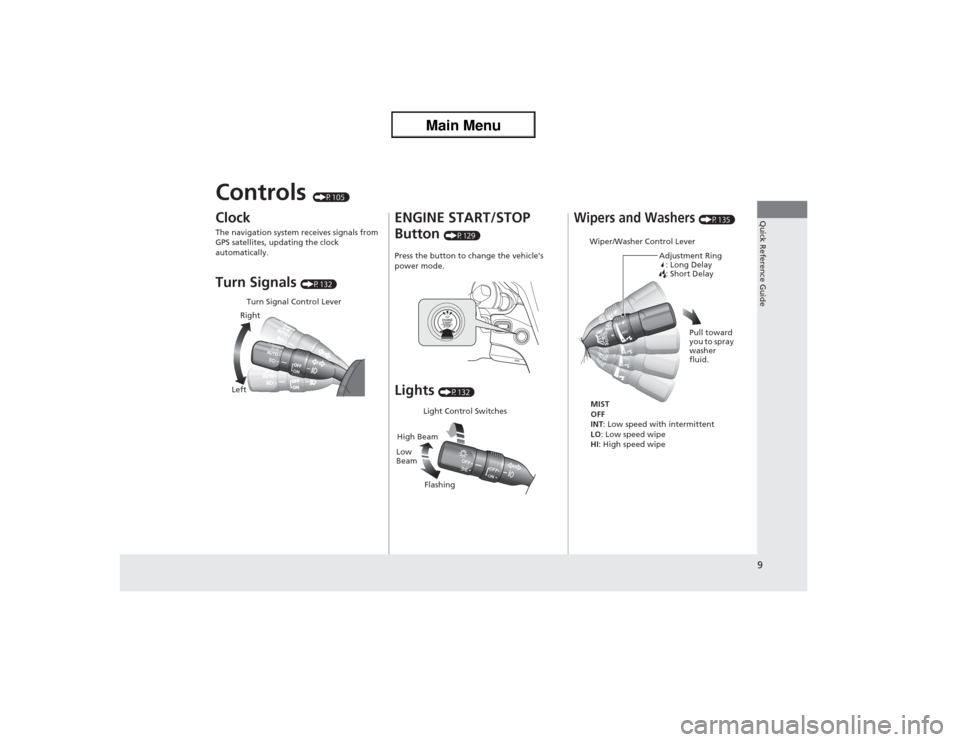
Controls
(P105)
Clock The navigation system receives signals from
GPS satellites, updating the clock
automatically.Turn Signals
(P132)
LeftRightTurn Signal Control Lever
ENGINE START/STOP
Button
(P129)
Press the button to change the vehicle’s
power mode.
Lights
(P132)
Light Control Switches
High Beam
Low
Beam
Flashing
Wipers and Washers
(P135)
Wiper/Washer Control Lever
Adjustment Ring
: Long Delay
: Short DelayMIST
OFF
INT: Low speed with intermittent
LO: Low speed wipe
HI: High speed wipePull toward
you to spray
washer
fluid.
Page 12 of 324
11Quick Reference Guide
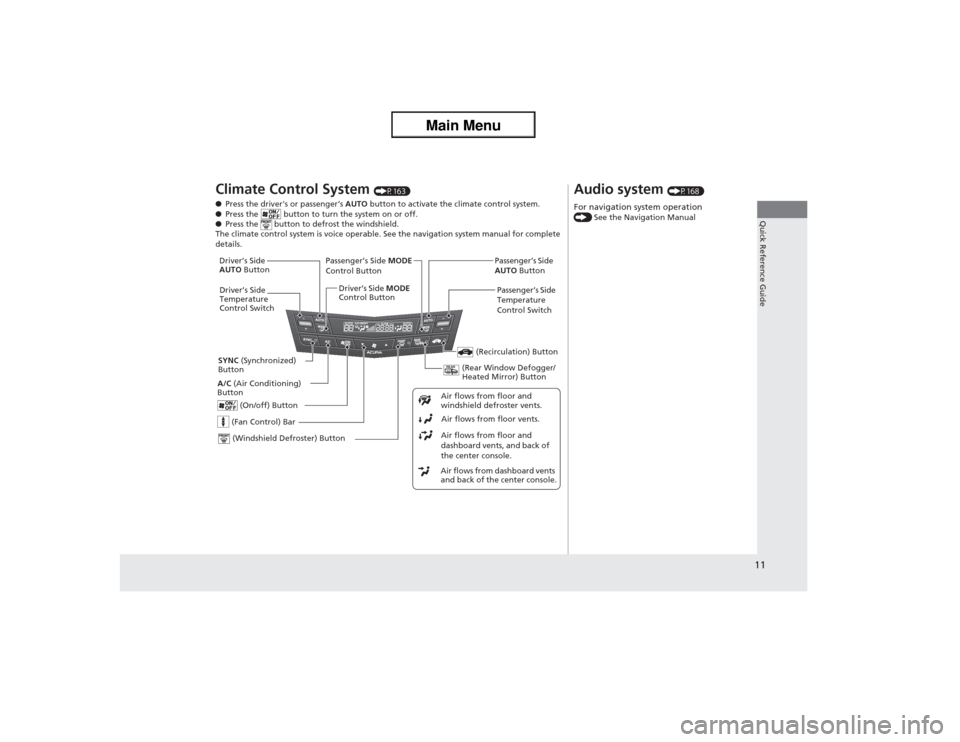
Climate Control System
(P163)
●Press the driver's or passenger’s AUTO button to activate the climate control system.
●Press the button to turn the system on or off.
●Press the button to defrost the windshield.
The climate control system is voice operable. See the navigation system manual for complete
details.
(Fan Control) Bar
(Rear Window Defogger/
Heated Mirror) Button
(Windshield Defroster) Button
A/C (Air Conditioning)
Button
Air flows from dashboard vents
and back of the center console.Air flows from floor and
dashboard vents, and back of
the center console.Air flows from floor vents. Air flows from floor and
windshield defroster vents.
(On/off) Button
(Recirculation) Button
Passenger’s Side MODE
Control Button
Passenger’s Side
Temperature
Control Switch
SYNC (Synchronized)
ButtonDriver’s Side
AUTO Button
Driver’s Side
Temperature
Control SwitchDriver’s Side MODE
Control ButtonPassenger’s Side
AUTO Button
Audio system
(P168)
For navigation system operation() See the Navigation Manual
Page 92 of 324
91
uuGauges and Multi-Information DisplayuMulti-Information DisplayContinued
Instrument Panel
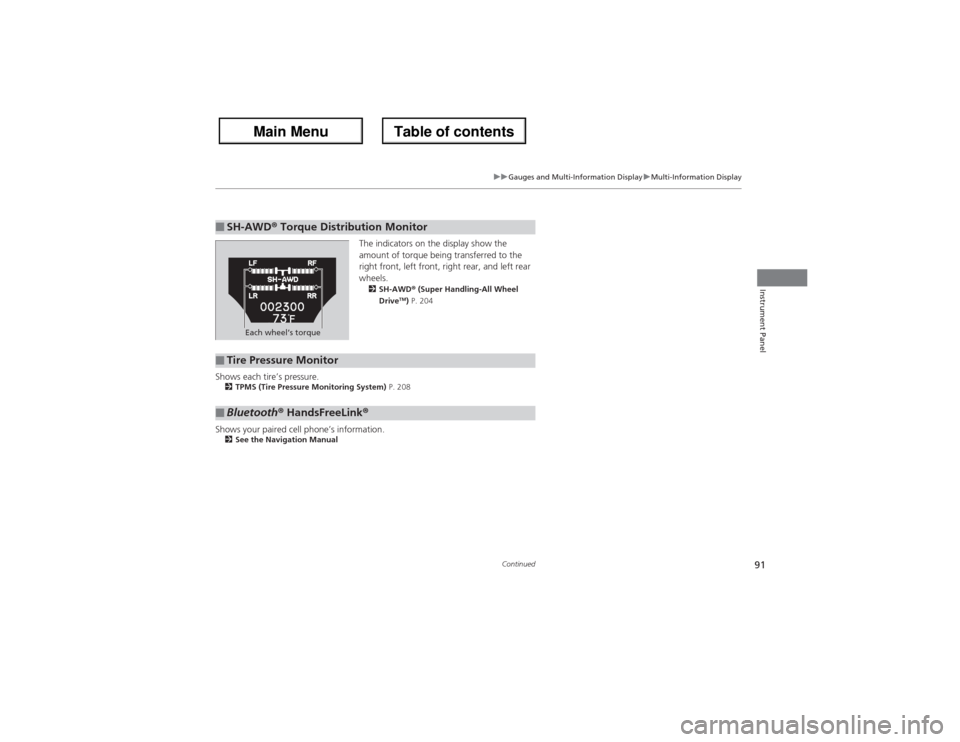
The indicators on the display show the
amount of torque being transferred to the
right front, left front, right rear, and left rear
wheels.2SH-AWD® (Super Handling-All Wheel
Drive
TM) P. 204
Shows each tire’s pressure.2TPMS (Tire Pressure Monitoring System) P. 208Shows your paired cell phone’s information.2See the Navigation Manual■SH-AWD® Torque Distribution Monitor
Each wheel’s torque
■Tire Pressure Monitor■Bluetooth® HandsFreeLink®
Page 140 of 324
139
uuOperating the Switches Around the Steering WheeluDriving Position Memory System
Continued
Controls
Driving Position Memory SystemYou can store two driver’s seat (except for power lumbar), steering wheel and
outside mirror positions with the driving position memory system.
When you unlock and open the driver’s door with the keyless access system, the seat
and outside mirrors adjust automatically to one of the two preset positions.
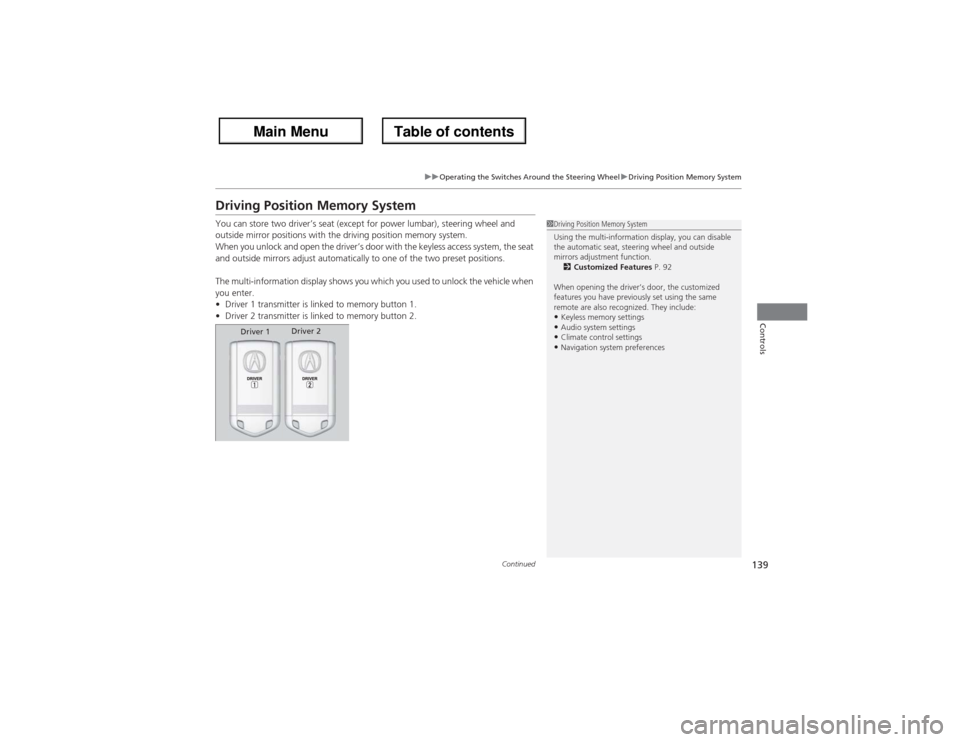
The multi-information display shows you which you used to unlock the vehicle when
you enter.
•Driver 1 transmitter is linked to memory button 1.
•Driver 2 transmitter is linked to memory button 2.
1Driving Position Memory System
Using the multi-information display, you can disable
the automatic seat, steering wheel and outside
mirrors adjustment function.
2Customized Features P. 92
When opening the driver’s door, the customized
features you have previously set using the same
remote are also recognized. They include:•Keyless memory settings•Audio system settings•Climate control settings•Navigation system preferences
Driver 1Driver 2
Page 166 of 324
165
uuClimate Control SystemuSynchronized Mode
Controls
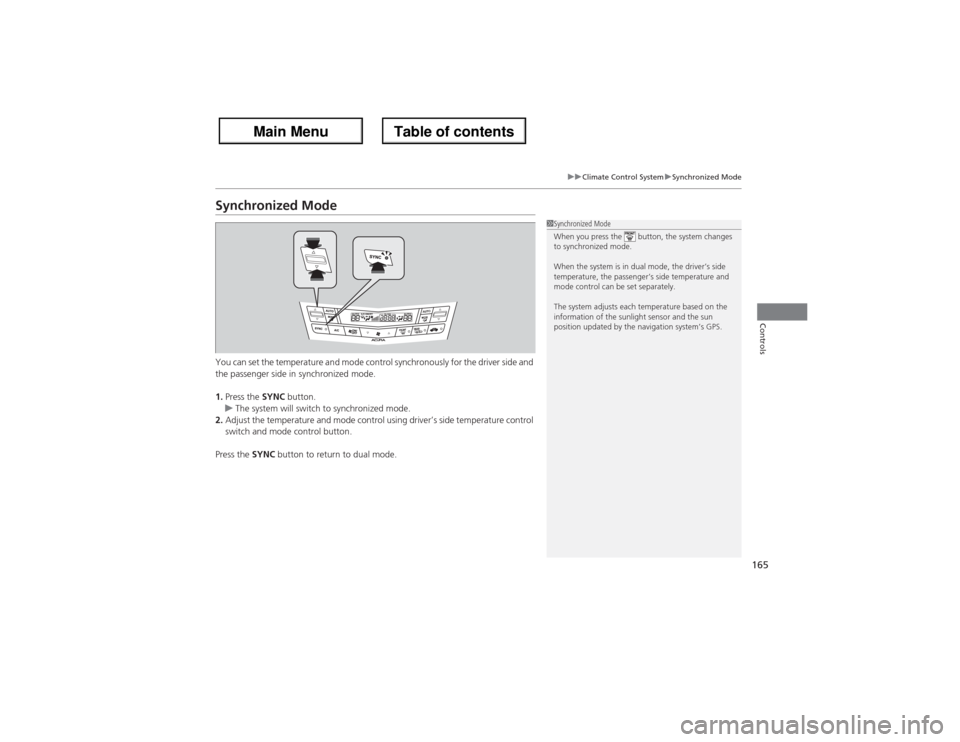
Synchronized ModeYou can set the temperature and mode control synchronously for the driver side and
the passenger side in synchronized mode.
1.Press the SYNC button.
uThe system will switch to synchronized mode.
2.Adjust the temperature and mode control using driver’s side temperature control
switch and mode control button.
Press the SYNC button to return to dual mode.
1Synchronized Mode
When you press the button, the system changes
to synchronized mode.
When the system is in dual mode, the driver’s side
temperature, the passenger’s side temperature and
mode control can be set separately.
The system adjusts each temperature based on the
information of the sunlight sensor and the sun
position updated by the navigation system’s GPS.
Page 169 of 324
168Features
Audio SystemAbout Your Audio SystemSee the Navigation Manual for operation of the audio system, AcuraLink
*,
Bluetooth® HandsFreeLink®, and voice commands for these features.
* Not available on all models
Page 268 of 324
267Maintenance
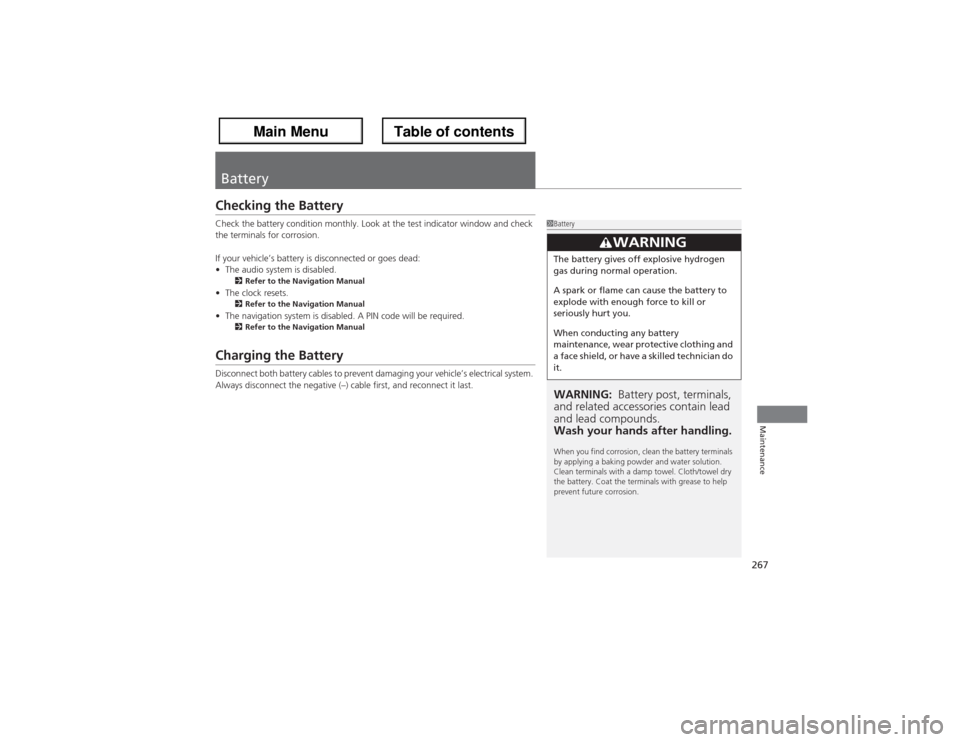
BatteryChecking the BatteryCheck the battery condition monthly. Look at the test indicator window and check
the terminals for corrosion.
If your vehicle’s battery is disconnected or goes dead:
•The audio system is disabled.
2Refer to the Navigation Manual
•The clock resets.
2Refer to the Navigation Manual
•The navigation system is disabled. A PIN code will be required.
2Refer to the Navigation Manual
Charging the BatteryDisconnect both battery cables to prevent damaging your vehicle’s electrical system.
Always disconnect the negative (–) cable first, and reconnect it last.
1BatteryWARNING: Battery post, terminals,
and related accessories contain lead
and lead compounds.
Wash your hands after handling.When you find corrosion, clean the battery terminals
by applying a baking powder and water solution.
Clean terminals with a damp towel. Cloth/towel dry
the battery. Coat the terminals with grease to help
prevent future corrosion.
3
WARNING
The battery gives off explosive hydrogen
gas during normal operation.
A spark or flame can cause the battery to
explode with enough force to kill or
seriously hurt you.
When conducting any battery
maintenance, wear protective clothing and
a face shield, or have a skilled technician do
it.
Page 315 of 324
314Information
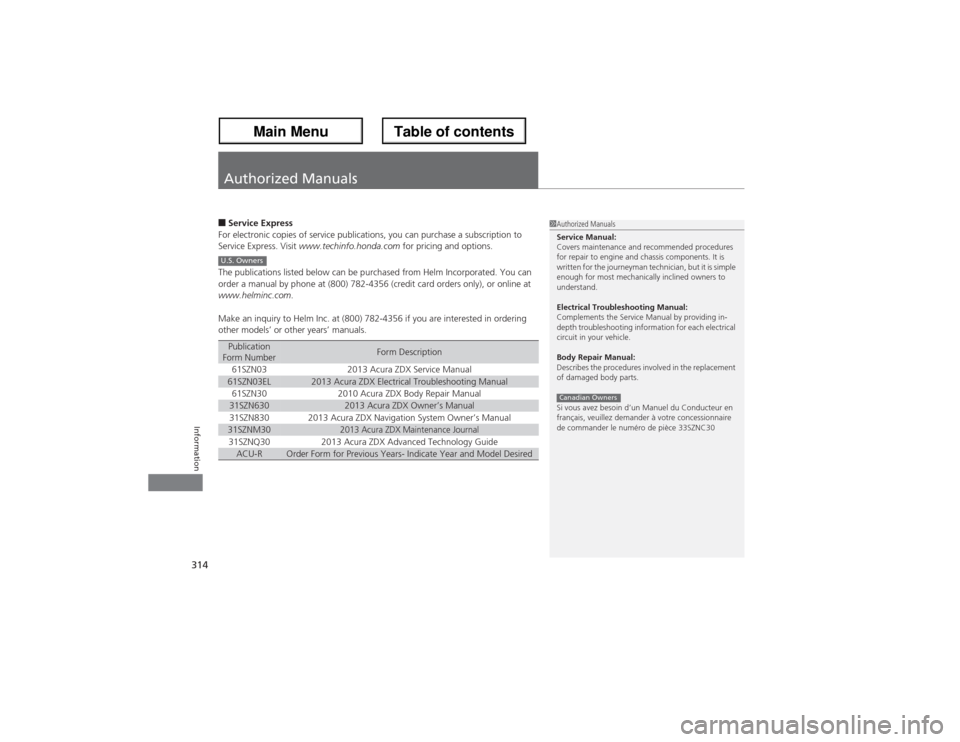
Authorized Manuals■Service Express
For electronic copies of service publications, you can purchase a subscription to
Service Express. Visit www.techinfo.honda.com for pricing and options.
The publications listed below can be purchased from Helm Incorporated. You can
order a manual by phone at (800) 782-4356 (credit card orders only), or online at
www.helminc.com.
Make an inquiry to Helm Inc. at (800) 782-4356 if you are interested in ordering
other models’ or other years’ manuals.Publication
Form Number
Form Description
61SZN03
2013 Acura ZDX Service Manual
61SZN03EL
2013 Acura ZDX Electrical Troubleshooting Manual
61SZN30
2010 Acura ZDX Body Repair Manual
31SZN630
2013 Acura ZDX Owner’s Manual
31SZN830
2013 Acura ZDX Navigation System Owner’s Manual
31SZNM30
2013 Acura ZDX Maintenance Journal
31SZNQ30
2013 Acura ZDX Advanced Technology Guide
ACU-R
Order Form for Previous Years- Indicate Year and Model Desired
1Authorized Manuals
Service Manual:
Covers maintenance and recommended procedures
for repair to engine and chassis components. It is
written for the journeyman technician, but it is simple
enough for most mechanically inclined owners to
understand.
Electrical Troubleshooting Manual:
Complements the Service Manual by providing in-
depth troubleshooting information for each electrical
circuit in your vehicle.
Body Repair Manual:
Describes the procedures involved in the replacement
of damaged body parts.
Si vous avez besoin d’un Manuel du Conducteur en
français, veuillez demander à votre concessionnaire
de commander le numéro de pièce 33SZNC30Canadian Owners
U.S. Owners