buttons Alfa Romeo 159 2006 Owner handbook (in English)
[x] Cancel search | Manufacturer: ALFA ROMEO, Model Year: 2006, Model line: 159, Model: Alfa Romeo 159 2006Pages: 299, PDF Size: 4.64 MB
Page 62 of 299

60
SAFETY
DEVICES
WARNING
LIGHTS AND
MESSAGES
IN AN
EMERGENCY
CAR
MAINTENANCE
TECHNICAL
SPECIFICATIONS
INDEX
CORRECT USE
OF THE CAR
DASHBOARD
AND
CONTROLS
THREE-ZONE controls fig. 50
Front controls
A- air distribution buttons (driver and pas-
senger side);
B- temperature adjustment knob on driver
side;
C- automatic operation button (FULL AUTO);
D- climate control data display;
E- temperature adjustment knob on passen-
ger side;
F- heated rear window/door mirrors on/off
button;
G- MAX-DEF function button (fast defrost-
ing/demisting function for windscreen, heat-
ed rear window and door mirrors with heating
function);
H- buttons for adjusting the fan speed and
for turning the climate control system off
(OFF);
I- Button for activating the MONO function
(alignment of set temperatures), correspond-
ing to driver’s one;
L- air recirculation on/off button;
M- climate control compressor on/off button;
N- passenger’s compartment temperature
sensor
Rear controls
P- knob for adjusting temperature on rear
passenger side;
Q- button for turning on automatic operation
(FULL AUTO) and for turning off air flow to
rear seats (OFF);
R- air distribution buttons;
S- rear temperature display.
fig. 50 - THREE-ZONE configuration - Front and rear controlsA0E0059m
Page 65 of 299

63
SAFETY
DEVICES
WARNING
LIGHTS AND
MESSAGES
IN AN
EMERGENCY
CAR
MAINTENANCE
TECHNICAL
SPECIFICATIONS
INDEX
CORRECT USE
OF THE CAR
DASHBOARD
AND
CONTROLS
FAN SPEED ADJUSTMENT
Press buttons +/–to increase or to de-
crease the fan speed.
The fan speed is shown by the lit bars on
the display:
❒min fan speed = one bar lit;
❒max fan speed = 6 bars lit;
At starting, if climate control system is
operating in automatic mode, the fan
speed is kept at minimum until the en-
gine has started.
With compressor on and engine running,
the fan speed cannot fall below the min.
speed.
The fan can be cut off (all bars off) on-
ly if the climate control compressor has
been switched off by pressing button
√.
To restore automatic fan speed control
after a manual adjustment, press but-
tons AUTO. AUTO will also go off if the system (spe-
cially when compressor is turned off
manually) cannot reach or cannot keep
the required temperature.
Button
√will not turn off AUTO if the
system can keep the required comfort.
It is inadvisable to use
air recirculation on
rainy/cold days as it would
considerably increase the pos-
sibility of windows misting up
inside.
WARNING
AUTOMATIC OPERATION
(AUTO BUTTON)
Pressing button AUTO (front and rear
controls) the displays will show FULL AU-
TO and the system will automatically ad-
just:
❒fan speed;
❒air distribution in passenger com-
partment;
❒air recirculation;
❒compressor;
and it will cancel all the previous man-
ual adjustments.
Wording FULL will disappear from the
display of the involved area (driver or
front passenger side or rear passenger
side) when performing whatever oper-
ation (excluding temperature change).
Page 68 of 299

66
SAFETY
DEVICES
WARNING
LIGHTS AND
MESSAGES
IN AN
EMERGENCY
CAR
MAINTENANCE
TECHNICAL
SPECIFICATIONS
INDEX
CORRECT USE
OF THE CAR
DASHBOARD
AND
CONTROLS
AIR DISTRIBUTION
SELECTION
Front seat Two-zone/
Three-zone configuration
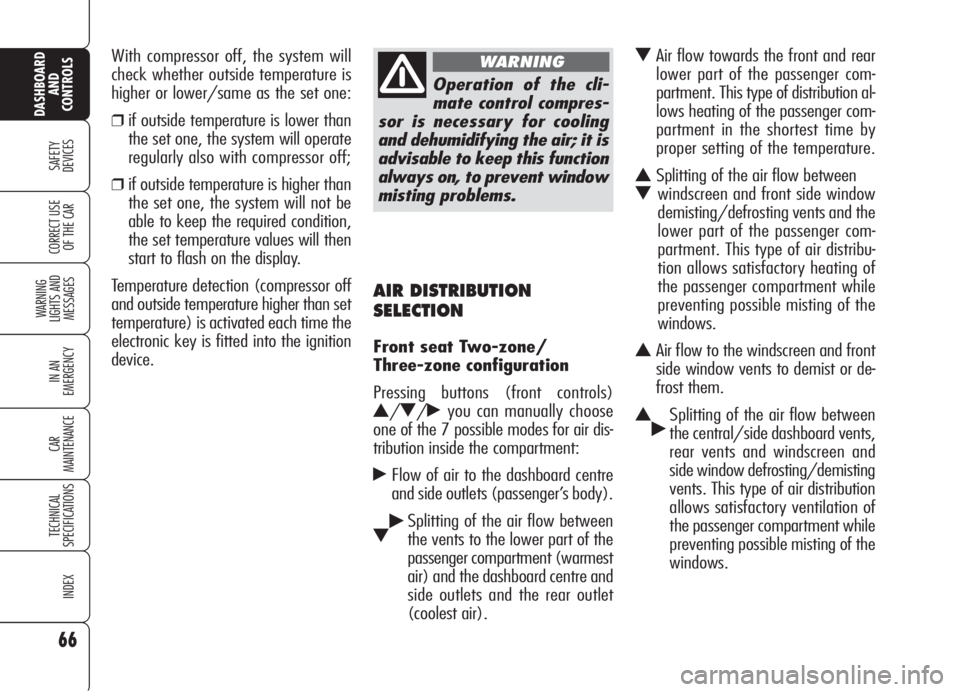
Pressing buttons (front controls)
N/O/˙you can manually choose
one of the 7 possible modes for air dis-
tribution inside the compartment:
˙Flow of air to the dashboard centre
and side outlets (passenger’s body).
O˙Splitting of the air flow between
the vents to the lower part of the
passenger compartment (warmest
air) and the dashboard centre and
side outlets and the rear outlet
(coolest air).
OAir flow towards the front and rear
lower part of the passenger com-
partment. This type of distribution al-
lows heating of the passenger com-
partment in the shortest time by
proper setting of the temperature.
NSplitting of the air flow between
Owindscreen and front side window
demisting/defrosting vents and the
lower part of the passenger com-
partment. This type of air distribu-
tion allows satisfactory heating of
the passenger compartment while
preventing possible misting of the
windows.
NAir flow to the windscreen and front
side window vents to demist or de-
frost them.
N˙Splitting of the air flow between
the central/side dashboard vents,
rear vents and windscreen and
side window defrosting/demisting
vents. This type of air distribution
allows satisfactory ventilation of
the passenger compartment while
preventing possible misting of the
windows. With compressor off, the system will
check whether outside temperature is
higher or lower/same as the set one:
❒if outside temperature is lower than
the set one, the system will operate
regularly also with compressor off;
❒if outside temperature is higher than
the set one, the system will not be
able to keep the required condition,
the set temperature values will then
start to flash on the display.
Temperature detection (compressor off
and outside temperature higher than set
temperature) is activated each time the
electronic key is fitted into the ignition
device.
Operation of the cli-
mate control compres-
sor is necessary for cooling
and dehumidifying the air; it is
advisable to keep this function
always on, to prevent window
misting problems.
WARNING
Page 69 of 299

67
SAFETY
DEVICES
WARNING
LIGHTS AND
MESSAGES
IN AN
EMERGENCY
CAR
MAINTENANCE
TECHNICAL
SPECIFICATIONS
INDEX
CORRECT USE
OF THE CAR
DASHBOARD
AND
CONTROLS
N˙Splitting of the air flow between
Oall vents.
Rear seat Three-zone
configuration controls
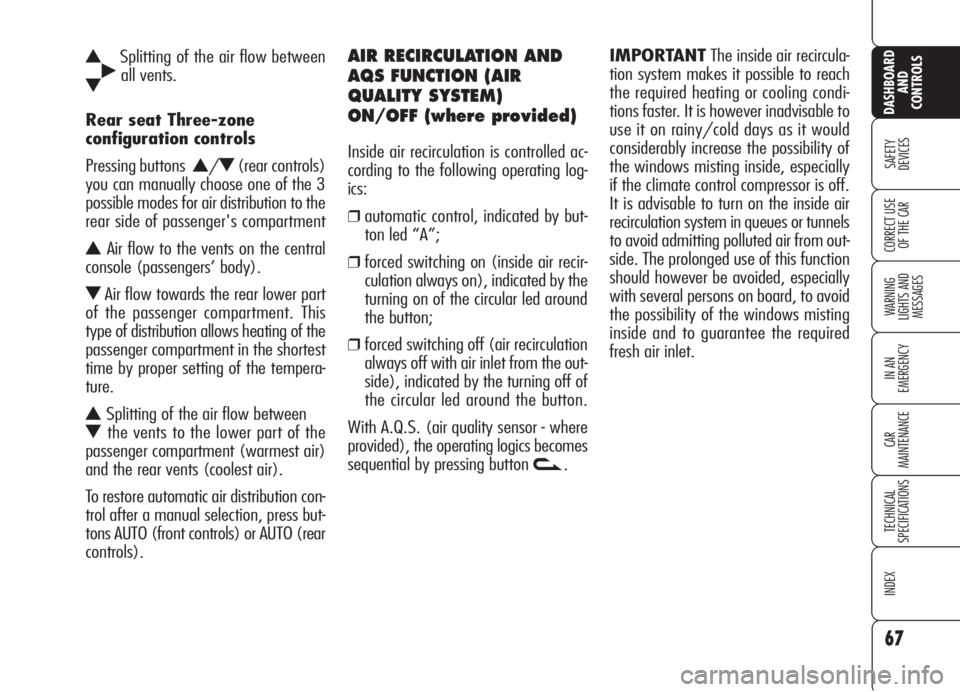
Pressing buttons
N/O(rear controls)
you can manually choose one of the 3
possible modes for air distribution to the
rear side of passenger's compartment
NAir flow to the vents on the central
console (passengers’ body).
OAir flow towards the rear lower part
of the passenger compartment. This
type of distribution allows heating of the
passenger compartment in the shortest
time by proper setting of the tempera-
ture.
NSplitting of the air flow between
Othe vents to the lower part of the
passenger compartment (warmest air)
and the rear vents (coolest air).
To restore automatic air distribution con-
trol after a manual selection, press but-
tons AUTO (front controls) or AUTO (rear
controls).
AIR RECIRCULATION AND
AQS FUNCTION (AIR
QUALITY SYSTEM)
ON/OFF (where provided)
Inside air recirculation is controlled ac-
cording to the following operating log-
ics:
❒automatic control, indicated by but-
ton led “A”;
❒forced switching on (inside air recir-
culation always on), indicated by the
turning on of the circular led around
the button;
❒forced switching off (air recirculation
always off with air inlet from the out-
side), indicated by the turning off of
the circular led around the button.
With A.Q.S. (air quality sensor - where
provided), the operating logics becomes
sequential by pressing button
v.IMPORTANTThe inside air recircula-
tion system makes it possible to reach
the required heating or cooling condi-
tions faster. It is however inadvisable to
use it on rainy/cold days as it would
considerably increase the possibility of
the windows misting inside, especially
if the climate control compressor is off.
It is advisable to turn on the inside air
recirculation system in queues or tunnels
to avoid admitting polluted air from out-
side. The prolonged use of this function
should however be avoided, especially
with several persons on board, to avoid
the possibility of the windows misting
inside and to guarantee the required
fresh air inlet.
Page 74 of 299

72
SAFETY
DEVICES
WARNING
LIGHTS AND
MESSAGES
IN AN
EMERGENCY
CAR
MAINTENANCE
TECHNICAL
SPECIFICATIONS
INDEX
CORRECT USE
OF THE CAR
DASHBOARD
AND
CONTROLS
Parking lights
With instrument panel off they turn on
by pressing button C. When pressing the
button a buzzer will sound and the in-
strument panel warning light
3will
turn on.
Press the button again to turn the lights
off.
With parking lights on, move the exter-
nal lights left-hand stalk upwards or
downwards to select on which side
(right or left) the lights must stay on. In
this event warning light
3will turn
off.
With left stalk at central position the four
parking lights and the number plate light
will turn on.
DASHBOARD BUTTONS
fig. 52
Front fog lights
(where provided)
To turn front fog lights on, press button
A; to activate these lights it is necessary
to have the side/taillights switched on.
The instrument panel warning light
5
will turn on. Press the button again or turn
side/taillights off to turn the lights off.
Rear fog lights
To turn rear fog lights on, press button
Bto activate these lights it is necessary
to have the dipped beams or front fog
lights switched on. The instrument pan-
el warning light
4will turn on. They turn
off by pressing the button again, turn-
ing the front or rear fog lights off or by
turning the engine off.
A0E0061mfig. 52
Hazard lights
These lights are turned on by pressing
buttonA-fig. 53.
When these lights are on, the switch
flashes and warning lights
Îand¥on
the instrument panel will turn on at the
same time.
Press switch Aagain to turn the lights
off.
Use of the hazard
warning lights is ruled
by the Highway Code of the
country in which the car is
used. Observe regulations.
WARNING
A0E0100mfig. 53
Page 91 of 299

PROGRAMMING
IMPORTANTWhile programming the
system, check for the absence of peo-
ple, animals or objects within the ma-
noeuvre space of main doors or gates to
prevent the risk of injuries or damages.
IMPORTANTPull up the handbrake
and fit the key into the ignition device.
Do not start the engine.Proceed as follows:
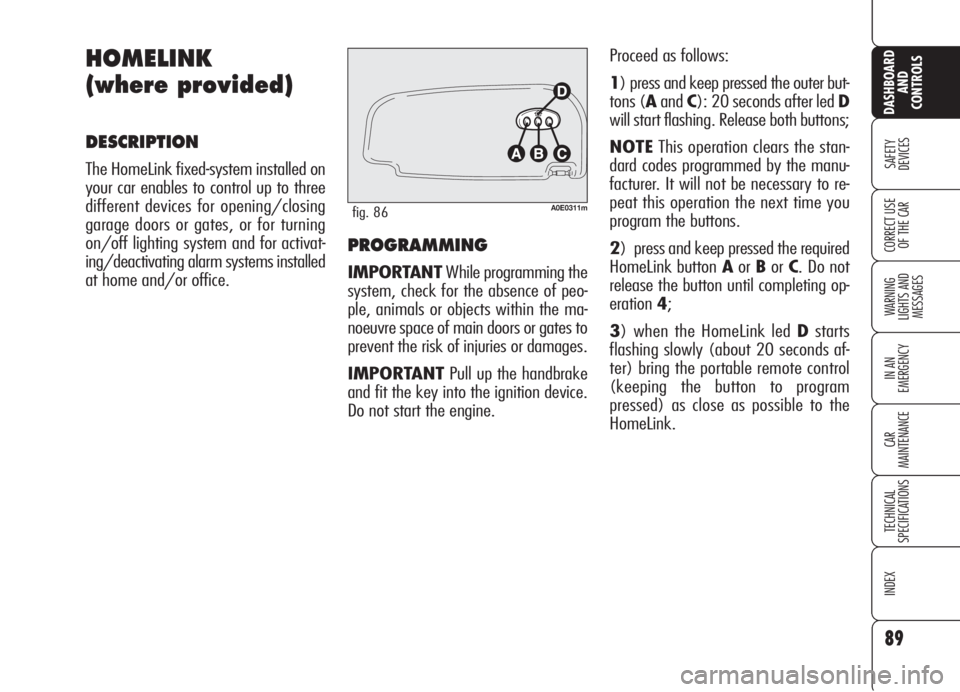
1) press and keep pressed the outer but-
tons (AandC): 20 seconds after led D
will start flashing. Release both buttons;
NOTEThis operation clears the stan-
dard codes programmed by the manu-
facturer. It will not be necessary to re-
peat this operation the next time you
program the buttons.
2) press and keep pressed the required
HomeLink button AorBorC. Do not
release the button until completing op-
eration4;
3) when the HomeLink led Dstarts
flashing slowly (about 20 seconds af-
ter) bring the portable remote control
(keeping the button to program
pressed) as close as possible to the
HomeLink.
89
SAFETY
DEVICES
WARNING
LIGHTS AND
MESSAGES
IN AN
EMERGENCY
CAR
MAINTENANCE
TECHNICAL
SPECIFICATIONS
INDEX
CORRECT USE
OF THE CAR
DASHBOARD
AND
CONTROLS
HOMELINK
(where provided)
DESCRIPTION
The HomeLink fixed-system installed on
your car enables to control up to three
different devices for opening/closing
garage doors or gates, or for turning
on/off lighting system and for activat-
ing/deactivating alarm systems installed
at home and/or office.
A0E0311mfig. 86
Page 92 of 299

HOW TO USE THE
HOMELINK SYSTEM
The HomeLink remote control activates
the operation of the garage door mo-
tor or gate motor exactly as the portable
remote control. The car shall be within
the range of the motor and the key shall
be fitted into the ignition device.
Press the programmed button (AorB
orC). During signal transmission the led
Dwill stay on and the set system
(garage door, gate, etc.) will obey.
If the HomeLink system set as described
above does not work, this may be due
to the fact the original portable remote
control has an alternate code (see para-
graph "Synchronising alternate codes").
It is however always possible to use the
original portable remote control to op-
erate the system (garage door, gate,
etc.).
SYNCHRONISING
ALTERNATE CODES
To ascertain whether your garage door
motor or gate motor is provided with an
alternate code, proceed as follows:
consult the owner handbook provided
by the garage door motor's or gate mo-
tor's manufacturer;
the portable remote control seems to
have programmed HomeLink; HomeLink
however is not up to open or to close
the garage door or the gate;
press and keep pressed the programmed
button (AorBorC).
With an alternate code system, the led
Dblinks fast for short and then it stays
on glowing steadily for two seconds.
This sequence is repeated for 20 sec-
onds. The distance required between the
portable remote control and the Home-
Link depends on the system to be pro-
grammed (type of frequency of main
door, gate or other system).
IfDdoes not start to flash quickly try
again changing the distance between
HomeLink and portable remote control
(move them away slightly). If 20 sec-
onds later the led is still flashing slow-
ing, repeat the operation changing again
the distance between Homelink and re-
mote control.
4) the HomeLink led Dwill start blink-
ing, first slowly and then quickly. When
it starts flashing quickly, release both
buttons (HomeLink and portable remote
control).
90
SAFETY
DEVICES
WARNING
LIGHTS AND
MESSAGES
IN AN
EMERGENCY
CAR
MAINTENANCE
TECHNICAL
SPECIFICATIONS
INDEX
CORRECT USE
OF THE CAR
DASHBOARD
AND
CONTROLS
Page 94 of 299

CLEARING THE
PROGRAMMED BUTTONS
You are recommended to clear the
HomeLink programming before selling
the car.
Programming is cleared on all the three
buttons at the same time.
Proceed as follows:
❒press and keep pressed the outer
buttons (AandC): 20 seconds af-
ter led Dwill start flashing.
❒Release both buttons.
TECHNICAL DATA FOR THE
ASSISTANCE SERVICE
If after following the previous instruc-
tions you are still unable to set the
HomeLink system, contact the Assis-
tance Service (HomeLink toll free num-
ber 00800046635465) and commu-
nicate the following data:
❒make and model of your car, in-
cluding the date of manufacture and
the country where you bought it;
❒make, model, date of manufacture
and operating frequency of the orig-
inal portable remote control (if
known). The distance required between the
portable remote control and the Home-
Link depends on the system to be pro-
grammed (type of frequency of main
door, gate or other system).
IfDdoes not start to flash quickly try
again changing the distance between
HomeLink and portable remote control
(move them away slightly). If 20 sec-
onds later the led is still flashing slow-
ing, repeat the operation changing again
the distance between Homelink and re-
mote control.
3) the HomeLink led Dwill start blink-
ing, first slowly and then quickly. When
it starts flashing quickly, release both
buttons (HomeLink and portable remote
control).
In this way the system previously pro-
grammed on HomeLink is cleared and
the new system is ready for use. This
operation has no effect on the other two
HomeLink buttons.
92
SAFETY
DEVICES
WARNING
LIGHTS AND
MESSAGES
IN AN
EMERGENCY
CAR
MAINTENANCE
TECHNICAL
SPECIFICATIONS
INDEX
CORRECT USE
OF THE CAR
DASHBOARD
AND
CONTROLS
Page 96 of 299

94
SAFETY
DEVICES
WARNING
LIGHTS AND
MESSAGES
IN AN
EMERGENCY
CAR
MAINTENANCE
TECHNICAL
SPECIFICATIONS
INDEX
CORRECT USE
OF THE CAR
DASHBOARD
AND
CONTROLS
SUN CURTAIN fig. 88
The sun curtain shall be used to adjust
brightness inside the passenger com-
partment. Sun curtain is fitted with han-
dle and air vents. If when removing the key from the ig-
nition device, you activate sunroof slid-
ing by pressing the electronic key but-
ton
ËorÁwhile sunroof sliding by man-
ual control (by pressing the selector) is
being performed, this last control will
prevail. To make the sunroof sliding au-
tomatically you have to press again but-
ton
ËorÁ.
Sunroof sliding by pressing the electronic
key buttons
ËorÁcan be stopped by op-
erating selector A-fig. 87(by changing
its position or pressing it).
Changing selector position, will make
the sunroof slide to the new position ig-
noring buttons
ËorÁ.
Open and close the roof
only when the vehicle
is stationary.
WARNING
A0E0070mfig. 88
SUNROOF CLOSING
Closing from inside the car
Turn selector A-fig. 87counter-clock-
wise.
Closing from outside the car
Press the electronic key button
Áfor
over 2 seconds.
During sunroof closing stroke, the anti-
crushing safety system is active along
the whole stroke (excluding the last 4
mm). The anti-crushing safety system is
always active when sunroof is closed by
pressing button
Á.
Though the selector (by pressing it) it is
possible to use the “Inhibit” position
that will exclude the anti-crushing safe-
ty system.
Page 102 of 299

100
SAFETY
DEVICES
WARNING
LIGHTS AND
MESSAGES
IN AN
EMERGENCY
CAR
MAINTENANCE
TECHNICAL
SPECIFICATIONS
INDEX
CORRECT USE
OF THE CAR
DASHBOARD
AND
CONTROLS
C(where provided) – rear left window
opening/closing; “automatic continu-
ous” mode operation during window
opening/closing;
D(where provided) – rear right win-
dow opening/closing; “automatic con-
tinuous” mode operation just during win-
dow opening;
E(where provided) – rear power win-
dow enabling/disabling controls (when
rear power window controls are dis-
abled, the led on button Ewill turn on
and disabled controls will turn off).
Press buttons A,B,CorDto open/
close the required window.
Pressing briefly one of the buttons the
window “jerks” whereas a prolonged
pressing makes the window opening or
closing in “automatic continuous”
mode.
Pressing button A,B,CorDagain will
stop the window in the required posi-
tion.Front passenger door/
rear doors
Front passenger door and, on certain
versions, rear doors are fitted with but-
ton panels controlling opening/closing
of the corresponding window.
CONTROLS
Driver side
On the driver’s door panel are set the
buttonsfig. 93 for controlling, with
electronic key fitted into the ignition de-
vice:
A– front left window opening/closing;
window opening or closing in “auto-
matic continuous” mode;
B– front right window opening/clos-
ing; window opening or closing in “au-
tomatic continuous” mode (only ver-
sions with 4 power windows);
A0E0051mfig. 93
Improper use of the
power windows can be
dangerous. Before and
during its operation ensure that
any passengers are not at risk
from the moving glass either by
personal objects getting caught
in the mechanism or by being in-
jured by it directly. Always re-
move the ignition key when
getting out of the car to prevent
the power windows being op-
erated accidentally and consti-
tuting a danger to the passen-
gers in the car.