dashboard Alfa Romeo 8C 2009 Owner handbook (in English)
[x] Cancel search | Manufacturer: ALFA ROMEO, Model Year: 2009, Model line: 8C, Model: Alfa Romeo 8C 2009Pages: 223, PDF Size: 14.35 MB
Page 75 of 223
73
3
GF
H
INSTRUMENTS AND CONTROLS
ASHTRAY AND
CIGARETTE LIGHTER
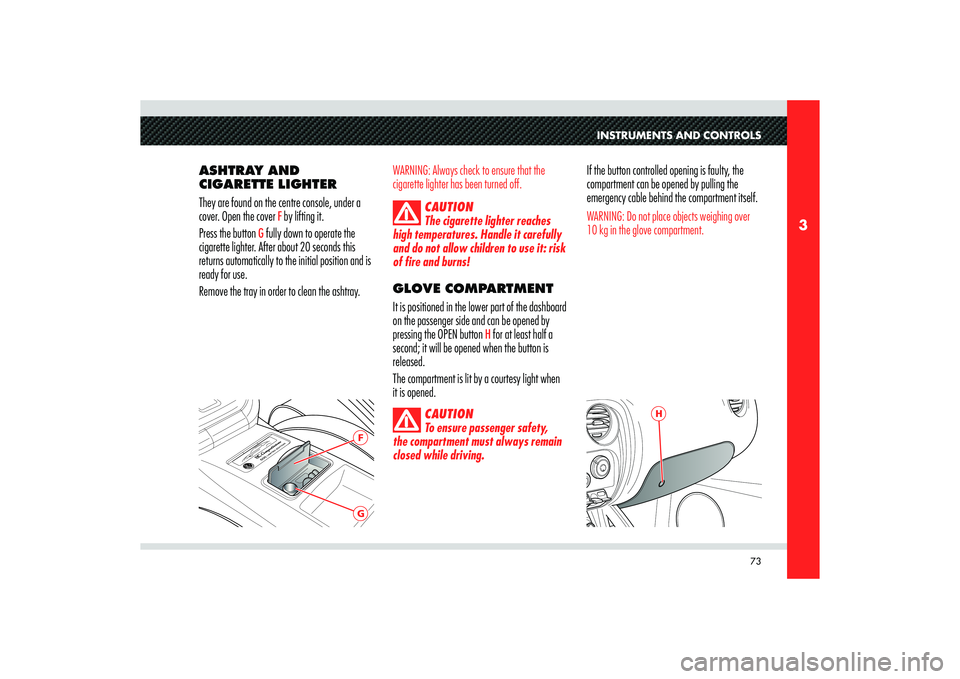
They are found on the centre console, under a
cover. Open the cover
F by lifting it.
Press the button
G fully down to operate the
cigarette lighter. After about 20 seconds this
returns automatically to the initial position and is
ready for use.
Remove the tray in order to clean the ashtray.
WARNING: Always check to ensure that the
cigarette lighter has been turned off.
CAUTION
The cigarette lighter reaches
high temperatures. Handle it carefully
and do not allow children to use it: risk
of fire and burns!GLOVE COMPARTMENT
It is positioned in the lower part of the dashboard
on the passenger side and can be opened by
pressing the OPEN button
H for at least half a
second; it will be opened when the button is
released.
The compartment is lit by a courtesy light when
it is opened.
CAUTION
To ensure passenger safety,
the compartment must always remain
closed while driving.
If the button controlled opening is faulty, the
compartment can be opened by pulling the
emergency cable behind the compartment itself.WARNING: Do not place objects weighing over
10 kg in the glove compartment.
Page 81 of 223
79
4
D
E
BEFORE YOU DRIVE
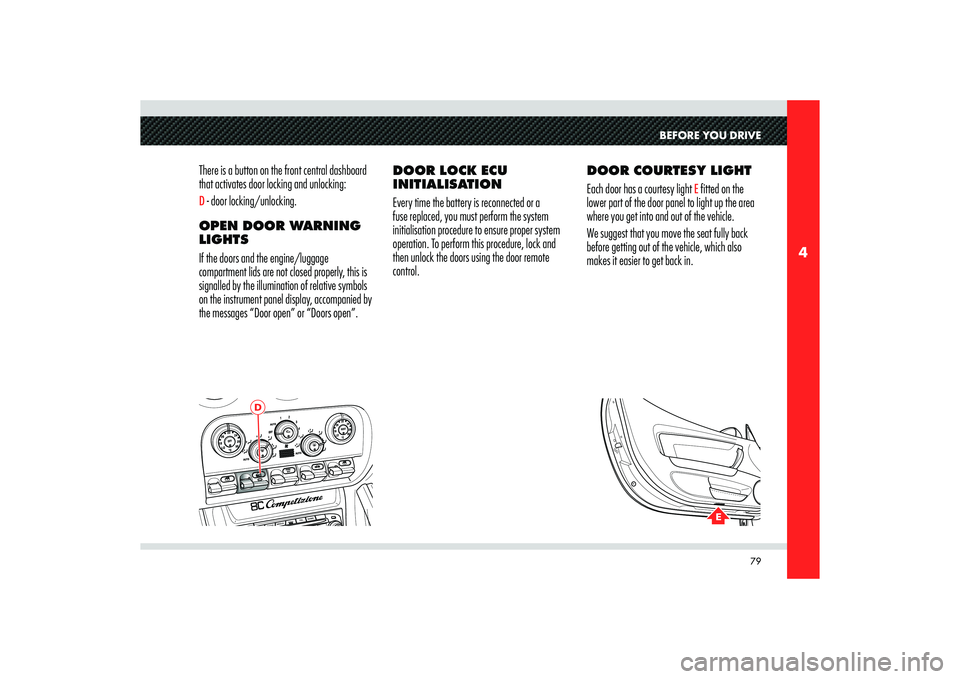
There is a button on the front central dashboard
that activates door locking and unlocking:D - door locking/unlocking.
OPEN DOOR WARNING
LIGHTS
If the doors and the engine/luggage
compartment lids are not closed properly, this is
signalled by the illumination of relative symbols
on the instrument panel display, accompanied by
the messages “Door open” or “Doors open”.DOOR LOCK ECU
INITIALISATION
Every time the battery is reconnected or a
fuse replaced, you must perform the system
initialisation procedure to ensure proper system
operation. To perform this procedure, lock and
then unlock the doors using the door remote
control.DOOR COURTESY LIGHT
Each door has a courtesy light
E fitted on the
lower part of the door panel to light up the area
where you get into and out of the vehicle.
We suggest that you move the seat fully back
before getting out of the vehicle, which also
makes it easier to get back in.
Page 83 of 223
81
4
A
B
BEFORE YOU DRIVE
WARNING: Before disconnecting the battery,
lower the side windows by at least 4-5 cm
to avoid damaging the weather strips when
opening and closing the doors. When the battery
is connected and fully charged, this operation
is done automatically whenever the doors are
opened or closed. The windows must remain
open until the charged battery is reconnected.
If the battery has discharged with the windows
fully closed, open the door only if necessary and
with the greatest care; do not close it again until
it the windows can be lowered.
WARNING: Before activating the alarm system,
check that all the windows and the sunroof are
closed to prevent accidental activation of the
alarm system.
ENGINE
COMPARTMENT LID
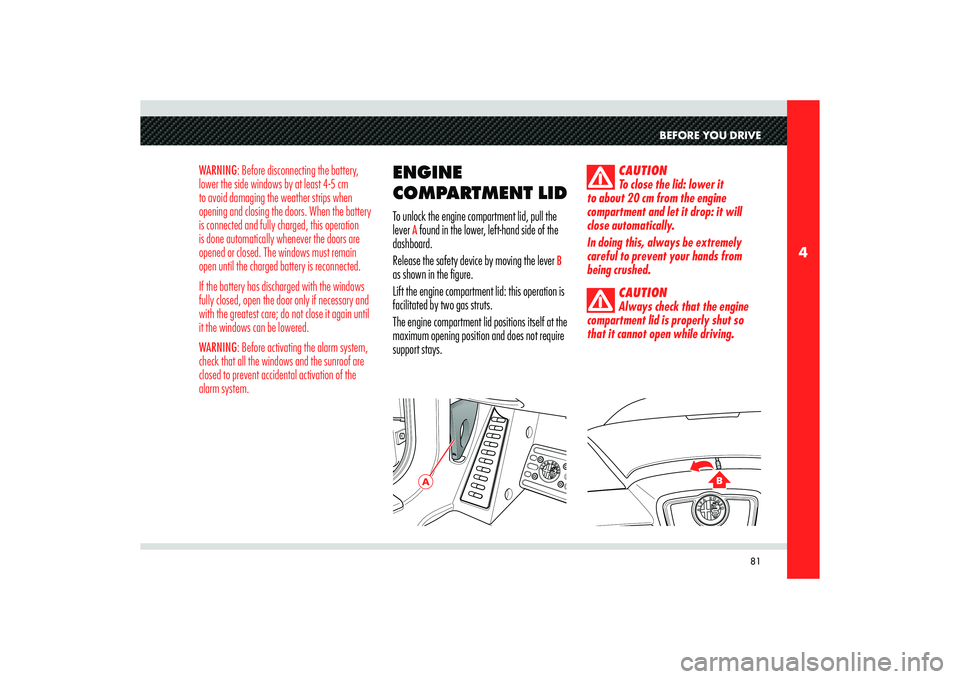
To unlock the engine compartment lid, pull the
lever
A found in the lower, left-hand side of the
dashboard.
Release the safety device by moving the lever
B
as shown in the figure.
Lift the engine compartment lid: this operation is
facilitated by two gas struts.
The engine compartment lid positions itself at the
maximum opening position and does not require
support stays.
CAUTION
To close the lid: lower it
to about 20 cm from the engine
compartment and let it drop: it will
close automatically.
In doing this, always be extremely
careful to prevent your hands from
being crushed.
CAUTION
Always check that the engine
compartment lid is properly shut so
that it cannot open while driving.
Page 100 of 223
98
4
HIGH BEAMS
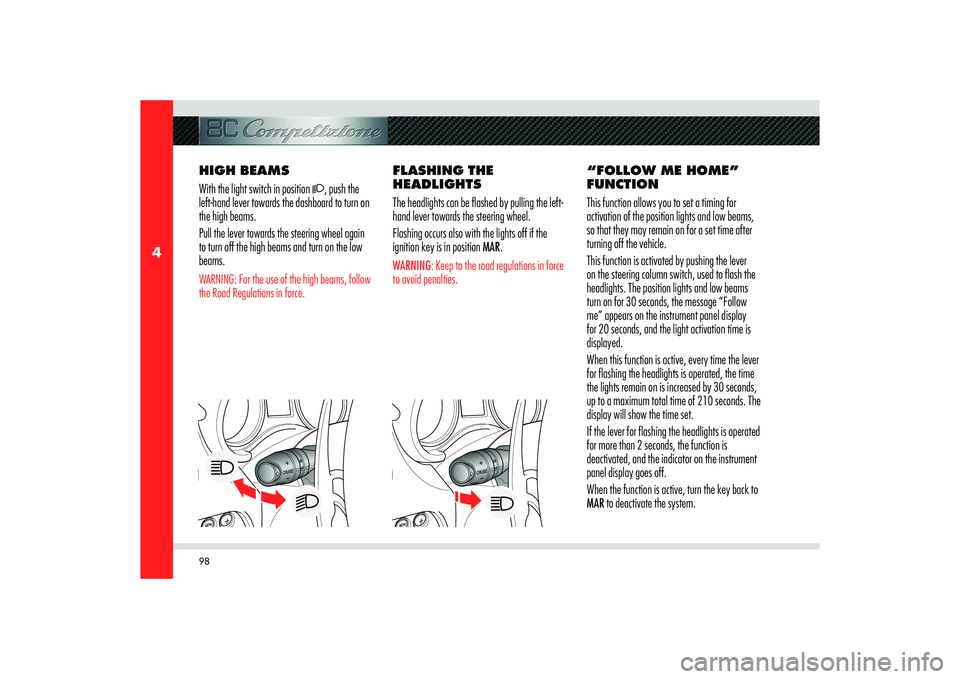
With the light switch in position
, push the
left-hand lever towards the dashboard to turn on
the high beams.
Pull the lever towards the steering wheel again
to turn off the high beams and turn on the low
beams.
WARNING: For the use of the high beams, follow
the Road Regulations in force.
FLASHING THE
HEADLIGHTS
The headlights can be flashed by pulling the left-
hand lever towards the steering wheel.
Flashing occurs also with the lights off if the
ignition key is in position MAR.WARNING: Keep to the road regulations in force
to avoid penalties.
“FOLLOW ME HOME”
FUNCTION
This function allows you to set a timing for
activation of the position lights and low beams,
so that they may remain on for a set time after
turning off the vehicle.
This function is activated by pushing the lever
on the steering column switch, used to flash the
headlights. The position lights and low beams
turn on for 30 seconds, the message “Follow
me” appears on the instrument panel display
for 20 seconds, and the light activation time is
displayed.
When this function is active, every time the lever
for flashing the headlights is operated, the time
the lights remain on is increased by 30 seconds,
up to a maximum total time of 210 seconds. The
display will show the time set.
If the lever for flashing the headlights is operated
for more than 2 seconds, the function is
deactivated, and the indicator on the instrument
panel display goes off.
When the function is active, turn the key back to
MAR to deactivate the system.
Page 110 of 223
108
4
2
1
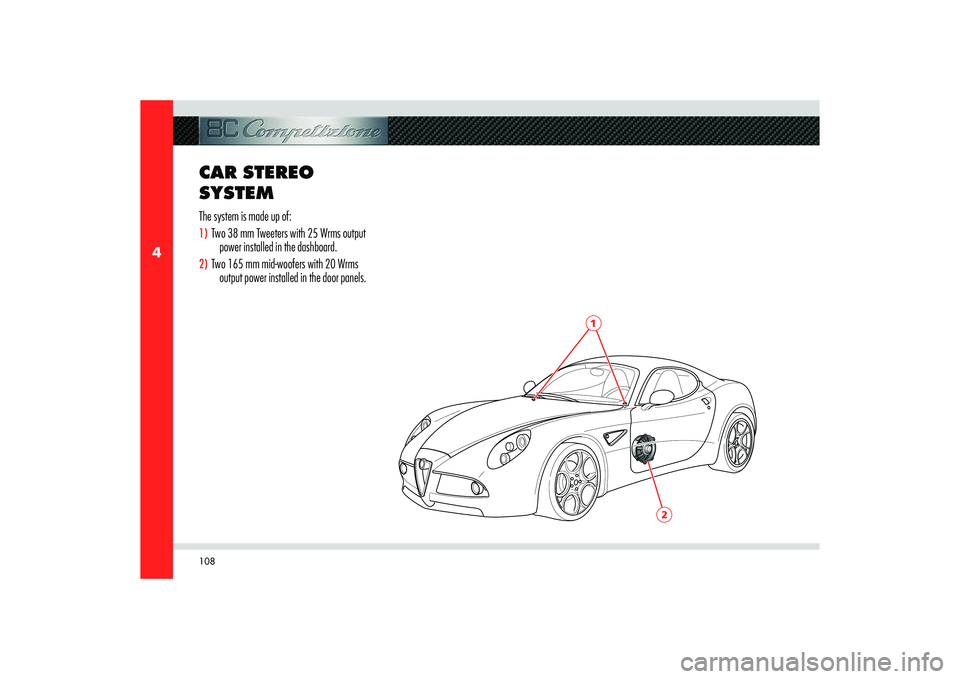
CAR STEREO
SYSTEMThe system is made up of:1) Two 38 mm Tweeters with 25 Wrms output
power installed in the dashboard.2) Two 165 mm mid-woofers with 20 Wrms
output power installed in the door panels.
Page 111 of 223

109
4
6
5
1
1
2
3
4
BEFORE YOU DRIVE
BOSE HI-FI
SYSTEM (OPTIONAL)The Bose HI-FI audio system has been carefully
designed to provide the best acoustics, also
based on the type of passenger compartment.
Technical Information:
The Bose HI-FI system is composed of:1) Two 38 mm Tweeters with 25 Wrms output
power installed in the dashboard.2) A sub-woofer box with 100 Wrms output
power bass-reflex type, installed in the
footwell.3) A power amplifier with DSP with 8
independent channels installed behind the
rear panel.4) A 290 mm sub-woofer with 100 Wrms
output power installed behind the driver’s
seat.
5)
Two 80 mm mid-range speakers with 25
Wrms output power installed on the rear
pillar
6) Two 165 mm mid-woofers with 40 Wrms
output power installed in the door panels
Page 139 of 223
137
5
A
USING THE VEHICLE
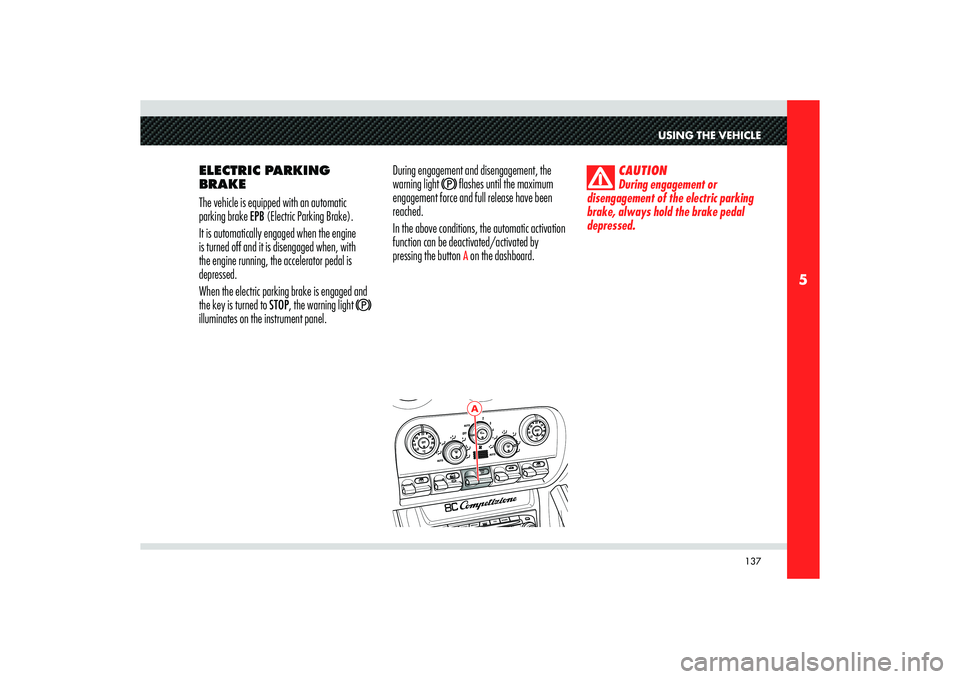
ELECTRIC PARKING
BRAKE
The vehicle is equipped with an automatic
parking brake EPB (Electric Parking Brake).
It is automatically engaged when the engine
is turned off and it is disengaged when, with
the engine running, the accelerator pedal is
depressed.
When the electric parking brake is engaged and
the key is turned to STOP, the warning light
illuminates on the instrument panel.During engagement and disengagement, the
warning light
flashes until the maximum
engagement force and full release have been
reached.
In the above conditions, the automatic activation
function can be deactivated/activated by
pressing the button A on the dashboard.
CAUTION
During engagement or
disengagement of the electric parking
brake, always hold the brake pedal
depressed.
Page 141 of 223

139
5
A
USING THE VEHICLE
Malfunction indication
In the event of electric parking brake system
failures, the warning light
! on the display
will come on.
Depending on the message displayed, it signals
the following failures of the EPB system:
- Parking brake failure
If the message warning you to go to the
nearest Authorised Service Centre of the
Manufacturer’s Network is displayed,
drive slowly and remember that the electric
parking brake device is not functioning.
- Excessive temperature. If after leaving the engine off (key turned
to STOP) for about 15 minutes without
using the parking brake, the warning
light illuminates again when the engine
is started, slowly drive to an Authorised
Service Centre of the Manufacturer’s
Network. If the brake failure is accompanied by the
message “Mechanical release only”, the
manual emergency deactivation procedure
must be performed to release the parking
brake.
Deactivating the PARK OFF automatic
operation
To deactivate manual operation of the electric
parking brake, with the engine on, press the
button
A on the dashboard. The words PARK OFF
will appear on the display for 5 seconds and then
the page that was active previously will reappear.
To reactivate automatic operation, press the
button A again, the words PARK ON appear on
the display for 5 seconds.
WARNING: In certain conditions, when the
battery voltage is low, the electric parking brake
activation/deactivation system may temporarily
be deactivated for safety reasons. Therefore,
typically during engine starting when the battery
voltage drops, the message PARK OFF may
temporarily appear on the display indicating that
automatic operation is temporarily disabled.
WARNING: In the case of performance
starting, check that the electric parking brake is
disengaged.
Page 150 of 223

148
6
CD
E
F
Remove the cigarette lighter
C, and insert the
connector
D.
Start the engine by pressing the start button (see
page 114).
Press the Fix&Go button
E at position “I”. The
electric compressor will activate and the liquid
with air will inflate the tyre.
A pressure of at least 1.8 bar (26 psi) should
be reached within 20 minutes. If this does not
occur, turn off and remove the Fix&Go kit.
Move the vehicle forward and backward by 10
metres to better distribute the sealant in the tyre.Attach the quick-connector of the compressor
directly on the tyre valve and repeat the inflation
procedure.
If the minimum tyre pressure is not reached,
do not start the vehicle. Contact an Authorised
Service Centre of the Manufacturer’s
Network.
When the correct pressure has been reached,
move the vehicle forward and backward to
evenly distribute the sealant in the tyre.
After 10 minutes, stop and check the tyre
pressure. If the pressure is below 1.3 bar
(19 psi), do not drive the vehicle. The tyre is
excessively damaged. Contact an Authorised Service Centre of the
Manufacturer’s Network.
If the pressure is equal to or greater than 1.3
bar (19 psi), repeat the inflation procedure until
reaching the adequate tyre pressure and resume
driving.
Remove the warning label
F from the bottle and
position it on the dashboard as a reminder to
the driver that the tyre has been treated with
automatic Fix&Go.
Page 157 of 223

155
6
H
L
G
IN AN EMERGENCY
3) Replace the bulb
G.
4) Refi t the cover, inserting fi rst the two-tab
side and then pressing on the other side.COURTESY LIGHTS
UNDER THE DOOR AND
THE DASHBOARD
To replace the bulb:
1) Use a screwdriver positioned at point
H to
lever out the light fi xing frame and remove
it.2) Turn the bulb holder
L and remove it.
3) Replace the snap-fi tted bulb
M