instrument panel Alfa Romeo 8C 2009 Owner handbook (in English)
[x] Cancel search | Manufacturer: ALFA ROMEO, Model Year: 2009, Model line: 8C, Model: Alfa Romeo 8C 2009Pages: 223, PDF Size: 14.35 MB
Page 52 of 223
50
3
Brightness adjustment
This function allows you to adjust the brightness
of the instrument panel to 8 levels.
To adjust, proceed as follows:
- briefl y press the MENU button: the display
highlights the level previously set.
- press button + o – to adjust;
- press the MENU button briefl y to return to
the menu page or hold it down to return to
the standard page.Speed limit
This function allows you to set the vehicle
speed limit (km/h or mph). When this limit is
exceeded, you are warned with an acoustic and
visual warning and a message appears on the
display (see the section “Warning lights and
messages”).
To set the speed limit proceed as follows:
- briefl y press the MENU button: the message
OFF is displayed ;
- Press the + button: the message ON; is
displayed briefl y press the MENU button
then press the buttons +/– to set the
desired speed (the value fl ashes during
setting).
- press the MENU button briefl y to return to
the main page or hold it down to return to
the standard page.
WARNING: The value can be set between
30 and 250 km/h (or 20 and 150 mph)
depending on the unit of measure previously
set (see the chapter “Unit of measure” below).
When the +/– button is pressed once, the speed
is increased/decreased by 5 units. Holding the
+/– button down, the value automatically
increases/decreases continuously until you
release the button. When you are close to the
desired value, release the button and then press
it briefly a few times until you reach the desired
value.To cancel the setting:
- briefl y press the MENU button: the message
ON is displayed;
- press button –: the message OFF is
displayed;
- press the MENU button briefl y to return to
the menu page or hold it down to return to
the standard screen page.
Page 62 of 223

60
3
WARNING LIGHTS
AND MESSAGESGENERAL WARNINGS
The failure warnings shown on the display are
divided into two categories: critical and serious
failures.
All the failure warnings are accompanied by
the illumination of the relative warning light on
the instrument panel (where provided) and by
specific warning messages (if needed).
In some cases, the failure warnings may also
be accompanied by an acoustic warning (the
volume is adjustable). These are synthetic and
precautionary warnings and suggest the prompt
action you need to take when a malfunction
occurs. These warnings should however not be
considered exhaustive and/or an alternative to
the instructions given in this Owner’s manual,
which must always be read carefully and
thoroughly.
Whatever the failure warning, always refer to
this section.Critical failures
These are shown on the display for an indefinite
time and interrupt any other information
displayed at that moment. Every time the key
is turned to MAR the warnings will reappear
until the malfunction that caused the failure is
corrected. This “cycle” can be interrupted by
pressing the MENU button: In this case, the
symbol referring to the malfunction will remain
displayed at the bottom left of the display
until the malfunction that caused the failure is
corrected.Serious failures
These are shown on the display for about 20
seconds and then disappear, but reappear every
time the key is turned to MAR. When the 20
seconds have elapsed, or when the MENU
button is pressed, the symbol referring to the
malfunction will remain displayed at the bottom
left of the display until the malfunction that
caused the failure is corrected.
Page 63 of 223
61
3
INSTRUMENTS AND CONTROLSWARNING: When the ignition key is turned to
MAR, if the warning light does not illuminate
or if it illuminates while driving, immediately
contact an Authorised Service Centre of the
Manufacturer’s Network.
Excessive coolant temperature
(*)
Combined with the “Coolant
thermometer”, it illuminates together with
the warning light on the instrument panel
and indicates an excessive temperature of the
coolant.
In this condition, stop the vehicle and have
the cooling system checked by an Authorised
Service Centre of the Manufacturer’s
Network. INDICATORS AND
WARNING LIGHTS
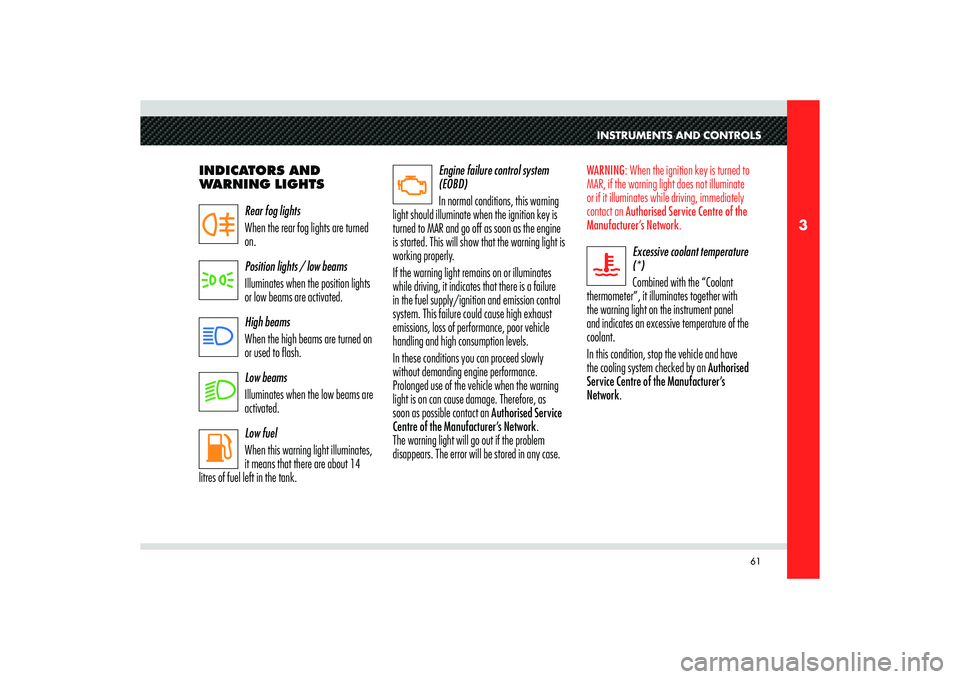
Rear fog lights
When the rear fog lights are turned
on.
Position lights / low beams
Illuminates when the position lights
or low beams are activated.
High beams
When the high beams are turned on
or used to flash.
Low beams
Illuminates when the low beams are
activated.
Low fuel
When this warning light illuminates,
it means that there are about 14
litres of fuel left in the tank.Engine failure control system
(EOBD)
In normal conditions, this warning
light should illuminate when the ignition key is
turned to MAR and go off as soon as the engine
is started. This will show that the warning light is
working properly.
If the warning light remains on or illuminates
while driving, it indicates that there is a failure
in the fuel supply/ignition and emission control
system. This failure could cause high exhaust
emissions, loss of performance, poor vehicle
handling and high consumption levels.
In these conditions you can proceed slowly
without demanding engine performance.
Prolonged use of the vehicle when the warning
light is on can cause damage. Therefore, as
soon as possible contact an Authorised Service
Centre of the Manufacturer’s Network.
The warning light will go out if the problem
disappears. The error will be stored in any case.
Page 72 of 223
70
3
E
D
B
A
G
FE
D
H
C
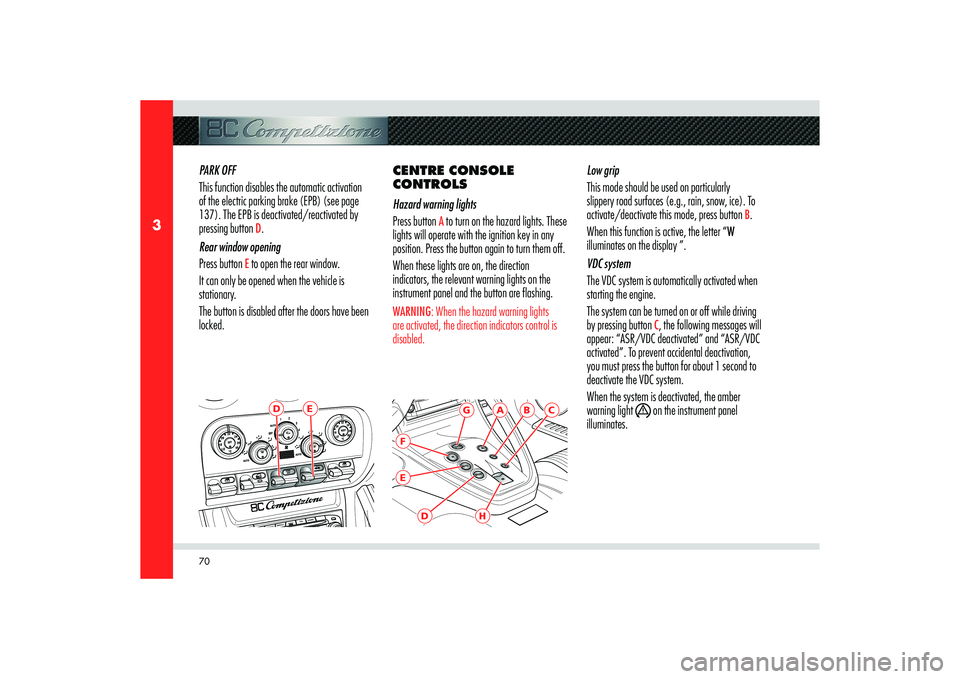
PARK OFF
This function disables the automatic activation
of the electric parking brake (EPB) (see page
137). The EPB is deactivated/reactivated by
pressing button
D.
Rear window opening
Press button
E to open the rear window.
It can only be opened when the vehicle is
stationary.
The button is disabled after the doors have been
locked.CENTRE CONSOLE
CONTROLS
Hazard warning lights
Press button
A to turn on the hazard lights. These
lights will operate with the ignition key in any
position. Press the button again to turn them off.
When these lights are on, the direction
indicators, the relevant warning lights on the
instrument panel and the button are flashing.
WARNING: When the hazard warning lights
are activated, the direction indicators control is
disabled.
Low grip
This mode should be used on particularly
slippery road surfaces (e.g., rain, snow, ice). To
activate/deactivate this mode, press button
B.
When this function is active, the letter “W
illuminates on the display ”.
VDC system
The VDC system is automatically activated when
starting the engine.
The system can be turned on or off while driving
by pressing button
C, the following messages will
appear: “ASR/VDC deactivated” and “ASR/VDC
activated”. To prevent accidental deactivation,
you must press the button for about 1 second to
deactivate the VDC system.
When the system is deactivated, the amber
warning light
on the instrument panel
illuminates.
Page 73 of 223
71
3
A
B
INSTRUMENTS AND CONTROLS
SPORT mode
Use button
D to select SPORT mode, which is
a sport setting for the Q-Select gearbox and
traction control.
Please note that selecting SPORT mode will
reduce driving comfort during gearshifting.
When this function is active, the letter “S
illuminates on the display”.
“Automatic gearshift” mode (AUTO)
Button
E activates/deactivates automatic
operation of the Q-Select gearbox.
When this mode is activated, the gear displayed
is replaced with the letter “D” and gearshifting
will be automatic.Reverse
Button
F engages reverse gear.
START button
Press button
G, with the key turned to MAR and
the brake pedal depressed, to start the engine.
Electric parking brake (EPB)
Pull up the lever EPB
H to engage/disengage
the electric parking brake.ROOF PANEL BUTTONS
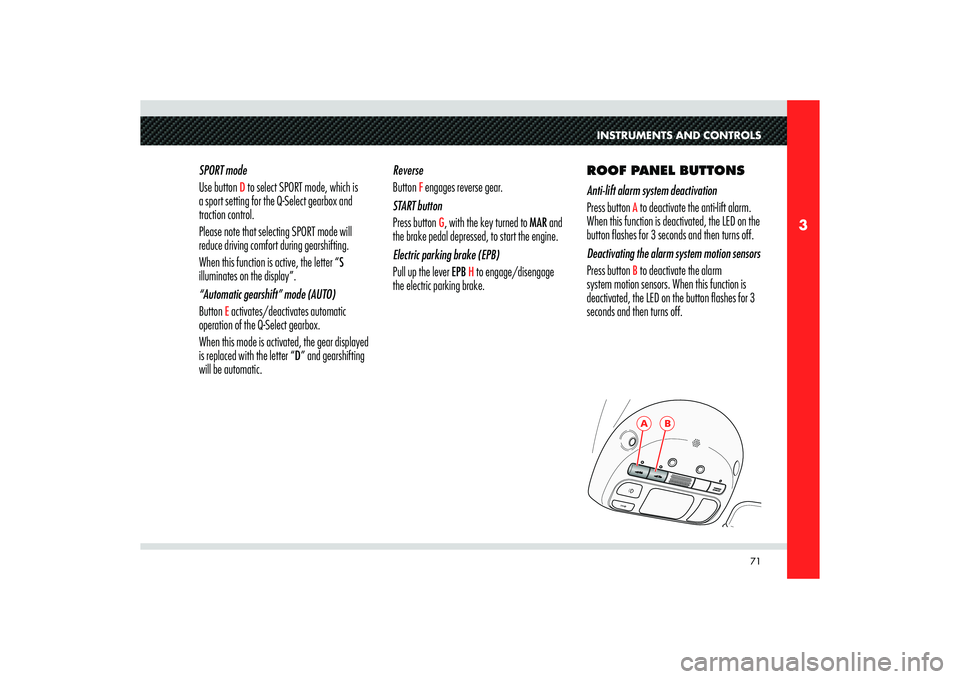
Anti-lift alarm system deactivation
Press button
A to deactivate the anti-lift alarm.
When this function is deactivated, the LED on the
button flashes for 3 seconds and then turns off.
Deactivating the alarm system motion sensors
Press button B to deactivate the alarm
system motion sensors. When this function is
deactivated, the LED on the button flashes for 3
seconds and then turns off.
Page 81 of 223
79
4
D
E
BEFORE YOU DRIVE
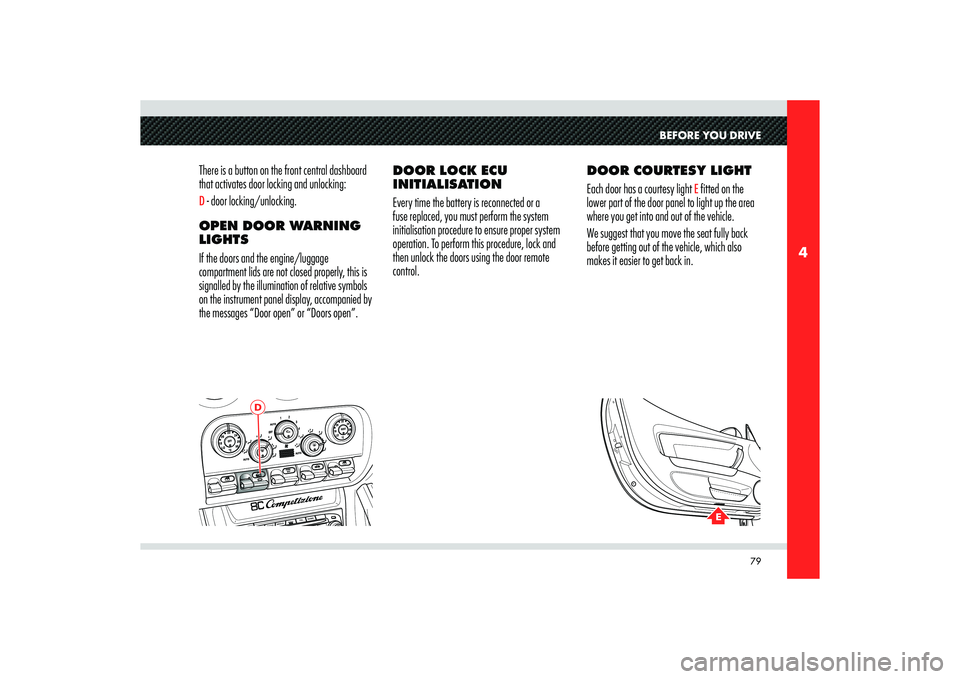
There is a button on the front central dashboard
that activates door locking and unlocking:D - door locking/unlocking.
OPEN DOOR WARNING
LIGHTS
If the doors and the engine/luggage
compartment lids are not closed properly, this is
signalled by the illumination of relative symbols
on the instrument panel display, accompanied by
the messages “Door open” or “Doors open”.DOOR LOCK ECU
INITIALISATION
Every time the battery is reconnected or a
fuse replaced, you must perform the system
initialisation procedure to ensure proper system
operation. To perform this procedure, lock and
then unlock the doors using the door remote
control.DOOR COURTESY LIGHT
Each door has a courtesy light
E fitted on the
lower part of the door panel to light up the area
where you get into and out of the vehicle.
We suggest that you move the seat fully back
before getting out of the vehicle, which also
makes it easier to get back in.
Page 86 of 223
84
4
B
OPERATION
Each time the ignition key is removed from
position STOP the protection system activates
the engine immobilizer.
Upon starting the engine, when the key is turned
to MAR:
1) If the code is recognised, the CODE
warning light on the instrument panel turns
off in one second, while the EOBD
warning light turns off after about four
seconds, after the ECU has completed its
diagnostic cycle. The protection system has
recognised the key code and deactivates the
engine immobilizer. With the brake pedal
depressed, pushing the START button, the
engine starts.
2) If the CODE warning light remains on
and the EOBD warning light goes off
after four seconds (ECU diagnostics) and
illuminates again immediately afterwards,
the code has not been recognised and the
message “Electronic key not recognised”
is displayed. In this case, it is advisable to
turn the key back to position STOP and
then back to MAR; If the immobilizer stays
on, try with the other keys. If you are still FUEL TANK DOOR
EMERGENCY OPENING
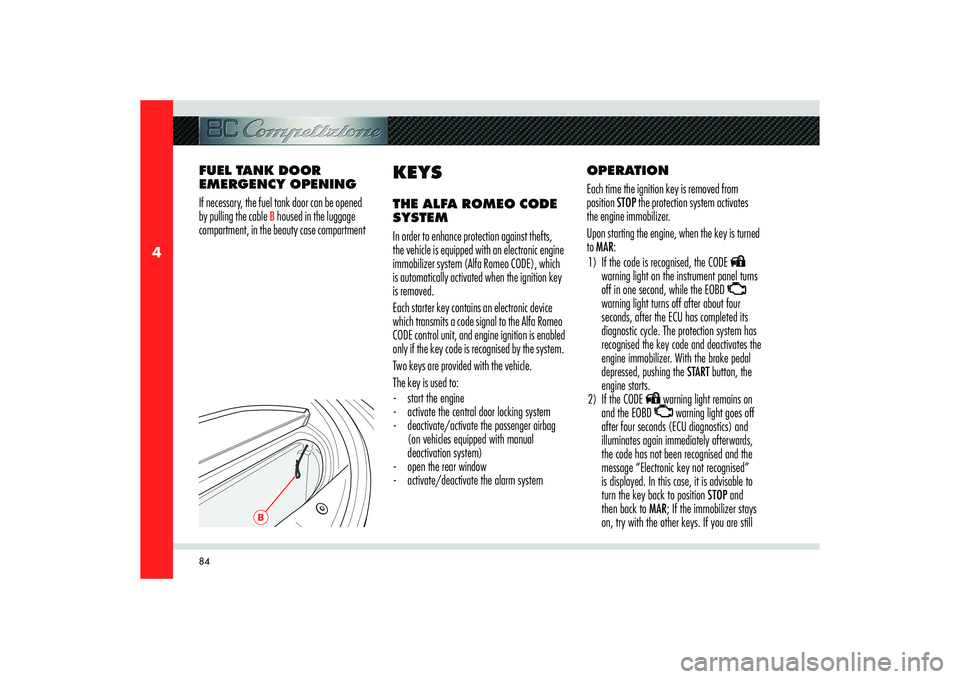
If necessary, the fuel tank door can be opened
by pulling the cable
B housed in the luggage
compartment, in the beauty case compartment
KEYSTHE ALFA ROMEO CODE
SYSTEM
In order to enhance protection against thefts,
the vehicle is equipped with an electronic engine
immobilizer system (Alfa Romeo CODE), which
is automatically activated when the ignition key
is removed.
Each starter key contains an electronic device
which transmits a code signal to the Alfa Romeo
CODE control unit, and engine ignition is enabled
only if the key code is recognised by the system.
Two keys are provided with the vehicle.
The key is used to:
- start the engine
- activate the central door locking system
- deactivate/activate the passenger airbag
(on vehicles equipped with manual
deactivation system)
- open the rear window
- activate/deactivate the alarm system
Page 99 of 223
97
4
BC
D
BEFORE YOU DRIVE
TWILIGHT SENSOR
The twilight sensor is comprised of two sensors:
a global sensor, capable of measuring the light
intensity above, and a directional sensor, which
measures the light intensity in the vehicle’s
travelling direction, enabling it to recognise
tunnels and driveways. The sensing range of
the twilight sensor can be adjusted through the
instrument panel, by selecting the Setup mode.
In the event of a sensor failure, the system will
turn on the low beams and the position lights,
regardless of the light outside, and a failure
message will appear on the instrument panel
display.
The failure signal remains active until the switch A is turned to AUTO.
In this case, we recommend that you deactivate
the automatic system and turn on the external
lights manually if necessary; as soon as possible,
contact an Authorised Service Centre of the
Manufacturer’s Network.DIRECTION INDICATORS
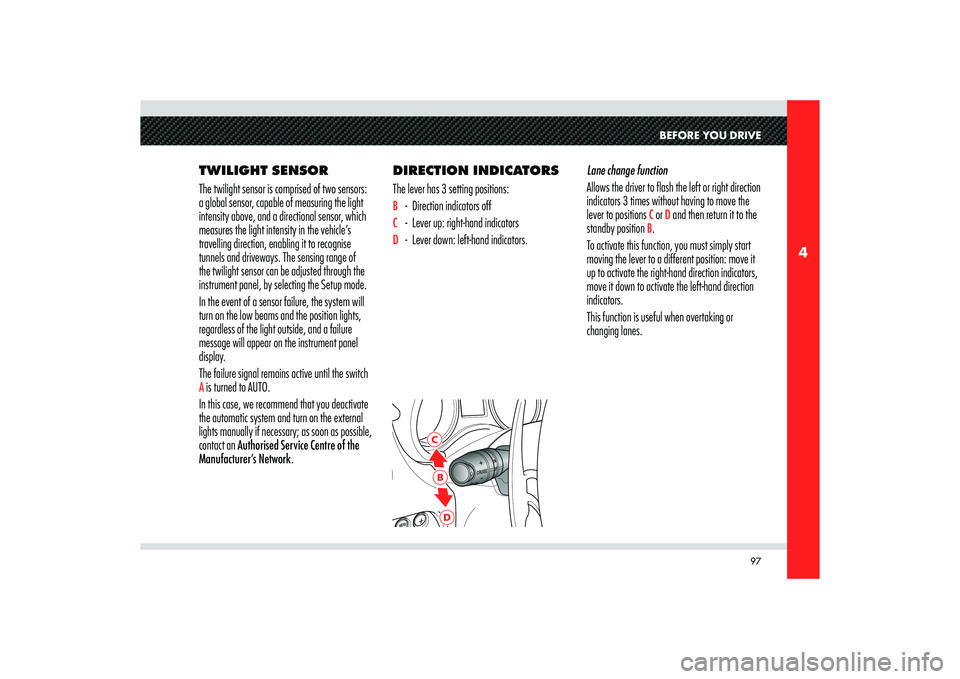
The lever has 3 setting positions:
B - Direction indicators offC - Lever up: right-hand indicatorsD - Lever down: left-hand indicators.Lane change function
Allows the driver to flash the left or right direction
indicators 3 times without having to move the
lever to positions
C or D and then return it to the
standby position
B.
To activate this function, you must simply start
moving the lever to a different position: move it
up to activate the right-hand direction indicators,
move it down to activate the left-hand direction
indicators.
This function is useful when overtaking or
changing lanes.
Page 100 of 223
98
4
HIGH BEAMS
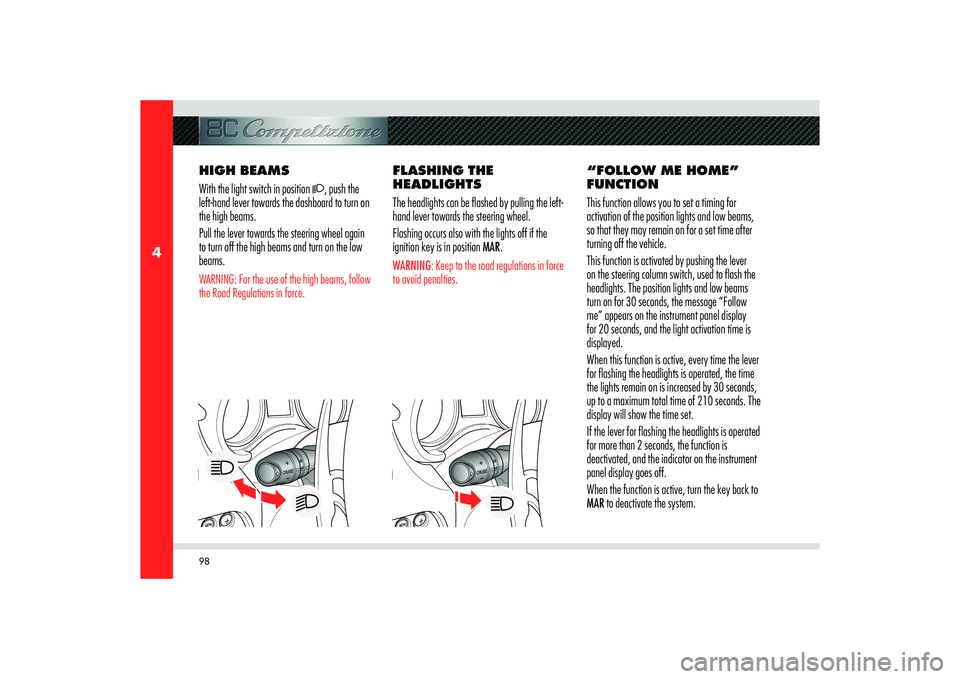
With the light switch in position
, push the
left-hand lever towards the dashboard to turn on
the high beams.
Pull the lever towards the steering wheel again
to turn off the high beams and turn on the low
beams.
WARNING: For the use of the high beams, follow
the Road Regulations in force.
FLASHING THE
HEADLIGHTS
The headlights can be flashed by pulling the left-
hand lever towards the steering wheel.
Flashing occurs also with the lights off if the
ignition key is in position MAR.WARNING: Keep to the road regulations in force
to avoid penalties.
“FOLLOW ME HOME”
FUNCTION
This function allows you to set a timing for
activation of the position lights and low beams,
so that they may remain on for a set time after
turning off the vehicle.
This function is activated by pushing the lever
on the steering column switch, used to flash the
headlights. The position lights and low beams
turn on for 30 seconds, the message “Follow
me” appears on the instrument panel display
for 20 seconds, and the light activation time is
displayed.
When this function is active, every time the lever
for flashing the headlights is operated, the time
the lights remain on is increased by 30 seconds,
up to a maximum total time of 210 seconds. The
display will show the time set.
If the lever for flashing the headlights is operated
for more than 2 seconds, the function is
deactivated, and the indicator on the instrument
panel display goes off.
When the function is active, turn the key back to
MAR to deactivate the system.
Page 102 of 223
100
4
F
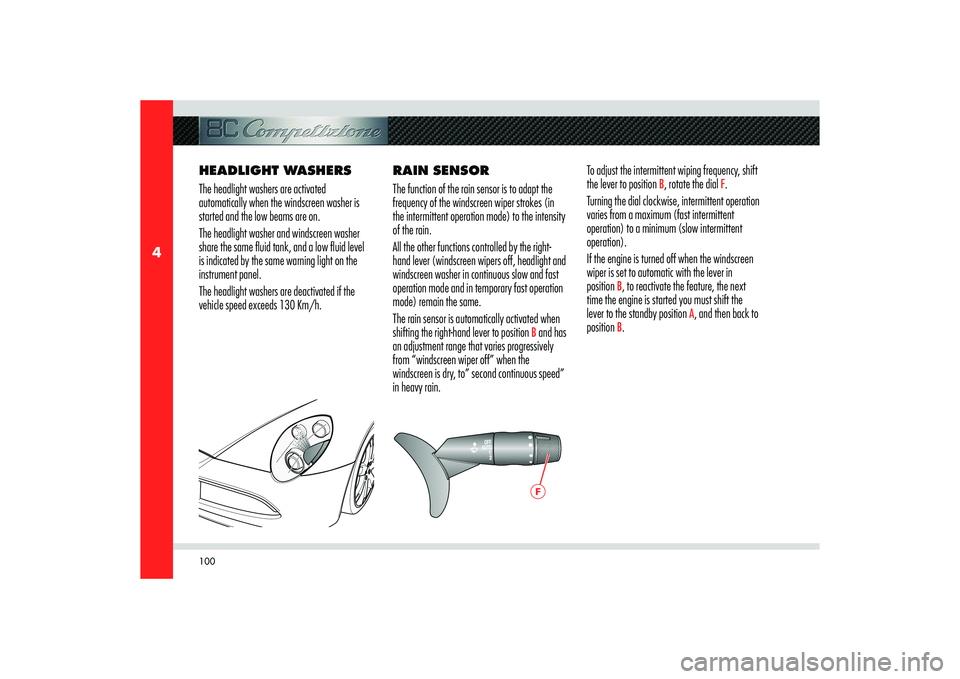
HEADLIGHT WASHERS
The headlight washers are activated
automatically when the windscreen washer is
started and the low beams are on.
The headlight washer and windscreen washer
share the same fluid tank, and a low fluid level
is indicated by the same warning light on the
instrument panel.
The headlight washers are deactivated if the
vehicle speed exceeds 130 Km/h.RAIN SENSOR
The function of the rain sensor is to adapt the
frequency of the windscreen wiper strokes (in
the intermittent operation mode) to the intensity
of the rain.
All the other functions controlled by the right-
hand lever (windscreen wipers off, headlight and
windscreen washer in continuous slow and fast
operation mode and in temporary fast operation
mode) remain the same.
The rain sensor is automatically activated when
shifting the right-hand lever to position
B and has
an adjustment range that varies progressively
from “windscreen wiper off” when the
windscreen is dry, to” second continuous speed”
in heavy rain.To adjust the intermittent wiping frequency, shift
the lever to position
B, rotate the dial
F.
Turning the dial clockwise, intermittent operation
varies from a maximum (fast intermittent
operation) to a minimum (slow intermittent
operation).
If the engine is turned off when the windscreen
wiper is set to automatic with the lever in
position
B, to reactivate the feature, the next
time the engine is started you must shift the
lever to the standby position
A, and then back to
position
B.